
This post is a follow-up to How to Build a Site Quickly If You Are Not a Web Developer, where I only talked about the stack.
For this tutorial, we will set up a script that reads data from Google Sheets, generates a static site using a predefined template, and deploys it to an S3 bucket. This article is meant for programmers with little knowledge of web development that want to get something running quickly.
There are five sections in the tutorial: Requirements, Review Code and Jinja Template, Using the Google Sheets API, and Build and Deploy Your Site.
Requirements
These you'll need to set up or review on your own. I added some links for that purpose.
- Python >= 3.7
- Google account
- Google Cloud Platform (GCP) account
- Amazon AWS account
- AWS CLI (You can use brew if you have a Mac)
- A bit of HTML and CSS
Code and Jinja Template
First, create a directory called my_pokemon_stats and open a terminal from there. Then, create a virtual environment and install the required packages as follows:
python3 -m venv venv
source venv/bin/activate
pip3 install boto3 gspread jinja2 oauth2client
Next, download and save these two files there: template.html and site_builder.py. These are the building blocks for generating the site.
template.html is the Jinja template we will use for building the site. It's an HTML-like file where you can add logic that will be processed in Python and generate the definitive site. This file looks as follows:
<!doctype html>
<html lang="en">
<head>
    <meta charset="UTF-8">
    <meta name="viewport"
          content="width=device-width, user-scalable=no, initial-scale=1.0, maximum-scale=1.0, minimum-scale=1.0">
    <meta http-equiv="X-UA-Compatible" content="ie=edge">
    <link href="https://stackpath.bootstrapcdn.com/bootstrap/4.4.1/css/bootstrap.min.css" rel="stylesheet"
          integrity="sha384-Vkoo8x4CGsO3+Hhxv8T/Q5PaXtkKtu6ug5TOeNV6gBiFeWPGFN9MuhOf23Q9Ifjh" crossorigin="anonymous">
    <title>My Pokemon Stats</title>
</head>
<body>

<header id="header">
    <div class="container text-center">
        <h1 class="pt-5 pb-1 font-weight-bold">
            My Pokemon Stats
        </h1>
        <hr>
        <p class="pt-2">
            This is a site I use to store the stats of all my Pokemon.
        </p>
    </div>
</header>

<section id="pokemon_table">
    <div class="container py-4">
        <div class="table-responsive">
            <table class="table table-hover">
                <thead class="thead-dark">
                <tr>
                    <th scope="col">Name</th>
                    <th scope="col">Type 1</th>
                    <th scope="col">Type 2</th>
                    <th scope="col">Total</th>
                    <th scope="col">HP</th>
                    <th scope="col">Attack</th>
                    <th scope="col">Defense</th>
                </tr>
                </thead>
                <tbody>
                {% for row in data %}
                <tr>
                    <td>{{ row["Name"] }}</td>
                    <td>{{ row["Type 1"] }}</td>
                    <td>{{ row["Type 2"] }}</td>
                    <td>{{ row["Total"] }}</td>
                    <td>{{ row["HP"] }}</td>
                    <td>{{ row["Attack"] }}</td>
                    <td>{{ row["Defense"] }}</td>
                </tr>
                {% endfor %}
                </tbody>
            </table>
        </div>
    </div>
</section>
</body>
</html>
Let's break it down:
- You can safely ignore most of what's inside the
<head>tag. It's standard HTML5 code that you'll see in most pages. However, there are just two interesting tags that we'll take a closer a look at:<link>and<title>. - In this case, the
<link>tag is used to import the Bootstrap component library. We will use it to define simple styles for the different sections of the page and make it look good without much effort.<title>defines the title of the page (what you see in the browser's tab) and it is useful for SEO and social media sharing. - Next, there's the
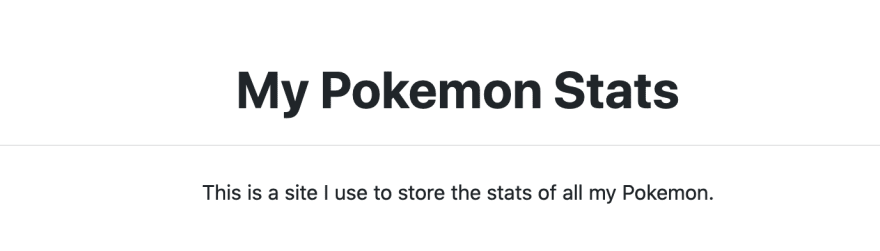
<header>section inside the<body>tag. This is where we define the text that will appear in the page. It will look like the image below. I used standard styling from Bootstrap to center the text and added a bit of padding.
- Finally, we have the
<section id="pokemon_table">. The<div>and<table>tags provide some basic styling for building a table. Next, we define the header of the table inside the<thead>tags. Inside the<tbody>tag is where Jinja does its magic - The
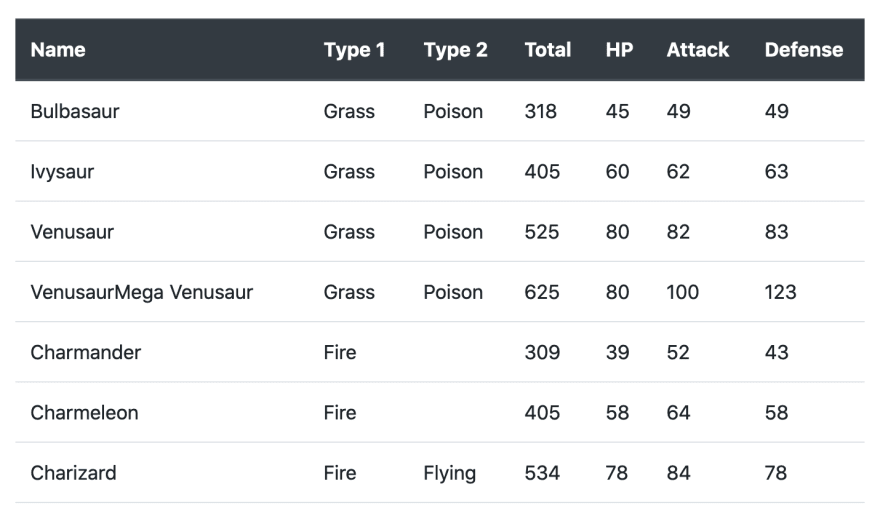
{% for row in data %}is a loop that goes through each row of the Pokemon's data. In each of the<td>{{ row["..."] }}</td>we get the information per row from field (e.g. Name, Type 1, Type 2). This generates something that will look as follows:
Next, we have the site_builder.py file. This script downloads the Pokemon's data from Google Sheets, processes the data and the template.html file, and then uploads the resulting file to an S3 bucket.
import csv

import boto3
import gspread
import jinja2
from oauth2client.service_account import ServiceAccountCredentials

AWS_PROFILE = "INSERT-AWS-PROFILE-HERE"
BUCKET = "INSERT-BUCKET-NAME-HERE"
WORKBOOK = "INSERT-WORKBOOK-NAME-HERE"


def download_data():
    """Download data using the Google Sheets API"""
    scope = [
        "https://spreadsheets.google.com/feeds",
        "https://www.googleapis.com/auth/drive",
    ]
    credentials = ServiceAccountCredentials.from_json_keyfile_name(
        "credentials.json", scope
    )
    client = gspread.authorize(credentials)

    worksheet = client.open(WORKBOOK).get_worksheet(0)
    sheet_values = worksheet.get_all_values()

    print(f"Downloading: {worksheet.title}")
    with open("my_pokemon_stats.csv", "w") as f:
        writer = csv.writer(f)
        writer.writerows(sheet_values)


def generate_site():
    """Generate site in local directory"""
    print("Process data and build site")

    template_loader = jinja2.FileSystemLoader(searchpath="./")
    template_env = jinja2.Environment(loader=template_loader)
    template = template_env.get_template("template.html")

    with open("my_pokemon_stats.csv") as csv_file:
        csv_reader = csv.DictReader(csv_file)
        data = [row for row in csv_reader]

    output = template.render(data=data)

    with open("index.html", "w") as f:
        f.write(output)


def deploy_site():
    """Deploy site S3 bucket"""
    print("Upload data to S3")
    session = boto3.Session(profile_name=AWS_PROFILE)
    s3 = session.resource("s3")
    s3.Bucket(BUCKET).upload_file(
        Filename="index.html", Key="index.html", ExtraArgs={"ContentType": "text/html"}
    )


if __name__ == "__main__":
    download_data()
    generate_site()
    deploy_site()
The code is structured in 3 functions: download_sheets, generate_site, and deploy_site. We will fill the details for accessing AWS and the Google Sheets API in the next sections.
Using the Google Sheets API
Follow these steps to download the Pokemon's data using the Google Sheets API:
- Create a Workbook in Google Sheets (you can copy mine: My Pokemon Stats)
- Go to the Google APIs Console
- Create a new project called MyPokemonStats.
- Click on Enable API and Services. Search for and enable the Google Sheets API.
- Go back to the Google APIs Console and click on Enable API and Services again. Now search for and enable the Google Drive API.
- Click on Create credentials.*For the next 4 questions select:*Google Drive API, Web Server (e.g. node.js, Tomcat), *Application data, *and *No, I'm not using them. *
- Click on What credentials do I need? *Select a name for the service account (e.g. get-data) grant it a *Project Role of Editor. Select the JSON option for Key type
- A dialog box will open. Save the JSON file, copy it to the
my_pokemon_statsdirectory, and rename it tocredentials.json. - Open the
credentials.jsonfile. Find a key calledclient_email, copy its value (e.g., get-data@iam....). Go back to your Workbook in Google Sheets, click the Share button in the top right, and paste the client email into the People field to give it edit rights. Hit Send. - Go to the
site_builder.pyscript, and set theWORKBOOKvariable to whatever name you gave to your workbook on step 1.
Setting up an S3 bucket and AWS-related configurations
Now, let's create the S3 bucket and configure our code to access AWS programmatically:
- Go to the Amazon S3 Console
- Create an S3 bucket
- Once in the bucket, click on Properties and then on Static website hosting
- Select the option Use this bucket to host a website
- Under Index document and Error document put
index.html - Save the URL from Endpoint. You'll use that URL for connecting to your site.
- Go to Permissions and click Edit
- Clear Block all public access, choose Save, and confirm. When you change this anyone on the internet will have access to the contents of this bucket. That's what you want when you are publishing a site, however don't put anything private there!
- Now go to Bucket Policy, replace the bucket name in the following policy, paste it there, and click Save.
{
  "Version":"2012-10-17",
  "Statement":[{
    "Sid":"PublicReadGetObject",
        "Effect":"Allow",
      "Principal": "*",
      "Action":["s3:GetObject"],
      "Resource":["arn:aws:s3:::BUCKET-NAME-HERE/*"
      ]
    }
  ]
}
- Go to the
site_builder.pyscript. Set the variableAWS_PROFILEvariable to the profile name you use for accessing AWS (in a UNIX sytem it should be one of the profiles in~/.aws/credentials).
Build and Deploy Your Site
Finally, you should be able to run python site_builder.py from the root folder of the project to generate the site. This will download the data from Google Sheets, process the template.html file using Jinja and upload the site to the S3 bucket.
If you want to check the site, go to the endpoint URL (step 6 from the previous section).
Closing Words
This method is by no means perfect but will help you ship something quickly. I used this strategy to build stayhomeandlearn.org and it worked quite well. From April 1st until April 16th, the site got over fifteen thousand visitors, which exceeded my most optimistic expectations.

The site is slowly walking towards its death now. However, this process taught me how important it is to focus on shipping instead of wasting time looking for the perfect tools. I built the site quickly, people liked it, and after the first day it already had more traffic than any of the side projects I've done so far. That thing about perfect being the enemy of good is real.
In my case, I had to add more functionality to the script for styling and deploying purposes. If you are interested, you can take a look at the code in my GitHub repository. Or check other articles in my site.
Finally, there are a couple of things you can do now to make your site more interesting:
References
[1] G. Bauges, Google Spreadsheets and Python (2017)
[2] V. Drake, Hosting your static site with AWS S3, Route 53, and CloudFront (2017)
[3] A. Barradas, Pokemon With Stats (2016)


Top comments (0)