
All shared code should have written documentation to show what it can be used for and what the idea behind it is.
Users should at least be able to get a high level understanding of what they are using, what they're using it for, and why.
On the web, we have many many different ways of writing documentation.
However, one thing almost all of them have in common is that they rely on Markdown or some kind of variation of it.
And it's no surprise, because Markdown is supported practically everywhere (vscode, atom, github, gitlab, dev.to, npmjs, ...)
For tools that do not run in the browser
In this case, you will mostly share code snippets that people will need to run in their own projects in which case traditional static site generators like Docusaurus, VuePress, Gatsby, et al work great. All of them have full support for Markdown and allow you to easily create beautiful documentation pages with code snippets/highlighting, and more.
And frankly, if that is your use case almost everything you need should be possible with those tools as long as you feel comfortable with the ecosystem/framework.
For (visual) components that do run in the browser
In this context, users probably do expect a live demo to see all the different options of your component in action. So pure Markdown is usually not enough as we now want to actually execute code and "insert" our working component in our documentation somehow. This would require specialized handling for each framework.
Vue
For Vue, as an example, you can use VuePress which auto registers all Vue components in a certain folder and then you can use as normal html tags since Markdown supports html
.
└─ .vuepress
  └─ components
      ├─ demo-1.vue
<demo-1 />
- supports vue components and has "magical" import for them
- no support for generic javascript or passing properties to components
React
For React you can use Mdx which extends Markdown with JSX support. Mdx is available via multiple tools like Gatsby, docz, storybook, etc.
import { Chart } from '../components/chart'

# Here’s a chart

The chart is rendered inside our MDX document.
<Chart />
- supports import/export JavaScript
- passes everything through JSX
- Doesn't look great on github, requires special tools in editors to get highlighting
Limitations
What all these specialized tools have in common is that they require a specific build tooling setup to work.
For web components, none of that is actually needed. Markdown already allows for HTML. The only missing piece is how to load a web component through JavaScript?
Introducing Markdown with JavaScript (mdjs)
The primary goals are
- minimal complexity
- follows progressive enhancement
- stick close to valid markdown syntax
- code highlighting in editors without additional tools
- looks good on github/gitlab/any source code management tool
The fundamental idea seems almost too simple to be true. We "enhance" a code fence block with additional meta data js script.
```js script
import './my-component.js';
```
# This is my component
<my-component></my-component>
And that's it! 😄
Alright, enough talk, you can see it live here:
How does it work
Mdjs hooks into remark and extracts all those tagged js blocks.
In the end, html and js is separately available.
{
  html: '<h1>This is my component</h1><my-component></my-component>',
  jsCode: "import './my-component.js';"
}
It can then be combined/processed by any tool to create an actual documentation page.
The process looks like this:
- Extract
js scriptand separate it from md - Render md
- Provide html & js
Link to animation as slides
This already is powerful enough to directly include JavaScript and render web components with attributes.
Enhancing mdjs with demo format
Now that we can execute JavaScript within our Markdown this opens the door for more advanced features.
Our first step is to create another enhanced js code block, namely; js story.
From this code block you can export a function to be executed on demand:
```js script
import './my-component.js';
```
# This is my component
```js preview-story
export const demo = () => `<my-component header="from attribute"></my-component>`
```
if you want to add a border around and a button to show/hide the actual source code you can use
js preview-story
What you get looks something like this
{
  html: '<h1>This is my component</h1><my-component></my-component>',
  jsCode: "import './my-component.js';",
  stories: [
    key: 'demo',
    name: 'demo',
    code: 'export const demo = () => `<my-component header="from attribute"></my-component>`',
  ]
}
Under the hood, this adds an extra step to the processing:
- Extract
js scriptand separate from md - Extract
js storyandjs preview-storyand separate from md - Put a placeholder
<mdjs-story mdjs-story-name="demo"></mdjs-story>ormdjs-previewat it's place - Render markdown
- Provide html, javascript, and stories
This is all the information we need to create full javascript and demo capable pages purely from markdown.
By default Mdjs takes it a small step further by supporting an actual template system - namely lit-html.
```js script
import './demo-wc-card.js';
import { html } from 'lit-html';
```
# This is my component
```js story
export const demo = () => html`
  <demo-wc-card header="HEADER"></demo-wc-card>
`;
```

Link to animation as slides
Here another playground mimicking a full documentation page.
mdjs default docs page
Once all this meta-information is available you can render a specific docs page.
It basically comes down to generating this code which assigns the demo function to the actual web component.
const stories = [{ key: 'demo', story: demo, code: demo }];
for (const story of stories) {
  const storyEl = rootNode.querySelector(`[mdjs-story-name="${story.key}"]`);
  storyEl.story = story.story;
  storyEl.code = story.code;
}
All of this happens under the hood for you 🤗
Where can you use mdjs?
You can use it locally via es-dev-server
Here i'll show you how you can create a github like markdown view for all your local markdown files including live demos.

Install es-dev-server as a dependency by running
npm i -D es-dev-serverAdd the following script to your
package.json:
  "scripts": {
    "start": "es-dev-server",
  }
- Create a
es-dev-server.config.jsin the root of your repo.
  const { mdjsTransformer } = require('@mdjs/core');

  module.exports = {
    nodeResolve: true,
    open: 'README.md',
    watch: true,
    responseTransformers: [mdjsTransformer],
  };
After executing npm run start you can happily browse your live documentation via http://localhost:8000/README.md.
You can see an example setup in the demo-wc-card repo.
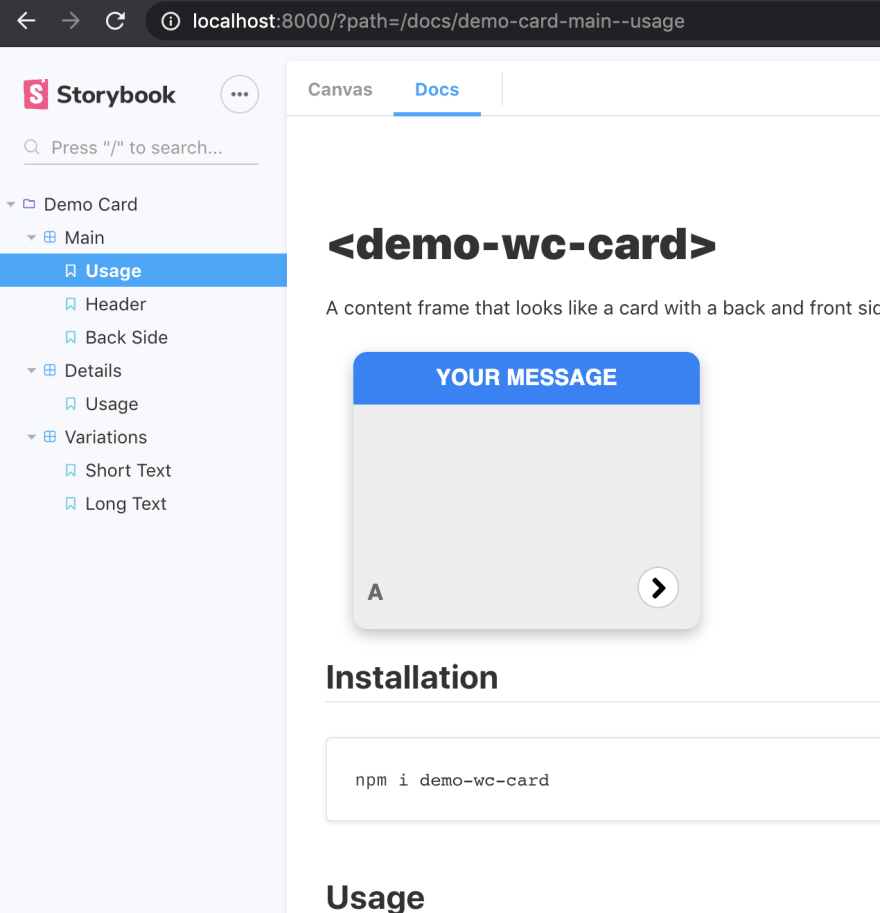
You can use it via Storybook
If you want to work on individual components or get a list of all demos you can use Storybook.
Install dependency
npm i -D @open-wc/demoing-storybookAdd to your
package.json:
  "scripts": {
    "storybook": "start-storybook",
  }
- Adjust your
.storybook/main.jsto load markdown files
  module.exports = {
    stories: ['../README.md', '../docs/**/*.md'],
    esDevServer: {
      nodeResolve: true,
      watch: true,
      open: true,
    },
  };
- Add to every markdown file that should be in storybook a name via
  export default {
    title: 'My Group/My Awesome Component',
  };
And just like that, you are good to go.
No additional changes to any files are needed; a plugin will take care of everything by converting your markdown files to the support Storybook's mdx format.
For more detailed information please see https://open-wc.org/demoing-storybook/.
Show it on github
Since Github supports markdown out of the box, we can take things even further by using Mdjs.

As it's not supported by github directly you will need a chrome extension called mdjs-viewer.
- Do you want to see a demo without opening a different page? mdjs-viewer!
- Do you want to show a live example of the issue you are having? mdjs-viewer!
Almost looks like black magic, huh?
All you did was install a Chrome extension and suddenly Github got superpowers.
All that you need is to have some Markdown files with the correct code fence blocks, and have your code up and running on unpkg.com.
How does it actually work?
The extension detects which Github page you are on.
If it actually finds a markdown file or an issue with mdjs code then it adds a "show demo" button to activate it.
Only if you click the button it will start gathering all the needed info.
- find the nearest
package.json - read the actual markdown file/issue content
- replace all bare import with
unpkg.comimports - replace all relative imports with
unpkg.comand the name of the package.json + relative path for it - create a secured iframe
- position the iframe absolute as an overlays
- put the javascript and html code inside the iframe
- the button becomes a toggle to show/hide the iframe
Some of the tasks are more complicated and require some extra work to make it secure but in essence, that's it.
With that, you can put documentation with live examples on github.
Even issues with demos showing the actual error in the code are possible.
That sure sounds like a hell of a tool to improve your documentation an issue reproduction, doesn't it?
Especially as the readme and issue content still remain useful even without the extension.
For more detailed information please see https://github.com/open-wc/mdjs-viewer.
Supported on webcomponents.dev
Fully supported by this awesome online editor.

You can directly edit your documentation, demos and code directly in the browser.

You can start directly with documentation as in the screenshot above, or even better you can use it in every Markdown file or README.md 💪
Give it a go and document your components in all its glory.
All the demo links are actually from webcomponents.dev.
Be sure to check it out.
How you can add support for mdjs
Please check the official documentation page at https://rocket.modern-web.dev/docs/markdown-javascript/overview/.
Resume
There you have it - mdjs is a format that can be shown in many different ways.
It is your single source of truth for good looking documentation everywhere.
Be it locally, a published storybook, on github or npmjs it always looks good even if there is no direct support for it, but when possible it will become interactive demos through progressive enhancement.
Now go out there and write good documentation for your components!
Future
- Have a separate github repo (potentially group as well).
- Have a dedicated homepage
- The default story preview frame should look a little nicer
- Support multiple renderers - discussion in issue
- Highlighting of code snippets
- More helpers to be used within stories
- ... (feel free to open issues within the corresponding projects)
Acknowledgements
Follow us on Twitter, or follow me on my personal Twitter.
Make sure to check out our other tools and recommendations at open-wc.org.
Thanks to Pascal for feedback and helping turn my scribbles to a followable story.
Photo by Aaron Burden on Unsplash


Top comments (6)
Interesting concept. Digging the simplicity of the execution, thoughtfulness towards backwards (and code editor) compatibility, lots of cool stuff going on.
Been working with MDX a lot myself, big fan of the syntax and how easy it makes including components (or straight up JS). The limitation I see with this method vs MDX is the inability to beat Markdown inside components. With this method, you essentially “eject” to HTML, which can be tricky for those looking for simpler authoring experiences.
I can't really follow 🙈what does "beat Markdown inside components" mean? care to elaborate 🤗
The only guess I have is that you mean it does not support jsx? if so yes that is currently true - although if needed we could introduce a
jsx storywhich could support it 🤔Oops. Meant “Write” 😅 phone autocorrected I guess.
For example, I do this in MDX projects all the time:
Should work the same with Web Components if they have slots?
markdown supported usage of HTML right from the start 👍
we use details/summary a lot like this
and as web components are "normal" html tags they will work just fine as well 👍
e.g. you could do
to bring in your design/ux/animations/...
Hey @ben wouldn't it be cool if dev.to ran these?
Yes it would!