
As you see the situation today, the Coronavirus is widespread across the world. For that, in this tutorial, we will show you how to build a simple dashboard for the coronavirus positive cases. This dashboard has total cases worldwide, daily chart grow, the country list with cases, and input form to update the data.
For the datastore, we will use Firebase which accessible using the Javascript Firebase library or module. To build to native mobile apps (Android and iOS), this time we will use a Capacitor which is the default build tool for Ionic apps. To display the chart, we will use React Charts 2 (react-chartjs-2) module.
This tutorial divided into several steps:
- Step #1: Setup Firebase
- Step #2: Create a New Ionic 5 React App
- Step #3: Install Firebase, react-chartjs-2, and chart.js Module/Library
- Step #4: Implementing Coronavirus Cases Dashboard
- Step #5: Implementing Country List with Cases
- Step #6: Implementing Country Chart
- Step #7: Add Coronavirus Cases Input Form
- Step #8: Run and Test the Ionic 5 React Firebase App
The following tools, frameworks, and modules are required for this tutorial:
- Node.js
- Ionic 5
- Ionic CLI
- Capacitor
- Firebase
- react-chartjs-2 and Chart.js
- Android Studio
- XCode
- Terminal or Node Command Line
- IDE or Text Editor (we are using VSCode)
You can watch the video tutorial in our YouTube channel.
Let get started!
Step #1: Setup Firebase
We will set up or create a new Google Firebase project that can use the realtime database. Just open your browser then go to Google Firebase Console and you will take to this page.

From that page, click the Create Project button to create a Google Firebase project then it will be redirected to this page.

After filling the project name text field which our project name is "Coronavirus" then click continue button and it will be redirected to this page.

This time, choose to not add Firebase analytics for now then click Create Project button. Now, you have a Google Firebase Project ready to use.

After click the Continue button it will be redirected to this page.

While the Develop menu expanded in the left menu, choose the Database menu then click the "Create Database" button then it will open this dialog.

Select "Start in test mode" then click next and it will go to the next dialog.

Select the Firebase database server location (better near your Angular server location) then click the Done button. Don't forget to select or change Cloud Firestore to Realtime Database in Develop -> Database dashboard. Next, go to the Rules tab and you will see these rules values.
{
  /* Visit https://firebase.google.com/docs/database/security to learn more about security rules. */
  "rules": {
    ".read": false,
    ".write": false
  }
}
Change it to readable and writeable from everywhere for this tutorial only.
{
  /* Visit https://firebase.google.com/docs/database/security to learn more about security rules. */
  "rules": {
    ".read": "auth === null",
    ".write": "auth === null"
  }
}
Click the publish button to update or save the changes. Now, the Google Firebase database is ready to use with your Ionic 5 React Mobile Apps.
Step #2: Create a New Ionic 5 React App
We will use Ionic CLI to create or generate the Ionic 5 app. For that, we need to install or update the Ionic CLI to the latest version. Before that, make sure you have to install Node.js and NPM. To check the installed Node.js and NPM, type these commands from the Terminal or Node command line.
node -v
v12.16.1
npm -v
6.14.4
That's the version that we are currently using right now. To install or update Ionic CLI, type this command.
sudo npm install -g @ionic/cliSudo is optional is your Node.js/NPM requires administrator permission. Now, we have this version of Ionic CLI 6.
ionic -v
6.4.3
Next, create a new Ionic 5 app by type this command.
ionic start coronavirus blankSelect React as the framework for this Ionic app then integrate with Capacitor by choosing "Y" because we will use a Capacitor to build this Coronavirus app to mobile device/simulator. Next, go to the newly created Ionic 5 app then run this new Ionic 5 app for the first time.
cd ./coronavirus
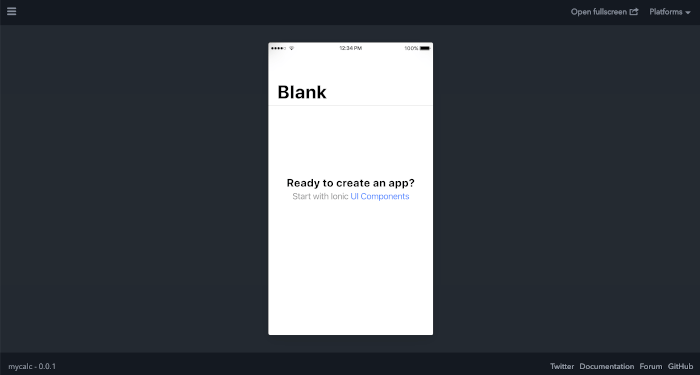
ionic serve -lIf there's a question to install @ionic/lab, just type "Y" to install it. If your browser opens this Ionic 5 app automatically and shows a blank Ionic app then your Ionic 5 app is ready to develop.
Step #3: Install Firebase, react-chartjs-2, and chart.js Module/Library
Start your IDE or Text editor then open this new Ionic 5 project. To use VSCode, just type this command inside the new Ionic 5 app folder.
code .We use the Firebase module to access the Firebase Realtime Database. The Firebase module is available as an NPM module. For that, type this command to install the module.
npm install --save firebaseNext, create a new file `Firebase.tsx` in the root of the project folder for Firebase configuration.
touch src/Firebase.tsxOpen and edit `src/Firebase.tsx` then replace all codes with this.
import * as firebase from 'firebase';

const config = {
  apiKey: "YOUR_API_KEY",
  databaseURL: "YOUR_DATABASE_URL"
};
firebase.initializeApp(config);

export default firebase;
You can find API Key in the Firebase console under Settings(gear icon) and there is Web API Key. For databaseURL, go to the Service Accounts tab under Settings, and you will see databaseURL in Admin SDK configuration snippet for Node.js.
The react-chartjs-2 is the React wrapper for the Chart.js. So, any configuration is basically based on Chart.js configuration. To install both of them, type this command.
npm install --save react-chartjs-2 chart.jsNow, the react-chartjs-2 is ready to use inside the React component.
Step #4: Implementing Coronavirus Cases Dashboard
As we mentioned before, the Coronavirus dashboard will contain a total of cases and a graph chart. We will use the default Home.tsx for this implementation. Open and edit "src/pages/Home.tsx" then add/modify these imports.
import { IonContent,
  IonHeader,
  IonPage,
  IonTitle,
  IonToolbar,
  IonCard,
  IonCardHeader,
  IonCardTitle,
  IonCardContent,
  IonGrid,
  IonRow,
  IonCol,
  IonButton
 } from '@ionic/react';
import React, { useState, useEffect } from 'react';
import { Bar } from 'react-chartjs-2';
import firebase from '../Firebase';
import './Home.css';
Add the constant variable of the required date, chart, total data, and Firebase collection initialization inside the main function.
  const [datenow, setDate] = useState(
    new Intl.DateTimeFormat("en-GB", {
      year: "numeric",
      month: "long",
      day: "2-digit"
    }).format(new Date())
  )
  const [cases, setCases] = useState(0)
  const [deaths, setDeaths] = useState(0)
  const [recov, setRecov] = useState(0)
  const [caseChart, setCaseChart] = useState({})
  const [deathChart, setDeathChart] = useState({})
  const [recovChart, setRecovChart] = useState({})

  const dbref = firebase.database().ref('coronavirus/')
Load all required data from the Firebase collection to the React.js array the distribute as the data for the total cases, deaths, recovered, and charts.
  const loadData = () => {
    // Extract Firebase collection to array
    dbref.on('value', resp => {
      let data: any[] = snapshotToArray(resp)
      // Sum total
      let caseCount = 0
      let deathCount = 0
      let recovCount = 0
      data.forEach((doc) => {
        caseCount = caseCount + doc.cases
        deathCount = deathCount + doc.deaths
        recovCount = recovCount + doc.recovered
      });
      setCases(caseCount)
      setDeaths(deathCount)
      setRecov(recovCount)

      // Build charts
      let chartData: any[] = []
      let caseDate: any[] = []
      let caseAmount: any[] = []
      let deathAmount: any[] = []
      let recovAmount: any[] = []
      data.reduce((res, value) => {
        if (!res[value.date]) {
          res[value.date] = { date: value.date, cases: 0, deaths: 0, recovered: 0 };
          chartData.push(res[value.date])
        }
        res[value.date].cases += value.cases;
        res[value.date].deaths += value.deaths;
        res[value.date].recovered += value.recovered;
        return res;
      }, {});
      chartData.forEach((cd) => {
        caseDate.push(cd.date)
        caseAmount.push(cd.cases)
        deathAmount.push(cd.deaths)
        recovAmount.push(cd.recovered)
      })
      setCaseChart({
        labels: caseDate,
        datasets: [
          {
            label: 'Cases Chart',
            backgroundColor: 'rgba(255,99,132,0.2)',
            borderColor: 'rgba(255,99,132,1)',
            borderWidth: 1,
            hoverBackgroundColor: 'rgba(255,99,132,0.4)',
            hoverBorderColor: 'rgba(255,99,132,1)',
            data: caseAmount
          }
        ]
      })
      setDeathChart({
        labels: caseDate,
        datasets: [
          {
            label: 'Deaths Chart',
            backgroundColor: 'rgba(255,99,132,0.2)',
            borderColor: 'rgba(255,99,132,1)',
            borderWidth: 1,
            hoverBackgroundColor: 'rgba(255,99,132,0.4)',
            hoverBorderColor: 'rgba(255,99,132,1)',
            data: deathAmount
          }
        ]
      })
      setRecovChart({
        labels: caseDate,
        datasets: [
          {
            label: 'Recovered Chart',
            backgroundColor: 'rgba(255,99,132,0.2)',
            borderColor: 'rgba(255,99,132,1)',
            borderWidth: 1,
            hoverBackgroundColor: 'rgba(255,99,132,0.4)',
            hoverBorderColor: 'rgba(255,99,132,1)',
            data: recovAmount
          }
        ]
      })
    });
  }
That algorithm is too ugly because there's no aggregate method in Firebase. You can simplify it by your own codes if planning to use an advance query for Firebase Database. As you see, there is a function calls that converting Firebase documents to the array. For that, add a function to convert it to the array.
  const snapshotToArray = (snapshot: any) => {
    const returnArr: any[] = []

    snapshot.forEach((childSnapshot: any) => {
        const item = childSnapshot.val()
        item.key = childSnapshot.key
        returnArr.push(item)
    });

    return returnArr;
  }
Next, call that function inside useEffect function.
  useEffect(() => {
    loadData()
  }, [])
Finally, modify the render to show the total of coronavirus cases, deaths, recovered and bar charts.
  return (
    <IonPage>
      <IonHeader>
        <IonToolbar>
          <IonTitle>Coronavirus Dashboard</IonTitle>
        </IonToolbar>
      </IonHeader>
      <IonContent>
        <IonCard color="light">
          <IonCardHeader>
            <IonCardTitle>Latest Situation per {datenow}</IonCardTitle>
          </IonCardHeader>
          <IonCardContent>
            <IonGrid>
              <IonRow>
                <IonCol size="12" size-sm>
                  Confirmed Cases: <strong>{cases}</strong>
                </IonCol>
                <IonCol size="12" size-sm>
                  <Bar
                    data={caseChart}
                    width={100}
                    height={100}
                    options={{
                      maintainAspectRatio: true
                    }}
                  />
                </IonCol>
              </IonRow>
              <IonRow>
                <IonCol size="12" size-sm>
                  Death: <strong>{deaths}</strong>
                </IonCol>
                <IonCol size="12" size-sm>
                  <Bar
                    data={deathChart}
                    width={100}
                    height={100}
                    options={{
                      maintainAspectRatio: true
                    }}
                  />
                </IonCol>
              </IonRow>
              <IonRow>
                <IonCol size="12" size-sm>
                  Recovered: <strong>{recov}</strong>
                </IonCol>
                <IonCol size="12" size-sm>
                  <Bar
                    data={recovChart}
                    width={100}
                    height={100}
                    options={{
                      maintainAspectRatio: true
                    }}
                  />
                </IonCol>
              </IonRow>
            </IonGrid>
          </IonCardContent>
        </IonCard>
      </IonContent>
    </IonPage>
  );
Additionally, you can test this Coronavirus dashboard page by import the dummy data to the Firebase Realtime-Database. Create a JSON file then fill it by this JSON data.
{
  "-M4Ws3Z0XxWfxUnPrT7C" : {
    "cases" : 1029,
    "country" : "United States",
    "date" : "2020-03-01",
    "deaths" : 22,
    "recovered" : 2
  },
  "-M4Ws3Z0XxWfxUnPrT7D" : {
    "cases" : 1120,
    "country" : "United States",
    "date" : "2020-03-02",
    "deaths" : 11,
    "recovered" : 1
  },
  "-M4Ws3Z0XxWfxUnPrT7E" : {
    "cases" : 1222,
    "country" : "United States",
    "date" : "2020-03-03",
    "deaths" : 5,
    "recovered" : 7
  },
  "-M4Ws3Z0XxWfxUnPrT7F" : {
    "cases" : 1342,
    "country" : "United States",
    "date" : "2020-03-04",
    "deaths" : 13,
    "recovered" : 21
  },
  "-M4Ws3Z0XxWfxUnPrT7G" : {
    "cases" : 1543,
    "country" : "United States",
    "date" : "2020-03-05",
    "deaths" : 15,
    "recovered" : 3
  },
  "-M4Ws3Z0XxWfxUnPrT7H" : {
    "cases" : 455,
    "country" : "Spain",
    "date" : "2020-03-01",
    "deaths" : 4,
    "recovered" : 6
  }
}
Inside the Firebase console and Realtime-Database import this JSON to the "coronavirus" collection.
Step #5: Implementing Country List with Cases
We will use another Ionic React page to display the list of cases by countries. First, add a new Ionic React page inside the pages folder.
touch src/pages/List.tsx
touch src/pages/List.css
Add that page to the IonReactRouter by open and edit "src/App.tsx" then add this line after home <Route>.
<Route path="/list" component={List} exact={true} />Also, add the import of that component.
import List from './pages/List'; Before edit List.tsx, modify the "src/pages/Home.tsx" to add the navigation button from the Home page to the List page by adding this <IonRow> after the last </IonRow>.
              <IonRow>
                <IonCol>
                  <IonButton expand="block" fill="solid" color="secondary" routerLink="/list">Show List of Countries</IonButton>
                </IonCol>
              </IonRow>
Next,open and edit "src/pages/List.tsx" then add these imports.
import { IonContent,
    IonHeader,
    IonPage,
    IonTitle,
    IonToolbar,
    IonCard,
    IonCardHeader,
    IonCardTitle,
    IonCardContent,
    IonGrid,
    IonRow,
    IonCol
   } from '@ionic/react';
import React, { useState, useEffect } from 'react';
import firebase from '../Firebase';
import './List.css';
Add the main function and export it.
const List: React.FC = () => {

};

export default List;
Next, declare these constant variables inside the main function.
  const [data, setData] = useState<any[]>([])
  const [showLoading, setShowLoading] = useState(true);
  const dbref = firebase.database().ref('coronavirus/')
Add a function to load data from the Firebase collection.
  const loadData = () => {
     // Extract Firebase collection to array
    dbref.on('value', resp => {
      let cases = snapshotToArray(resp)

      let bycountry: any[] = []
      cases.reduce((res, value) => {
        if (!res[value.country]) {
          res[value.country] = { country: value.country, cases: 0, deaths: 0, recovered: 0 };
          bycountry.push(res[value.country])
        }
        res[value.country].cases += value.cases;
        res[value.country].deaths += value.deaths;
        res[value.country].recovered += value.recovered;
        return res;
      }, {});
      setData(bycountry)
      setShowLoading(false);
    });
  }
Add a function to extract data from Firebase collection to the React array.
  const snapshotToArray = (snapshot: any) => {
    const returnArr: any[] = []

    snapshot.forEach((childSnapshot: any) => {
      const item = childSnapshot.val()
      item.key = childSnapshot.key
      returnArr.push(item)
    });

    return returnArr;
  }
Call that load data function inside useEffect.
  useEffect(() => {
    loadData()
  }, [])
Add the rendered template that shows the IonList component.
  return (
    <IonPage>
      <IonHeader>
        <IonToolbar>
          <IonButtons slot="start">
            <IonBackButton defaultHref="/" />
          </IonButtons>
          <IonTitle>List of Countries</IonTitle>
        </IonToolbar>
      </IonHeader>
      <IonContent>
        <IonLoading
            isOpen={showLoading}
            onDidDismiss={() => setShowLoading(false)}
            message={'Loading...'}
        />
        <IonList>
          {data.map((item, idx) => (
            <IonItem key={idx}>
              <IonLabel>
                <h2>{item.country}</h2>
                <h3>Cases: {item.cases}</h3>
                <h3>Deaths: {item.deaths}</h3>
                <h3>Recovered: {item.recovered}</h3>
              </IonLabel>
            </IonItem>
          ))}
        </IonList>
      </IonContent>
    </IonPage>
  );
Step #6: Implementing Country Chart
Now, we need to add the country chart that shows Coronavirus cases, deaths, and recovered day by day. Create a new TSX and CSS file inside the "src/pages" folder.
touch src/pages/Details.tsx
touch src/pages/Details.css
Fill the initial codes for this page or component.
import React, { useState, useEffect } from 'react';
import './Details.css';

const Details: React.FC = () => {

}

export default Details;
Register this new component to the IonRouterOutlet in "src/App.tsx".
<Route path="/details/:name" component={Details} exact={true} />Also, add the import for that component.
import Details from './pages/Details';Next, add the navigation to this new page from the list page by modify the <IonItem> in "src/pages/List.tsx" with this.
<IonItem key={idx} onClick={() => { showDetail(item.country) }}>Then add a function that will navigate to the details page.
  const showDetail = (params: any) => {
    let prop: any = props;
    prop.history.push({
      pathname: '/details/' + params
    })
  }
Add the "props" parameter to the main function.
const List: React.FC = (props) => {
...
}
Next, open and edit "src/pages/Details.tsx" then add/modify these imports.
import { IonContent,
  IonHeader,
  IonPage,
  IonTitle,
  IonToolbar,
  IonCard,
  IonCardHeader,
  IonCardTitle,
  IonCardContent,
  IonGrid,
  IonRow,
  IonCol,
  IonButtons,
  IonBackButton,
  IonLoading
  } from '@ionic/react';
import React, { useState, useEffect } from 'react';
import { Bar } from 'react-chartjs-2';
import firebase from '../Firebase';
Add the props parameter to the main function.
const Details: React.FC = (props) => {
...
}
Declare the required variables, constant, and Firebase collection initialization at the top of the main function.
  let prop: any = props;
  let match: any = prop.match;

  const dbref = firebase.database().ref('coronavirus/')
  const [caseChart, setCaseChart] = useState({})
  const [deathChart, setDeathChart] = useState({})
  const [recovChart, setRecovChart] = useState({})
  const [showLoading, setShowLoading] = useState(true);
  const [cases, setCases] = useState(0)
  const [deaths, setDeaths] = useState(0)
  const [recov, setRecov] = useState(0)
Add useEffect function that calls load data function.
  useEffect(() => {
    loadData()
  }, [])
Add load data function to load data from the Firebase collection with the filter by country then extract the response to the array of objects.
  const loadData = () => {
    console.log(match.params.name)
    // Extract Firebase collection to array
    dbref.orderByChild('country').equalTo(match.params.name).on('value', resp => {
      let respdata = snapshotToArray(resp)
      let caseDate: any[] = []
      let caseAmount: any[] = []
      let deathAmount: any[] = []
      let recovAmount: any[] = []
      let caseCount = 0
      let deathCount = 0
      let recovCount = 0
      respdata.forEach((dt) => {
        caseDate.push(dt.date)
        caseAmount.push(dt.cases)
        deathAmount.push(dt.deaths)
        recovAmount.push(dt.recovered)
        caseCount = caseCount + dt.cases
        deathCount = deathCount + dt.deaths
        recovCount = recovCount + dt.recovered
      })
      setCases(caseCount)
      setDeaths(deathCount)
      setRecov(recovCount)
      setCaseChart({
        labels: caseDate,
        datasets: [
          {
            label: 'Cases Chart',
            backgroundColor: 'rgba(255,99,132,0.2)',
            borderColor: 'rgba(255,99,132,1)',
            borderWidth: 1,
            hoverBackgroundColor: 'rgba(255,99,132,0.4)',
            hoverBorderColor: 'rgba(255,99,132,1)',
            data: caseAmount
          }
        ]
      })
      setDeathChart({
        labels: caseDate,
        datasets: [
          {
            label: 'Cases Chart',
            backgroundColor: 'rgba(255,99,132,0.2)',
            borderColor: 'rgba(255,99,132,1)',
            borderWidth: 1,
            hoverBackgroundColor: 'rgba(255,99,132,0.4)',
            hoverBorderColor: 'rgba(255,99,132,1)',
            data: deathAmount
          }
        ]
      })
      setRecovChart({
        labels: caseDate,
        datasets: [
          {
            label: 'Cases Chart',
            backgroundColor: 'rgba(255,99,132,0.2)',
            borderColor: 'rgba(255,99,132,1)',
            borderWidth: 1,
            hoverBackgroundColor: 'rgba(255,99,132,0.4)',
            hoverBorderColor: 'rgba(255,99,132,1)',
            data: recovAmount
          }
        ]
      })
      setShowLoading(false);
    });
  }
Add a function that converts Firebase response as the array objects.
  const snapshotToArray = (snapshot: any) => {
    const returnArr: any[] = []

    snapshot.forEach((childSnapshot: any) => {
      const item = childSnapshot.val()
      item.key = childSnapshot.key
      returnArr.push(item)
    });

    return returnArr;
  }
Modify or add a return function that renders the template to display the details of cases by country with the bar chart.
  return (
    <IonPage>
      <IonHeader>
        <IonToolbar>
          <IonButtons slot="start">
            <IonBackButton defaultHref="/list" />
          </IonButtons>
          <IonTitle>Country Details</IonTitle>
        </IonToolbar>
      </IonHeader>
      <IonContent>
        <IonLoading
            isOpen={showLoading}
            onDidDismiss={() => setShowLoading(false)}
            message={'Loading...'}
        />
        <IonCard color="light">
          <IonCardHeader>
            <IonCardTitle>{match.params.name}</IonCardTitle>
          </IonCardHeader>
          <IonCardContent>
            <IonGrid>
              <IonRow>
                <IonCol size="12" size-sm>
                  Confirmed Cases: <strong>{cases}</strong>
                </IonCol>
                <IonCol size="12" size-sm>
                  <Bar
                    data={caseChart}
                    width={100}
                    height={100}
                    options={{
                      maintainAspectRatio: true
                    }}
                  />
                </IonCol>
              </IonRow>
              <IonRow>
                <IonCol size="12" size-sm>
                  Death: <strong>{deaths}</strong>
                </IonCol>
                <IonCol size="12" size-sm>
                  <Bar
                    data={deathChart}
                    width={100}
                    height={100}
                    options={{
                      maintainAspectRatio: true
                    }}
                  />
                </IonCol>
              </IonRow>
              <IonRow>
                <IonCol size="12" size-sm>
                  Recovered: <strong>{recov}</strong>
                </IonCol>
                <IonCol size="12" size-sm>
                  <Bar
                    data={recovChart}
                    width={100}
                    height={100}
                    options={{
                      maintainAspectRatio: true
                    }}
                  />
                </IonCol>
              </IonRow>
            </IonGrid>
          </IonCardContent>
        </IonCard>
      </IonContent>
    </IonPage>
  );
Step #7: Add Coronavirus Cases Input Form
To create the input for the new cases by country and by day, create the TSX and CSS to create a new page or component inside "src/pages" folder.
touch src/pages/Input.tsx
touch src/pages/Input.css
Fill the Input.tsx file with the initial React codes.
import React, { useState, useEffect } from 'react';
import './Input.css';

const Input: React.FC = () => {

}

export default Input;
Register this new component to the IonRouterOutlet in "src/App.tsx".
<Route path="/input" component={Input} exact={true} />Also, add the import for that component.
import Input from './pages/Input';Next, add a button in the "src/pages/Home.tsx" toolbar that navigates to the input form.
        <IonToolbar>
          <IonTitle>Coronavirus Dashboard</IonTitle>
          <IonButtons slot="end">
            <IonButton routerLink="/input">
              <IonIcon slot="icon-only" icon={add} />
            </IonButton>
          </IonButtons>
        </IonToolbar>
Modify or add the import for the required elements.
import { IonContent,
  ...
  IonButtons,
  IonIcon
 } from '@ionic/react';
import { add } from 'ionicons/icons'
Next, open and edit "src/pages/Input.tsx" then add or modify these imports.
import { IonContent,
    IonHeader,
    IonPage,
    IonTitle,
    IonToolbar,
    IonItem,
    IonLabel,
    IonSelect,
    IonSelectOption,
    IonDatetime,
    IonInput,
    IonButton,
    IonButtons,
    IonBackButton,
    IonLoading,
    IonList,
    IonAlert
    } from '@ionic/react';
import React, { useState, useEffect } from 'react';
import firebase from '../Firebase';
import './Input.css';
Add these constant variables that required for the input-form, check the existing data, and Firebase collection initialization.
  const [showLoading, setShowLoading] = useState(false);
  const countries = ['United States', 'Spain', 'Italy', 'Germany', 'France', 'China', 'United Kingdom', 'Iran', 'Turkey', 'Belgium', 'Netherlands', 'Switzerland']
  const [date, setDate] = useState<string>('')
  const [country, setCountry] = useState<string>('')
  const [cases, setCases] = useState<string>('')
  const [deaths, setDeaths] = useState<string>('')
  const [recovered, setRecovered] = useState<string>('')
  const [showAlert, setShowAlert] = useState(false);
  const dbref = firebase.database().ref('coronavirus/')
Add a function to check the existing country and date then show an alert if it exists or send data to Firebase collection if it doesn't exist.
  const addCases = () => {
    let dt = new Date(date)
    let df = dt.getFullYear() + '-' + pad(dt.getMonth() + 1, 2, 0) + '-' + pad(dt.getDate(), 2, 0)
    dbref.orderByChild('date').equalTo(df).once('value', resp => {
      let cdata = snapshotToArray(resp)
      let checkCtr = cdata.filter(d => d.country === country)
      if (checkCtr.length > 0) {
        setShowAlert(true)
        return
      } else {
        let casesdata = { date: df, country: country, cases: parseInt(cases), deaths: parseInt(deaths), recovered: parseInt(recovered) }
        dbref.push(casesdata, (error) =>{
          if (error) {
            console.log("Data could not be saved." + error);
          } else {
            setDate('')
            setCountry('')
            setCases('')
            setDeaths('')
            setRecovered('')
            let prop: any = props;
            prop.history.push({
              pathname: '/'
            })
          }
        })

      }
    })
  }
As you see in the above function, there is additional function to extract or convert Firebase snapshot to the array of objects and give zero pad to the manually formatted date.
  const pad = (n: any, width: number, z: any) => {
    z = z || '0';
    n = n + '';
    return n.length >= width ? n : new Array(width - n.length + 1).join(z) + n;
  }

  const snapshotToArray = (snapshot: any) => {
    const returnArr: any[] = []

    snapshot.forEach((childSnapshot: any) => {
      const item = childSnapshot.val()
      item.key = childSnapshot.key
      returnArr.push(item)
    });

    return returnArr;
  }
Finally, add or modify the render/return function that shows the template for input a new Coronavirus case.
  return (
    <IonPage>
      <IonHeader>
        <IonToolbar>
          <IonButtons slot="start">
            <IonBackButton defaultHref="/" />
          </IonButtons>
          <IonTitle>Input Cases</IonTitle>
        </IonToolbar>
      </IonHeader>
      <IonContent>
        <IonLoading
            isOpen={showLoading}
            onDidDismiss={() => setShowLoading(false)}
            message={'Loading...'}
        />
        <IonAlert
          isOpen={showAlert}
          onDidDismiss={() => setShowAlert(false)}
          header={'Invalid'}
          message={'Country with this date is already exists!'}
          buttons={['OK']}
        />
        <IonList>
          <IonItem>
            <IonLabel>Date</IonLabel>
            <IonDatetime displayFormat="YYYY-MM-DD" value={date} onIonChange={e => setDate(e.detail.value!)}></IonDatetime>
          </IonItem>
          <IonItem>
            <IonLabel>Country</IonLabel>
            <IonSelect value={country} onIonChange={e => setCountry(e.detail.value)}>
              {countries.map((ctr, idx) => (
                <IonSelectOption key={idx} value={ctr}>{ctr}</IonSelectOption>
              ))}
            </IonSelect>
          </IonItem>
          <IonItem>
            <IonLabel>Cases</IonLabel>
            <IonInput value={cases} onIonChange={e => setCases(e.detail.value!)}></IonInput>
          </IonItem>
          <IonItem>
            <IonLabel>Deaths</IonLabel>
            <IonInput value={deaths} onIonChange={e => setDeaths(e.detail.value!)}></IonInput>
          </IonItem>
          <IonItem>
            <IonLabel>Recovered</IonLabel>
            <IonInput value={recovered} onIonChange={e => setRecovered(e.detail.value!)}></IonInput>
          </IonItem>
          <IonItem>
            <IonButton expand="block" fill="solid" color="secondary" onClick={() => { addCases() }}>Save</IonButton>
          </IonItem>
        </IonList>
      </IonContent>
    </IonPage>
  );
Step #8: Run and Test the Ionic 5 React Firebase App
Now, we will build this Ionic 5 React Firebase app to the Android or iOS device or simulator. Because, we are using a Capacitor to build this app, type this command to add platform and build or run this app to an Android device or simulator.
ionic build
ionic capacitor add android
ionic capacitor run android
After the last command, it will open Android Studio automatically. Now, you can select your device or simulator then run it by click on the play button in the Android Studio. For iOS, run these commands.
ionic capacitor add ios
npx cap open ios
The XCode will open this iOS build and now you can run to your device or simulator. If you are using the device, make sure you have to change the Bundle ID to your Apple developer account prefix (for example com.djamware.coronavirusapp). And here the app looks like.


That it's, the Build Ionic 5 React Firebase Coronavirus Dashboard Mobile App. You can get the full working source code from our GitHub.
We know that building beautifully designed Ionic apps from scratch can be frustrating and very time-consuming. Check Ionic 4 - Full Starter App and save development and design time. Android, iOS, and PWA, 100+ Screens and Components, the most complete and advance Ionic Template.
That just the basic. If you need more deep learning about Ionic, Angular, and Typescript, you can take the following cheap course:
- IONIC 4 Design Hybrid Mobile Applications IOS & Android
- Wordpress Rest API and Ionic 4 (Angular) App With Auth
- Mobile App from Development to Deployment - IONIC 4
- Ionic 4 Crash Course with Heartstone API & Angular
- Ionic 4 Mega Course: Build 10 Real World Apps
Thanks!