Introduction
This guide is meant to help Windows 10 users set up their development
environment for Ruby on Rails application development. This guide touches, among
others, on:
- WSL 2 (Windows Subsystem for Linux)
- Setting up Ruby and Rails
- Setting up VSCode for local development
Setting up WSL2 on Windows 10
Reference: Install WSL 2 | Microsoft
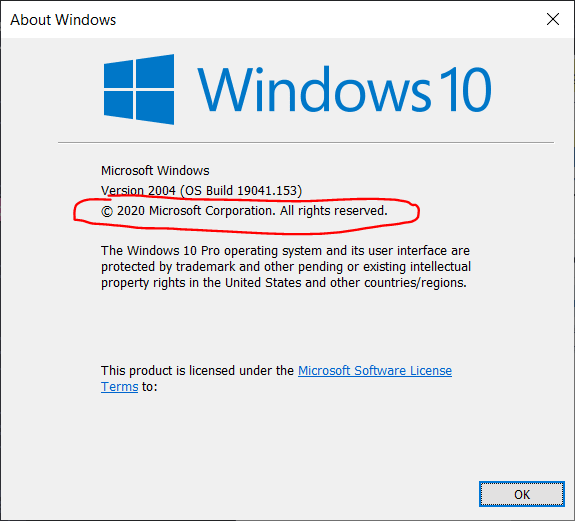
The first thing you want to do is make sure your Windows 10 version and
build are compatible with WSL2 -- As of April 3, 2020, version 1909,
build 18363.720 is **not* compatible with WSL. This is the standard
widely distributed version at the moment*
If by the time you're reading this your windows version is lower than
version 2004, build 19041.153, then you will most likely have to
get into the Windows Insider program to get Windows preview builds,
more information on this page.
You can check your windows version by typing
winveron the start menu
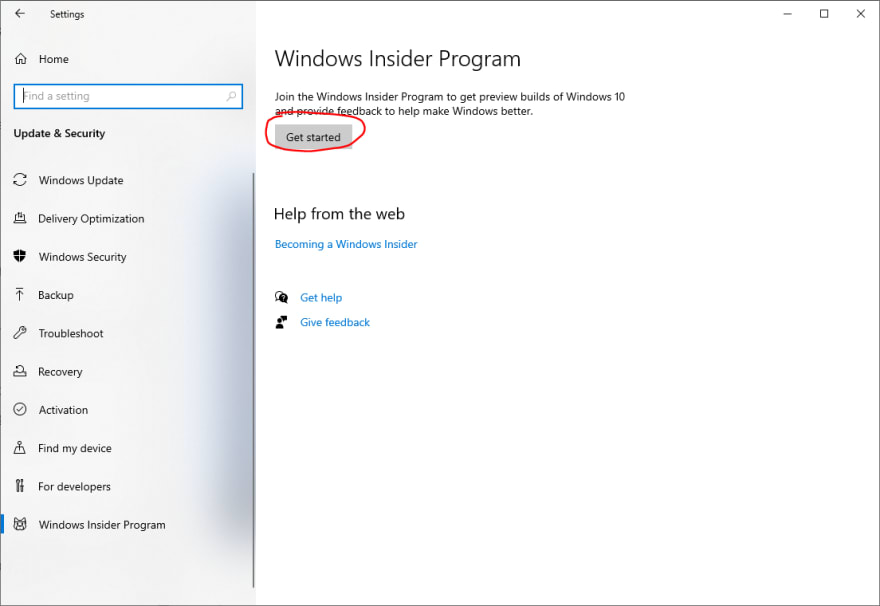
Getting into the Insider Program
If you're not yet in the insider program, you can visit the
following link for very detailed instructions on how to
enroll into Insider Program, and install WSL 2:
Official Microsoft's WSL2 Installation Instructions
How to install Windows Subsystem for Linux 2 on Windows 10
Note: These guides includes WSL2 installation too
If you want the short version, go to Settings > Update
& Security > Windows Insider Program. There, make sure to get onto the
SLOW ring. At the time this guide was first written, you don't need
get into the Fast ring, so let's avoid unnecessary problems.
After getting into the Slow ring, restart your PC if
required. Then, check windows for updates on Settings >
Uptade & Security > Windows Update. Once your Windows
build is above build 18917, you can continue.
Installing WSL2
Now that you have the right OS build, you can enable WSL2
on your computer manually or via Poweshell:
Powershell instructions
Open up Powershell as Admin by right clicking the Windows
start button and selecting "Windows Powershell (Admin)".
Then, paste and run the following commands and restart your computer
after they are done running:
dism.exe /online /enable-feature /featurename:Microsoft-Windows-Subsystem-Linux /all /norestart

dism.exe /online /enable-feature /featurename:VirtualMachinePlatform /all /norestart
Manual instructions
Go to Windows' start menu, and type "Turn Windows features
on or off". If you click in the right item, you'll see the
window below. Make sure to check "Windows Subsystem for
Linux"
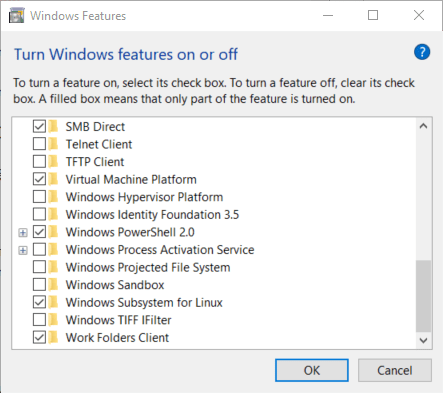
You'll probably be asked to restart your PC, please do so now.
After enabling Windows Subsystem for Linux, then we have to
install a Linux distro (short for distribution). Open up
the Windows Store app, and search for "Linux". You should
see something like the image below:
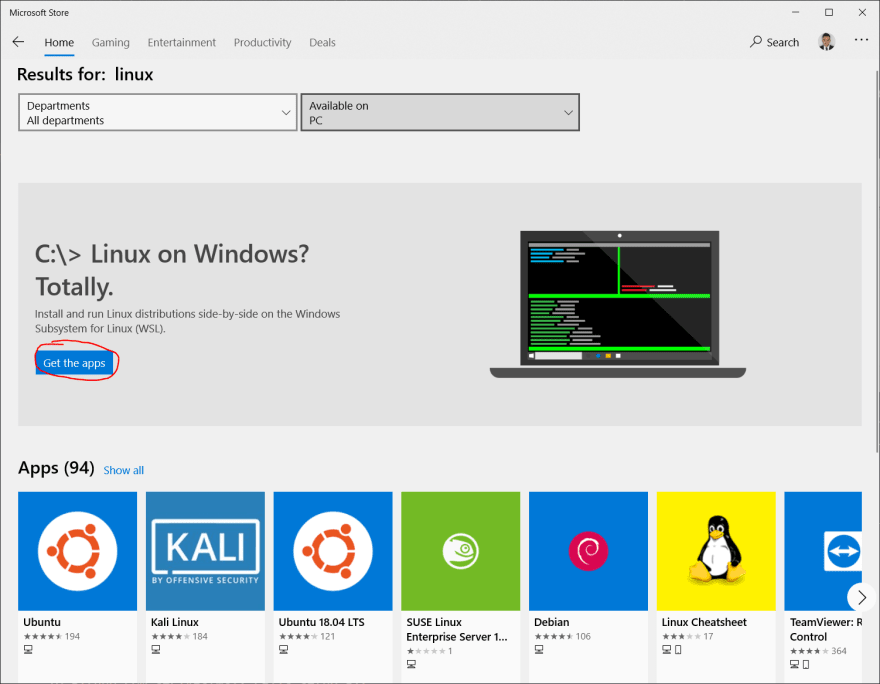
Install "Ubuntu" from the linux subpage. It will take a few
seconds. After it is installed, launch it. You will see a
terminal window showing the following message:
Installing, this may take a few minutes...
You will be asked to create a default UNIX user account.
Make sure it is a simple username (avoid mayus, symbols,
etc). Then type a password (no characters will show
while you type, so make sure you get it right!) and
confirm it. If everything went according to plan, you
should see the following message:
Installation successful!

To run a command as administrator (user "root"), use
"sudo `<command>`".

See "man sudo_root" for details.
Congratulations! You are now running a virtual Linux inside
Windows 10. If anything didn't go as expected, Google the
error messages you get until everything is going as expected.
Assuming you got the right version of Windows 10 running, if you
made a mistake while installing Ubuntu, you can always just uninstall
from the Windows Store and try again. This will reset (almost)
everything related to that Linux distro, so if you seriously mess up,
you can always reset.
Making sure WSL version 2 is running
If you still have your Ubuntu bash terminal open, close it (pro tip:
type exit instead of clicking the X arrow. Get used to the CLI -
Command Line Interface). Open Powershell and type
wsl -l -v
You should see something like this:

If your distro's version is NOT 2, then you definitely have to run the
command below. If it is 2, you should run it anyways just in case:
wsl --set-version <Distro> 2
Where <Distro> is your distro's name from the list (mine is "Ubuntu").
You will see online that some people have other names (like Ubuntu 18.04),
don't worry about that for now. If successful, you should see the following
message:
Conversion in progress, this may take a few minutes...

For information on the key differences with WSL 2 please visit <https://aka.ms/wsl2>
Then, run the following command so every next instance is WSL 2 too:
wsl --set-default-version 2
Run the wsl -l -v command again and make sure you got version 2 now. If
everything went well, you have finished the WSL 2 setup part.
Setting up Ruby on Rails
Now you have to update your Linux distro and set up Rails. For detailed and
up-to-date instructions, you can visit Rails Installation Tutorial;
I recommend that you follow the steps outlined in this site and select all
recommended options and don't skip any steps! You will need everyhing done
here at some point or another. Most of the guide works, although some parts
may not work for you as time passes and different packages get updated. For
instance, at this time, the installation instruction for PostgreSQL from
the tutorial above doesn't work (I show how to do this below).
Tip: when pasting lines of code into your Ubuntu bash terminal, CTRL+V
won't work, but if you right-click the terminal it will paste the content
from your clipboard.Tip 2: If this is your first time using the terminal, it's best if you
paste commands 1 line at a time. Multi-line should work, but you may make
mistakes as sometimes the last line doesn't run automatically.

GoRails tutorial example
As you follow the steps above, make sure to read the return messages from
the terminal. If there's anything funky or you get an error message, stop
and debug it! The order in which things are done makes a big difference.
Just in case the guide above changes, I will show the instructions for Ruby
version 2.7.1 and Rails version 6.0.2.2 below, with some handy tips for
beginners.
Installing Ruby and Updating your Distro
Ruby is the backend language that powers Rails apps. This means that it
controls the logic via scripts, just like Python or R. You can learn more
about this here and here.
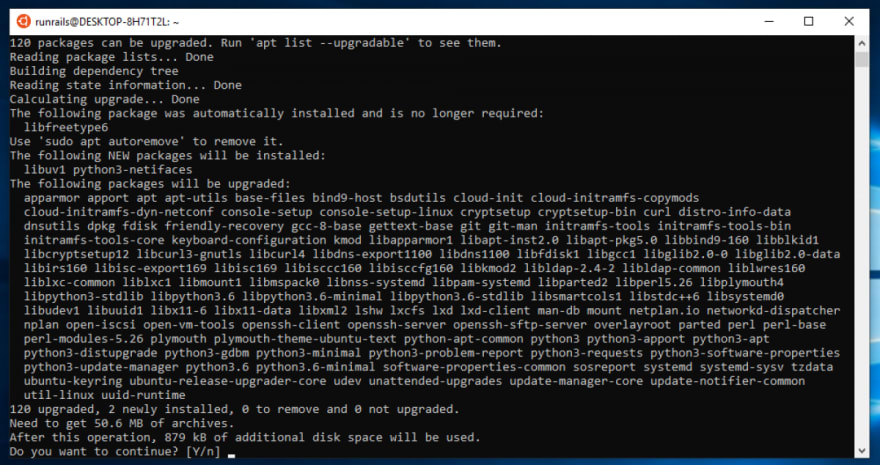
First, let's get your distro upgraded! In Linux speech, "update" means
getting the latest version numbers, and "upgrade" means actually downloading
and installing them. Run the following code in Ubuntu:
sudo apt update && sudo apt dist-upgrade && sudo apt-get autoremove && sudo
apt-get clean
If you are asked to proceed, type "Y" and hit enter
Now that your distro's libraries are up-to-date, let's proceed to install
ruby. Run the following 2 lines in your Ubuntu terminal:
sudo apt install curl
curl -sL https://deb.nodesource.com/setup_12.x | sudo -E bash -
curl -sS https://dl.yarnpkg.com/debian/pubkey.gpg | sudo apt-key add -
echo "deb https://dl.yarnpkg.com/debian/ stable main" | sudo tee /etc/apt/sources.list.d/yarn.list

sudo apt-get update

sudo apt-get install git-core zlib1g-dev build-essential libssl-dev libreadline-dev libyaml-dev libsqlite3-dev sqlite3 libxml2-dev libxslt1-dev libcurl4-openssl-dev software-properties-common libffi-dev nodejs yarn
That's a long code! If you are promped for your password, please input it
and press enter. This is because we invoked sudo (pro tip: sudo won't ask
you for a password for some time after inputting it successfully).
Now, let;s install Ruby using rbenv. Run the following lines in your
bash terminal (same Ubuntu window):
cd
git clone https://github.com/rbenv/rbenv.git ~/.rbenv
echo 'export PATH="$HOME/.rbenv/bin:$PATH"' >> ~/.bashrc
echo 'eval "$(rbenv init -)"' >> ~/.bashrc
exec $SHELL

git clone https://github.com/rbenv/ruby-build.git ~/.rbenv/plugins/ruby-build
echo 'export PATH="$HOME/.rbenv/plugins/ruby-build/bin:$PATH"' >> ~/.bashrc
exec $SHELL

rbenv install 2.7.1
rbenv global 2.7.1
ruby -v
Now let's install bundler, which is an impotant gem (ruby libary):
gem install bundler
rbenv rehash
Configuring Git
If you don't already have a GitHub account, create one now.
This will come very handy in the future, and some things we do here (like
creating SSH keys) will be useful outside of Git and Github, so no skipping.
After creating your Github account (or if you already had one), paste the
following commands in your terminal, replaceing the items in CAPS with your
name (use your UNIX username for simplicity) and github email:
git config --global color.ui true
git config --global user.name "YOUR NAME"
git config --global user.email "YOUR@EMAIL.com"
ssh-keygen -t rsa -b 4096 -C "YOUR@EMAIL.com"
When prompted for a location, just press enter. Same for password, no need
to add a password to this for now. If successful, this is a sample output:
Generating public/private rsa key pair.
Enter file in which to save the key (/Users/USERNAME/.ssh/id_rsa):
Enter passphrase (empty for no passphrase):
Enter same passphrase again:
Your identification has been saved in /Users/USERNAME/.ssh/id_rsa.
Your public key has been saved in /Users/USERNAME/.ssh/id_rsa.pub.
The key fingerprint is:
80:5f:25:7c:f4:90:aa:e1:f4:a0:01:43:4e:e8:bc:f5 vivek@desktop01
The key's randomart image is:
+--[ RSA 2048]----+
| oo    ...+.     |
|.oo  .  .ooo     |
|o .o. . .o  .    |
| o ...+o.        |
|  o .=.=S        |
| .  .Eo .        |
|                 |
|                 |
|                 |
+-----------------+
We just generated fancy, industrial-grade security keys. This is much more
convenient and secure than using passwords (even though you would never
re-use a password, rigt?). So we'll paste the encrypted PUBLIC key into
Github, which will accept our connections in the future without the need
of a password. Get your public key by running the following command:
cat ~/.ssh/id_rsa.pub
This will output the contents of the "id_rsa.pub" file, which holds your
SSH public key. Once you get that output, you can select it with your
mouse and right-click it to copy it (remember, CTRL+C doesn't copy things
in the Ubuntu bash terminal).
Note: the ~ variable is the same as typing \$HOME, which is a variable as
indicated by the preceding dollar sign (\$). This is just a shortcut to
indicate your user's home folder, very similar to your user folder in
Windows 10.
The command's output should look something like this:
ssh-rsa AAAAB3NzaC1yc2EAAAABIwAAAQEAklOUpkDHrfHY17SbrmTIpNLTGK9Tjom/BWDSU
GPl+nafzlHDTYW7hdI4yZ5ew18JH4JW9jbhUFrviQzM7xlELEVf4h9lFX5QVkbPppSwg0cda3
Pbv7kOdJ/MTyBlWXFCR+HAo3FXRitBqxiX1nKhXpHAZsMciLq8V6RjsNAQwdsdMFvSlVK/7XA
t3FaoJoAsncM1Q9x5+3V0Ww68/eIFmb1zuUFljQJKprrX88XypNDvjYNby6vw/Pb0rwert/En
mZ+AW4OZPnTPI89ZPmVMLuayrD2cE86Z/il8b+gw3r3+1nKatmIkjn2so1d01QraTlMqVSsbx
NrRFi9wrf+M7Q== USER@HOSTNAME
Now, let's head to Github and paste that
SSH key in here. Remember to give this
key a name so you remember it's your WSL 2 connecting to Github. Let's
double-check that everything worked out, run the following command:
ssh -T git@github.com`
You should see something like this:
Hi USERNAME! You've successfully authenticated, but GitHub does not provide shell access.
Great! So now we have a) WSL 2 set up, b) an Ubuntu distro installed and
updated, c) Ruby installed, and d) an SSH key pair created and successfully
connected to Github. We're almost there.
Installing Rails
Run the following commands in your bash terminal:
curl -sL https://deb.nodesource.com/setup_12.x | sudo -E bash -
curl -sS https://dl.yarnpkg.com/debian/pubkey.gpg | sudo apt-key add -
echo "deb https://dl.yarnpkg.com/debian/ stable main" | sudo tee /etc/apt/sources.list.d/yarn.list

sudo apt update
sudo apt-get install -y nodejs yarn
This may take a few minutes as you're installing NodeJS and Yarn, two very
important packages.
Note: you may have noticed that whenever we run the
apt updateorapt-get installcommands we get more packages, and
whenever we rungem installcommand we get more "gems" (ruby libraries)
And now we finally install Rails (this may take a few minutes too):
gem install rails -v 6.0.2.2
rbenv rehash
Let's test it out by running rails -v, you should get:
rails -v
Rails 6.0.2.2
If you get anything different, start debugging/Googling.
Installing and Configuring PostgreSQL
You can install PostgreSQL in Windows or directly in the WSL. It is easier
to install it in Windows, but I prefer separating my development environment
from my personal user space, so I'll show how to install it in your WSL.
As of April 3, 2020, installing PostgreSQL-11 isn't trivial. First, let's
go to Postgre's website.
Choose your Ubuntu apt repository (most likely Bionic 18.04) and run the
following commands from your bash terminal:
sudo vim /etc/apt/sources.list.d/pgdg.list
Vim is the terminal's text editor. Don't try typing things yet! Vim
doesn't start in "insert mode" which is the mode that lets you type stuff,
instaed it starts in the mode that accepts commands. So first push the "i"
key in your keyboard. This will take vim into "insert mode" like below:
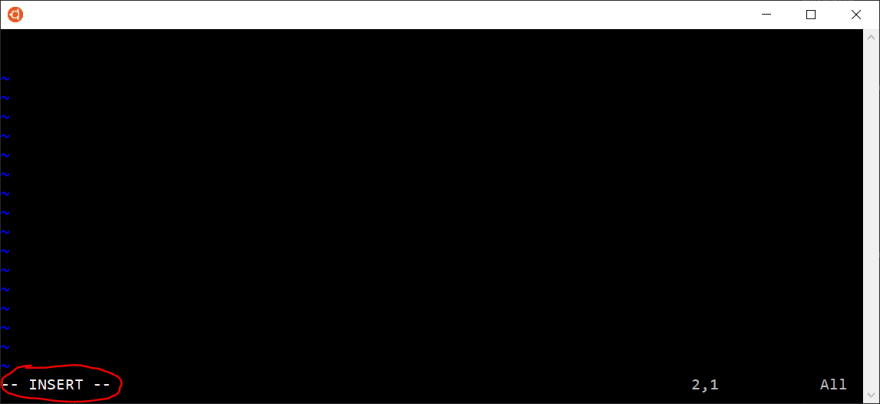
Vim in insert mode -> text editing enabled
Now that we can insert stuff, paste the following line into the
document (remember to right-click)L
deb http://apt.postgresql.org/pub/repos/apt/ bionic-pgdg main
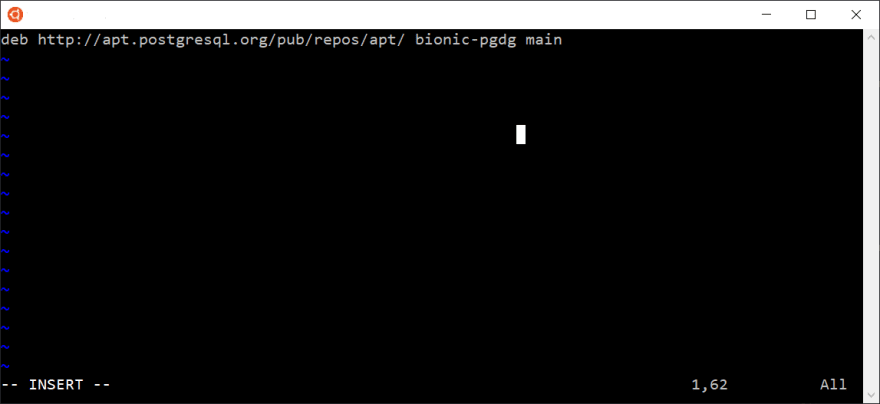
After pasting that line, we have to save and exit. To do this, first
exit INSERT mode by pressing your ESC key. You'll notice that the
-- INSERT -- message disappeared from the bottom left corter of
vim's screen. Now, type :w and press enter. This will ask vim
to write changes into the file. Then, type :q which will ask
vim to exit (Note: you can also do :wq to do both at the same time).
We just added the information required for bash to successfully get the
latest version of PostgreSQL. So now we'll get it! Run the following
command in bash:
wget --quiet -O - https://www.postgresql.org/media/keys/ACCC4CF8.asc | sudo apt-key add -

sudo apt-get update
We got the update info now, let's install:
sudo apt-get install postgresql-11

sudo apt install libpq-dev
Now that PostgreSQL is installed, let's set up a user. Run the code below
replacing USERNAME for your UNIX user for simplicity:
sudo -u postgres createuser USERNAME -s
And now we're done with PostgreSQL! All that's left is to test the server:
Testing Rails server
To see whether things are working, lets boot up a server. Run the following
lines of code in your terminal:
cd
rails new helloworldapp
cd helloworldapp
rails server -b 0.0.0.0 -p 3000

Puma server booted successfully
Now, if you were able to boot up Puma successfully, you
should be able to open up Chrome or any other browser and
enter http://localhost:3000 in the address bar. If you
did everything well, you should see the following page:
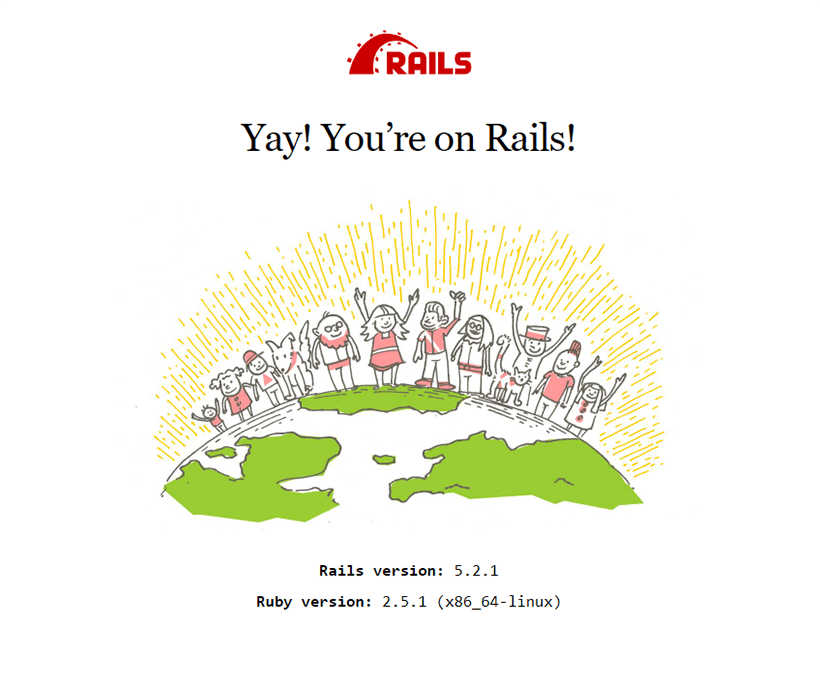
Rejoice! The hard part is over. Now, close your server by going back to the
terminal and pressing CTRL+C
Setting up VSCode for Local Development
It's great that you have a server up and running, but you will most likely
want to have real-time access to the code and assets in the server. The files
that live in your Linux subsystem don't like comingling with your Windows
files (they are completely separate Operating Systems after all). This means
that you can't really edit those files DIRECTLY from Windows. If we left
things as they are now, you would have to make some code, upload it to
Github, and then download it using your Ubuntu terminal. This would be
cumbersome to say the least.
Fret not! Since your WSL lives inside Windows, you CAN edit the files using
Windows, but not directly. This means that you will be able to code and
instantly see the changes you made in the same computer.
If this sounds a bit too technical, just follow these steps so you can
use VSCode inside your new Linux environment.
Download and Install VSCode
In case you don't already have VSCode, then please download and install it
now (download the Windows 64 bit
version unless you know you have a different Operating System). You may be
thinking about downloading the Ubuntu version, but don't. WSL 2 is kind of
Linux, but not full fledged, VSCode needs to run from a fully functional
Operating System like the Windows 10 you're running now.
Make sure to leave the "Add to PATH" checkbox TICKED
Some resources in case something goes wrong:
Official "Developing in WSL" guide
Remote development in WSL guided tutorial
Remote-WSL Extension site
Full guide from Microsoft
Install Remote Development Extensions
After installing, open VSCode. It will most likely offer you to install a
"Remote-WSL" extension. Don't do it for now. Go to extensions on the left
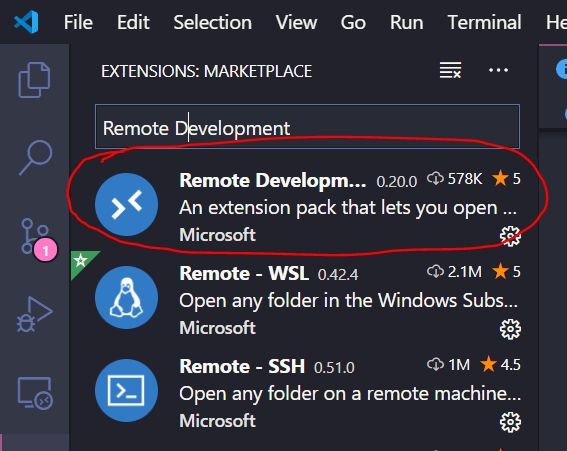
(or hit CTRL+SHIFT+X) and paste this into the search bar:
Remote Development
You should see something like the picture below but with
the option to install available (I already have it installed
so it doesn't show up):
Install this one. If you installed it successfully, you should see the little
connection icon in the bottom-left corner of your VSCode:
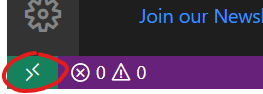
Click on that green icon. You'll notice a dropdown menu appeared near the
top of your VSCode. Click on Remote-WSL: New Window. Now VSCode is asking
for a folder to open. Browse to the helloworld app we created before to
test whether Rails was creating a server successfully. It should be something
like /home/USERNAME/helloworld/. Click OK. After a second, you should see
a notification at the bottom-right corner of VSCode stating that "Code
Server" is being installed in WSL:

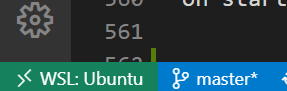
Once this is finished, VSCode will open up a new window and your status
at the bottom-left corner will change to WSL: <DISTRO> like below:
If you got all the way here, then congratulations! You can now successfully
code from your Windows 10 machine using VSCode and see those changes
reflected in real time in your server. Try it out by creating a hello-world
view inside your helloworld app!
Test VSCode by Making Hello World View
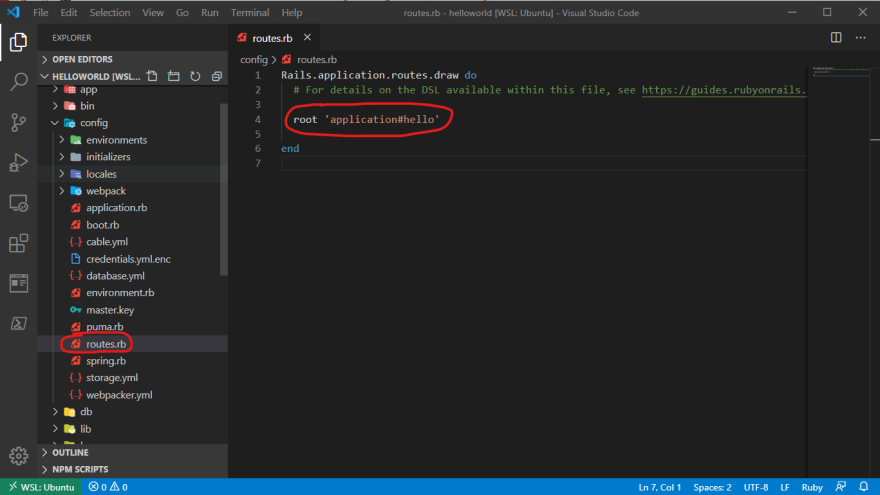
From your helloworld app folder, go to config > routes.rb and double
click the file to open. Add the following line inside the Rails.application.routes.draw do block:
root 'application#hello'
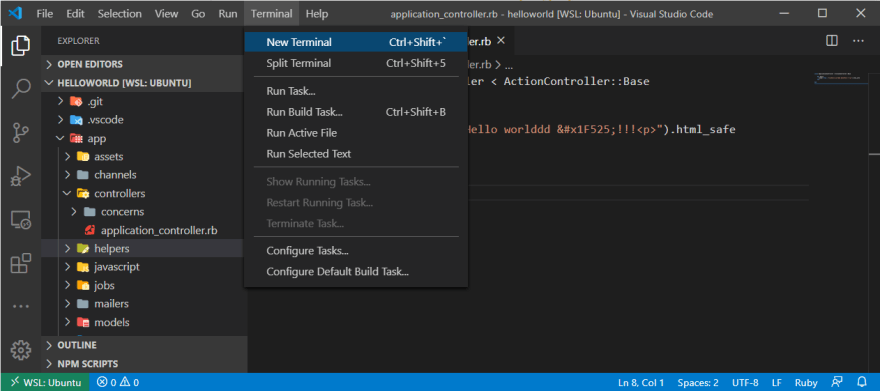
Then go to app > controllers > application_controller.rb and open the file.
Inside the ApplicationController class, add the following instance method:
def hello
render html: ("<p>Hello worlddd 🔥!!!<p>").html_safe
end

Now let's boot up the server again, and let's do it well. At the menu on the
top, click on Terminal > New Terminal, or better yet, press CTRL+SHIFT+`
(" ` " is the key next to "1" in your keyboard).
Once you open the terminal, make sure that the commands are being run from the helloworld folder. This can be double-checked by looking at the
terminal line:

If everything is going according to plan, then type the following in this
new terminal:
rails server -b 0.0.0.0 -p 3000
If you have done everything well up to this point, visit http://localhost:3000
and you will see this:
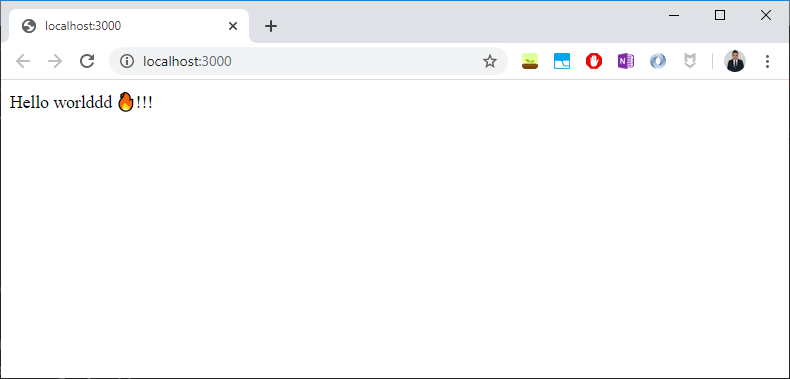
Don't forget to stop the server again, CTRL+C.
Congratulations, you are now up and running with VSCode + WSL2 + Ruby on Rails.
Nothing is stopping you now.


Top comments (2)
Step one: Install Linux
Step two: be happy!
P.S. wsl is hell
Used to think the same, but now I'm warming up to it! But even still, trying to make it a bit less hellish for devs out there ;)