
Building a Music Player Application with Kendo UI and jQuery

In this tutorial, we build a music player using jQuery and Kendo UI’s component for notifications. The player will pause and play songs, and deliver notifications based on the song playing.
Music players are everywhere these days. On our phones, on websites, and on computers. The most popular way to distribute music is through the internet. Over the years many applications have sprung up giving us the ability to stream, download or buy music from the comfort of our beds.
Kendo UI is a set of tools and components created to help reduce the amount of code necessary to perform certain UI tasks.
In this tutorial we attempt to create a basic music player with jQuery while utilizing one of Kendo UI’s handy components.
Prerequisites
To follow this tutorial, a basic understanding of jQuery and JavaScript is required. HTML/CSS knowledge is also recommended but not mandatory.
To build the application, here are a few tools we’ll use:
Initializing the Application
Our goal is to have a working music player where music can be played from. We will go through the steps necessary to create one with HTML/CSS and jQuery.
Create a folder called musicplayer and define this folder structure inside it:
    musicplayer/
          css/
           player.css
          js/
           player.js
          index.html
Let’s start adding data and functionality to our application.
Open your index.html file and add the following lines of code to it:
    <!-- ./index.html -->
    <!Doctype html>
     <html>
        <head>
            <!-- Section one -->
            <title>Music Player</title>
            <link rel="stylesheet" href="https://cdnjs.cloudflare.com/ajax/libs/ionicons/2.0.1/css/ionicons.min.css"/>
            <link rel="stylesheet" href="https://cdnjs.cloudflare.com/ajax/libs/twitter-bootstrap/3.3.7/css/bootstrap.min.css"/>
            <link rel="stylesheet" href="css/player.css"/>
        </head>
      <body>
               <!-- Section two -->
                   <div class="player">
                     <div class="clearfix"></div>

                    <div class="trackDetails ">
                      <span class="artist"></span>
                      <span class="splitTxt"> - </span>
                      <span class="title"></span>
                    </div>

                    <div class="controls">
                      <div class="rew">
                        <i class="icons ion-ios-skipbackward"></i>
                      </div>
                      <div class="play">
                        <i class="icons ion-ios-play"></i>
                      </div>
                      <div class="pause">
                        <i class="icons ion-ios-pause"></i>
                      </div>

                      <div class="fwd">
                        <i class="icons ion-ios-skipforward"></i>
                      </div>
                    </div>

                    <div class="volumeIcon">
                      <i class="icons ion-android-volume-up"></i>
                      <div class="volume"></div>
                    </div>

                    <div class="tracker"></div>
                  </div>
               <!-- Section three -->
                  <ul class="playlist" id="playlist">
                    <li audioURL="https://res.cloudinary.com/daintu6ky/video/upload/v1553018255/A_Chase.mp3" artist="Artist 1">Track 1</li>
                    <li audioURL="https://res.cloudinary.com/daintu6ky/video/upload/v1553018255/A_Chase.mp3" artist="Artist 2">Track 2</li>
                    <li audioURL="http://picdn.net/shutterstock/audio/397292/preview/preview.mp3https://res.cloudinary.com/daintu6ky/video/upload/v1553018255/A_Chase.mp3" artist="Artist 3">Track 3</li>
                    <li audioURL="https://res.cloudinary.com/daintu6ky/video/upload/v1553018255/A_Chase.mp3" artist="Artist 4">Track 4</li>
                  </ul>
              <!-- Section four -->
              <script src="https://code.jquery.com/jquery-3.3.1.js"
              integrity="sha256-2Kok7MbOyxpgUVvAk/HJ2jigOSYS2auK4Pfzbm7uH60="
              crossorigin="anonymous">
              </script>
              <script src="https://cdnjs.cloudflare.com/ajax/libs/jqueryui/1.12.0/jquery-ui.min.js"></script>
              <script src="js/player.js"></script>
        </body>
    </html>
In our index.html file we have four sections. Let’s briefly discuss their usage:
- Section One: Here we import the libraries that will be required for our app.
- Section Two: We define the HTML tags necessary to control sections of the player body. We will display the artist’s name and the song title, display some buttons and a tracker for our player.
- Section Three: We define our list of songs. When we add our JavaScript functions, we will see how to dynamically pass the values to the tags created above.
- Section Four: We import our JavaScript file and the libraries needed for our app.
To visualize our screen we need some css styles. Let’s add them. Open up your player.css file and add the following to it:
    // js/player.css
    * {
      margin: 0;
      padding: 0;
    }
    body {
      background-color: #fff;
      font-family: 'lato', sans-serif !important;
    }
    .player {
      background: #242628;
      background: -moz-linear-gradient(top, #242628 0%, #000000 100%);
      background: -webkit-linear-gradient(top, #242628 0%, #000000 100%);
      background: linear-gradient(to bottom, #242628 0%, #000000 100%);
      filter: progid: DXImageTransform.Microsoft.gradient( startColorstr='#242628', endColorstr='#000000', GradientType=0);
      position: relative;
      width: 500px;
      margin: 0 auto;
      margin-top: 80px;
      z-index: 2;
    }
    .splitTxt,
    .icons {
      color: #ffffff;
    }
    .trackDetails {
      text-align: center;
      margin: 4px auto;
      width: 300px;
      height: 38px;
      border: 1px solid #1e1e1e;
      background: #000000;
      border-radius: 4px;
      padding: 6px;
    }
    .title,
    .artist {
      color: #999;
      left: 167px;
    }
    .title {
      font-size: 14px;
      font-weight: bold;
    }
    .artist {
      font-size: 12px;
    }
Here we add styles for our music player’s basic look. Since we want music control options in our application, let’s add some more styling for that. In the same file add the following lines of code:
    .volumeIcon {
      position: absolute;
      right: 0;
      cursor: pointer;
      height: 34px;
      width: 32px;
    }
    .volumeIcon {
      bottom: 6px;
      display: block;
    }
    .controls {
      cursor: pointer;
      height: 40px;
      width: 120px;
      margin: 0 auto;
    }
    .controls .play,
    .controls .pause,
    .controls .rew,
    .controls .fwd {
      float: left;
      height: 40px;
      width: 40px;
      line-height: 40px;
      text-align: center;
    }
    .controls .play,
    .controls .pause,
    .plIcon,
    .volumeIcon {
      font-size: 26px;
    }
    .controls .pause {
      display: none;
    }
    .hidden {
      display: none;
    }
    .controls .visible {
      display: inline-block;
    }
    .tracker {
      cursor: pointer;
      height: 5px;
    }
    .ui-widget.ui-widget-content {
      border: 0;
    }
    .ui-corner-all {
      border-radius: 0;
    }
    .ui-slider .ui-slider-handle {
      display: block;
      height: 14px;
      border-radius: 14px;
      width: 14px;
      -webkit-transition: all ease-in-out .3s;
      transition: all ease-in-out .3s;
    }
    .tracker .ui-slider-range {
      background: #00dbde;
      background: -moz-linear-gradient(left, #00dbde 0%, #fc00ff 100%);
      background: -webkit-linear-gradient(left, #00dbde 0%, #fc00ff 100%);
      background: linear-gradient(to right, #00dbde 0%, #fc00ff 100%);
      filter: progid: DXImageTransform.Microsoft.gradient( startColorstr='#00dbde', endColorstr='#fc00ff', GradientType=1);
      -webkit-transition: all ease-in-out .3s;
      transition: all ease-in-out .3s;
      height: 100%;
      top: 0;
    }
    .volume .ui-slider-range {
      background: #333333;
      -webkit-transition: all ease-in-out .3s;
      transition: all ease-in-out .3s;
    }
    .volume.ui-widget-content {
      background: #00dbde;
    }
    .ui-slider-handle {
      cursor: pointer;
      height: 10px;
      margin-left: -5px;
      top: 2px;
      width: 10px;
      z-index: 2;
    }
    .volume {
      display: none;
      right: 12px;
      position: absolute;
      top: 35px;
      height: 100px;
      width: 20px;
      box-shadow: 0px 0px 10px #000;
    }
    .volume .ui-slider-handle {
      display: none;
    }
    .playlist {
      background-color: #1e1e1e;
      list-style-type: none;
      padding-bottom: 10px;
      padding: 15px;
      position: relative;
      width: 100%;
      z-index: 1;
      display: none;
      -webkit-transition: all ease-in-out .1s;
      transition: all ease-in-out .1s;
    }
    .playlist li {
      color: #eeeeee;
      cursor: pointer;
      margin-bottom: 4px;
      padding: 6px 12px;
      -webkit-transition: all ease-in-out .1s;
      transition: all ease-in-out .1s;
    }
    .playlist li:hover {
      background: #333333;
    }
    .playlist li.active {
      font-weight: bold;
      background: #000000;
    }
    .show {
      display: block;
    }
    .ui-state-default,
    .ui-widget-content .ui-state-default,
    .ui-widget-header .ui-state-default,
    .ui-button,
    html .ui-button.ui-state-disabled:hover,
    html .ui-button.ui-state-disabled:active {
      border: 0;
    }
    .ui-widget-content {
      background: #666666;
    }
Now when you open up your index.html file you will see this:
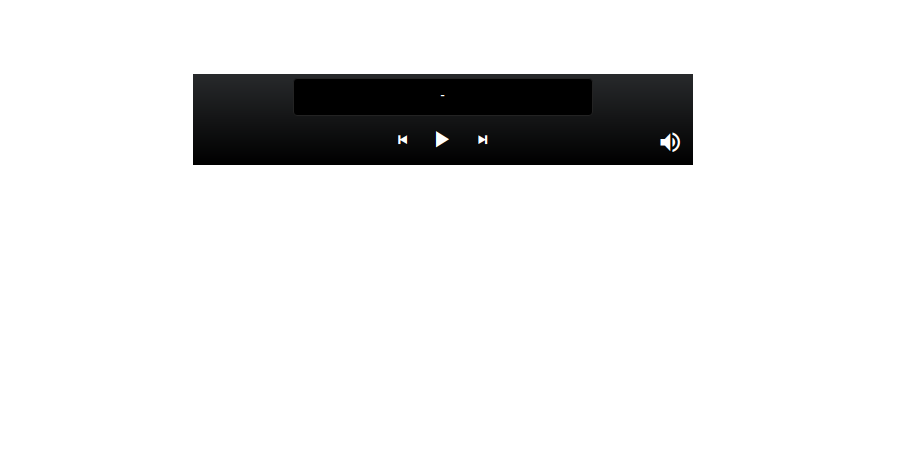
We have our basic screen up. Next, we need to add some interaction.
Writing Our Music Player Function
We will use a mix of JavaScript and jQuery to add functionality to our UI to make it work as expected. Now open up your player.js file and add the following code to it:
    // js/player.js
    function init(){
       var song;
       var tracker = $('.tracker');
       var volume = $('.volume');

      function initAudio(elem) {
        var url = elem.attr('audiourl');

        var title = elem.text();
        var artist = elem.attr('artist');

        $('.player .title').text(title);
        $('.player .artist').text(artist);

        // song = new Audio('media/'+url);
        song = new Audio(url);

        // timeupdate event listener
        song.addEventListener('timeupdate', function() {
          var curtime = parseInt(song.currentTime, 10);
          tracker.slider('value', curtime);
        });

        $('.playlist li').removeClass('active');
        elem.addClass('active');
      }

      function playAudio() {
        song.play();

        tracker.slider("option", "max", song.duration);

        $('.play').addClass('hidden');
        $('.pause').addClass('visible');
      }

      function stopAudio() {
        song.pause();

        $('.play').removeClass('hidden');
        $('.pause').removeClass('visible');
      }

      // play click
      $('.play').click(function(e) {
        e.preventDefault();
        // playAudio();

        song.addEventListener('ended', function() {
          var next = $('.playlist li.active').next();
          if (next.length == 0) {
            next = $('.playlist li:first-child');
          }
          initAudio(next);

          song.addEventListener('loadedmetadata', function() {
            playAudio();
          });

        }, false);

        tracker.slider("option", "max", song.duration);
        song.play();
        $('.play').addClass('hidden');
        $('.pause').addClass('visible');

      });

      // pause click
      $('.pause').click(function(e) {
        e.preventDefault();
        stopAudio();
      });

      // next track
      $('.fwd').click(function(e) {
        e.preventDefault();

        stopAudio();

        var next = $('.playlist li.active').next();
        if (next.length === 0) {
          next = $('.playlist li:first-child');
        }
        initAudio(next);
        song.addEventListener('loadedmetadata', function() {
          playAudio();
        });
      });

      // prev track
      $('.rew').click(function(e) {
        e.preventDefault();

        stopAudio();

        var prev = $('.playlist li.active').prev();
        if (prev.length === 0) {
          prev = $('.playlist li:last-child');
        }
        initAudio(prev);
        song.addEventListener('loadedmetadata', function() {
          playAudio();
        });
      });

      // playlist elements - click
      $('.playlist li').click(function() {
        stopAudio();
        initAudio($(this));
      });

      // initialization - first element in playlist
      initAudio($('.playlist li:first-child'));

      song.volume = 0.8;

      volume.slider({
        orientation: 'vertical',
        range: 'max',
        max: 100,
        min: 1,
        value: 80,
        start: function(event, ui) {},
        slide: function(event, ui) {
          song.volume = ui.value / 100;
        },
        stop: function(event, ui) {},
      });

      $('.volumeIcon').click(function(e) {
        e.preventDefault();
        $('.volume').toggleClass('show');
      });

      // empty tracker slider
      tracker.slider({
        range: 'min',
        min: 0,
        max: 10,
        start: function(event, ui) {},
        slide: function(event, ui) {
          song.currentTime = ui.value;
        },
        stop: function(event, ui) {}
      });

    }
    $(init);
Let’s go over some defined functions:
- First we define wrapper function (init) to house all other variables, events and functions. It is initialized at the end of the file.
- We declare variables to reference the player controllers in our HTML file.
- Next we define a function to initialize and play our audio file by passing a value to it.
- We then add an event listener at the end of the function to listen for when our tracker is clicked or changed in position.
- Next we define a play function. This will be triggered anytime the play button is clicked.
- Next we define a stop function. This will be triggered anytime the pause button is clicked.
- The functions that follow define what happens when the play, pause, next and previous buttons are clicked.
- The last two functions define the actions for when the button for volume or the music tracker is clicked.
Adding Notifications to Our Player Using Kendo UI
We want to receive a notification whenever our song is changed. To do that, we will use Kendo UI’s notification component. We will need to add some code to both our HTML and JavaScript file for it to work.
Open up your index.html file and add the following code to our first and fourth section.
    <!-- ./index.html -->

    <!-- other code stays same -->

     <head>
              <link rel="stylesheet" href="https://kendo.cdn.telerik.com/2019.1.220/styles/kendo.common.min.css">
              <link rel="stylesheet" href="https://kendo.cdn.telerik.com/2019.1.220/styles/kendo.rtl.min.css">
              <link rel="stylesheet" href="https://kendo.cdn.telerik.com/2019.1.220/styles/kendo.default.min.css">
              <link rel="stylesheet" href="https://kendo.cdn.telerik.com/2019.1.220/styles/kendo.mobile.all.min.css">
              <script src="https://kendo.cdn.telerik.com/2019.1.220/js/kendo.all.min.js">           </script>
     </head>

        <!-- add id in bold to the play class button -->
         <div class="controls">
            <div id="showPopupNotification" class="play">
              <i class="icons ion-ios-play"></i>
            </div>
         </div>

       <span id="popupNotification"></span>
       <!-- the end of the closing div -->
    <!-- other code stays same -->
Here, we import all our files needed for Kendo UI to work. Then we update parts of our HTML to enable display. Since we want a notification to happen when the play button is clicked, we give it an **id** so we can reference it in our JavaScript file. Finally we add a span to display the notification.
Add this code to the player.js file:
    // js/player.js

    // add this inside the initAudio function after declare title variable.
     var popupNotification = $("#popupNotification").kendoNotification().data("kendoNotification");
      $("#showPopupNotification").click(function(){
           popupNotification.show("You are playing "+ title);
       });
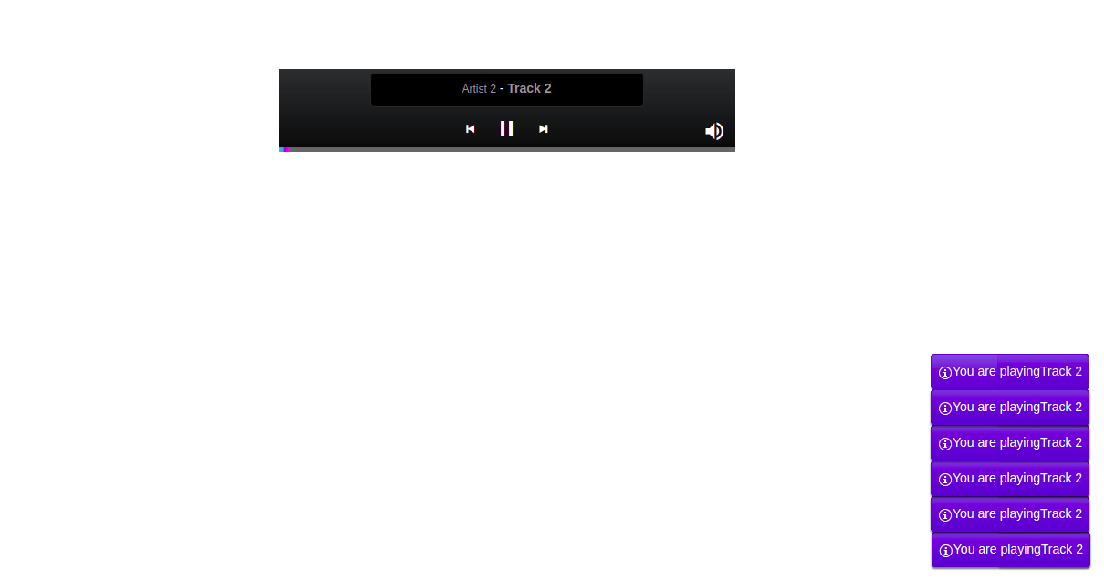
Now whenever you click the play button you will get a notification on what song you are playing.
Conclusion
In this tutorial we learned how to use jQuery, HTML and CSS to build a music player. The knowledge from here can help you create more real-time apps. Be sure to post comments for clarity on parts you don’t understand. Happy coding.

Christian Nwamba
Chris Nwamba is a Senior Developer Advocate at AWS focusing on AWS Amplify. He is also a teacher with years of experience building products and communities.
Related Posts
Comments
All articles
Topics
Latest Stories
in Your Inbox
Subscribe to be the first to get our expert-written articles and tutorials for developers!
All fields are required