blog
How to Restore a Single MySQL Table Using mysqldump?

Mysqldump is the most popular logical backup tool for MySQL. It is included in the MySQL distribution, so it’s ready for use on all of the MySQL instances.
Logical backups are not, however, the fastest nor the most space-efficient way of backing up MySQL databases, but they have a huge advantage over physical backups.
Physical backups are usually all or nothing type of backups. While it might be possible to create partial backup with Xtrabackup (we described this in one of our previous blog posts), restoring such backup is tricky and time-consuming.
Basically, if we want to restore a single table, we have to stop the whole replication chain and perform the recovery on all of the nodes at once. This is a major issue – these days you rarely can afford to stop all of the databases.
Another problem is the table level is the lowest granularity level you can achieve with Xtrabackup: you can restore a single table but you cannot restore part of it. Logical backup, though, can be restored in the way of running SQL statements, therefore it can easily be performed on a running cluster and you can (we wouldn’t call it easily, but still) pick which SQL statements to run so you can do a partial restore of a table.
Let’s take a look at how this can be done in the real world.
Restoring a Single MySQL Table Using mysqldump
At the beginning, please keep in mind that partial backups do not provide a consistent view of the data. When you take backups of separate tables, you cannot restore such backup to a known position in time (for example, to provision the replication slave) even if you would restore all of the data from the backup. Having this behind us, let’s proceed.
We have a master and a slave:
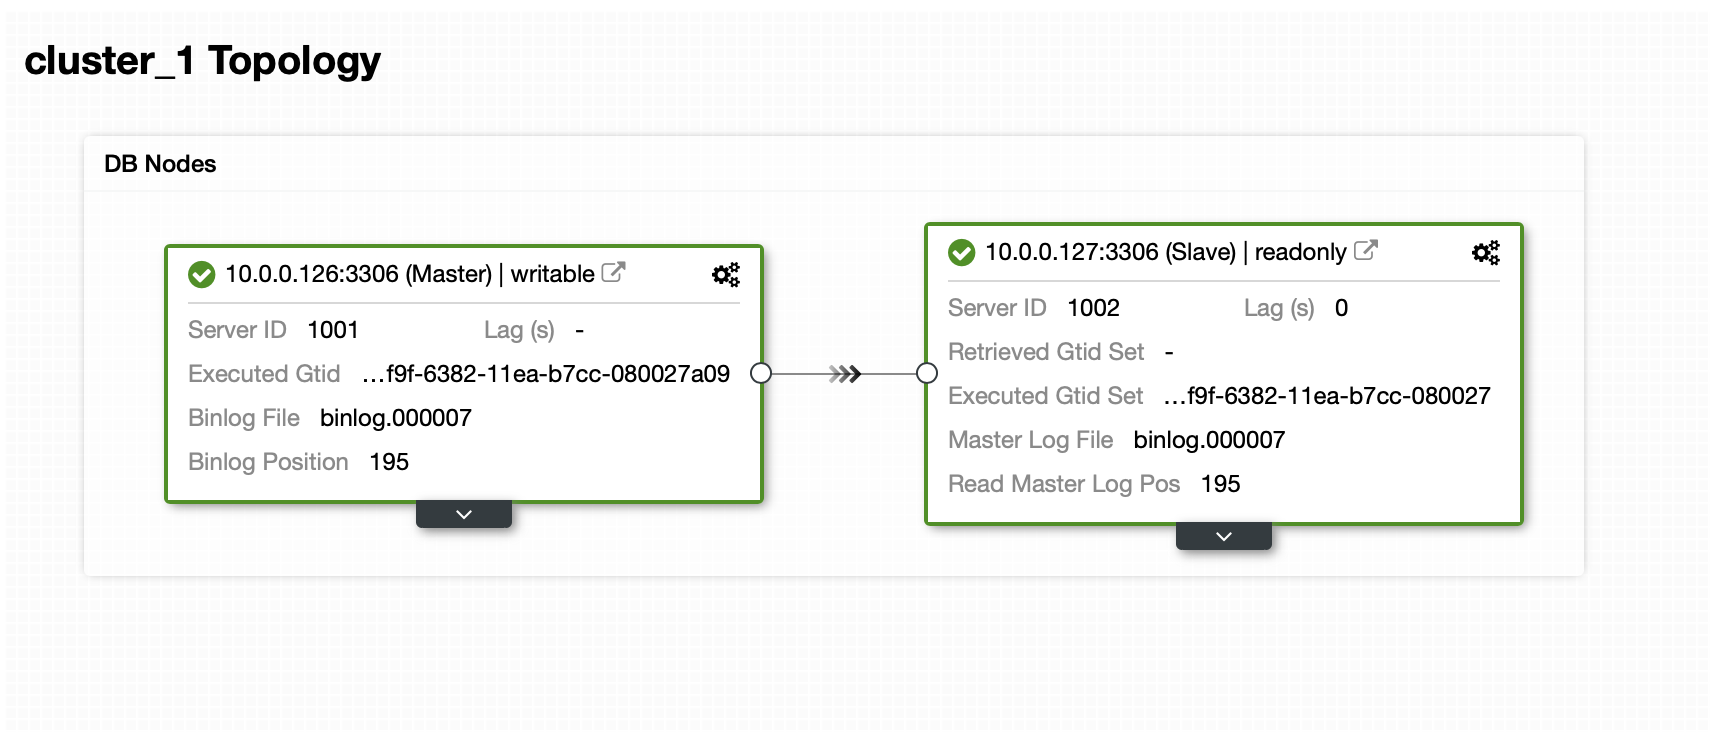
Dataset contains of one schema and several tables:
mysql> SHOW SCHEMAS;

+--------------------+

| Database           |

+--------------------+

| information_schema |

| mysql              |

| performance_schema |

| sbtest             |

| sys                |

+--------------------+

5 rows in set (0.01 sec)


mysql> SHOW TABLES FROM sbtest;

+------------------+

| Tables_in_sbtest |

+------------------+

| sbtest1          |

| sbtest10         |

| sbtest11         |

| sbtest12         |

| sbtest13         |

| sbtest14         |

| sbtest15         |

| sbtest16         |

| sbtest17         |

| sbtest18         |

| sbtest19         |

| sbtest2          |

| sbtest20         |

| sbtest21         |

| sbtest22         |

| sbtest23         |

| sbtest24         |

| sbtest25         |

| sbtest26         |

| sbtest27         |

| sbtest28         |

| sbtest29         |

| sbtest3          |

| sbtest30         |

| sbtest31         |

| sbtest32         |

| sbtest4          |

| sbtest5          |

| sbtest6          |

| sbtest7          |

| sbtest8          |

| sbtest9          |

+------------------+

32 rows in set (0.00 sec)
Now, we have to take a backup. There are several ways in which we can approach this issue. We can just take a consistent backup of the whole dataset but this will generate a large, single file with all the data. To restore the single table we would have to extract data for the table from that file. It is of course possible, but it is quite time-consuming and it’s pretty much manual operation that can be scripted but if you do not have proper scripts in place, writing ad hoc code when your database is down and you are under heavy pressure is not necessarily the safest idea.
Instead of that we can prepare backup in a way that every table will be stored in a separate file:
root@vagrant:~/backup# d=$(date +%Y%m%d) ; db='sbtest'; for tab in $(mysql -uroot -ppass -h127.0.0.1 -e "SHOW TABLES FROM ${db}" | grep -v Tables_in_${db}) ; do mysqldump --set-gtid-purged=OFF --routines --events --triggers ${db} ${tab} > ${d}_${db}.${tab}.sql ; donePlease note that we set –set-gtid-purged=OFF. We need it if we’d be loading this data later to the database. Otherwise MySQL will attempt to set @@GLOBAL.GTID_PURGED, which will, most likely, fail. MySQL would as well set SET @@SESSION.SQL_LOG_BIN= 0
That command generated a nice list of sql files that can be uploaded to the production cluster:
root@vagrant:~/backup# ls -alh

total 605M

drwxr-xr-x 2 root root 4.0K Mar 18 14:10 .

drwx------ 9 root root 4.0K Mar 18 14:08 ..

-rw-r--r-- 1 root root  19M Mar 18 14:10 20200318_sbtest.sbtest10.sql

-rw-r--r-- 1 root root  19M Mar 18 14:10 20200318_sbtest.sbtest11.sql

-rw-r--r-- 1 root root  19M Mar 18 14:10 20200318_sbtest.sbtest12.sql

-rw-r--r-- 1 root root  19M Mar 18 14:10 20200318_sbtest.sbtest13.sql

-rw-r--r-- 1 root root  19M Mar 18 14:10 20200318_sbtest.sbtest14.sql

-rw-r--r-- 1 root root  19M Mar 18 14:10 20200318_sbtest.sbtest15.sql

-rw-r--r-- 1 root root  19M Mar 18 14:10 20200318_sbtest.sbtest16.sql

-rw-r--r-- 1 root root  19M Mar 18 14:10 20200318_sbtest.sbtest17.sql

-rw-r--r-- 1 root root  19M Mar 18 14:10 20200318_sbtest.sbtest18.sql

-rw-r--r-- 1 root root  19M Mar 18 14:10 20200318_sbtest.sbtest19.sql

-rw-r--r-- 1 root root  19M Mar 18 14:10 20200318_sbtest.sbtest1.sql

-rw-r--r-- 1 root root  19M Mar 18 14:10 20200318_sbtest.sbtest20.sql

-rw-r--r-- 1 root root  19M Mar 18 14:10 20200318_sbtest.sbtest21.sql

-rw-r--r-- 1 root root  19M Mar 18 14:10 20200318_sbtest.sbtest22.sql

-rw-r--r-- 1 root root  19M Mar 18 14:10 20200318_sbtest.sbtest23.sql

-rw-r--r-- 1 root root  19M Mar 18 14:10 20200318_sbtest.sbtest24.sql

-rw-r--r-- 1 root root  19M Mar 18 14:10 20200318_sbtest.sbtest25.sql

-rw-r--r-- 1 root root  19M Mar 18 14:10 20200318_sbtest.sbtest26.sql

-rw-r--r-- 1 root root  19M Mar 18 14:10 20200318_sbtest.sbtest27.sql

-rw-r--r-- 1 root root  19M Mar 18 14:10 20200318_sbtest.sbtest28.sql

-rw-r--r-- 1 root root  19M Mar 18 14:10 20200318_sbtest.sbtest29.sql

-rw-r--r-- 1 root root  19M Mar 18 14:10 20200318_sbtest.sbtest2.sql

-rw-r--r-- 1 root root  19M Mar 18 14:10 20200318_sbtest.sbtest30.sql

-rw-r--r-- 1 root root  19M Mar 18 14:10 20200318_sbtest.sbtest31.sql

-rw-r--r-- 1 root root  19M Mar 18 14:10 20200318_sbtest.sbtest32.sql

-rw-r--r-- 1 root root  19M Mar 18 14:10 20200318_sbtest.sbtest3.sql

-rw-r--r-- 1 root root  19M Mar 18 14:10 20200318_sbtest.sbtest4.sql

-rw-r--r-- 1 root root  19M Mar 18 14:10 20200318_sbtest.sbtest5.sql

-rw-r--r-- 1 root root  19M Mar 18 14:10 20200318_sbtest.sbtest6.sql

-rw-r--r-- 1 root root  19M Mar 18 14:10 20200318_sbtest.sbtest7.sql

-rw-r--r-- 1 root root  19M Mar 18 14:10 20200318_sbtest.sbtest8.sql

-rw-r--r-- 1 root root  19M Mar 18 14:10 20200318_sbtest.sbtest9.sql
When you would like to restore the data, all you need to do is to load the SQL file into the master node:
root@vagrant:~/backup# mysql -uroot -ppass sbtest < 20200318_sbtest.sbtest11.sqlData will be loaded into the database and replicated to all of the slaves.
How to Restore a Single MySQL Table Using ClusterControl?
Currently ClusterControl does not provide an easy way of restoring just a single table but it is still possible to do it with just a few manual actions. There are two options you can use. First, suitable for small number of tables, you can basically create schedule where you perform partial backups of a separate tables one by one:
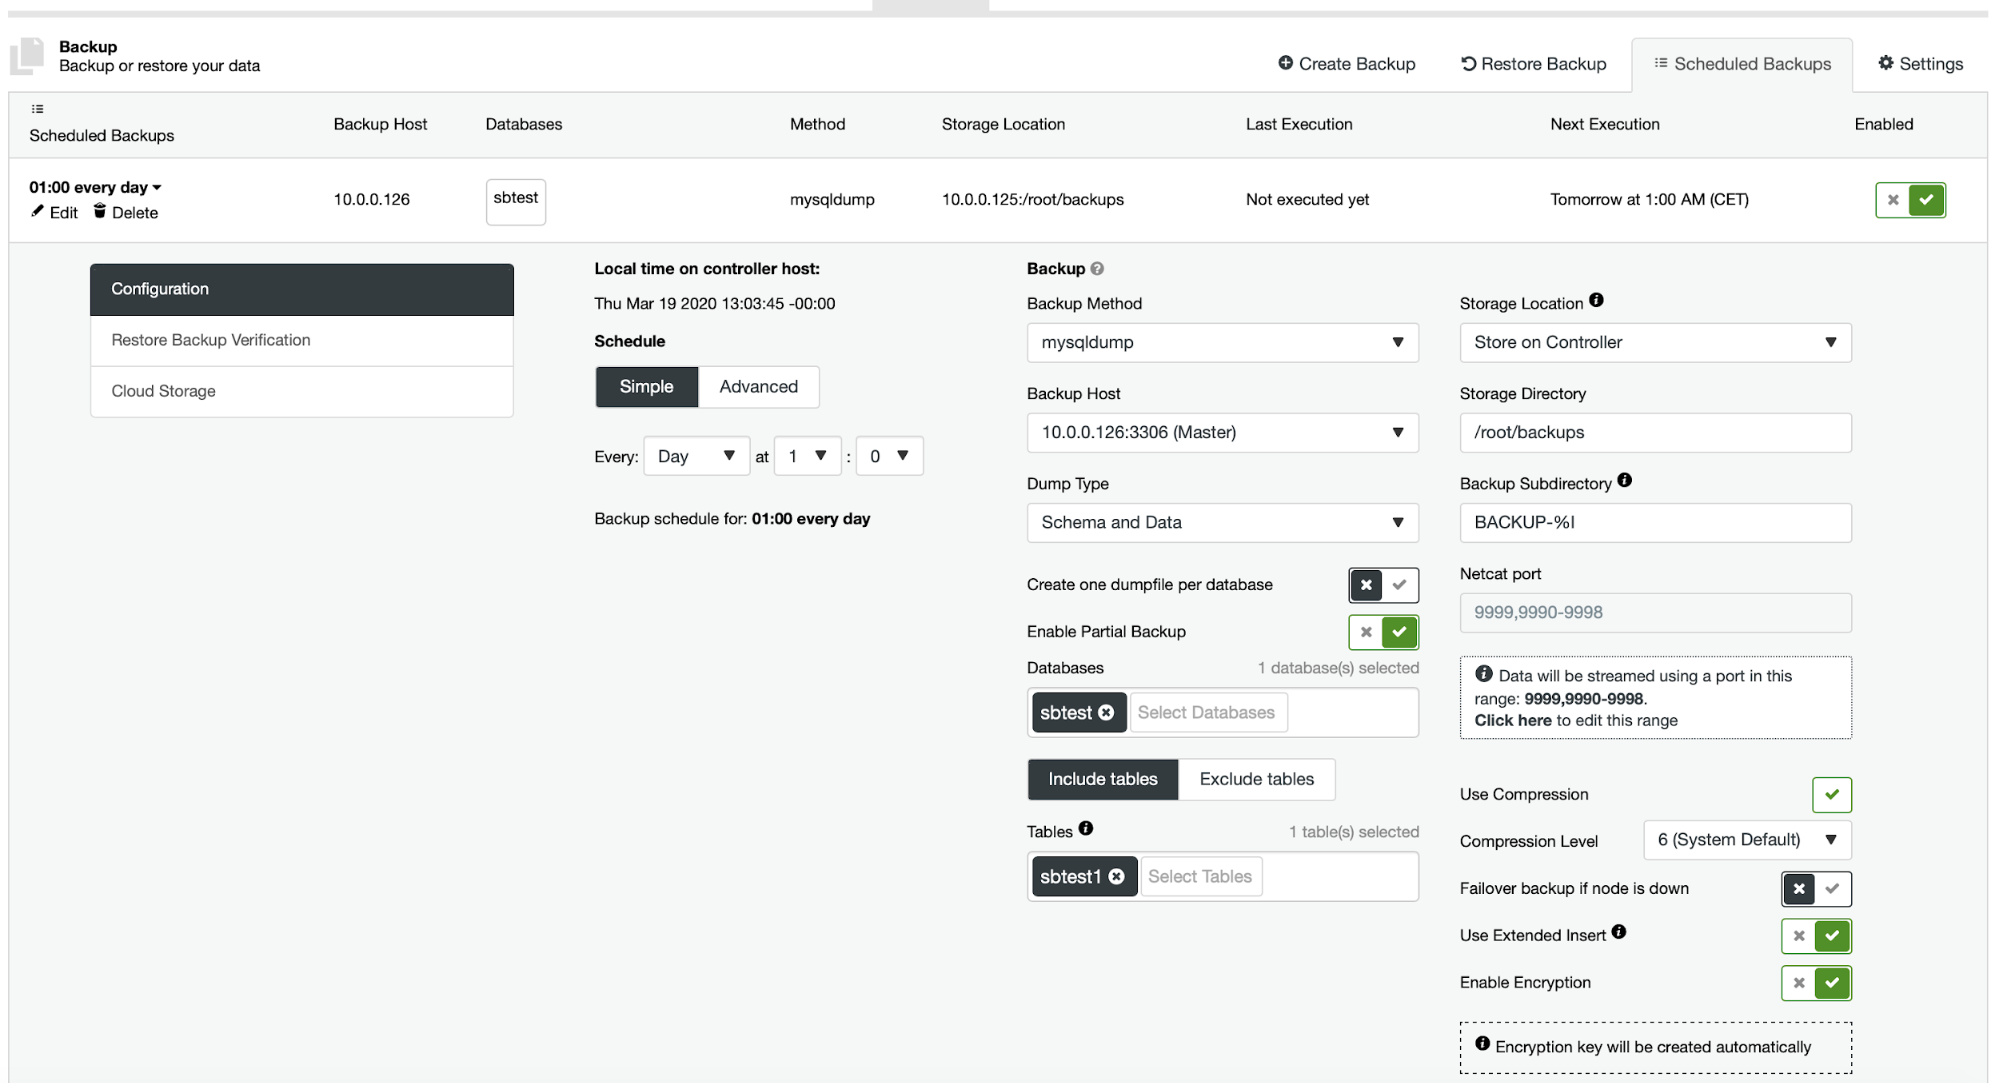
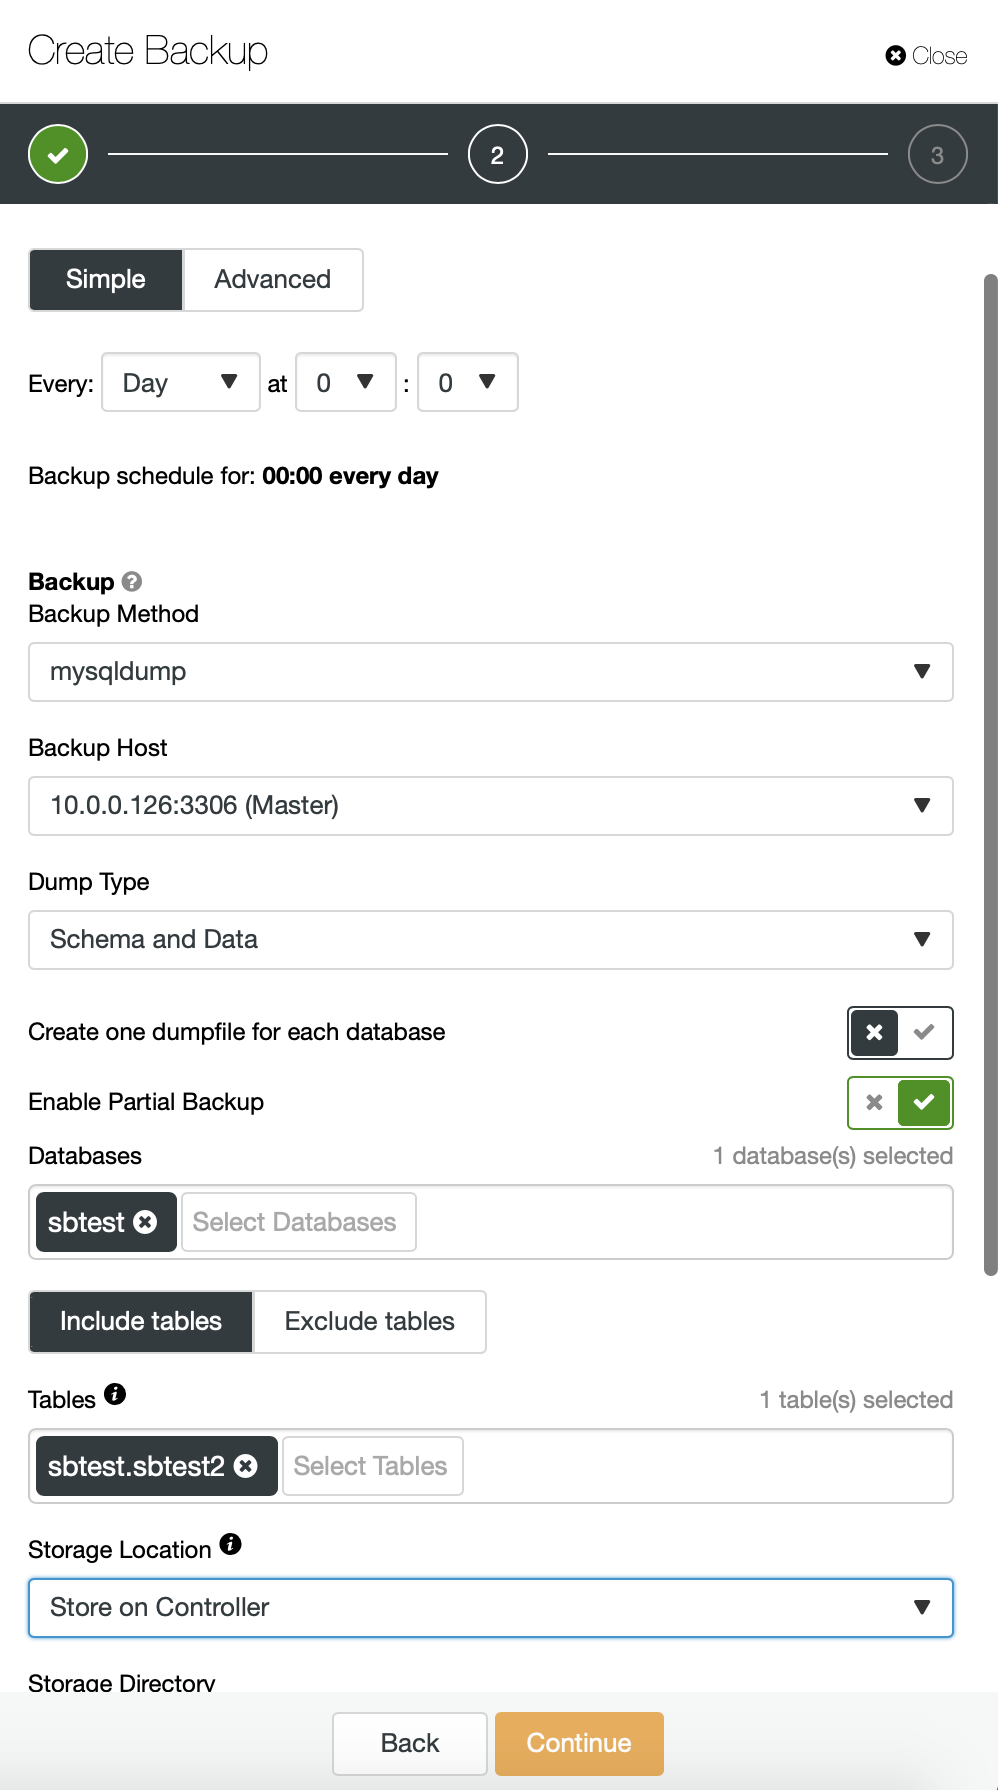
Here, we are taking a backup of sbtest.sbtest1 table. We can easily schedule another backup for sbtest2 table:
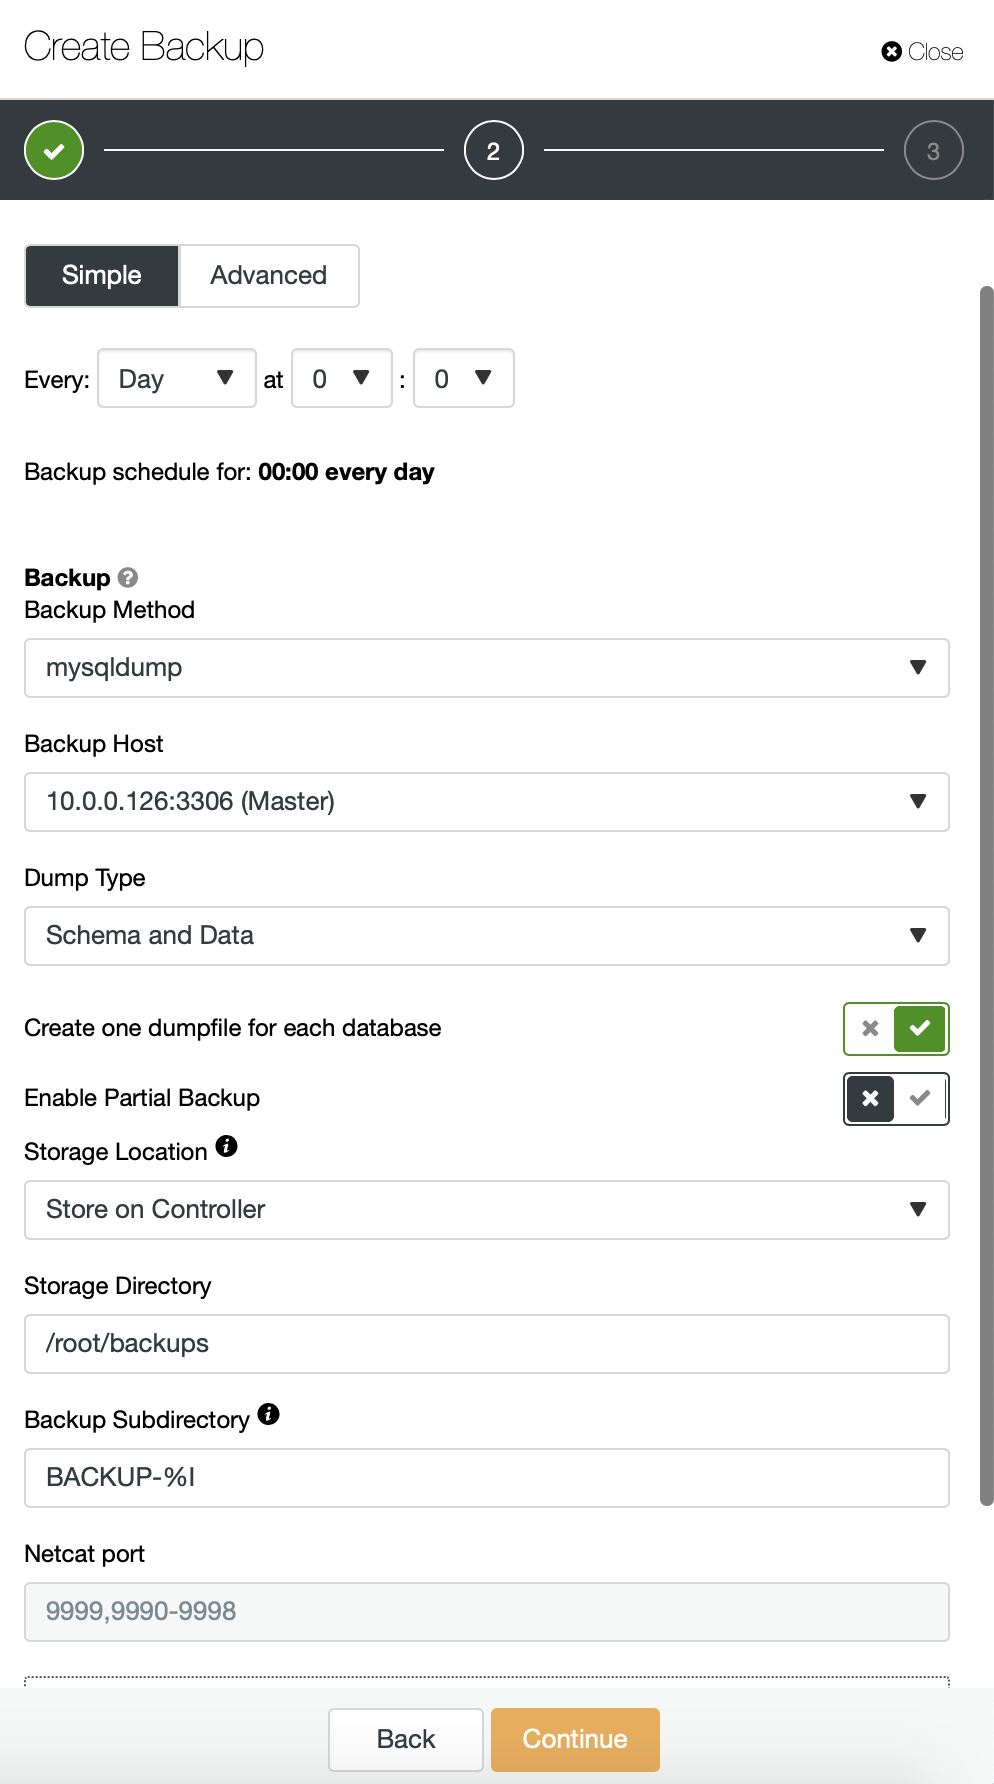
Alternatively we can perform a backup and put data from a single schema into a separate file:
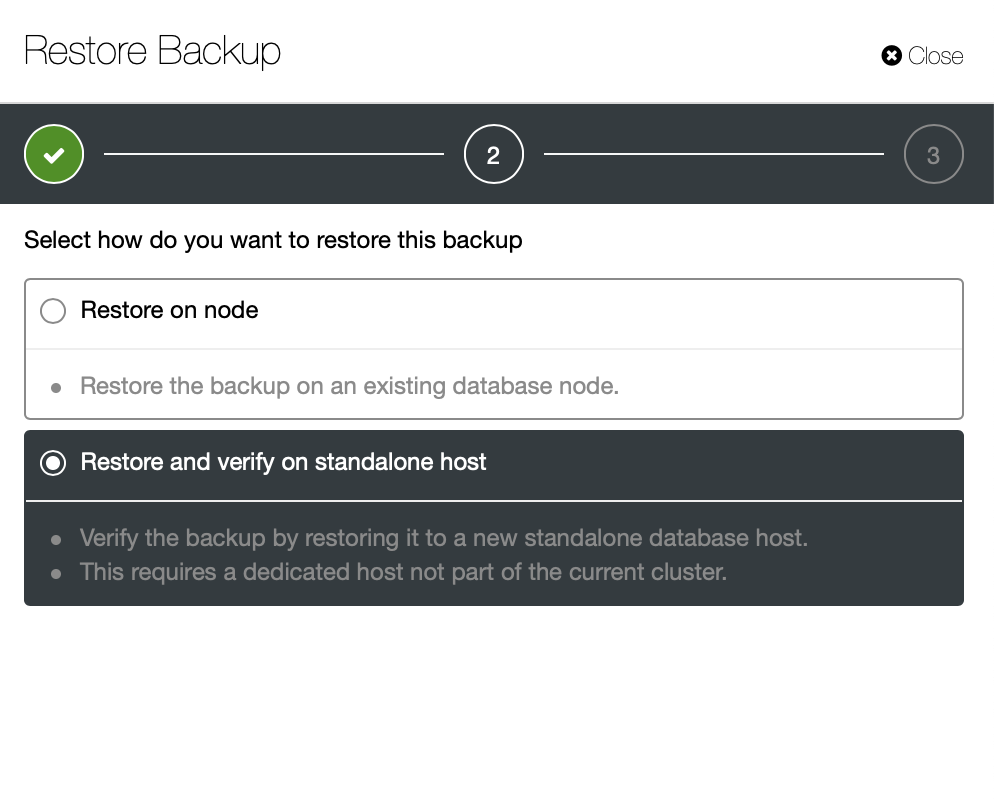
Now you can either find the missing data by hand in the file, restore this backup to a separate server or let ClusterControl do it:
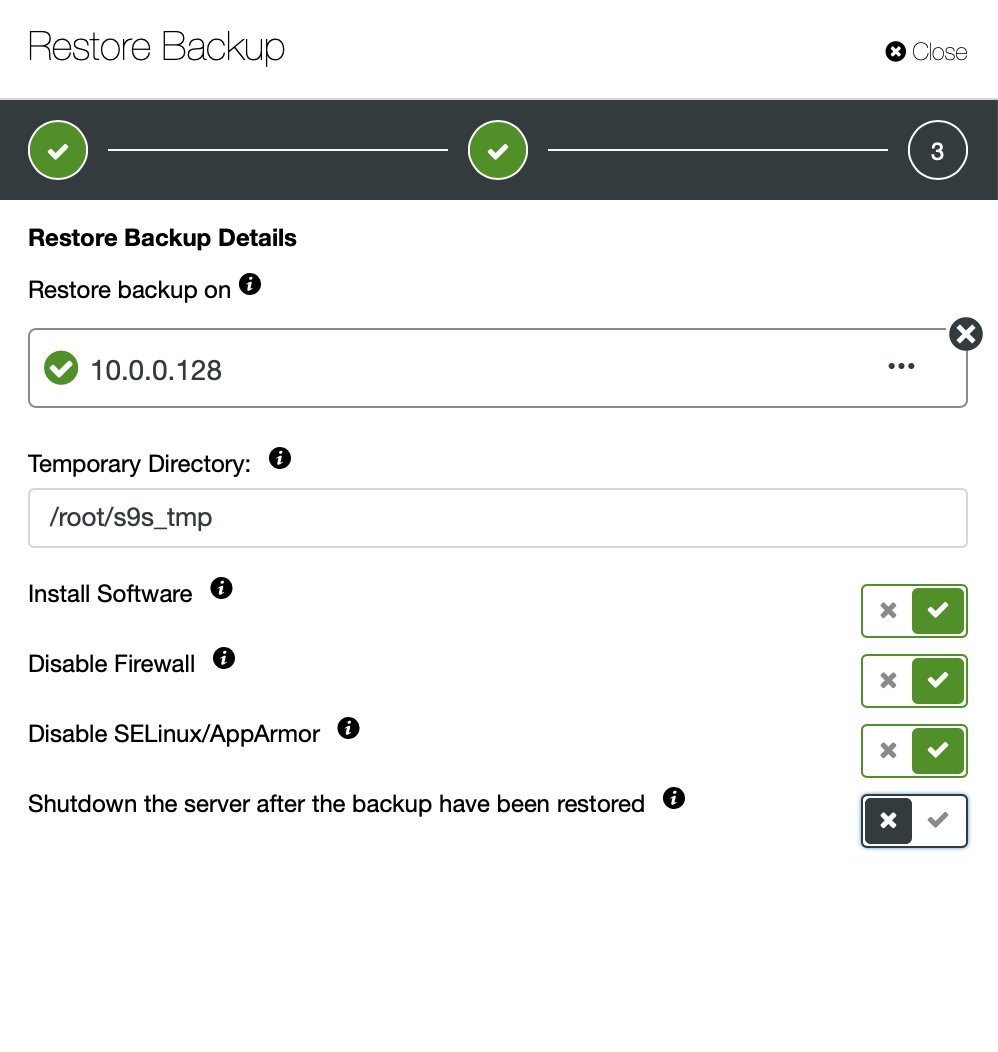
You keep the server up and running and you can extract the data that you wanted to restore using either mysqldump or SELECT … INTO OUTFILE. Such extracted data will be ready to be applied on the production cluster.