
In this article, we’ll take a look at how to make chat applications more accessible to visually impaired users by adding text-to-speech functionality, which makes it possible for these users to have incoming messages read to them in realtime. We’ll be leveraging AWS Polly’s natural speech capabilities to implement this feature and Stream's Messaging Platform for our chat infrastructure and interface.
AWS Polly supports dozens of languages and a wide selection of natural-sounding male and female voices. When you send text to AWS Polly's API, it returns the audio to your application as a stream, so you can play the voices immediately. This is better than processing the text locally, as AWS Polly is capable of continuously learning and improving its speech rendering capabilities.
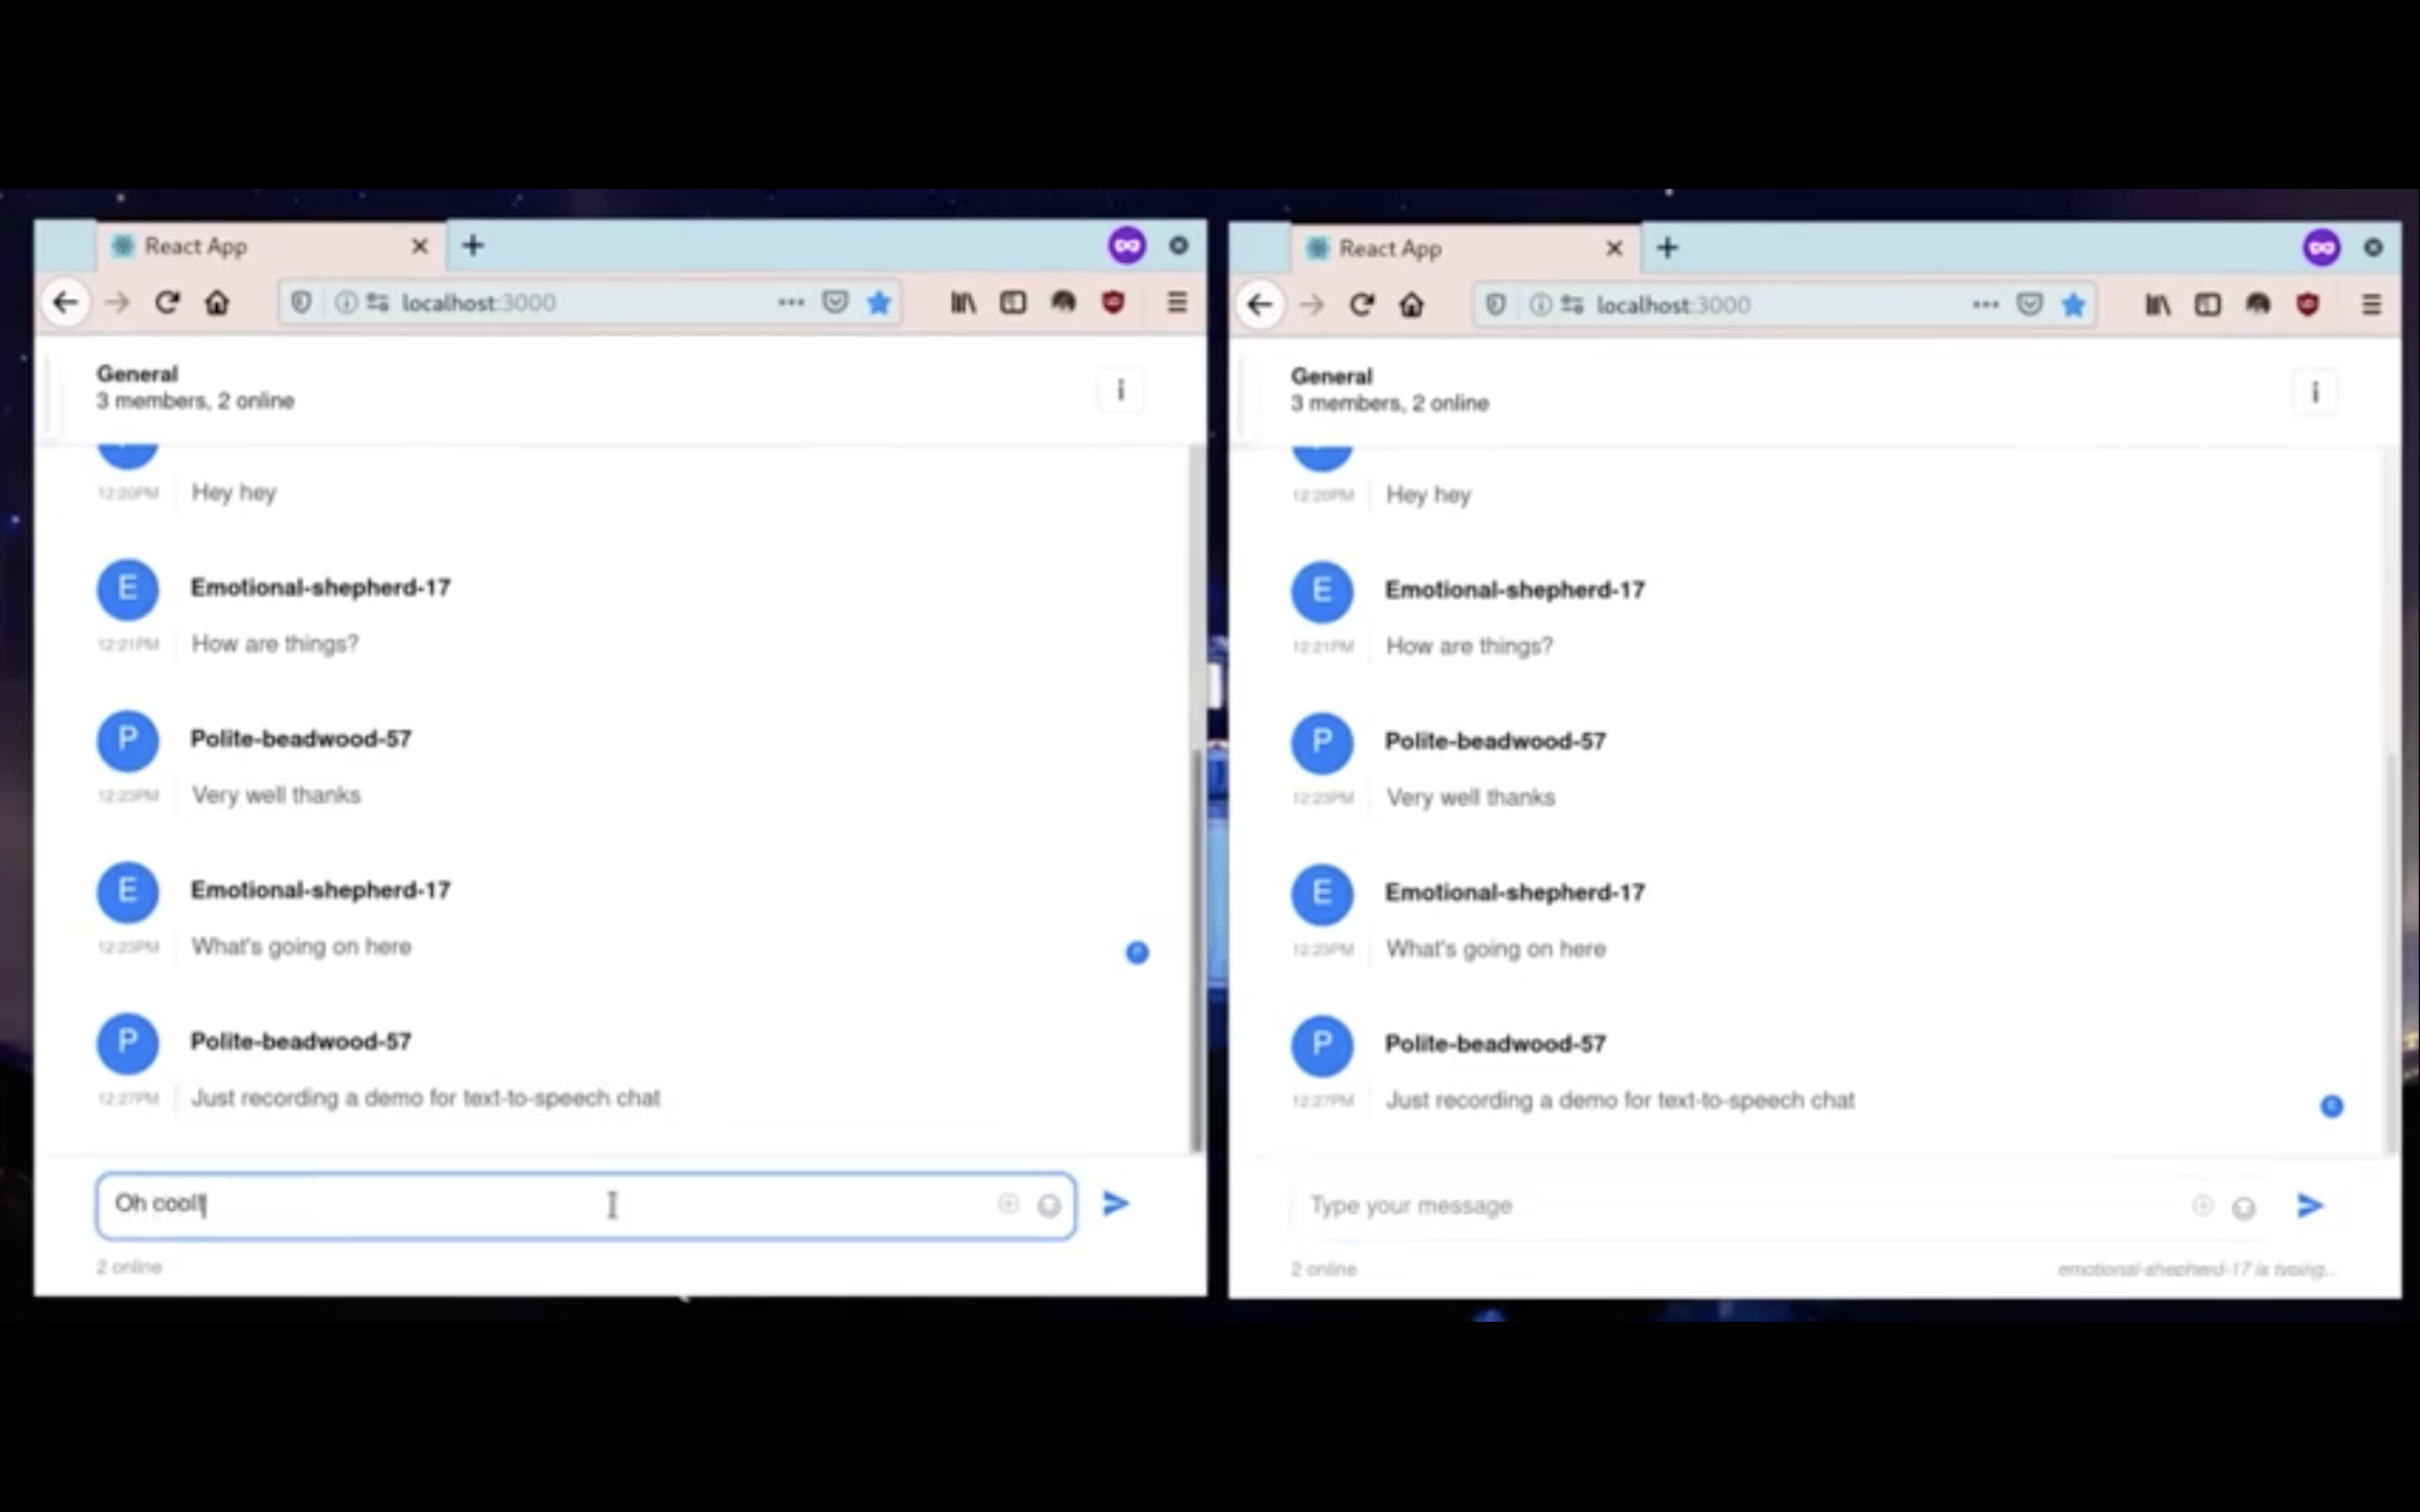
The application we will be building in this tutorial will look and function like this:

Setting the Scene
The code used to develop our demo app can be found on GitHub. You can clone it and follow along with the explanations below, or type the code in yourself, from scratch. If you decide to set up the GitHub repo, you will find all the necessary steps in the accompanying README file.
Before you proceed with the steps below, make sure you have Node.js (version 10 or later) and yarn installed on your computer. It would also help to be equipped with a working knowledge of React to follow along with this tutorial.
Signing Up for Stream
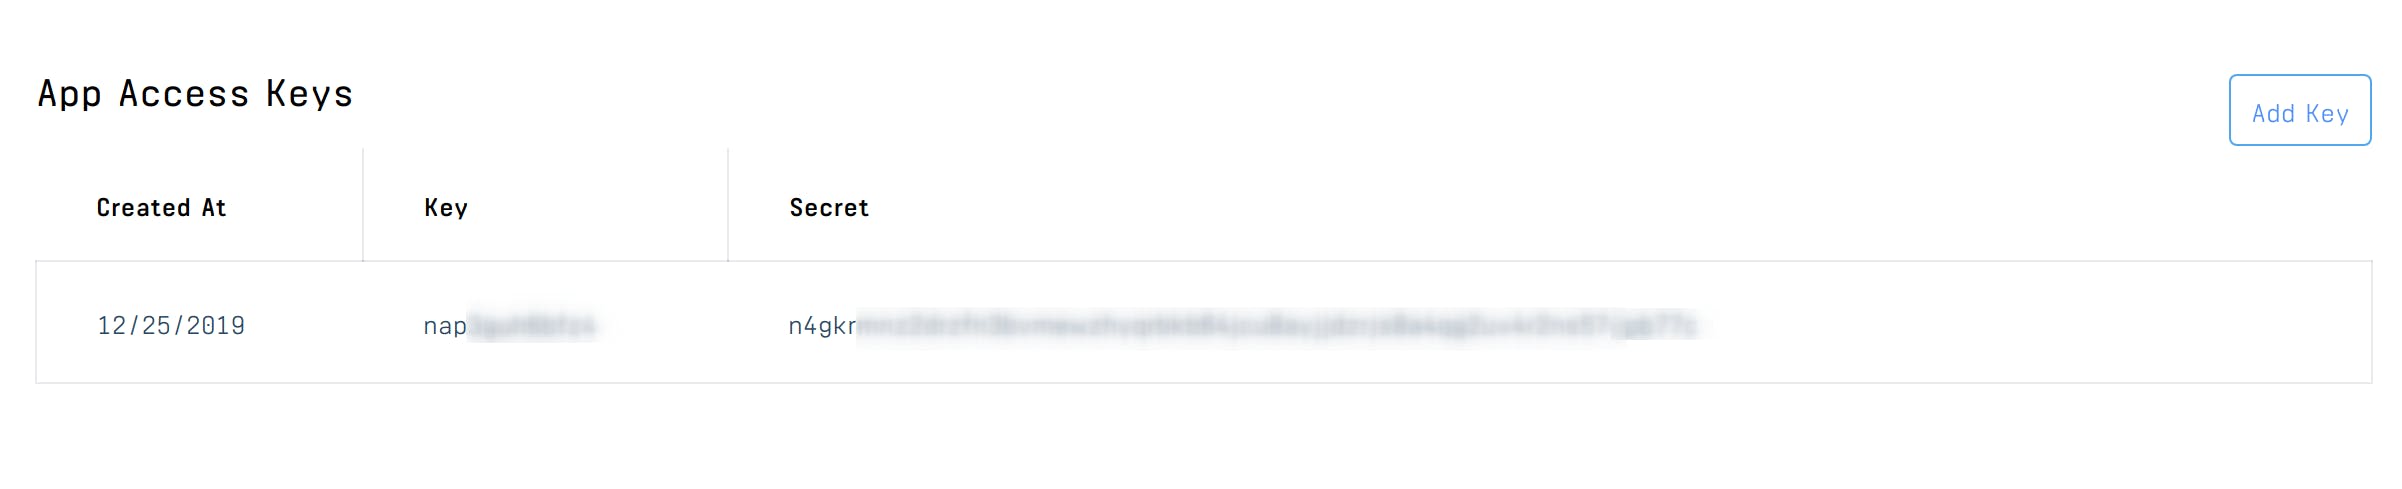
Follow this link to create a new Stream account, or sign in to your existing account. Once you’re redirected to the dashboard, create a new app and take note of the application access keys which will be presented to you upon creation of the app (if you've just created your account, your first app will have been created for you):
Signing Up for Amazon AWS
Before we can utilize Amazon Polly’s text to speech features in your application, you need to create a free AWS account. Complete the signup process and wait for your account to be activated; you will receive an email confirming the activation of your account.
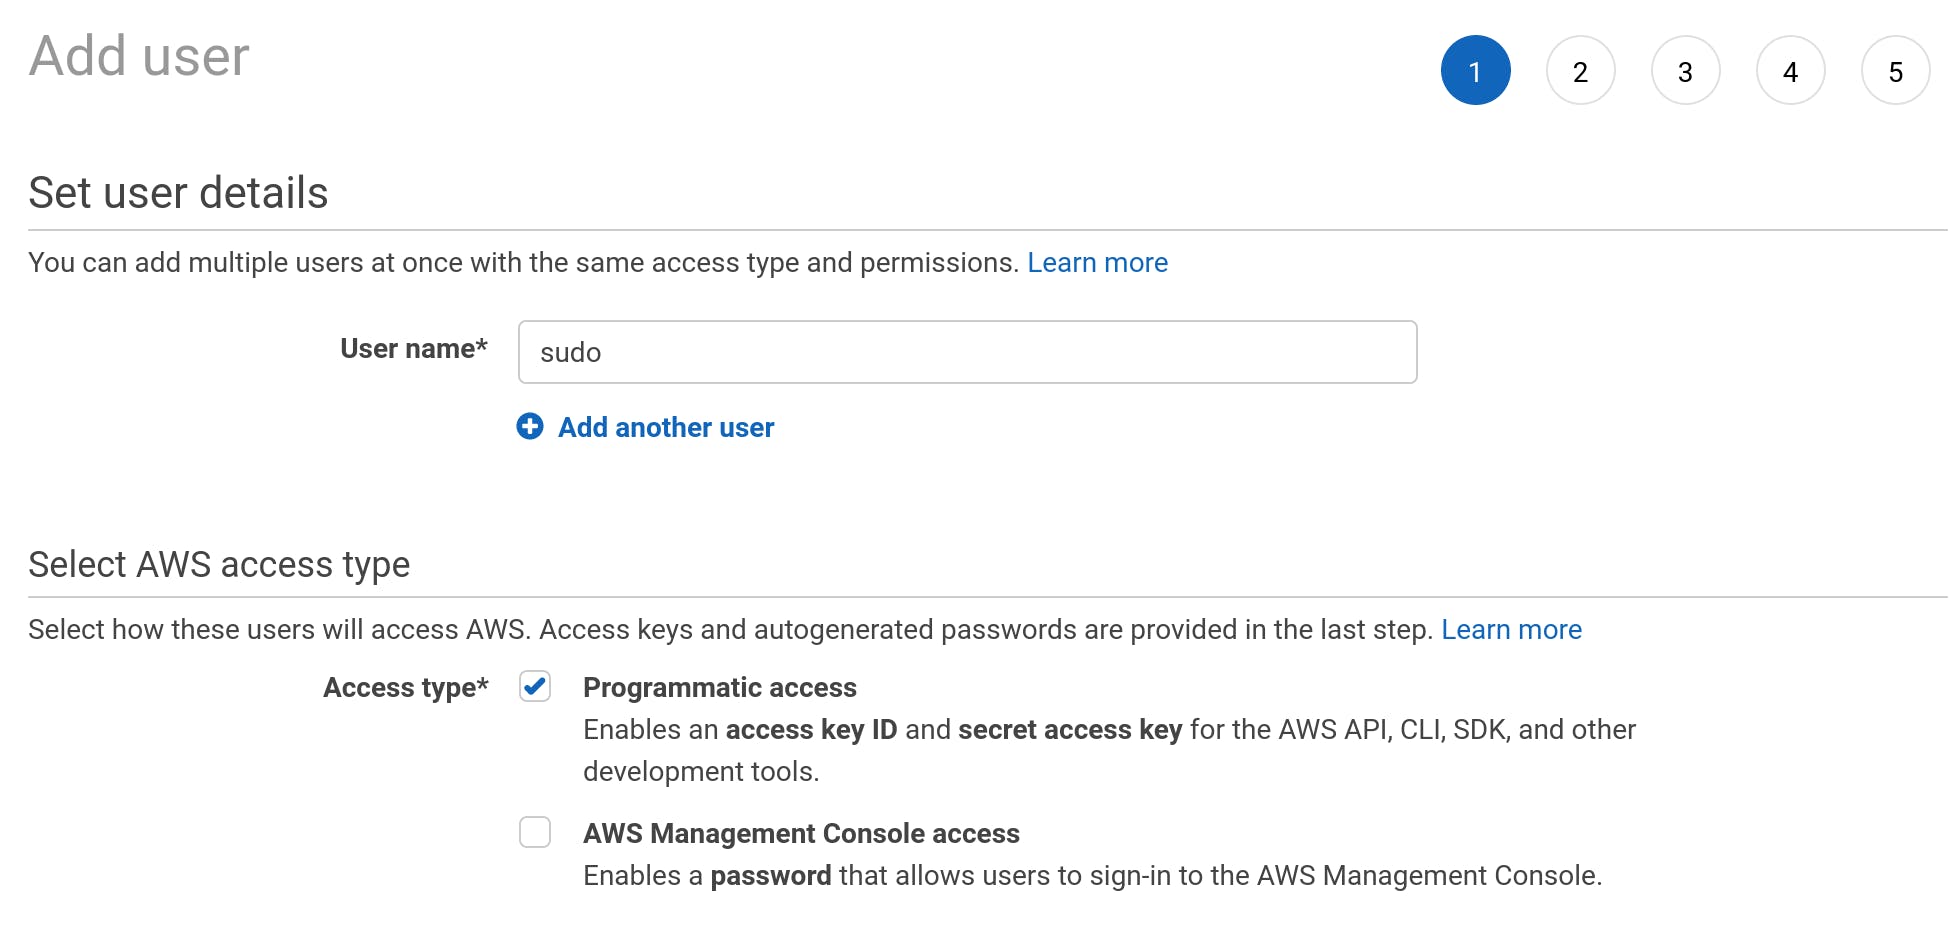
Once your account is activated, log into your AWS console and click your username at the top right corner, then click My Security Credentials. Next, click Users in the sidebar. You will be redirected to a page where you can view, add, or delete users on your account. Click the Add user button, assign a username to the user, and tick Programmatic access under Access type:
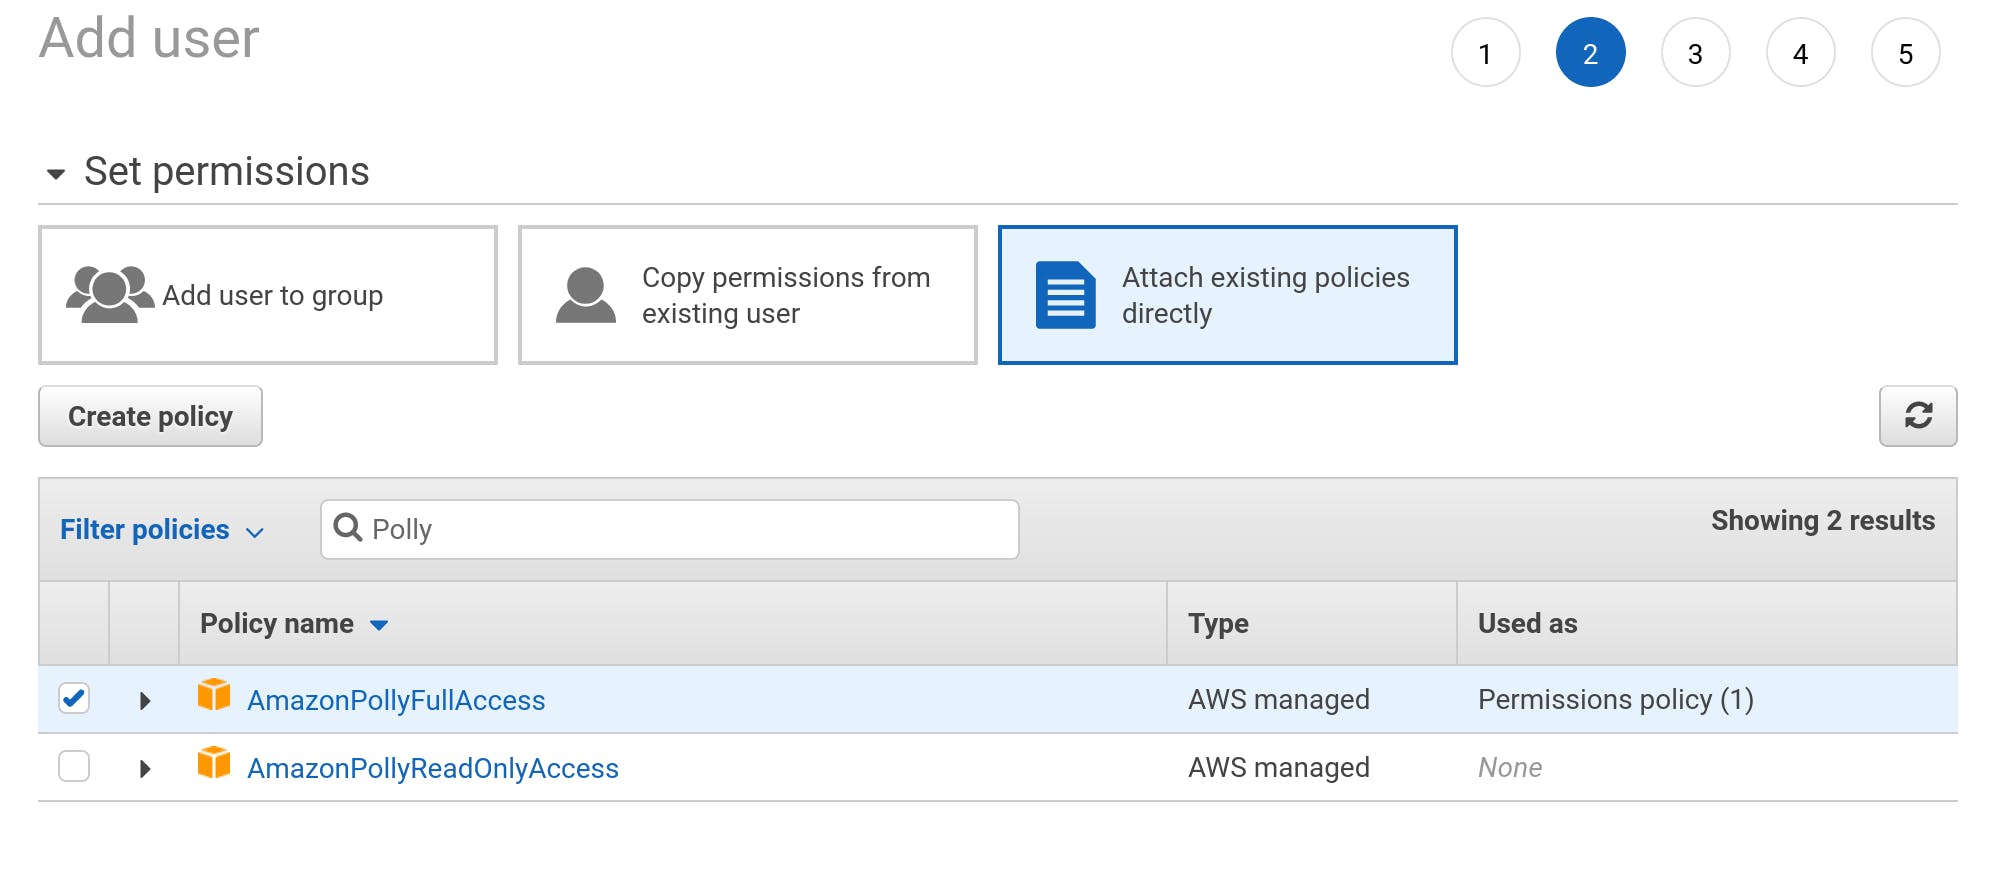
On the next page, under Set permissions, click Attach existing policies directly, and then select AmazonPollyFullAccess under Filter policies.
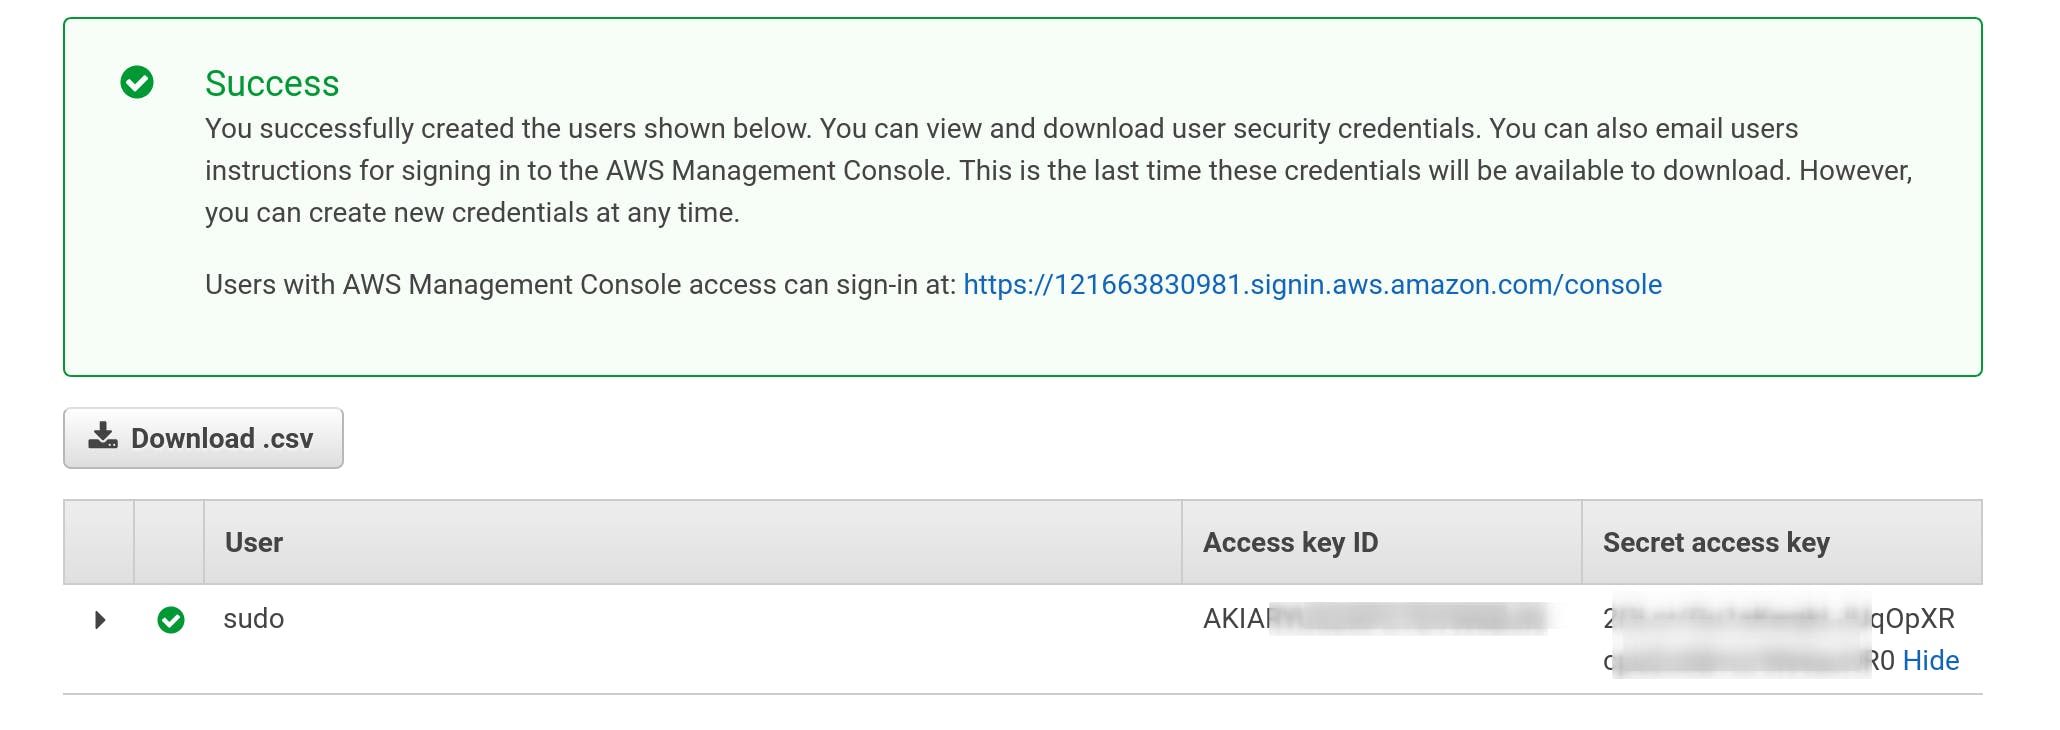
You can skip the optional Tags step, and go ahead to create the user in the final step. Once the user is created, you will be provided with an Access key ID and a Secret access key. Keep this tab open until the values are copied over into your .env file, which we’ll be creating in the next step.
Setting Up the Chat Server
In this section, we’ll set up an Express server for the purpose of authenticating users and creating them on our Stream instance. We’ll also set up a route for synthesizing text received from the client to speech through Amazon Polly.
Launch your terminal app, and create a new directory for this project in your filesystem. Navigate to the created directory and initialize the project with a package.json file:
$ mkdir speech-enabled-chat && cd speech-enabled-chat && yarn init -yNext, create a new .env file in the project root, and set it up as shown below (Copy your Stream and AWS credentials over as appropriate):
PORT=5500
STREAM_API_KEY=
STREAM_APP_SECRET=
AWS_ACCESS_KEY_ID=
AWS_SECRET_ACCESS_KEY=
Save the file, and run the command below to install all the dependencies that we’ll be needing to build out our server:
$ yarn add express dotenv cors aws-sdk stream-chat body-parserNext, create a new server.js file in your project root and update its contents to the below:
require('dotenv').config();

const express = require('express');
const cors = require('cors');
const bodyParser = require('body-parser');
const { StreamChat } = require('stream-chat');
const AWS = require('aws-sdk');
const app = express();

app.use(cors());
app.use(bodyParser.json());
app.use(bodyParser.urlencoded({ extended: true }));

// initialize Stream Chat SDK
The /join route is where the creation of users on our Stream chat instance takes place. The generated token is sent back to the client to confirm that the user was authenticated successfully. For the purpose of this tutorial, we don’t actually try to authenticate users, but you'll want to do so in your production code.
The /speech route is where the text sent by the chat client is converted to speech via AWS Polly’s synthesizeSpeech method, and the result is sent back to the client to be played in the browser. As you can see, we are setting the VoiceID to "Kimberly"; other voice options can be found here.
That’s all we need to do on the server! Go ahead and start it on port 5500 by running node server.js.
Creating the Chat Interface
In this section, we’ll set up the chat interface using Stream’s React components. The components allow us to quickly build out some advanced features into our chat application with only a few lines of code, such as:
- Typing indicators
- Emoji reactions
- File sharing
- Rich link previews
- Message threads
- Read receipts
To get started, run the command below from your project root to bootstrap a new React application with the create-react-app CLI:
$ npx create-react-app clientOnce that command finishes, cd into the client folder and install additional packages we'll be utilizing, using this command:
$ yarn add stream-chat stream-chat-react random-username-generatorThe packages we just installed are:
- stream-chat: The Stream chat client library
- stream-chat-react: Stream chat components for React.
- random-username-generator: For generating random usernames, so we can rapidly spin up multiple instances on our chat app
Once the additional dependencies are installed, start the development server with yarn start, which should set up the app on http://localhost:3000.
Open up client/src/App.js in your text editor and update it to look like the snippet below:
import React, { useState, useEffect } from 'react';
import {
  Chat,
  Channel,
  Thread,
  Window,
  ChannelList,
  ChannelListTeam,
  MessageList,
  MessageTeam,
  MessageInput,
  ChannelHeader,
} from 'stream-chat-react';
import rug from 'random-username-generator';
import { StreamChat } from 'stream-chat';The stream-chat-react package provides us with the following components which we’ve used to construct our application UI:
<Chat />component acts as a wrapper and providesChatContextto all other components.<ChannelList />is used to render a list of channels on the sidebar.<Channel />acts as a wrapper component for a channel.- To render basic information about a channel, the list of messages in the channel and the text input, the
<CustomChannelHeader />,<MessageList />, and<MessageInput />components are used, respectively.
After initializing the client, we call the setUser method on the client, with the user fields as the first argument, and the token received from the server as the second argument. Next, we create a team channel (see channel types) with an id of gen and update the channel state using the setChannel function. Note that, if a channel with the id already exists, create will return that channel instead of creating a new one.
Between lines 49-71 is where we’re converting new messages sent to the channel to speech. Typically, you only want messages from other users to be read out, so we’re using the if conditional to filter out messages sent by the current user before sending off the message text to the server to be converted into synthesized speech, which is eventually streamed back into the app.
That’s all the code we need to add text-to-speech capabilities to our chat app! You can test it out by opening two instances of the app in separate tabs or windows and sending messages between them. Each message should be read out clearly on the receiving end.
Wrapping Up
In this article, we discussed why it is important to provide text-to-speech features in your chat app for the purpose of accessibility, and explored the steps for doing so. As you can see, building a speech-enabled chat app is a trivial task with the help of AWS Polly’s robust API, and Stream’s React components, which significantly ease the process of implementing complex chat features.
You can extend this demo in many different ways, depending on what your product does. Check out the documentation for both Stream and AWS Polly to learn more about all the features that are available to you.
The source code of this application can be found on GitHub.
Thanks for reading, and happy coding!
