How to create a Virtual Machine (VM) on Google Cloud Platform (GCP)
Google Compute Engine lets you use virtual machines that run on Google's infrastructure inside the Google Cloud Platform. You can create small VMs or larger instances with Debian, Windows or other standard images as per your requirement on the Google Cloud Platform(GCP).
The user can rent a VM and pay as per the usage. To understand more about billing, click here
In this article, we will demonstrate how to create a virtual machine (vm) using the Ubuntu 18.04 boot disk image in Google Cloud Platform (GCP), but first, let us have a look at what is a virtual machine.
What is a virtual machine?
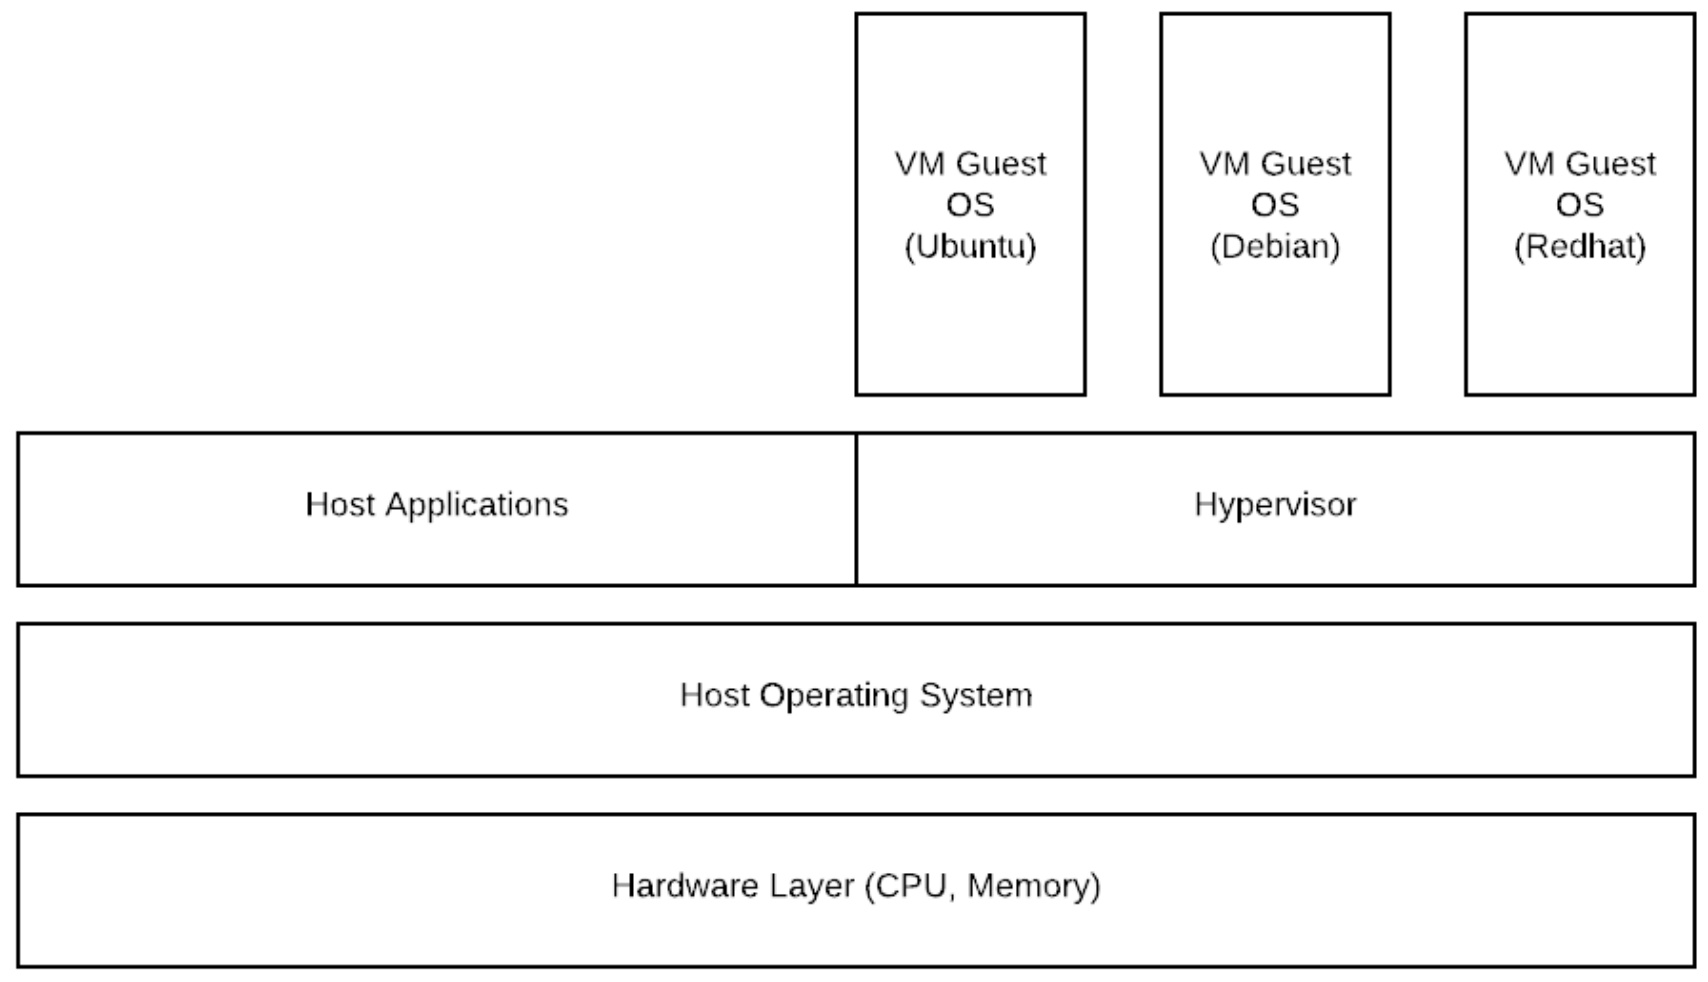
A virtual machine is a computer file called as an image that runs on the hypervisor making it feel like a full-fledged machine, it behaves like an actual computer, the processes within the virtual machine are isolated from the host system, this makes it ideal for cloud computing. Cloud providers like GCP provision multiple virtual machines on a single hypervisor that share the same underlying hardware.
Below is a basic architecture diagram of a virtual machine.
Prerequisites:
This article assumes the user has a valid Google Cloud Platform account. If the user does not have the GCP account they can create one by clicking on the link provided below.
What we will do:
- Login to Google Cloud Platform
- Create a virtual machine from Ubuntu:18.04 Boot Image
- Connect to the Instance
Login to Google Cloud Platform
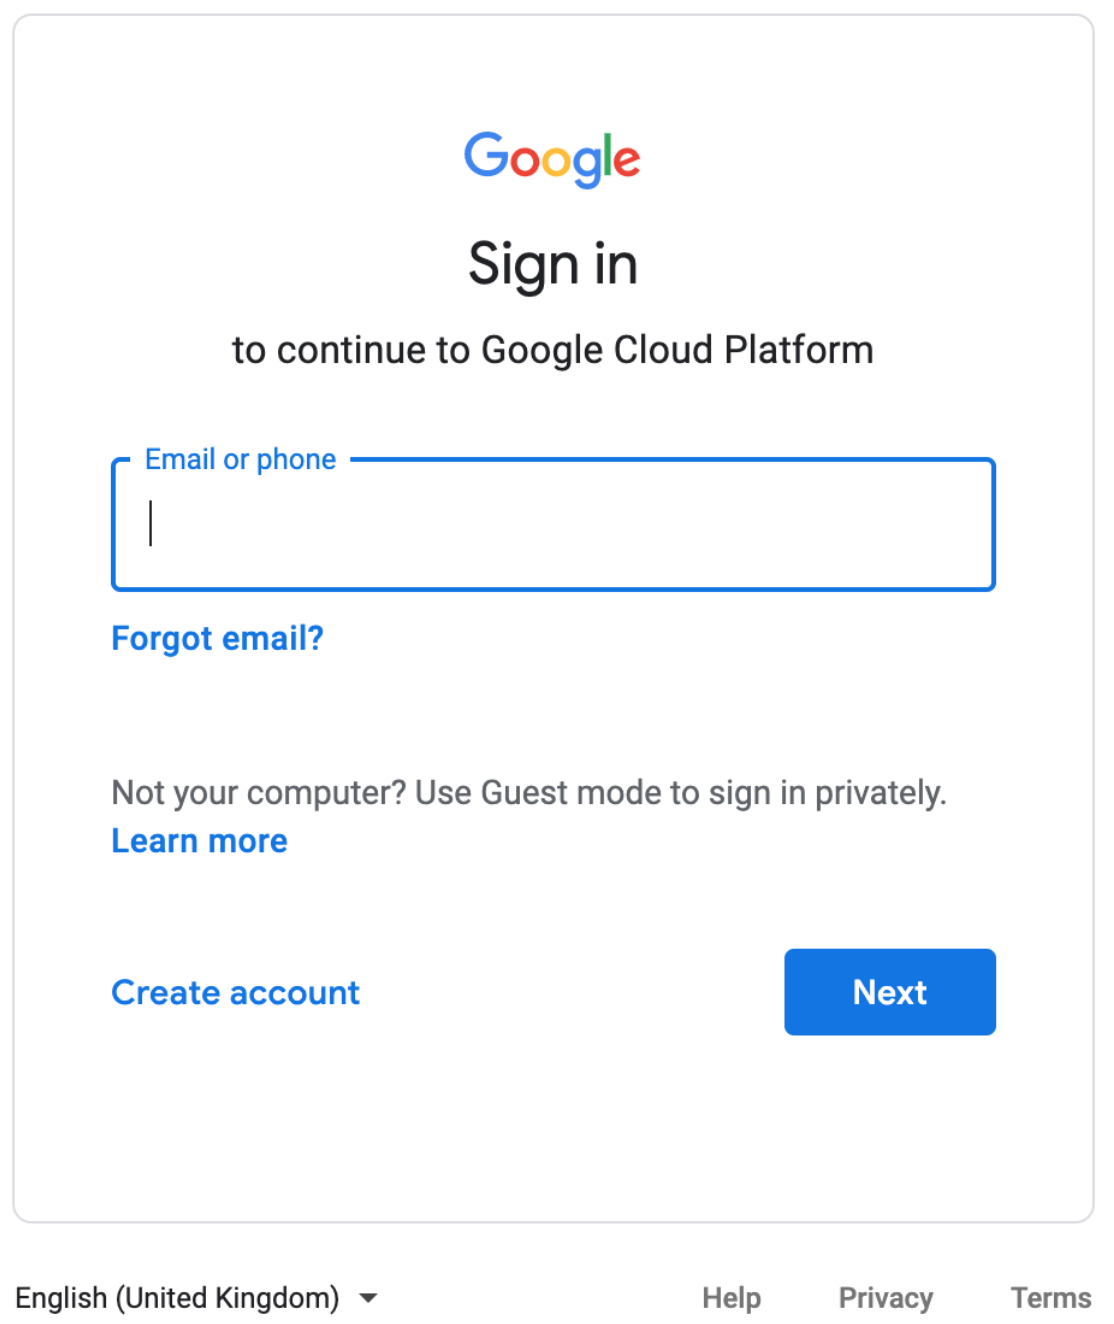
- Click here to go to the GCP login page.
When you hit the above link, you will see a web page as follows where you are required to login using your credentials.
Create a virtual machine from Ubuntu:18.04 Boot Image
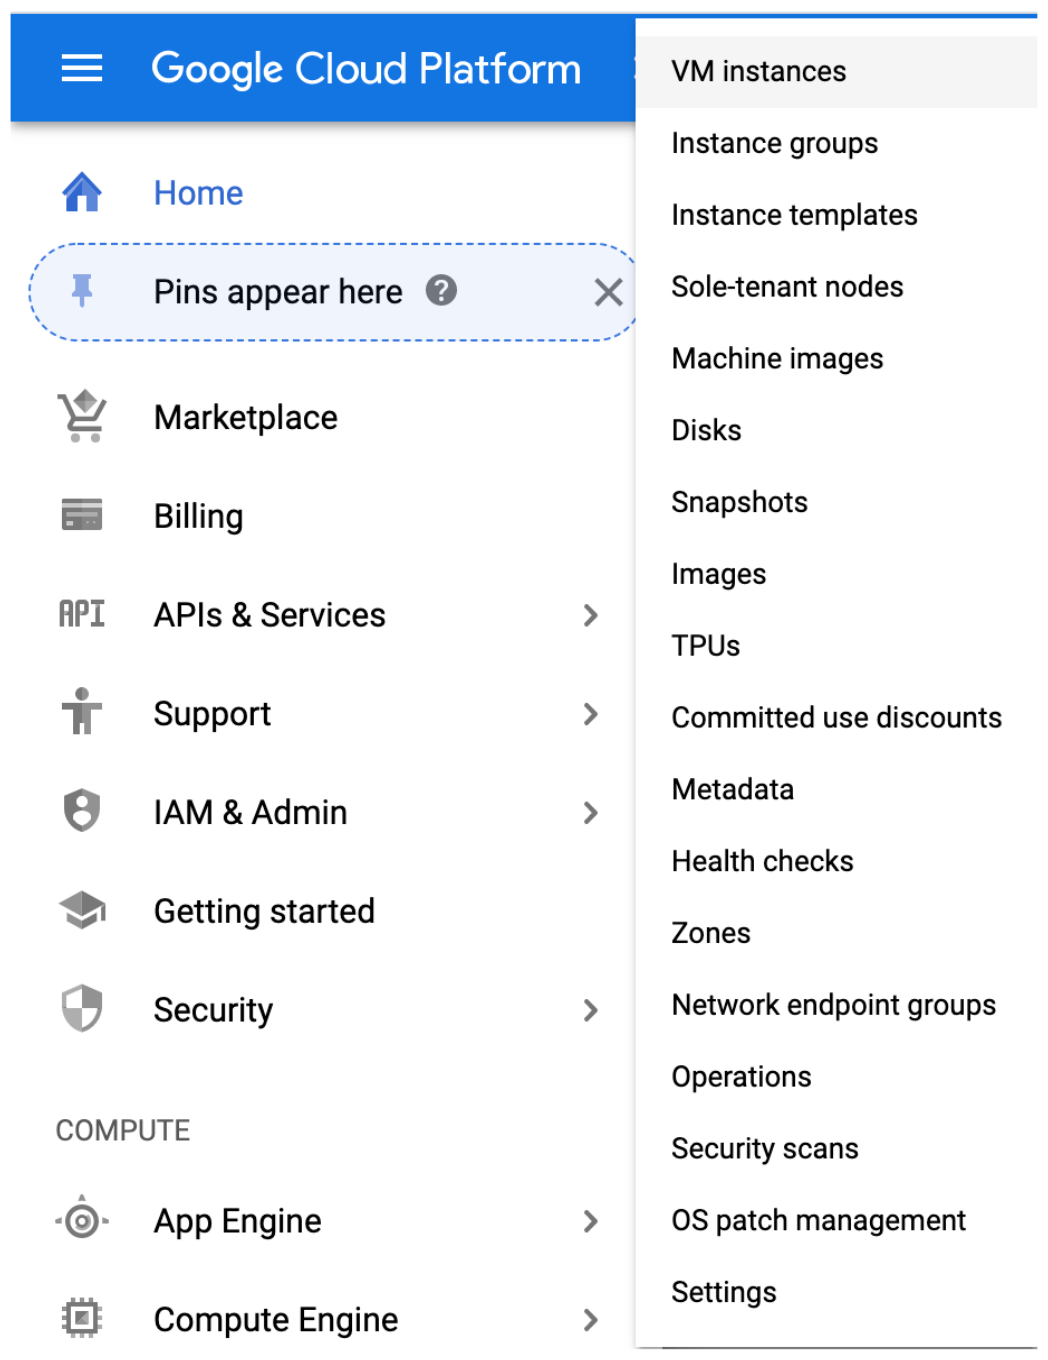
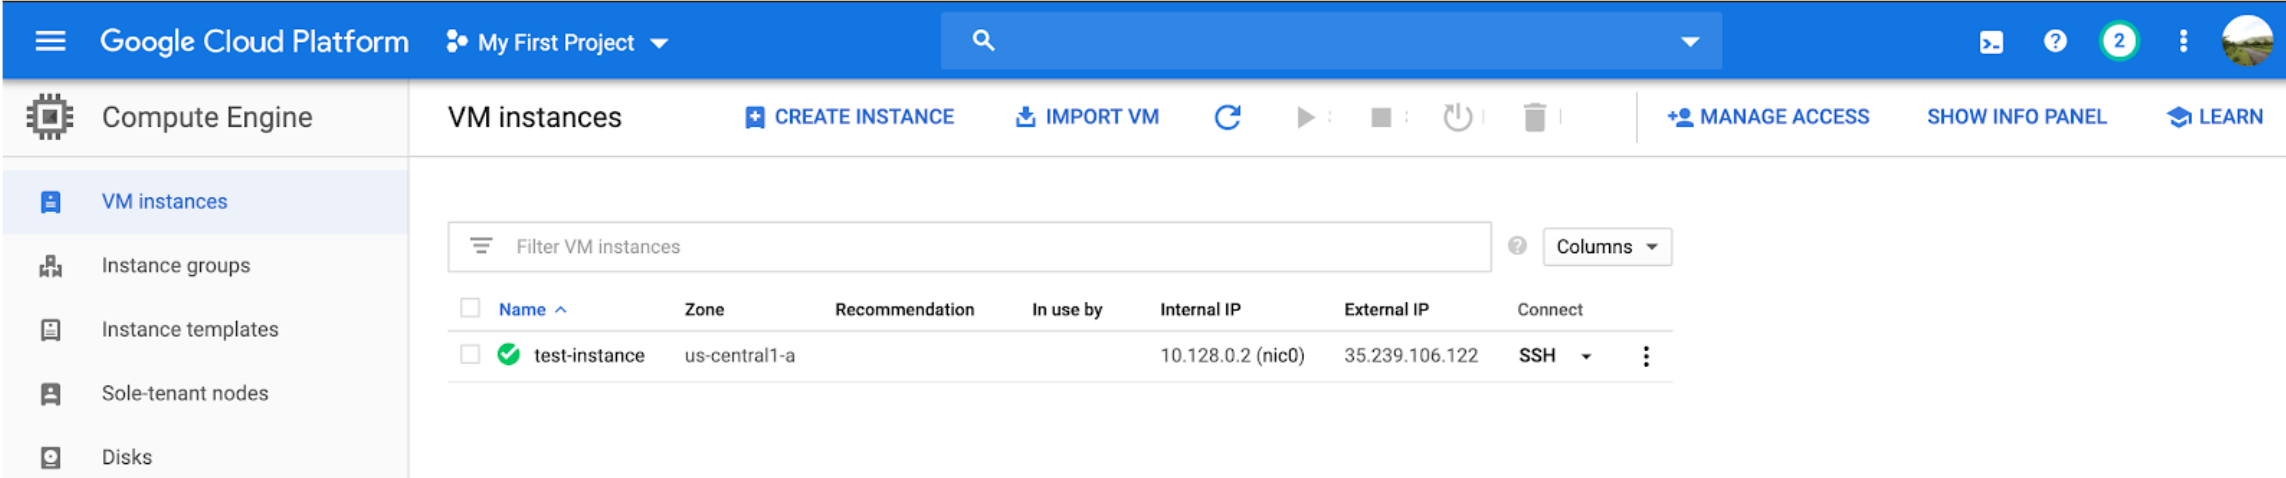
Step1: Navigate to the Compute Engine Section from the side navigation pane and click on VM Instances.
Step 2: Click on the ‘CREATE INSTANCE’ button in the top navigation pane.

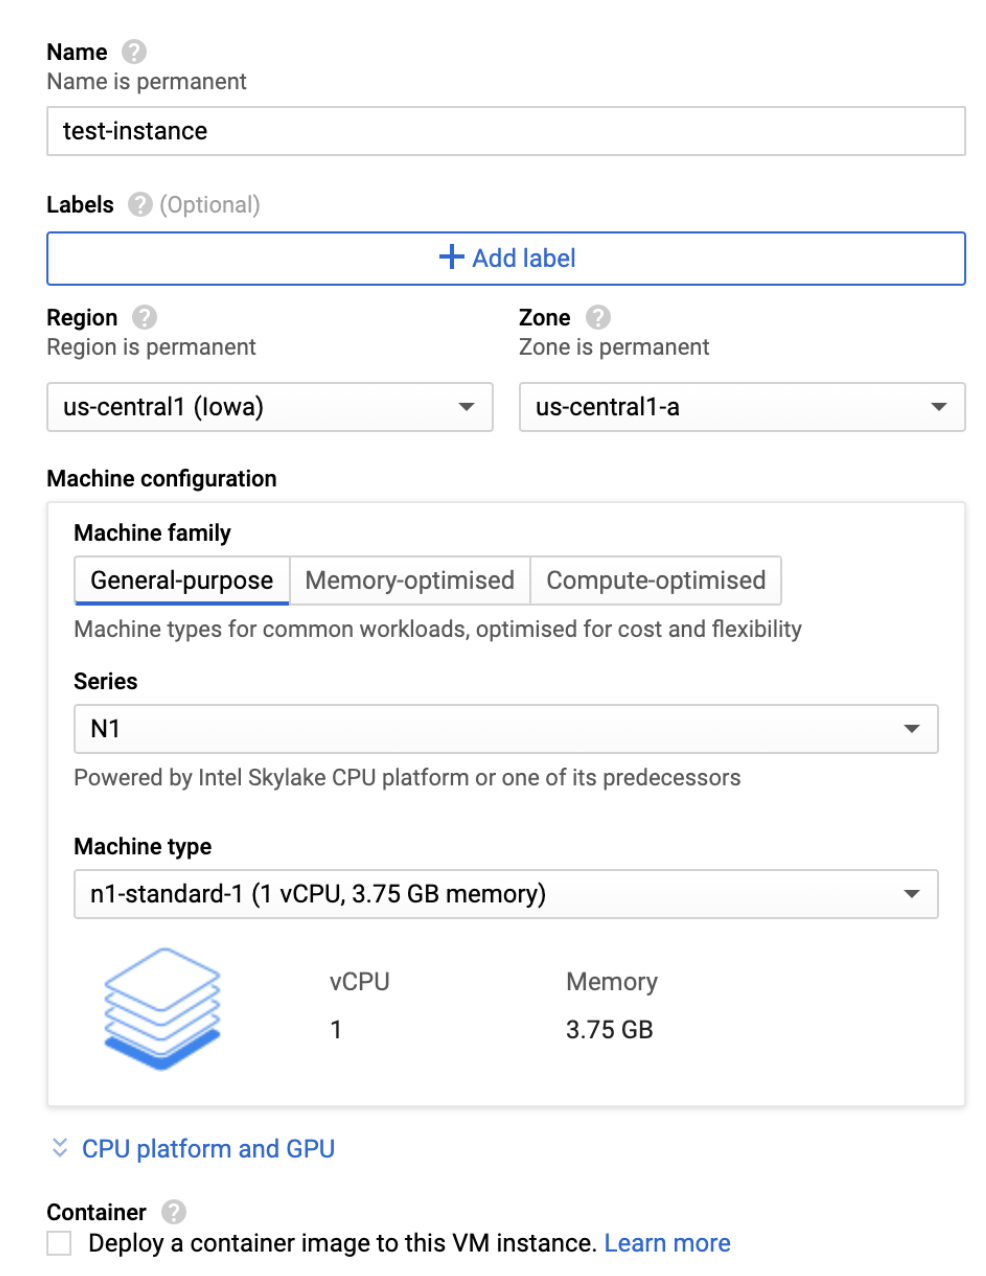
Step 3: Select the options
- Name: Type in the name of the virtual machine. Please note that the Name must be lowercase letters, numbers, and hyphens
- Region and zone: Select the region and zone where you wish to launch the VM instance. As per GCP official documentation “A region is a specific geographical location where you can host your resources. Each region has one or more zones”
- Machine configuration: Select the machine configuration as per your requirements, you can find more information on Machine configuration here, Please note for the purpose of this article I have kept the machine configuration to default, those can be seen in the image below
Boot Disk: Select the boot disk as per your preferences, here I have selected the ubuntu 18.04 boot disk.
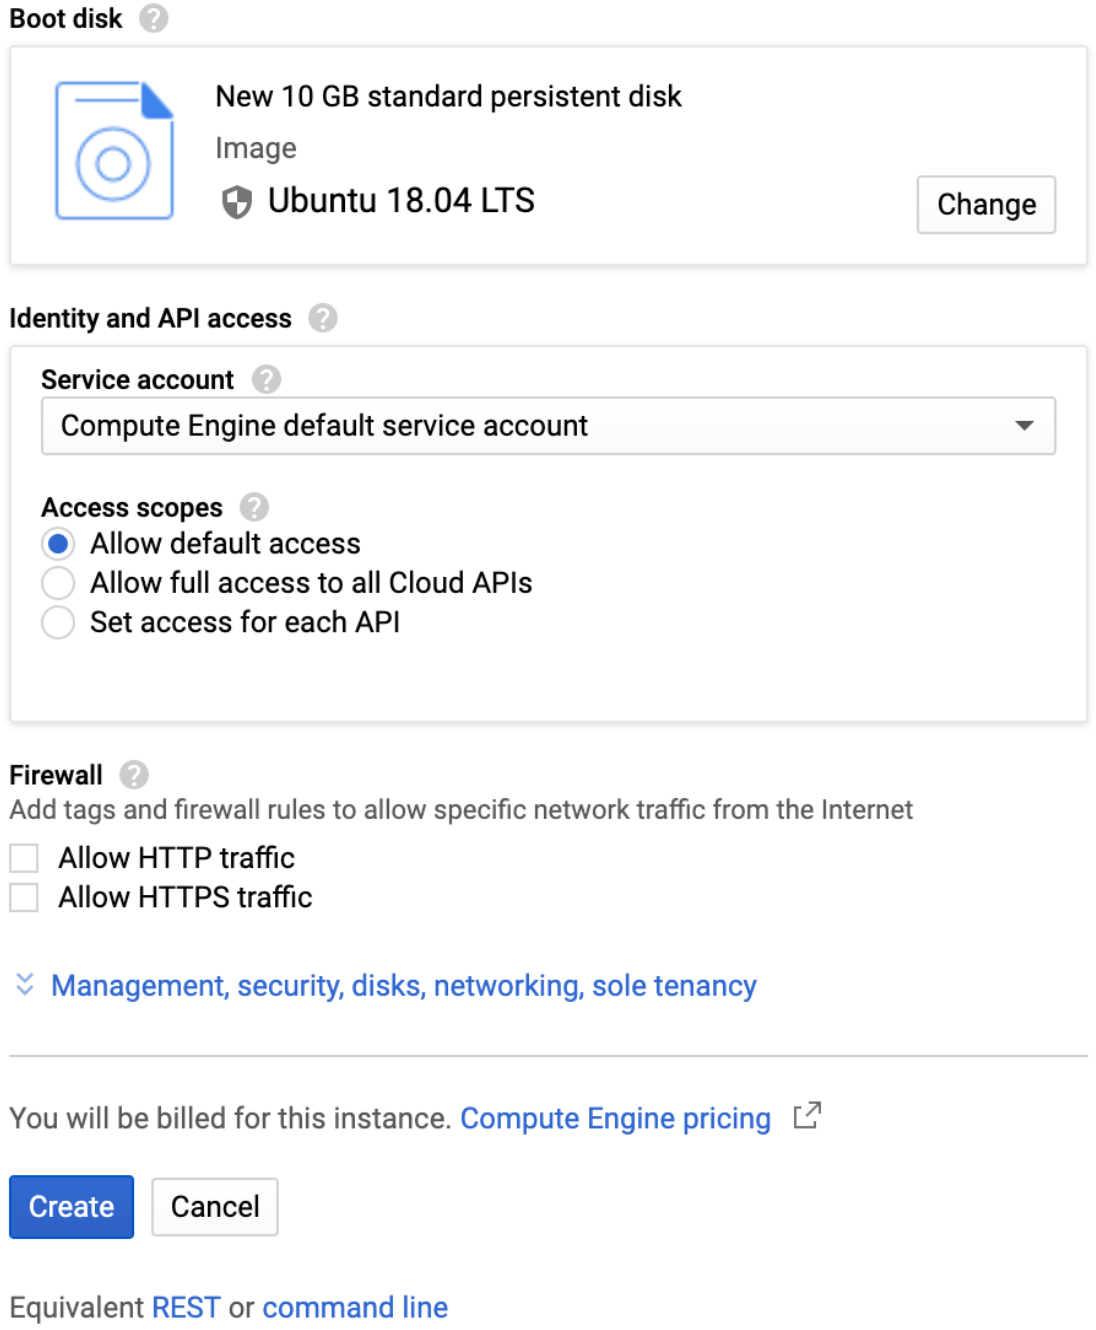
Step 4: Click on the create button at the bottom of page, This will start the process of creating a VM in GCP, it may take a while for the VM to be up and running.
A green tick will appear next to the VM name once, the VM instance is in available state
Connect to the Instance
Navigate to the recently created VM instance and click on SSH menu and select the "Open in browser window" option
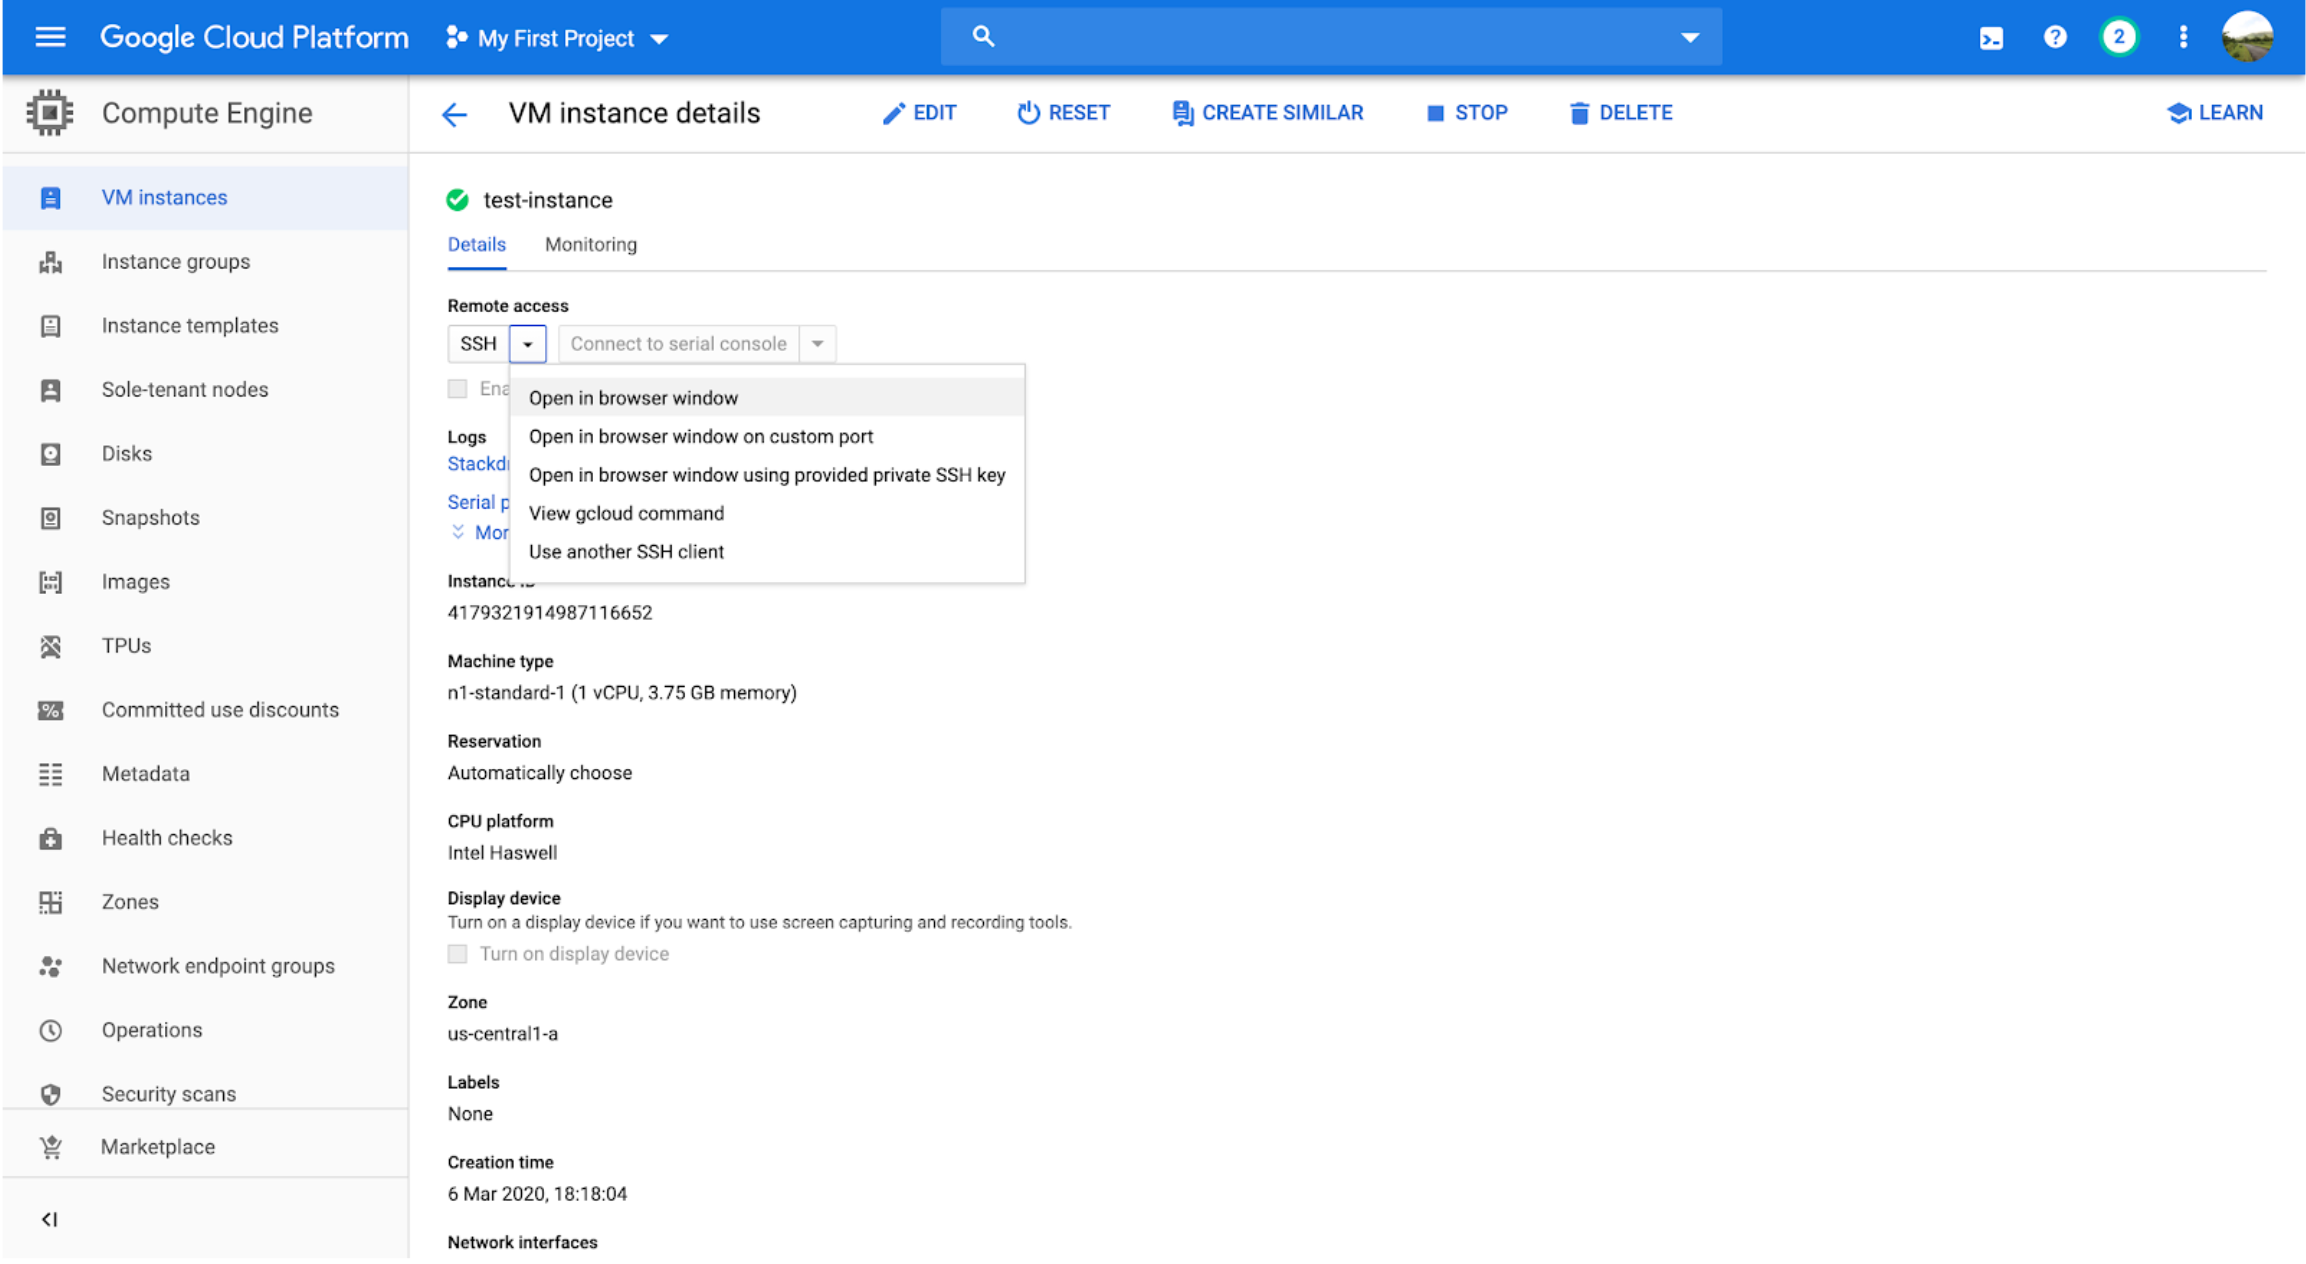
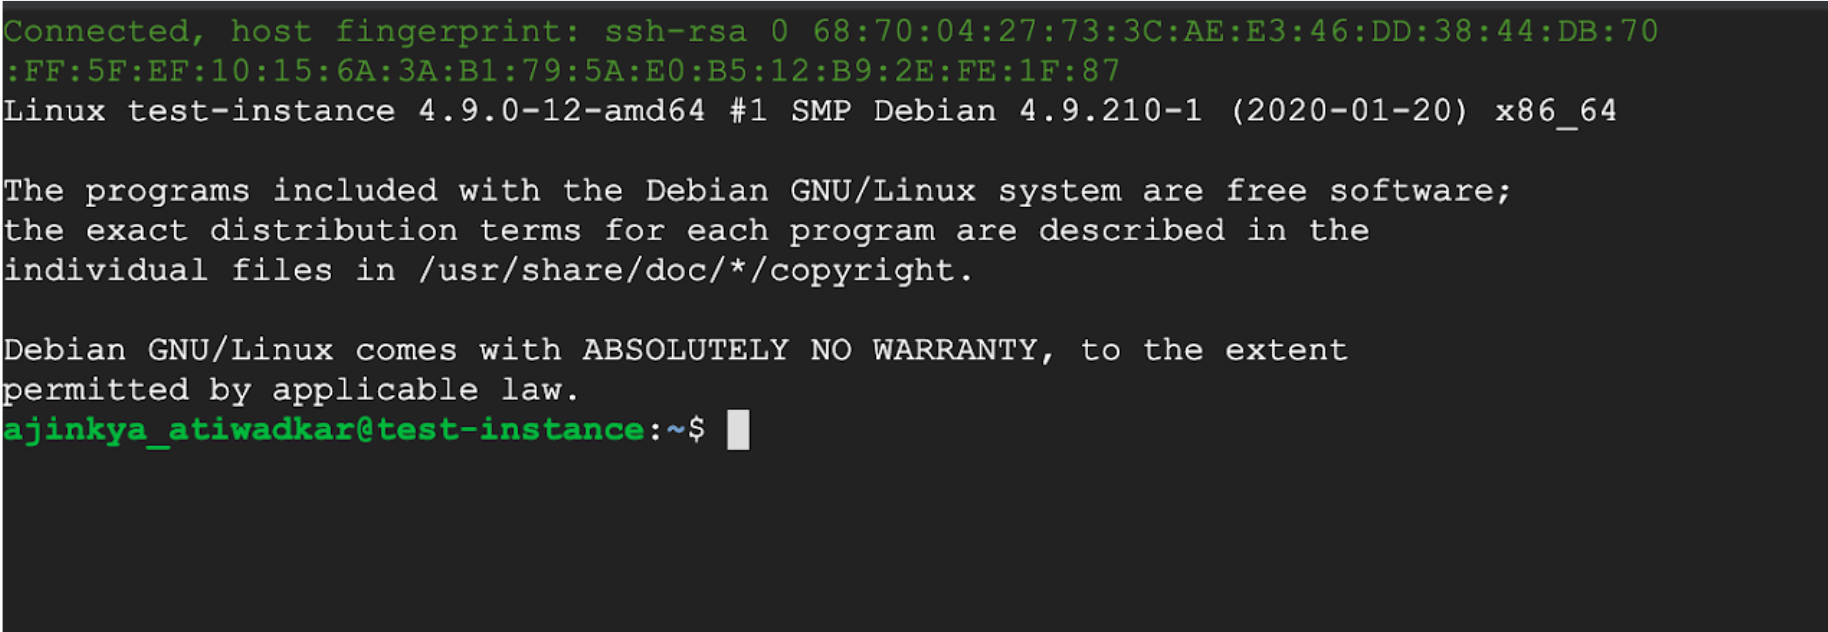
Please note that it will open the shell in a new tab you can now access the VM instance using the browser.
Summary:
This article demonstrates the creation of Ubuntu 18.04 VM instance with the default setting, GCP provides advance options for us to configure the Instance type, Disk type, and the network preferences as per our requirements, however, they are out of scope for this article, you can play around with the VM instance advance options in GCP if you wish to do so.

