Recently, I developed a new boilerplate for Django apps with React. A boilerplate refers to a project that can be used as a base that you start from, allowing you to skip a lot of configuration. The project I developed has the following pre-built features:
- Project configuration that easily lets you toggle between production and local development mode
- Integration with powerful React modules (styled components, react bootstrap, redux)
- Use of TypeScript to allow for a more maintainable code base
- Includes implementations for the most common user access flows that most apps need (sign up, password reset, login, sessions with tokens)
- Page layout with common components that most apps use (cookie banner, footer, nav bar, loading bar)
- Out-of-the-box instant CI/CD with Heroku
In this tutorial, I am going to cover how you can deploy this boilerplate to Heroku very easily.
Setting up the Project
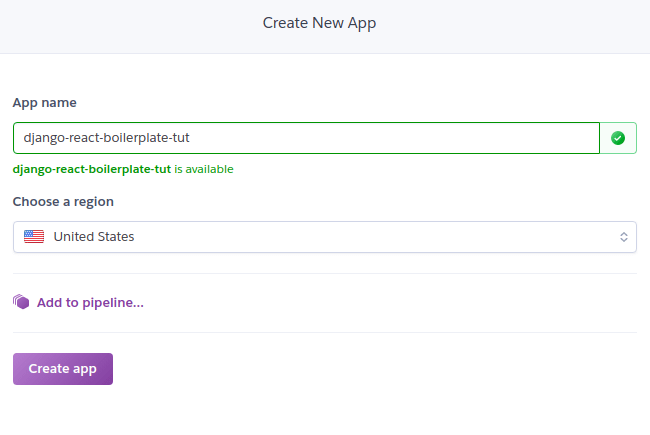
If you don't already have an account, head down to the sign up. We then want to create a new app.
Go to the Deploy section on the App dashboard and choose GitHub as the Deployment method. You can then setup Heroku to sync with your GitHub repository - this is the simplest method in my opinion, because you don't need to install the Heroku CLI and the boilerplate is designed to work without it.

Adding a Postgres Database
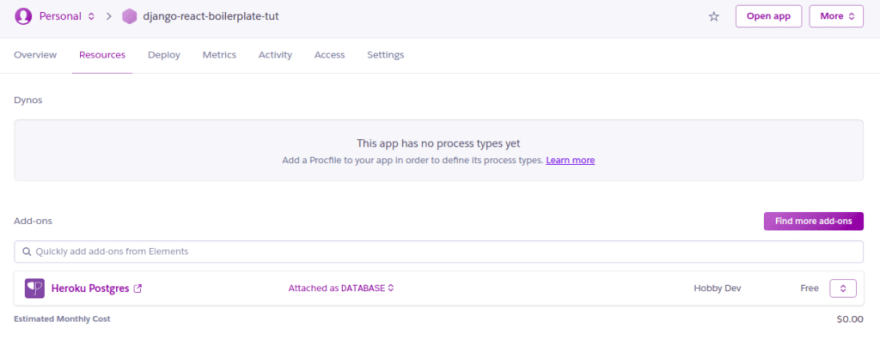
For this tutorial, I will be using a postgres database, as the boilerplate is laid about by default to use it. Heroku lets you use a free instance of postgres, simply go to the resources tab and search for it in the search bar.
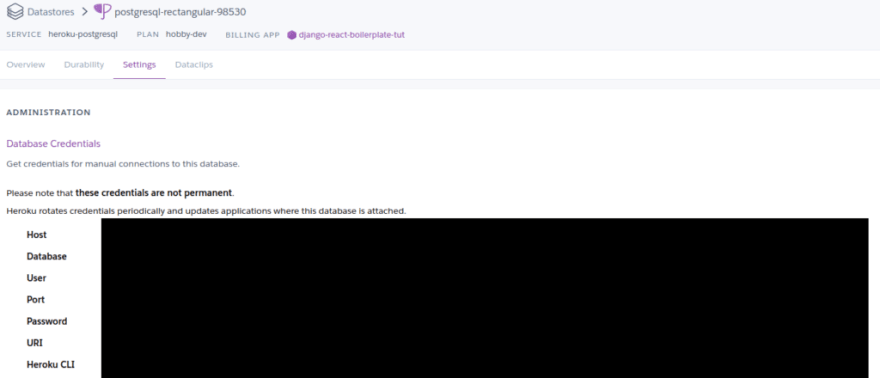
Heroku will configure the database for us, so we need to store the credentials and inject them into our app. Click on your postgres add-on and you will be taken to a new dashboard for your database. Hit the Settings tab and click on view credentials.

Now, you should see all the information, for your database. Take a screenshot or keep it open in a separate tab.
Setting up Environment Variables
The boilerplate project uses so-called environment variables that are injected into the project when you deploy in production mode.

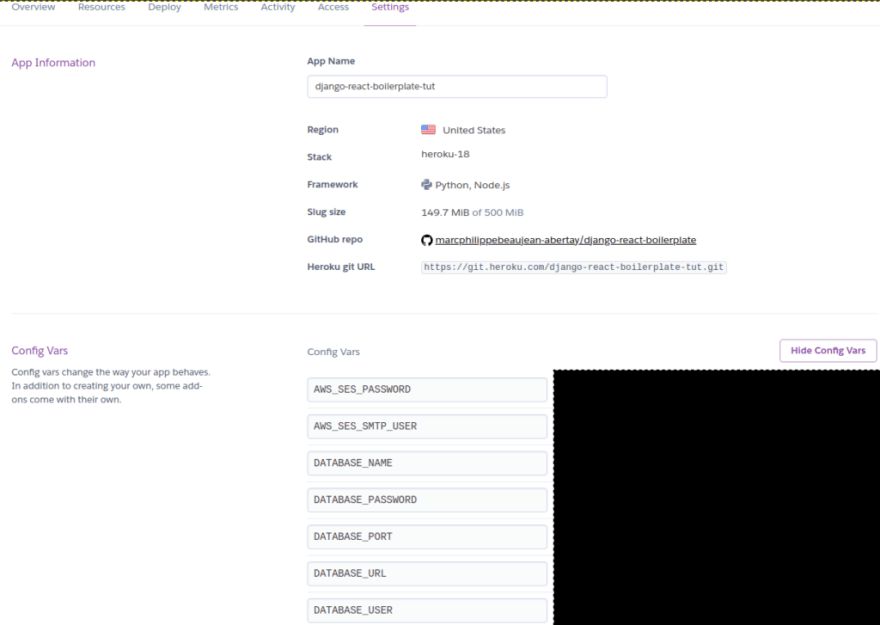
The os.environ.get method is used to grab any variables from the surrounding system. Heroku lets us define these, as those any typical operating system or hosting platform. Important is that we use the same key names as are in the code. You will also see from the code that the boilerplate is using amazon SES configuration to send emails - I have a tutorial on this if you are not sure how to set it up or you can replace that code with any email provider of your choosing. Same thing applies to the type of database, as you can see it is configured to Postgres here.
To configure environment variables in Heroku, go back to the Settings tab of your app. You will see a Config Vars option - click Reveal Config Vars. We can now add the environment variables that we need, this is where we enter the database information that Heroku gave us earlier.
...and that should be it! You can go to the Deploy tab, start deployment and enjoy the magic.


Top comments (0)