Introduction to SerenityOS GUI programming
This post will give you a quick intro to the basics of GUI programming for SerenityOS.
Hello friends! Let’s cut to the chase and go straight to some code!
The smallest possible GUI program
#include <LibGUI/Application.h>

int main(int argc, char** argv)
{
    GUI::Application app(argc, argv);
    return app.exec();
}
The above program creates a GUI::Application object and enters the main event loop. That’s it. It then does nothing until you interrupt it with ^C.
Details: GUI::Application is created on the stack in main() and will exist throughout the program’s lifetime. It can be reached globally as GUI::Application::the().
Let’s add a window!
#include <LibGUI/Application.h>
#include <LibGUI/Window.h>

int main(int argc, char** argv)
{
    GUI::Application app(argc, argv);
    auto window = GUI::Window::construct();
    window->set_title("My window!");
    window->set_rect(100, 100, 300, 200);
    window->show();
    return app.exec();
}
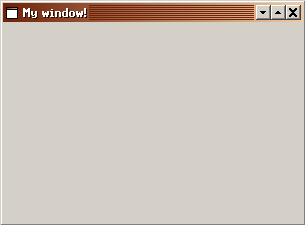
The above program creates a window and sets its title, screen location and size. It then displays the window on screen and enters the main event loop.
Details: Windows are represented by GUI::Window, which inherits from Core::Object, a foundational building block of the Serenity userspace programming environment. Core::Object is reference-counted, and is constructed using its construct() helper. The value you get back is a reference-counting smart pointer, in this case a NonnullRefPtr<GUI::Window>.
Let’s add a button!
#include <LibGUI/Application.h>
#include <LibGUI/Button.h>
#include <LibGUI/Window.h>

int main(int argc, char** argv)
{
    GUI::Application app(argc, argv);
    auto window = GUI::Window::construct();
    window->set_title("My window!");
    window->set_rect(100, 100, 300, 200);

    auto& button = window->set_main_widget<GUI::Button>("OK");
    button.on_click = [&] {
        app.quit();
    };

    window->show();
    return app.exec();
}
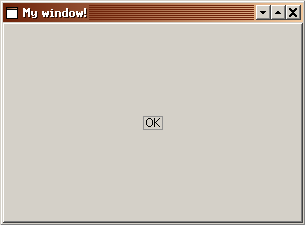
The above program creates a GUI::Button widget and makes it the main widget of the window. We install a callback for the on_click hook that calls GUI::Application::quit(). Clicking the button exits the event loop and terminates the program.
Details: A window’s main widget is the root of its widget tree. It fills up all the space in the window (and follows along with resizing.) The main widget is owned by the window.
Let’s use a layout to have more than one widget!
#include <LibGUI/Application.h>
#include <LibGUI/BoxLayout.h>
#include <LibGUI/Button.h>
#include <LibGUI/Label.h>
#include <LibGUI/Widget.h>
#include <LibGUI/Window.h>

int main(int argc, char** argv)
{
    GUI::Application app(argc, argv);
    auto window = GUI::Window::construct();
    window->set_title("My window!");
    window->set_rect(100, 100, 300, 200);
    window->show();

    auto& widget = window->set_main_widget<GUI::Widget>();
    widget.set_fill_with_background_color(true);
    widget.set_layout<GUI::VerticalBoxLayout>();

    widget.add<GUI::Label>("Hello!");
    widget.add<GUI::Button>("Friends!");

    return app.exec();
}
The above program uses a generic GUI::Widget as the window’s main widget, and assigns a layout to it. LibGUI currently offers two layouts: HorizontalBoxLayout and VerticalBoxLayout. Once a layout is assigned to a widget, it will manage the location and shape of that widget’s immediate children.
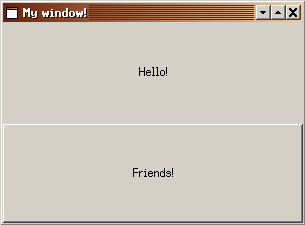
We add two children to the main widget, a label and button, causing them to get laid out vertically in insertion order, label up top, button down below.
Details: Using the layout system is optional (but preferred due to its simplicity.) It’s also possible to place and size children directly by calling GUI::Widget::set_relative_rect(x, y, width, height) on them. To build complex user interfaces, layouts can be nested arbitrarily by adding layouts to the children of the main widget, etc. Widgets have size policies and preferred size that can be used to adjust layout. Widgets own their children.
Okay, let’s make a custom widget!
For our final example, let’s make something a little more advanced…
#include <LibGUI/Application.h>
#include <LibGUI/Painter.h>
#include <LibGUI/Widget.h>
#include <LibGUI/Window.h>

class MyWidget final : public GUI::Widget {
    C_OBJECT(MyWidget);
private:
    MyWidget() {}
    virtual void paint_event(GUI::PaintEvent&) override;
    virtual void mousedown_event(GUI::MouseEvent&) override;

    Vector<Gfx::Point> m_points;
};

void MyWidget::paint_event(GUI::PaintEvent&)
{
    GUI::Painter painter(*this);
    painter.fill_rect(rect(), Gfx::Color::White);
    painter.draw_text(rect(), ":)", Gfx::TextAlignment::Center);

    Gfx::Point last_point;
    for (auto& point : m_points) {
        painter.draw_line(last_point, point, Gfx::Color::Red);
        last_point = point;
    }
}

void MyWidget::mousedown_event(GUI::MouseEvent& event)
{
    m_points.append(event.position());
    update();
}

int main(int argc, char** argv)
{
    GUI::Application app(argc, argv);
    auto window = GUI::Window::construct();
    window->set_title("My window!");
    window->set_rect(100, 100, 300, 200);
    window->show();

    window->set_main_widget<MyWidget>();
    return app.exec();
}
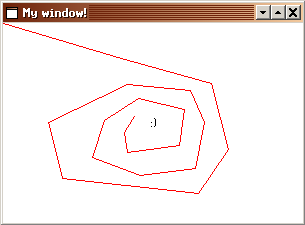
The above program defines a custom GUI::Widget subclass called MyWidget. It implements its own behavior for the mousedown and paint events. When you click somewhere in the window, it will draw a line from the last place you clicked to the new place you clicked.
The SerenityOS GUI is event-driven, and most of the logic is about widgets handling events. The following virtual functions from GUI::Widget can be overridden to handle specific events:
    virtual void change_event(GUI::Event&);
    virtual void child_event(Core::ChildEvent&);
    virtual void context_menu_event(GUI::ContextMenuEvent&);
    virtual void doubleclick_event(GUI::MouseEvent&);
    virtual void drag_move_event(GUI::DragEvent&);
    virtual void drop_event(GUI::DropEvent&);
    virtual void enter_event(Core::Event&);
    virtual void focusin_event(Core::Event&);
    virtual void focusout_event(Core::Event&);
    virtual void hide_event(GUI::HideEvent&);
    virtual void keydown_event(GUI::KeyEvent&);
    virtual void keyup_event(GUI::KeyEvent&);
    virtual void leave_event(Core::Event&);
    virtual void mousedown_event(GUI::MouseEvent&);
    virtual void mousemove_event(GUI::MouseEvent&);
    virtual void mouseup_event(GUI::MouseEvent&);
    virtual void mousewheel_event(GUI::MouseEvent&);
    virtual void paint_event(GUI::PaintEvent&);
    virtual void resize_event(GUI::ResizeEvent&);
    virtual void show_event(GUI::ShowEvent&);
Details: The C_OBJECT macro is used in all Core::Object subclasses to insert some shared functionality at the preprocessing stage. The call to GUI::Widget::update() in mousedown_event is what causes the widget to be repainted. Internally, this sends an invalidation rect to the WindowServer program, which will let us know when it’s time to paint. When the time comes, we get a call to paint_event and can paint our widget however we like.
Conclusion
And that’s it for today! I hope this gave you some idea of how GUI programming is done on SerenityOS.
If you would like to know more, I recommend looking at some of the many applications, games and demos. It’s also handy to look at the LibGUI source code itself.
Note that the system and its various libraries are under constant development, so the above may no longer be accurate by the time you read this. Come talk to us in #serenityos on the Freenode IRC network if you find bugs or have questions!
Thank you for stopping by! Until next time :^)