blog
How to Rebuild an Inconsistent PostgreSQL Slave

PostgreSQL Streaming Replication is a great way of scaling PostgreSQL clusters and doing it adds high availability to them. As with every replication, the idea is that the slave is a copy of the master and that the slave is constantly updated with the changes that happened on the master using some sort of a replication mechanism.
It may happen that the slave, for some reason, gets out of sync with the master. How can I bring it back to the replication chain? How can I ensure that the slave is again in-sync with the master? Let’s take a look in this short blog post.
What is very helpful, there is no way to write on a slave if it is in the recovery mode. You can test it like that:
postgres=# SELECT pg_is_in_recovery();

 pg_is_in_recovery

-------------------

 t

(1 row)

postgres=# CREATE DATABASE mydb;

ERROR:  cannot execute CREATE DATABASE in a read-only transaction
It still may happen that the slave would go out of sync with the master. Data corruption – neither hardware or software is without bugs and issues. Some problems with the disk drive may trigger data corruption on the slave. Some problems with the “vacuum” process may result in data being altered. How to recover from that state?
Rebuilding the Slave Using pg_basebackup
The main step is to provision the slave using the data from the master. Given that we’ll be using streaming replication, we cannot use logical backup. Luckily there’s a ready tool that can be used to set things up: pg_basebackup. Let’s see what would be the steps we need to take to provision a slave server. To make it clear, we are using PostgreSQL 12 for the purpose of this blog post.
The initial state is simple. Our slave is not replicating from its master. Data it contains is corrupted and can’t be used nor trusted. Therefore the first step we’ll do will be to stop PostgreSQL on our slave and remove the data it contains:
root@vagrant:~# systemctl stop postgresqlOr even:
root@vagrant:~# killall -9 postgresNow, let’s check the contents of the postgresql.auto.conf file, we can use replication credentials stored in that file later, for pg_basebackup:
root@vagrant:~# cat /var/lib/postgresql/12/main/postgresql.auto.conf

# Do not edit this file manually!

# It will be overwritten by the ALTER SYSTEM command.

promote_trigger_file='/tmp/failover_5432.trigger'

recovery_target_timeline=latest

primary_conninfo='application_name=pgsql_0_node_1 host=10.0.0.126 port=5432 user=cmon_replication password=qZnVoV7LV97CFX9F'
We are interested in the user and password used for setting up the replication.
Finally we are ok to remove the data:
root@vagrant:~# rm -rf /var/lib/postgresql/12/main/*Once the data is removed, we need to use pg_basebackup to get the data from the master:
root@vagrant:~# pg_basebackup -h 10.0.0.126 -U cmon_replication -Xs -P -R -D /var/lib/postgresql/12/main/

Password:

waiting for checkpoint
The flags that we used have following meaning:
- -Xs: we would like to stream WAL while the backup is created. This helps avoid problems with removing WAL files when you have a large dataset.
- -P: we would like to see progress of the backup.
- -R: we want pg_basebackup to create standby.signal file and prepare postgresql.auto.conf file with connection settings.
pg_basebackup will wait for the checkpoint before starting the backup. If it takes too long, you can use two options. First, it is possible to set checkpoint mode to fast in pg_basebackup using ‘-c fast’ option. Alternatively, you can force checkpointing by executing:
postgres=# CHECKPOINT;

CHECKPOINT
One way or the other, pg_basebackup will start. With the -P flag we can track the progress:
416906/1588478 kB (26%), 0/1 tablespaceceaceOnce the backup is ready, all we have to do is to make sure data directory content has the correct user and group assigned – we executed pg_basebackup as ‘root’ therefore we want to change it to ‘postgres’:
root@vagrant:~# chown -R postgres.postgres /var/lib/postgresql/12/main/That’s all, we can start the slave and it should start to replicate from the master.
root@vagrant:~# systemctl start postgresqlYou can double-check the replication progress by executing following query on the master:
postgres=# SELECT * FROM pg_stat_replication;
pid | usesysid | usename | application_name | client_addr | client_hostname | client_port | backend_start | backend_xmin | state | sent_lsn | write_lsn | flush_lsn | replay_lsn | write_lag | flush_lag | replay_lag | sync_priority | sync_state | reply_time
-------+----------+------------------+------------------+-------------+-----------------+-------------+-------------------------------+--------------+-----------+------------+------------+------------+------------+-----------+-----------+------------+---------------+------------+-------------------------------
23565 | 16385 | cmon_replication | pgsql_0_node_1 | 10.0.0.128 | | 51554 | 2020-02-27 15:25:00.002734+00 | | streaming | 2/AA5EF370 | 2/AA5EF2B0 | 2/AA5EF2B0 | 2/AA5EF2B0 | | | | 0 | async | 2020-02-28 13:45:32.594213+00
11914 | 16385 | cmon_replication | 12/main | 10.0.0.127 | | 25058 | 2020-02-28 13:42:09.160576+00 | | streaming | 2/AA5EF370 | 2/AA5EF2B0 | 2/AA5EF2B0 | 2/AA5EF2B0 | | | | 0 | async | 2020-02-28 13:45:42.41722+00
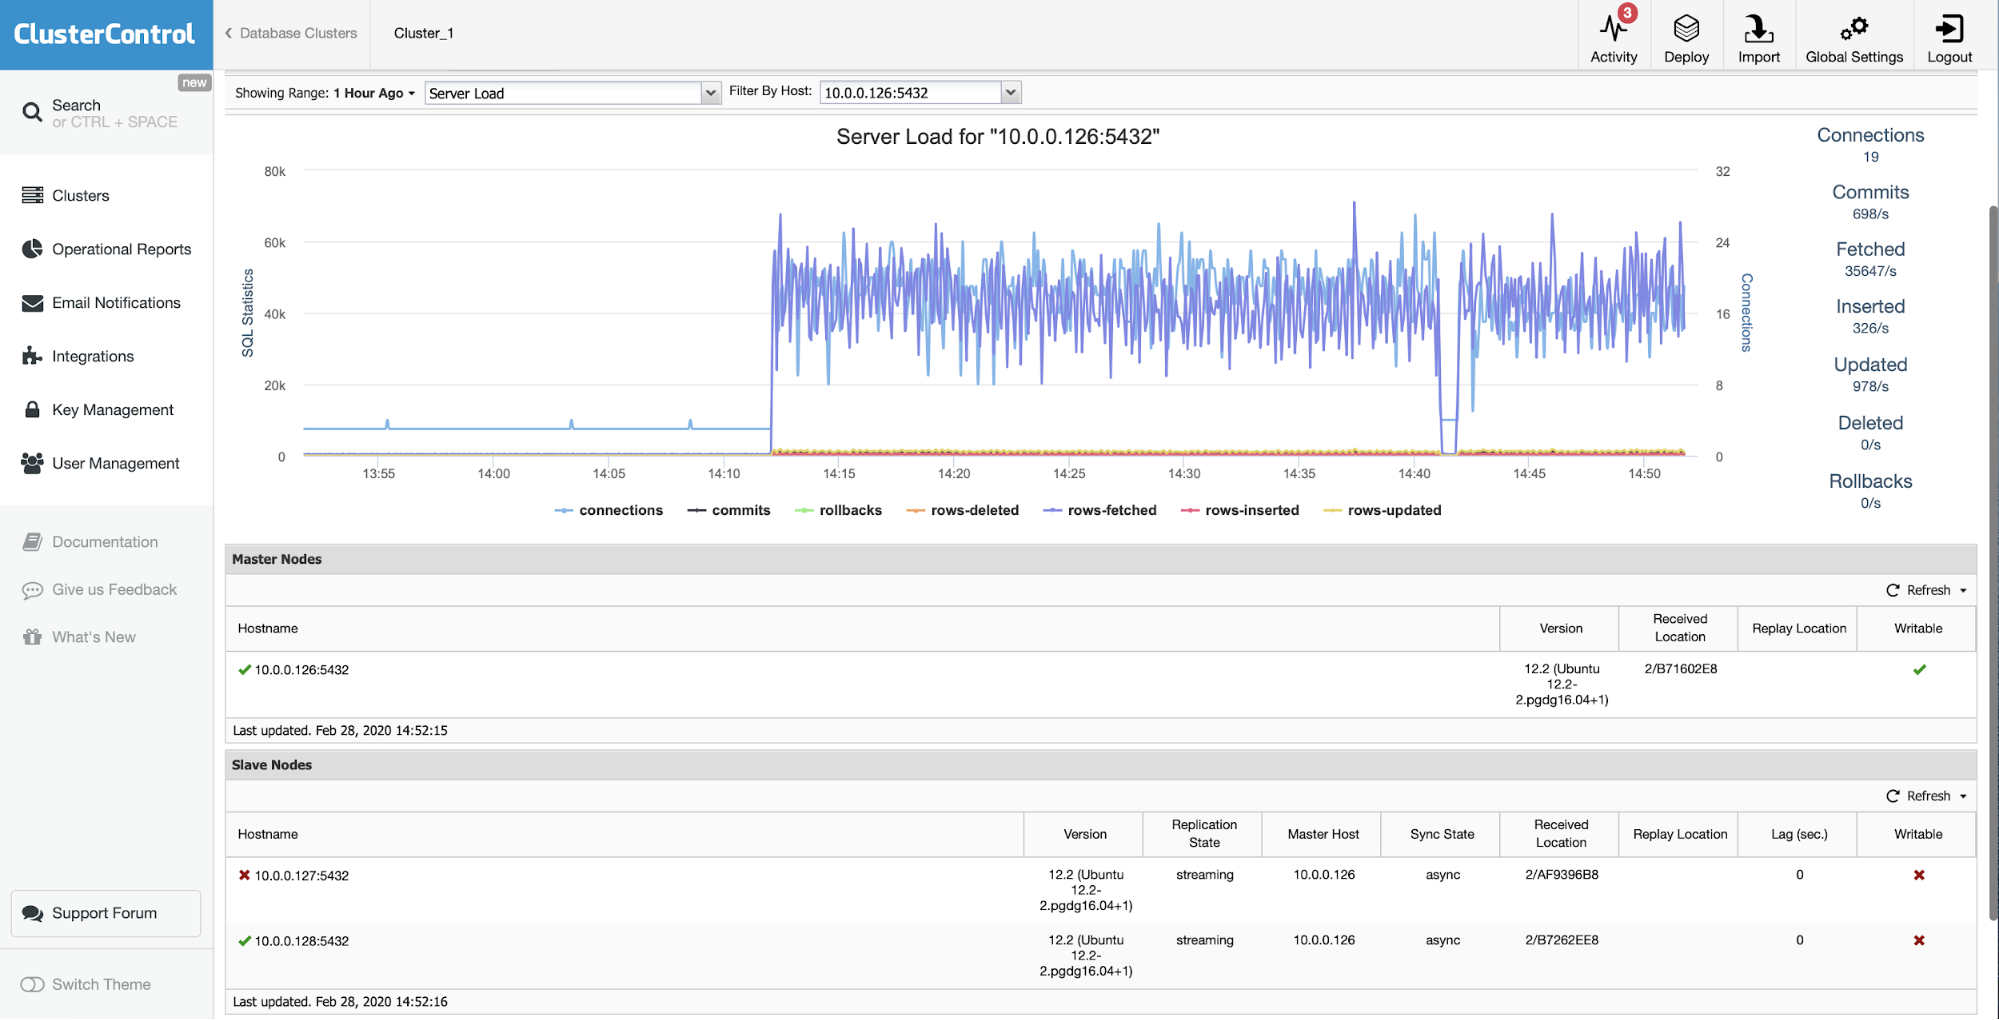
(2 rows)As you can see, both slaves are replicating correctly.
Rebuilding the Slave Using ClusterControl
If you are a ClusterControl user you can easily achieve exactly the same just by picking an option from the UI.
The initial situation is that one of the slaves (10.0.0.127) is not working and it is not replicating. We deemed that the rebuild is the best option for us.
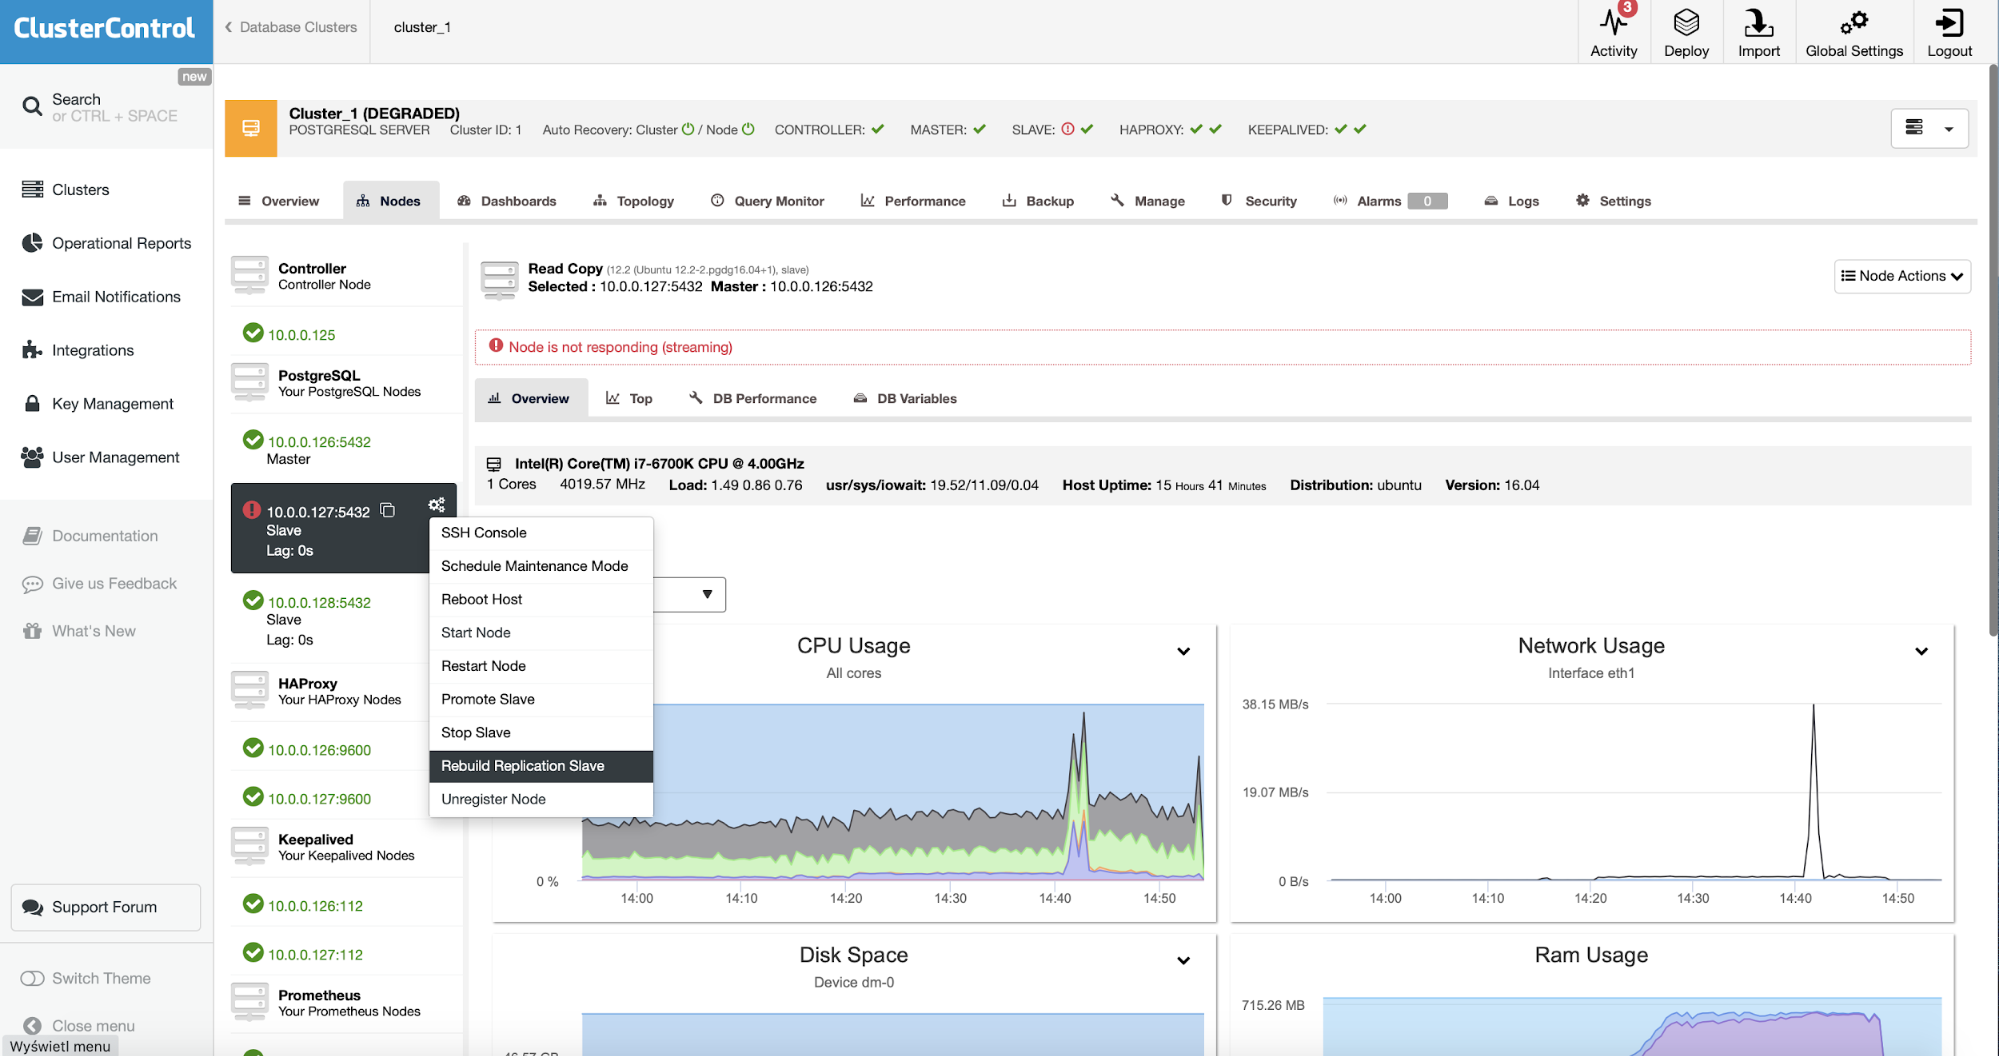
As ClusterControl users all we have to do is to go to the “Nodes” tab and run “Rebuild Replication Slave” job.
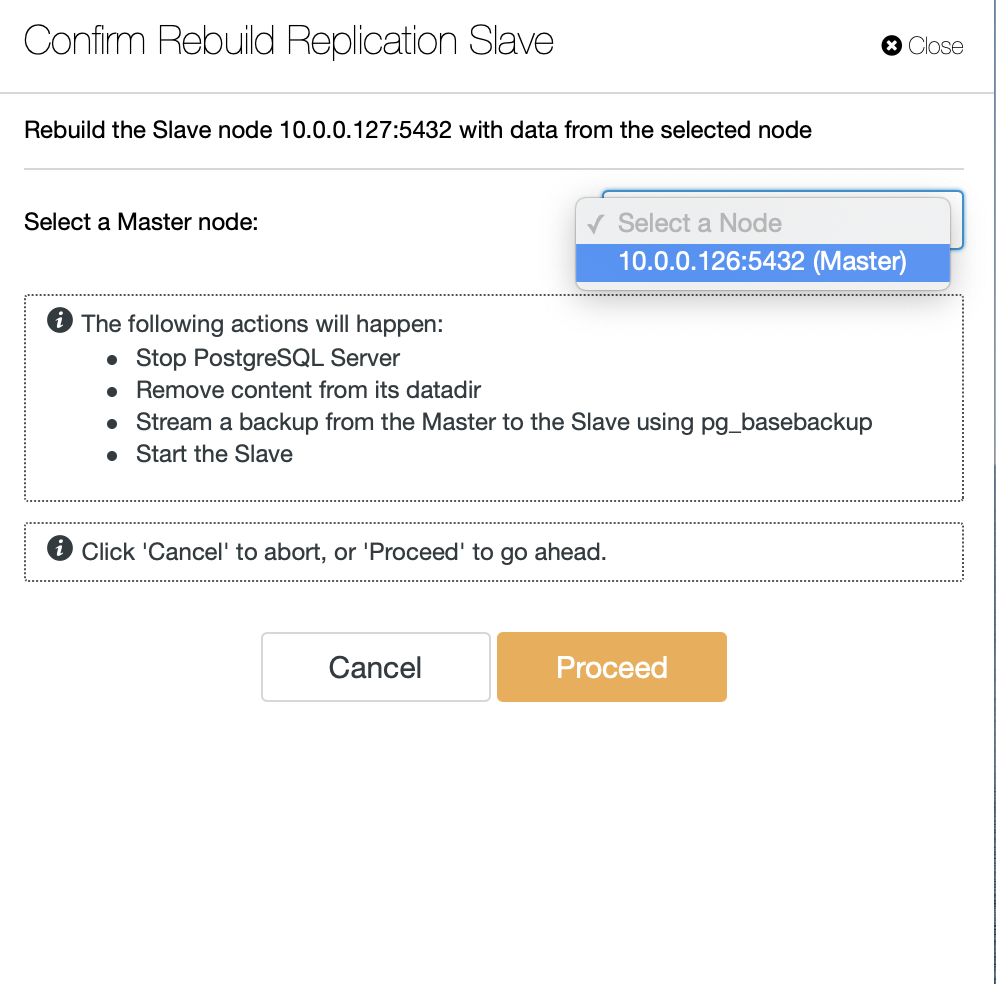
Next, we have to pick the node to rebuild slave from and that is all. ClusterControl will use pg_basebackup to set up the replication slave and configure the replication as soon as the data is transferred.
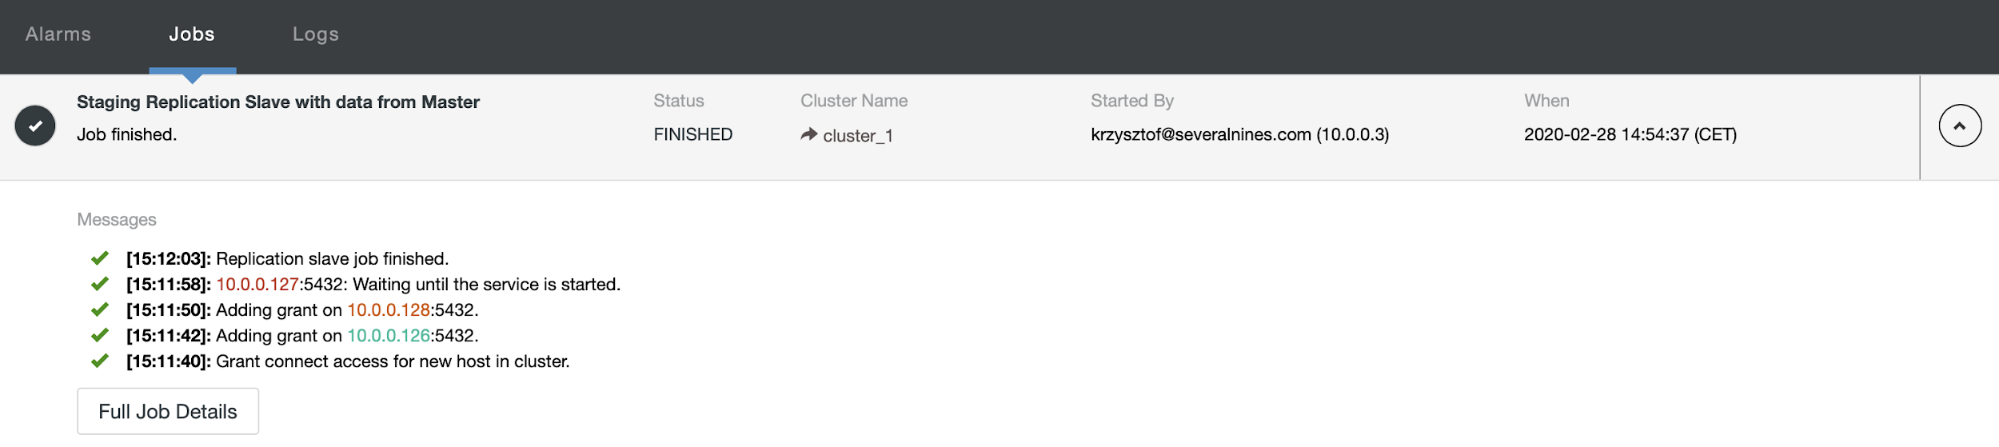
After some time job completes and the slave is back in the replication chain:
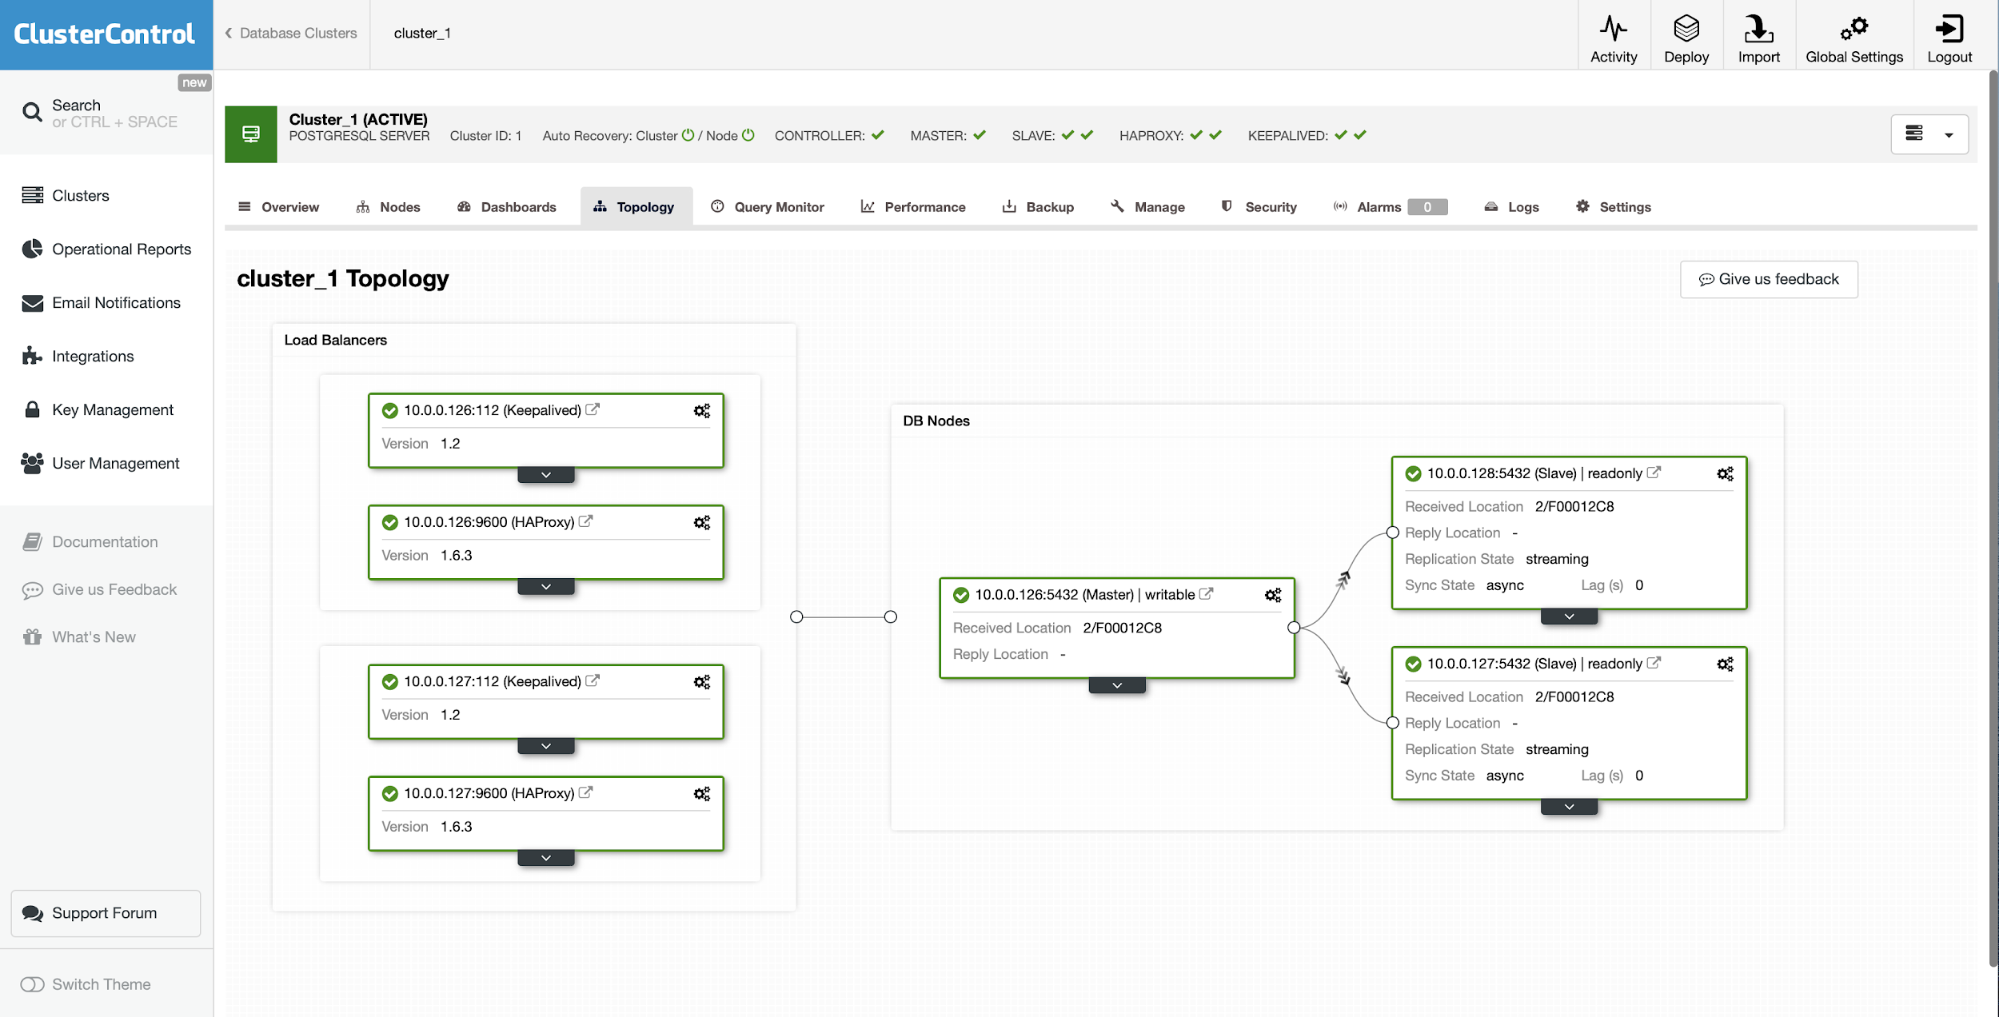
As you can see, with just a couple of clicks, thanks to ClusterControl, we managed to rebuild our failed slave and bring it back to the cluster.