How to run ONLYOFFICE integrated with Nextcloud on Cloudron
ONLYOFFICE is an open-source office suite distributed under GNU AGPL v3.0. It comprises collaborative online editors for text documents, spreadsheets, and presentations. Integrating ONLYOFFICE with open-source sync&share service Nextcloud, users are able to edit and co-author their documents stored there right within the platform.
Cloudron is a platform that offers sysadmin inside for self-hosted open-source tools and allows installing, managing and securing web apps on your server with less effort.
In this tutorial, we’ll learn how to easily run ONLYOFFICE in combination with Nextcloud on a Cloudron instance.
Step 1. Install and configure Cloudron on your server
Create a fresh Ubuntu Bionic 18.04 x64 server and run the following commands:
wget https://cloudron.io/cloudron-setup
chmod +x ./cloudron-setup
./cloudron-setup --provider <digitalocean | hetzner | generic | ovh ...]
Once done, proceed to https://<IP> in your browser and accept the self-signed certificate.
In the appeared Cloudron setup wizard, provide a domain like example.com.
Select the DNS service in which the domain is hosted from the drop-down list and enter the necessary info (such as API key, token, etc.). In case your hosting service is not on the list, domain setup can be done manually.
Once DNS setup is complete, you’re redirected to https://my.example.com. Create a Cloudron admin account: enter administrator user name, email and password.
Step 2. Install Nextcloud on Cloudron
Go to the Cloudron App Store, find and install Nextcloud app on your server with Cloudron.
Step 3. Install ONLYOFFICE on Cloudron
Go to the Cloudron App Store, find and install ONLYOFFICE app on your server with Cloudron.
Step 4. Install ONLYOFFICE connector for Nextcloud
Find and install the latest version of ONLYOFFICE integration app from the Nextcloud app library.
Step 5. Configure ONLYOFFICE app
Open the web terminal via the Console section to access the app's file system and edit the file /app/data/config/production-linux.json changing the default secret to your own unique secret key.
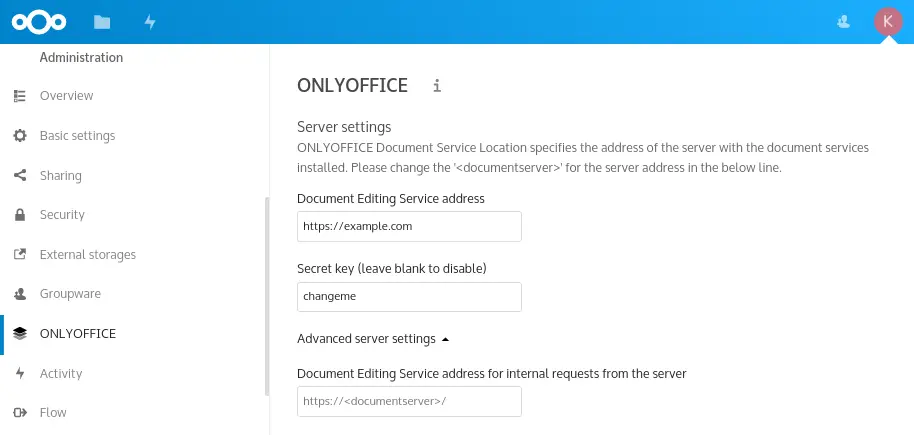
Go to the Settings page within your Nextcloud and select the ONLYOFFICE section on the left panel. Then, adjust the domain and specify the secret key (use the same one you’ve already changed in the app’s config file):
Go back to the web terminal and run:
supervisorctl restart ds:*.
That’s all. Now you can work on your documents using ONLYOFFICE editors within Nextcloud on your Cloudron instance.

