In this post we are going to walk through the steps of deploying a MERN stack application on the Google Cloud Platform. We will be deploying our React frontend and Node backend as separate services using Google App Engine, their Platform as a Service offering. In order to do this we are going to need to sign up for a GCP account. If you already have an account and have configured gcloud, you can skip the first couple of sections. Note: this tutorial assumes you have a demo application already built. If you do not, feel free to grab my code from https://github.com/ryanmercadante/Users-app-gcp
Table of Contents
- Signing up for GCP
- Creating our Project
- Setup the Cloud SDK
- Deploying our React Application
- Setup MongoDB using Atlas
- Deploying our Node.js API
- Recap
Signing up for GCP
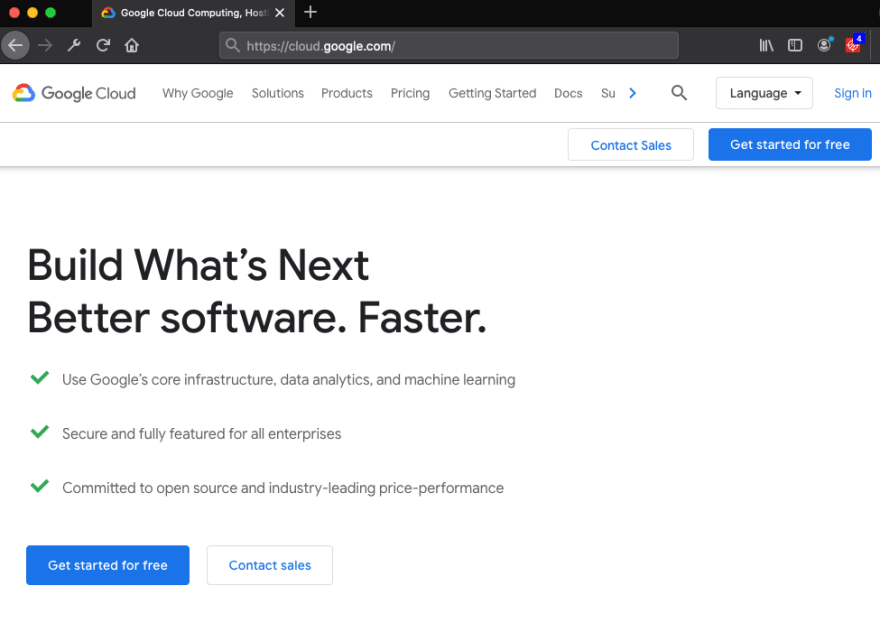
Head over to https://cloud.google.com/ and you should be presented with a page that looks something similar to this:
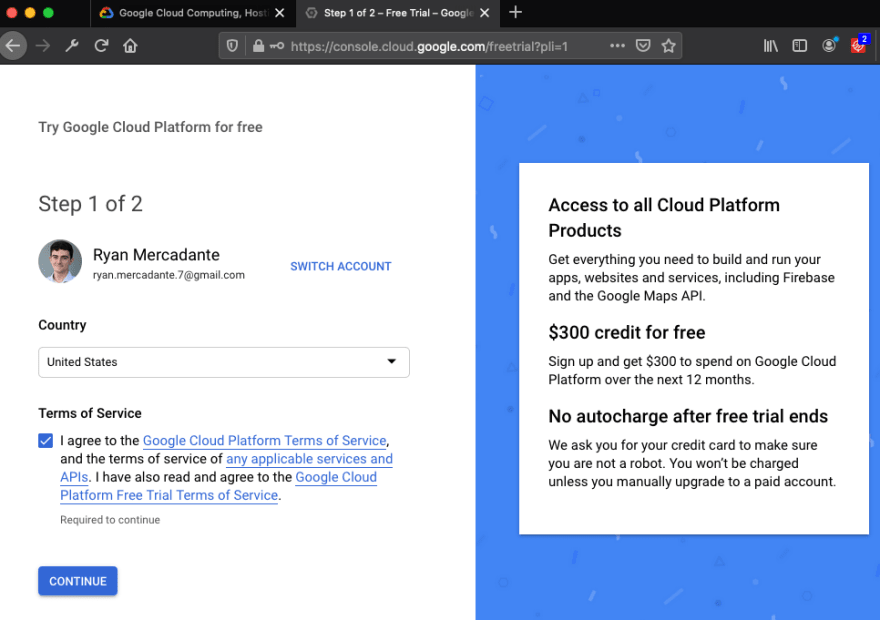
Click on the ‘Get started for free’ button and follow the steps. You’ll need to create a gmail account if you don’t have one already. Afterward you should be presented with a screen to try Google Cloud Platform for free. They have a very generous free plan, which gives you $300 dollars worth of credits for free and no auto charge if you run out. You have to manually upgrade to a paid account.
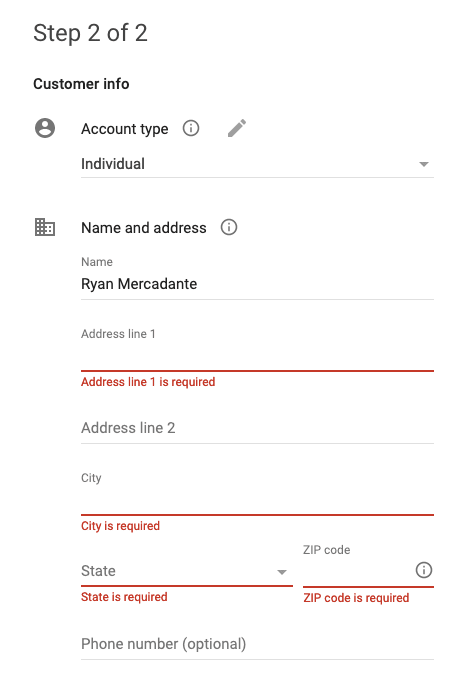
The second page of signing up is fairly straight forward, just make sure under ‘Account type’ you sign up for an Individual account and not a Business account.

Upon completion of the form, you should be redirected to the google console homepage.
Creating our Project
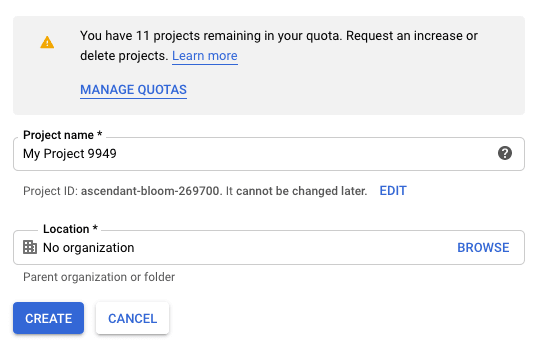
Now that we have an account setup, let’s create a new project. In the top navigation bar you should see a dropdown to select a project. Click on that and select New Project in the top right corner. You can name the project whatever you’d like, and google will automatically create a globally unique project id for you. You can edit this now but once you create the project you won’t be able to change it. I usually like to edit my project ids so they are a little bit easier to remember, such as the project name with my initials at the end of it. We are not going to select an organization at this time. Click on create when you are done with this.
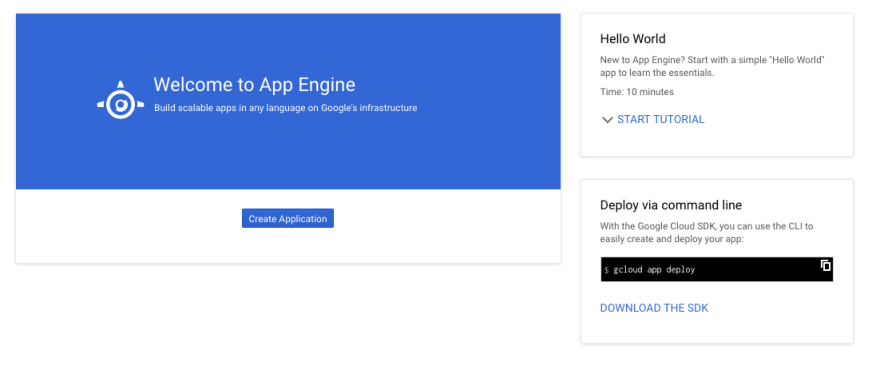
Head over to the navigation menu and select App Engine inside of the Compute section. First select download the SDK, we’ll be using this later to deploy our app to App Engine. When you are done install the SDK, come back to this page and select Create Application.
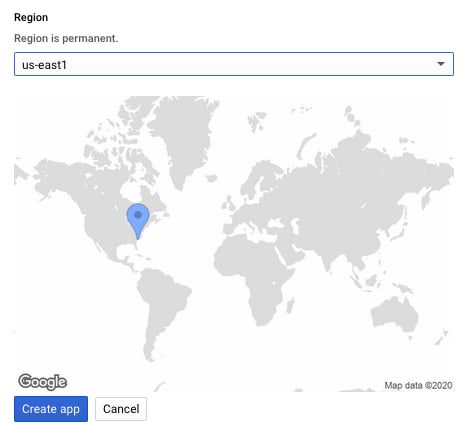
Select a region close to you (I will be using us-east1). On the next page we are going to select Node.js as our language, and Standard as our environment instead of Flexible. We will be using the standard environment so that our app can scale down to 0 instances when there is no traffic. This will allow us to run the app for free or for very little cost which is ideal in my case. You will want to use the flexible environment if you are using Docker containers and your app receives regular traffic, or if you want to use a programming language that the standard environment doesn’t support.

If you’d like to see a full list of differences between the standard and flexible environments head over to https://cloud.google.com/appengine/docs/the-appengine-environments.
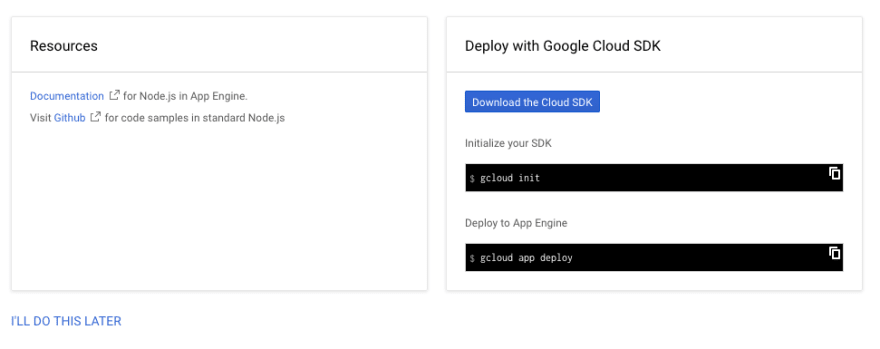
If you haven’t already done so go ahead and download the SDK, otherwise select I’ll do this later.
Setup the Cloud SDK
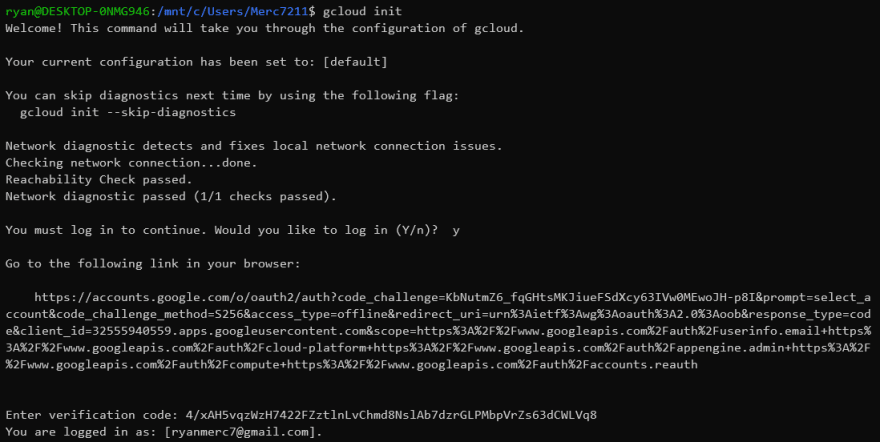
Open up your terminal of choice and run ‘gcloud init.’ This will run you through the steps of configuring gcloud, their CLI tool.
Deploying our React Application
Congrats on making it this far, now we get to the fun part. Head into the root directory of your react application and create an app.yaml file. This is where we configure our application settings for App Engine. It contains information about our code, runtime, URL paths and more. This is what our app.yaml file is going to look like.
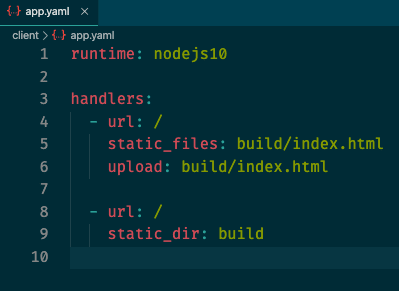
At the very least, our app.yaml needs to include a runtime, of which we are using nodejs10. The handlers will handle our static files that are in our build folder. If you haven’t created a build of your application yet you will want to do so now.
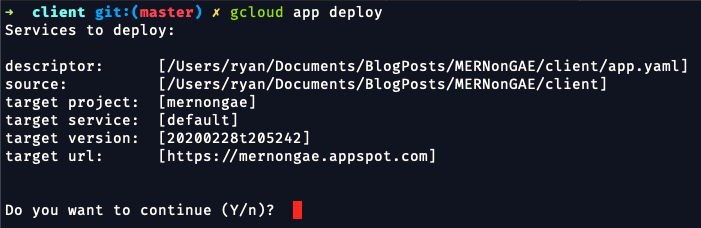
Because this is our first service that we are deploying, it will be deployed as the default service. Let’s go back to our terminal and run the command ‘gcloud app deploy’ from the root of our project. You will be asked if you want to continue, if you do enter Y for yes.
I am not deploying anything new so I have 0 files uploaded, but yours should be more than 0 if its your first time deploying your application or if you added something new since your last deploy.
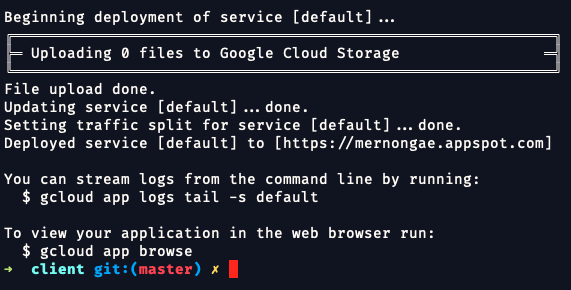
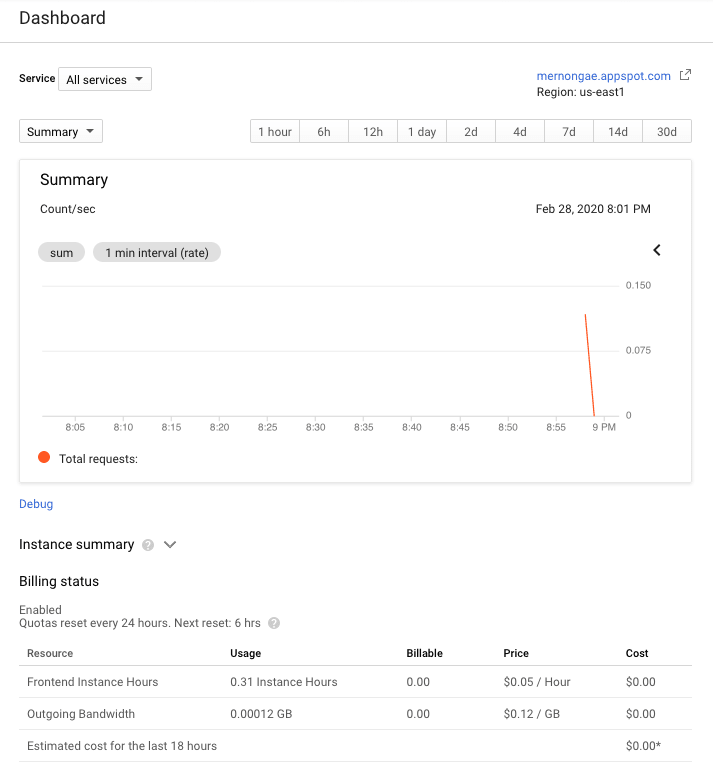
Now that your frontend is done deploying, run ‘gcloud app browse’ and checkout your deployed app! If you head back over to your GCP console and to the App Engine dashboard, you’ll see some statistics about your app.
If/when you deploy your app again, app engine won’t automatically delete your previous version that you deployed. You can see the different versions of your app under the versions tab. This is useful if you want to split traffic between different versions of your application for things like A/B testing. I won't cover that in this tutorial, but you can read more about that here https://cloud.google.com/appengine/docs/standard/nodejs/splitting-traffic. App Engine is smart enough to move traffic to the most recently deployed version of your application. If you select the older versions you can delete them if you choose to do so.
Setup MongoDB using Atlas
Before we deploy our node API, we should setup a database using MongoDB Atlas. Go to https://www.mongodb.com/cloud/atlas and either sign in to your account, or create one. After signing up you’ll be presented with a page to create an organization.
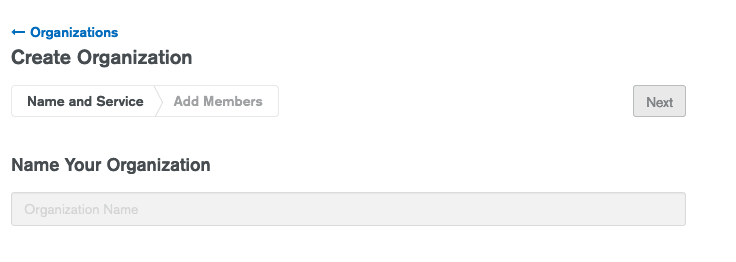
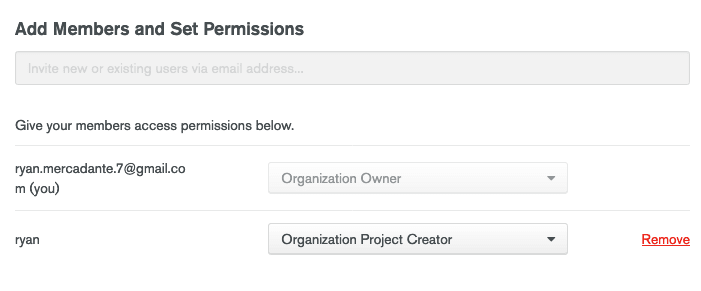
Since this is just an account for small personal projects, I am going to name my organization test. Click next, and then add a new user and give them the role of Organization Project Creator, otherwise you won’t be able to create any projects.
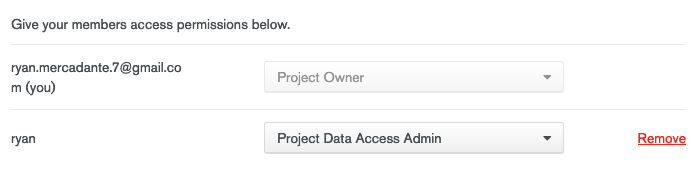
Afterward you’ll be redirected to your dashboard. Select create a project, and give your project a name. On the next page, when you click to add a new member, the user you created earlier should be presented as an option. Select that user and give them the Project Data Access Admin role. Because this is just a demo app, I am not going to worry about giving this user admin privileges, but for a real application with potentially sensitive information, you should be diligent about how you assign database roles to users.
Now it’s time to build a cluster. Select build a cluster in the center of the screen and then select the free shared clusters. Make sure to select Google Cloud Platform and the region closest to you that clearly states ‘Free Tier Available.’
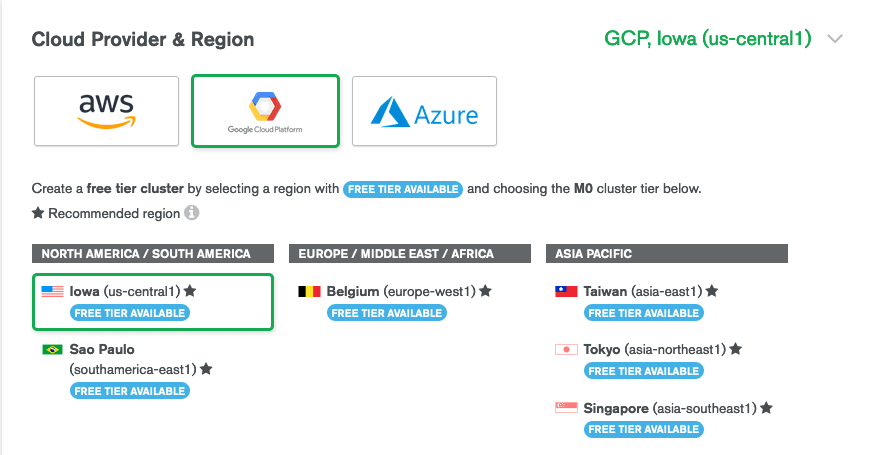
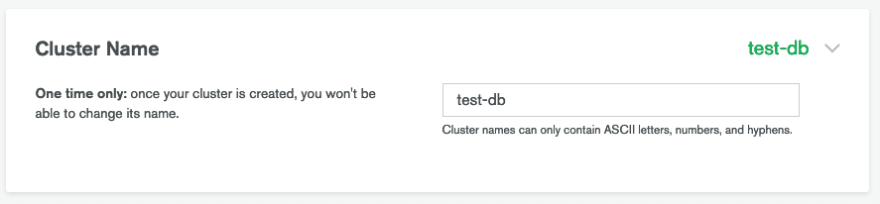
The M0 sandbox cluster tier is free forever so that is the one we’ll be selecting. You can rename the cluster to whatever you would like.
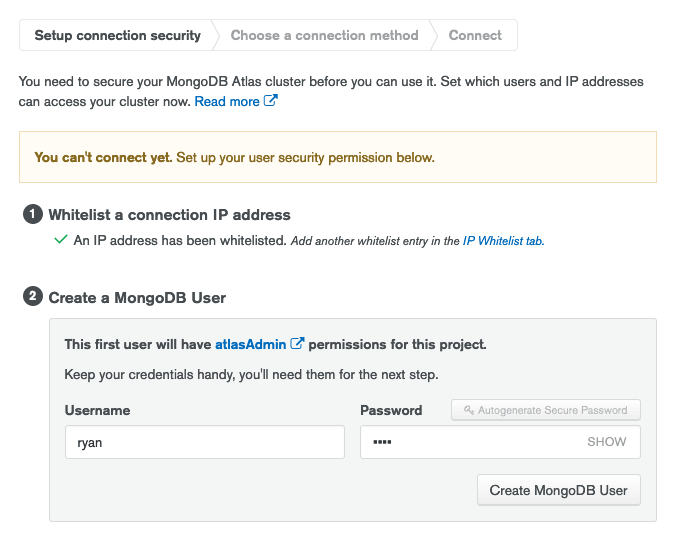
It should take a few minutes for your cluster to get setup, but once it does, click connect and whitelist 0.0.0.0. This will allow traffic from anywhere. This is fine for our demo app but for a production app you would probably never do this. You will also need to create a MongoDB user.
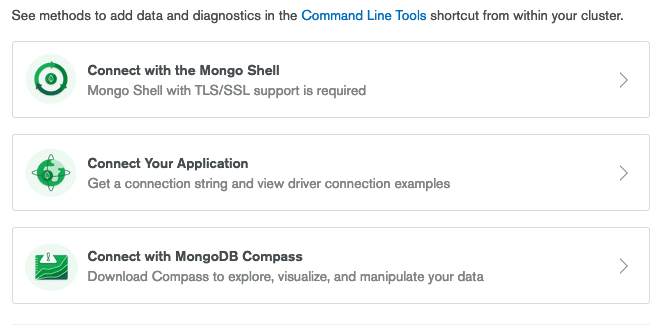
Next we need to choose a connection method. Select connect your application, and copy the connection string they provide for you to use in your application where needed.
Congrats! You now have your MongoDB cluster up and running. It has one primary node and two secondary nodes for data replication.
Deploying our Node.js API
Deploying our node api will follow similar steps we took to deploy our React frontend. We will create another app.yaml and place it in the root directory of our node application.
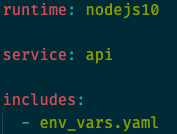
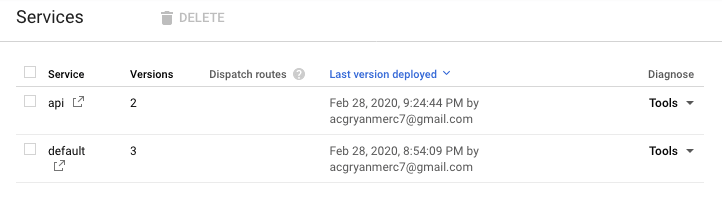
In the app.yaml for our react frontend, we didn’t name our service because it was our default service. Since this is not our default service, let’s just name it api. Once again we are use the nodejs10 runtime. Dealing with environment variables that are meant to be secret, such as our MongoDB URI, is a little bit tricky. The most straight forward solution I found was to create a separate yaml file for your environment variables, add that to your .gitignore file so it isn’t tracked, and use the includes element. Run the ‘gcloud app deploy’ command and your api will be deployed to App Engine. If you check the services tab, you should see both the default service and the api service, and how many version of each are deployed.
Both your frontend and backend are deployed now and you can go to the url that app engine created for you!
Recap
In this tutorial you learned how to deploy a React application, express API, and MongoDB database to Google Cloud Platform using Google App Engine and MongoDB Atlas. The steps you followed here are a great starting point for personal projects and I encourage you to build upon it. This application is most definitely not secure, and if you wanted to start building applications for clients utilizing GCP, https://cloud.google.com/appengine/docs/standard/nodejs/application-security is the first place I would start. In a future tutorial I plan to write about things like adding a custom domain, utilizing CI/CD, and more. If you have any questions, comments, or general feedback let me know in the comments below. If you would like to get in touch for any reason, feel free to connect with me on LinkedIn, follow me on Twitter, or send me an email. Thanks for reading!


Top comments (1)
Just a small note for others who follow: the
env_vars.yamlshould have theenv_variableskey at the top:it was hard to see because
env_vars.yamlis obviously not included in the final git repo :).