In this post I want to show you how to create your own private cloud with OpenFaaS Cloud and Kubernetes.
After the setup is complete, you can invite your team who will use their GitHub or GitLab accounts to log into a personal dashboard. CI/CD is built-in along with TLS, logging, encrypted secrets, DNS, and governance. Through a wildcard TLS certificate and DNS entry, each user and organization will receive their own sub-domain.
As the administrator, you’ll be defining a policy for which features are available, configuring auditing via Slack (or a webhook) and defining governance such as memory and CPU limits.
With your private cloud you’ll be able to deploy microservices, APIs, blogs, wikis, functions and more, whatever conforms to the OpenFaaS workload definition.
Updated December 2020: updated diagram to show that Helm 3 and arkade are used to install all required software from charts to CLIs used by ofc-bootstrap. OpenFaaS Cloud now also works on Raspberry Pi and ARM64, see the final links for more.
Pre-requisites
- A private or public Kubernetes cluster with Intel architecture (ARM is not supported at this time) with at least 3x nodes with 4GB RAM and 2vCPU each
Note: if you are planning on using k3s, then you should see the notes in the user-guide about disabling Traefik
-
An account with DigitalOcean, AWS, GCP or Cloudflare for automatic DNS configuration and TLS
-
A top-level domain that you own (
example.com), or a sub-zone (ofc.example.com) -
A GitHub.com account
Installed below:
- Local tooling: kubectl, faas-cli, ofc-bootstrap etc
An overview
The tool that we use to configure OpenFaaS Cloud (OFC) is ofc-bootstrap.

arkade automates kubectl and helm to deploy the above components
The core components installed are:
- OpenFaaS - to host your functions and endpoints
- OpenFaaS Cloud - CI/CD pipeline
- OpenFaaS Cloud - multi-user dashboard
- OpenFaaS Cloud - edge-auth and edge-router for OAuth2 support and multi-user routing
- SealedSecrets - to encrypt secrets for your repos
- buildkit - to build Docker images for your repos
- Minio - for build log storage
- Nginx-Ingress - to act as the IngressController for Kubernetes
- cert-manager - to issue TLS certificates
The installation takes between 50-100s, but most of the time is going to be spent in configuring the GitHub integration, security, TLS and DNS.
Download the tooling
Run these instructions on your laptop or local machine.
Clone ofc-bootstrap and then install its CLI:
mkdir -p ~/dev/
cd ~/dev/
git clone https://github.com/openfaas/ofc-bootstrap
cd ofc-bootstrap

curl -sLSf https://raw.githubusercontent.com/openfaas/ofc-bootstrap/master/get.sh | sudo sh
These instructions are also available in the user guide.
Note: You no longer need to install additional CLIs. ofc-bootstrap will download its own copies of kubectl, faas-cli, helm and kubeseal.
Create an overrides file
We can configure the ofc-bootstrap tool through a YAML file, this can be committed to git for later use, it covers everything from:
- Your secrets for things like: GitHub/GitLab and your Docker image registry
- The OAuth secret ID and client ID
- Your domain name for the private cloud
- Your preferences for OpenFaaS Cloud governance - read-only functions, memory limits, Dockerfile support and custom templates
Some secrets are read from files, some are generated from scratch and others are taken from a literal value.
Fortunately, you do not need to edit the whole file, you can create a set of override files with just the changes you need.
- Decide your domain, I’m picking
ofc.example.com, so create a new file and add:
Contents of: ofc.example.com.yaml
root_domain: ofc.example.com
We still have work to do, but this now would allow us to run ofc-bootstrap apply -f example.init.yaml -f ofc.example.com.yaml, which takes both the defaults for the current version of OFC and our domain override. We can also override each secret in the same way.
Configure your Docker registry
All images built by OFC will be stored in a Docker registry before being deployed, you can use the Docker Hub which is the default, or use a private registry.
Let’s log into our Docker registry and create a credentials file:
export USERNAME="docker-username"
ofc-bootstrap registry-login --username $USERNAME --password-stdin
By default this will use your Docker Hub account, but you can also Set up your own private TLS registry using arkade, use an existing registry with --server, or use AWS ECR (see the notes in the repo for this).
After running this command we’ll have a file in credentials/.config.json, which you can see that the example.init.yaml file will look for on disk, and use to create a Kubernetes secret later.
Add a line for your registry into the overrides file:
registry: docker.io/alexellis/
Create your GitHub App
Now let’s generate a GitHub App, which is how users will enroll a repo into our private cloud.
# We need to run this from the git repo, to access some templates
cd ~/dev/ofc-bootstrap

export DOMAIN="ofc.example.com"
export GH_APP_NAME="Our Team OFC"
ofc-bootstrap create-github-app \
  --name "$GH_APP_NAME" \
  --root-domain $DOMAIN
Note: If you don’t want to use TLS, you can specify
--insecureto use HTTP URLs
After running this command you will be redirected to GitHub, where a GitHub app will be created for you, and then YAML will be printed out on the terminal which you can save into your overrides file ofc.example.com.yaml.
secrets:
- name: github-webhook-secret
  literals:
  - name: github-webhook-secret
    value: cb539f01e7f06e0dbc60bc1c532ac4b3cb77d6e2
  namespace: openfaas-fn
  filters:
  - scm_github
- name: private-key
  literals:
  - name: private-key
    value: |
      -----BEGIN RSA PRIVATE KEY-----
      -----END RSA PRIVATE KEY-----
  namespace: openfaas-fn
  filters:
  - scm_github
root_domain: ofc.example.com
github:
  app_id: "55667"
The private-key is used to authenticate on behalf of each user and repository to update GitHub status checks and build logs. It also allows the use of private repositories where the token is used to clone the repository.
You should also note down your GitHub App URL, this is how each member of your team will enroll repos for CI/CD.
GitHub App result received.
App: Our Team OFC       URL: https://github.com/apps/our-team-ofc
Visit your App’s configuration page at https://github.com/settings/apps
Now click the “Active” button, sub-heading “We will deliver event details when this hook is triggered.”
Create the OAuth integration
To make sure that only authorized users can access dashboards and the cloud, we can integrate with GitHub via OAuth.
Our example Authorization URL is https://auth.system.example.com/
Now update your overrides file:
Add this secret, replacing the contents of value: etc with the client secret
- name: "of-client-secret"
  literals:
    - name: of-client-secret
      value: "4c8246da512c296861b7cd499a32f8194ca8945c"
  filters:
    - "auth"
  namespace: "openfaas"
Add your Client ID on a new line along with enable_oauth:
oauth:
  client_id: 8219a0399a231b94175f
enable_oauth: true
Configure a list of users
Now configure a list of users who you want to have access to log in, the easiest way to do this is through a Kubernetes secret, create a file named credentials/CUSTOMERS and then add the two secrets to the YAML overrides file:
echo alexellis > credentials/CUSTOMERS
echo openfaas >> credentials/CUSTOMERS
Now edit the overrides file:
- name: "of-customers"
  files:
    - name: "of-customers"
      value_from: "credentials/CUSTOMERS"
  namespace: "openfaas"
  filters:
    - "default"
- name: "customers"
  files:
    - name: "customers"
      value_from: "credentials/CUSTOMERS"
  namespace: "openfaas-fn"
  filters:
    - "default"
By default OFC will read the list of customers from a HTTPS URL, but since we have overridden this, let’s configure the bootstrap tool to use the Kubernetes secret.
Add the following to your overrides file:
customers_secret: true
Auditing via Slack
You can set up auditing and monitoring via a Slack webhook. Simply create a public or private channel in your Slack workspace, then create an incoming URL.
Set the Slack URL in your overrides file:
slack:
  url: http://slack.com/secret-url-goes-here
Governance
You can add additional overrides for the various features made available in example.init.yaml, including memory and CPU limits.
See the ofc-boostrap user-guide or the example.init.yaml file for more.
Configure TLS and DNS
ofc-bootstrap can configure TLS and DNS automatically so that every user and org in your cluster gets their own sub-domain.
For instance, if I deployed a webhook receiver called stripe-payment to a GitHub account linked under my user account (alexellis), my URL would be:
https://alexellis.ofc.example.com/stripe-payment
So called, pretty URLs are also available through the ingress-operator project, so that if we wanted we could add a custom domain like: stripe.example.com
Decide whether you are going to use AWS Route53, GCP Cloud DNS, DigitalOcean, or Cloudflare for DNS, then configure your user account as per the cert-manager docs. We will be using the DNS01 ACME challenge, so that we can obtain a wildcard certificate for all our team’s functions.
I’m going to use DigitalOcean for TLS for my domain ofc.example.com, it’s simply enough to use an API token from the dashboard, AWS and GCP configuration is slightly more involved.
Now update the overrides file:
tls: true
tls_config:
  dns_service: digitalocean
  issuer_type: "staging"
  email: "your@email.com"
Set your email, and an issuer_type of staging for the initial installation. This can be changed to prod after you are sure everything is configured correctly.
If you look at the example.init.yaml file you’ll see a section with secrets for DNS, you can either create your DigitalOcean API token in that location, or customise it by adding a new secret to your overrides file.
Default location:
- name: "digitalocean-dns"
  files:
    - name: "access-token"
      value_from: "~/Downloads/do-access-token"
  filters:
    - "do_dns01"
  namespace: "cert-manager"
You may want to customise it as follows:
- name: "digitalocean-dns"
  files:
    - name: "access-token"
      value_from: "credentials/do-access-token"
  filters:
    - "do_dns01"
  namespace: "cert-manager"
Deploy your OpenFaaS Cloud
Take a few moments to review your overrides file and the tutorial post so far, if you think you have everything configured correctly, and have checked it against GitHub, then go ahead and run ofc-bootstrap
cd ~/dev/ofc-bootstrap

ofc-bootstrap apply \
 -f example.init.yaml \
 -f ofc.example.com.yaml
You can now monitor the progress as a series of helm charts are installed, secrets are created and templated Kubernetes YAML files are applied.
Here’s the full example of my overrides file:
secrets:
- name: github-webhook-secret
  literals:
  - name: github-webhook-secret
    value: cb539f01e7f06e0dbc60bc1c532ac4b3cb77d6e2
  namespace: openfaas-fn
  filters:
  - scm_github
- name: private-key
  literals:
  - name: private-key
    value: |
      -----BEGIN RSA PRIVATE KEY-----
      -----END RSA PRIVATE KEY-----
  namespace: openfaas-fn
  filters:
  - scm_github
- name: "of-client-secret"
  literals:
    - name: of-client-secret
      value: "4c8246da512c296861b7cd499a32f8194ca8945c"
  filters:
    - "auth"
  namespace: "openfaas"
- name: "of-customers"
  files:
    - name: "of-customers"
      value_from: "credentials/CUSTOMERS"
  namespace: "openfaas"
  filters:
    - "default"
- name: "customers"
  files:
    - name: "customers"
      value_from: "credentials/CUSTOMERS"
  namespace: "openfaas-fn"
  filters:
    - "default"
- name: "digitalocean-dns"
  files:
    - name: "access-token"
      value_from: "credentials/do-access-token"
  filters:
    - "do_dns01"
  namespace: "cert-manager"

root_domain: ofc.example.com
github:
  app_id: "55667"

oauth:
  client_id: 8219a0399a231b94175f

enable_oauth: true

slack:
  url: http://slack.com/secret-url-goes-here

tls: true
tls_config:
  dns_service: digitalocean
  issuer_type: "staging"
  email: "your@email.com"
Post-install
Our first task is to find the IP address of the LoadBalancer created for the IngressController. This is the Public IP that will be used for all incoming traffic.
Note: if you are running in a private VPC, or a local on-premises cluster, or a laptop, then you can obtain a public Virtual IP through inlets-pro.
Create three DNS entries, if you are using AWS you will create CNAME records instead of A records.
*.ofc.example.com- to serve each user / org functionsystem.ofc.example.com- the dashboardauth.system.ofc.example.com- used for OAuth
Deploy your first application or function
Now head over to the OFC User Guide which will show you how to deploy a function using Node.js.
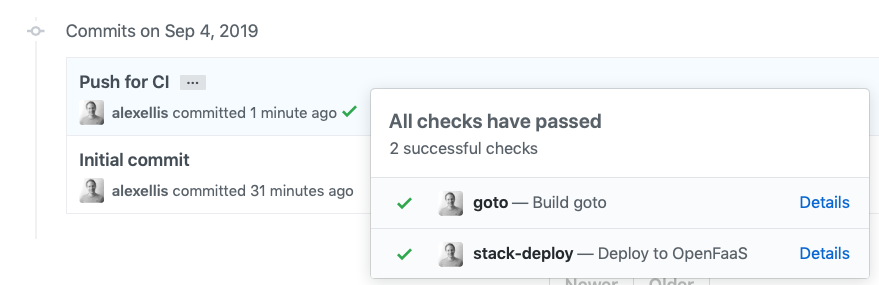
An example of CI/CD:
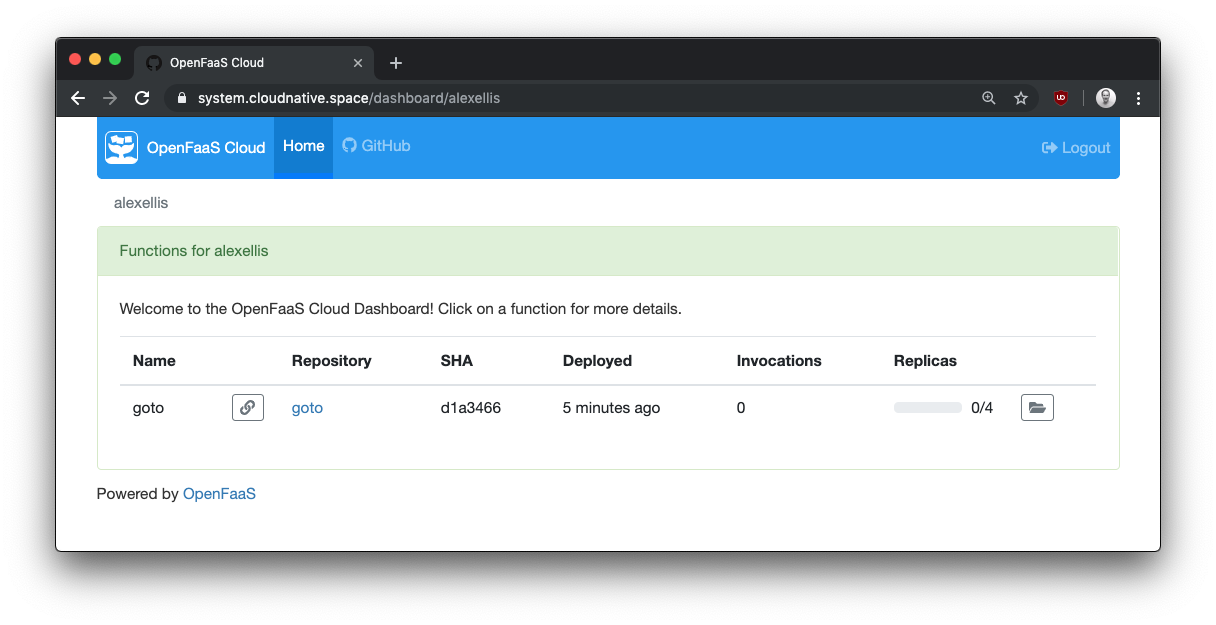
The user-level dashboard:
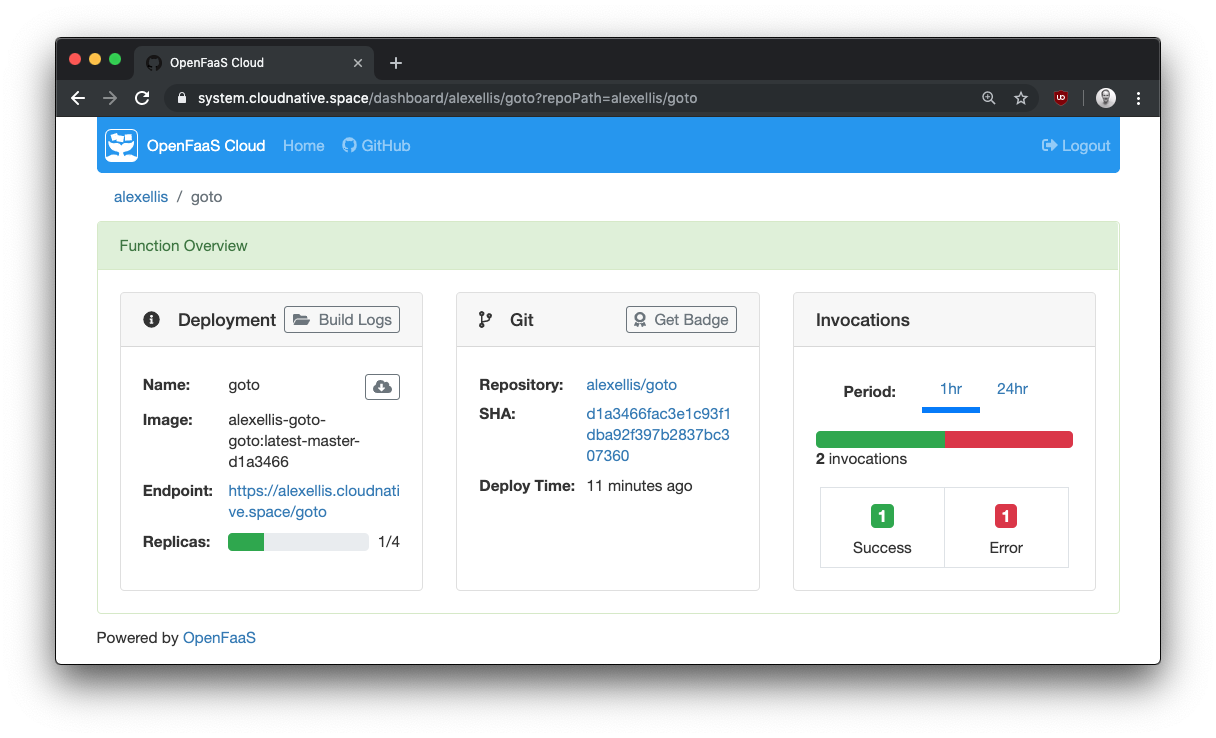
Details for an endpoint:
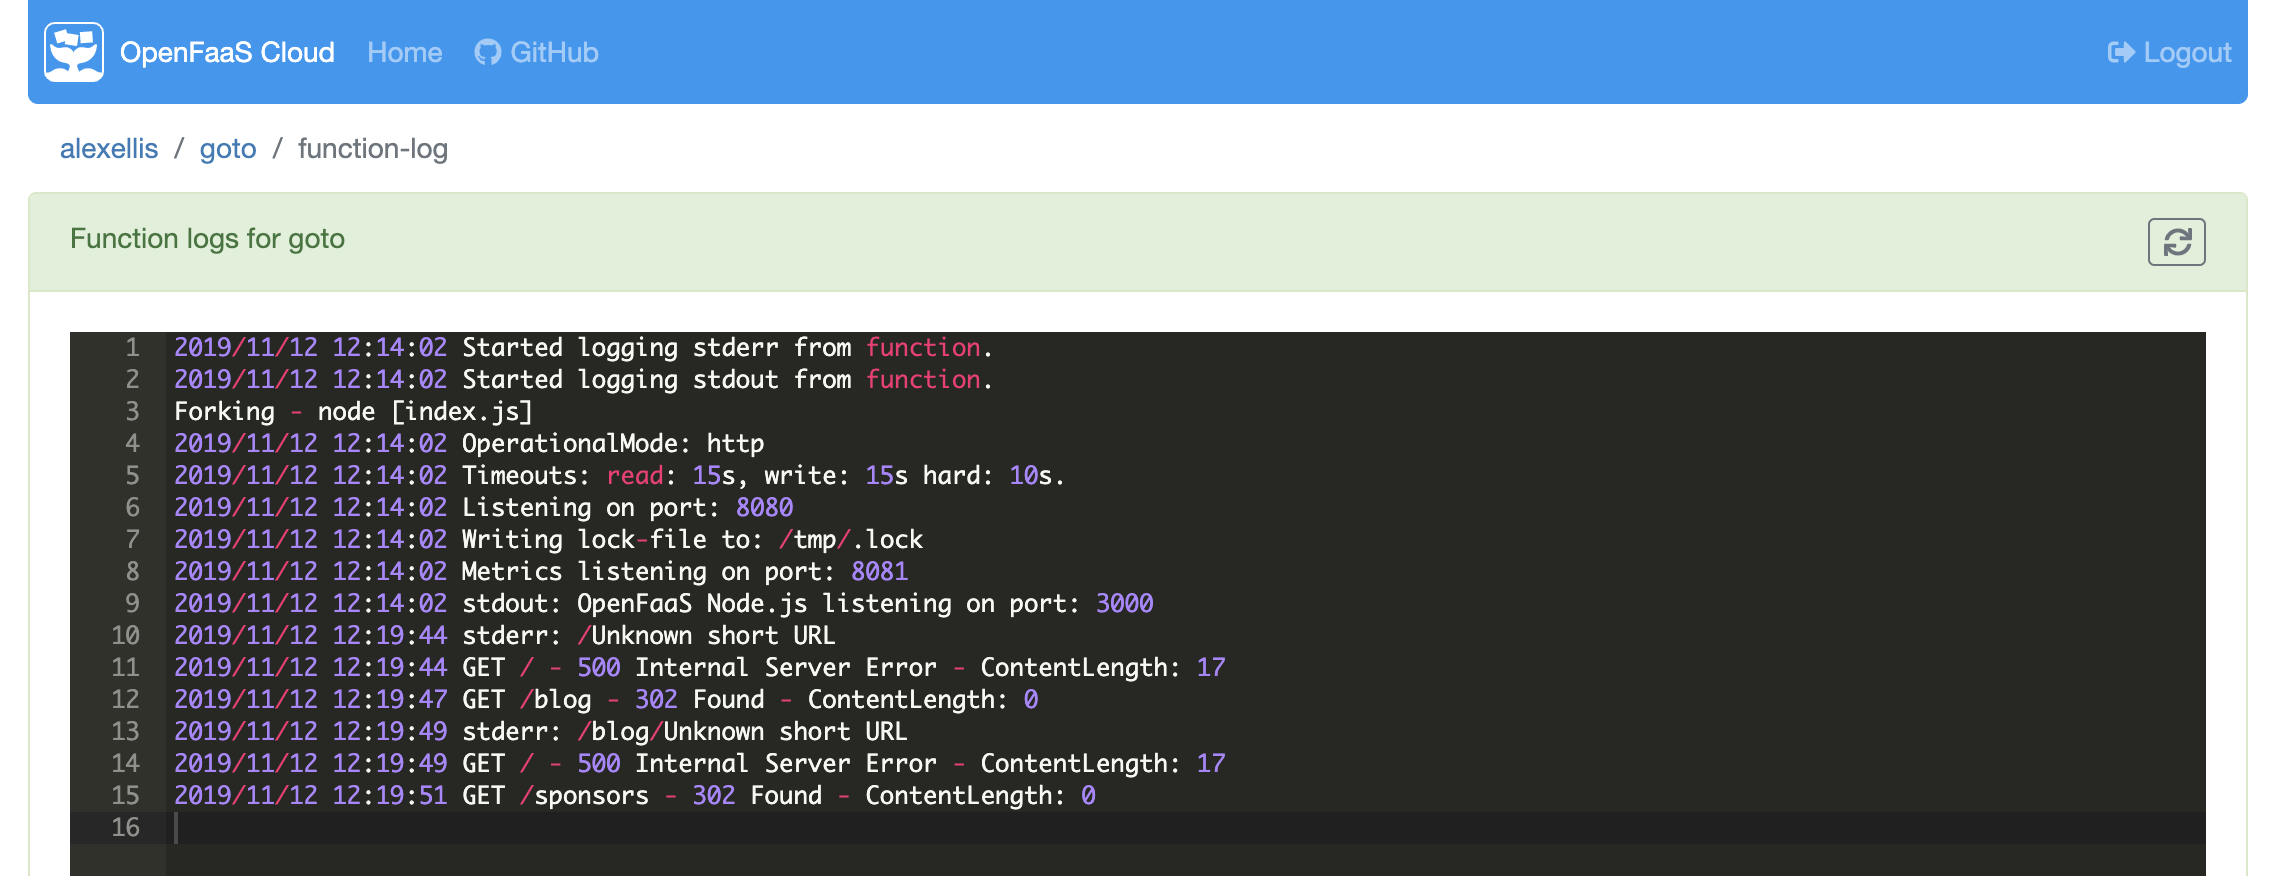
Runtime logs are also available:
Alternative, you can browse the blog or the docs.
Troubleshooting and support
You can pay an engineer from OpenFaaS Ltd to setup OpenFaaS Cloud on your preferred cloud, reach out sales@openfaas.com to arrange a call. Likewise, if you have features in mind, you can check the roadmap, or reach out about support.
See the troubleshooting guide in our docs
Wrapping up
We have now deployed a private cloud using OpenFaaS cloud, we can invite our team and users, who will each have their own dashboard to monitor and manage functions or microservices.
Everything we have deployed is stateless, and is running on Open Source software from the CNCF landscape, this means that disaster recover is easy, just run ofc-bootstrap against a cluster, and git push.
Get OFC even quicker than that
You can request an expert installation for evaluation, or for production use. Just contact us and let us know which option you prefer.
Or install OFC for local development by skipping TLS and OAuth, this reduces the time to around 15 minutes:
OpenFaaS Cloud for Development
Are you an EKS user? We have a specific guide for you that covers IAM, Route53, and role management: Build your own OpenFaaS Cloud with AWS EKS
As of December 2020 - OpenFaaS Cloud can also be used on a Raspberry Pi, find out how in the OpenFaaS 4th Birthday call
Source code / GitHub
You can fork/star/browse the code on GitHub:
We also have a video recording from KubeCon covering some customer case-studies and community projects that are running on OpenFaaS Cloud: OpenFaaS Cloud + Linkerd: A Secure, Multi-Tenant Serverless Platform - Charles Pretzer & Alex Ellis

Alex Ellis
Founder of @openfaas.