
The user lockout feature is the way to improve application security by locking out a user that enters a password incorrectly several times. This technique can help us in protecting against brute force attacks, where an attacker repeatedly tries to guess a password.
In this article, we are going to learn how to implement the user lockout functionality in our application and how to implement a custom password validator that extends default password policies.
To navigate through the entire series, visit the ASP.NET Core Identity series page.

User Lockout Configuration
The default configuration for the lockout functionality is already in place, but if we want, we can apply our configuration. To do that, we have to modify the AddIndentity method in the ConfigureService method for .NET 5 or previous versions:
services.AddIdentity<User, IdentityRole>(opt =>
{
    //previous code removed for clarity reasons

    opt.Lockout.AllowedForNewUsers = true;
    opt.Lockout.DefaultLockoutTimeSpan = TimeSpan.FromMinutes(2);
    opt.Lockout.MaxFailedAccessAttempts = 3;
})
In .NET 6, we have to modify the Program class:
builder.Services.AddIdentity<User, IdentityRole>(opt =>
{
    //previous code removed for clarity reasons
    opt.Lockout.AllowedForNewUsers = true;
    opt.Lockout.DefaultLockoutTimeSpan = TimeSpan.FromMinutes(2);
    opt.Lockout.MaxFailedAccessAttempts = 3;
})
The user lockout feature is enabled by default, but we state that here explicitly by setting the AllowedForNewUsers property to true. Additionally, we configure a lockout time span to two minutes (default is five) and maximum failed login attempts to three (default is five). Of course, the time span is set to two minutes just for the sake of this example, that value should be a bit higher in production environments.
So, this is the way to configure the user lockout functionality in our application by using IdentityOptions.
Implementing User Lockout in the Login Action
If we check the Login action, we are going to see this code:
var result = await _signInManager.PasswordSignInAsync(userModel.Email,
    userModel.Password, userModel.RememberMe, false);
The last parameter from the PasswordSignInAsync method stands for enabling or disabling the lockout feature. For now, it’s disabled and we have to enable it by setting it to true. Furthermore, this method returns a SignInResult with the IsLockedOut property we can use to check whether the account is locked out or not.
With that said, let’s modify the Login action:
[HttpPost]
[ValidateAntiForgeryToken]
public async Task<IactionResult> Login(UserLoginModel userModel, string returnUrl = null)
{
    if (!ModelState.IsValid)
    {
        return View(userModel);
    }

    var result = await _signInManager.PasswordSignInAsync(userModel.Email, userModel.Password, userModel.RememberMe, lockoutOnFailure: true);
    if (result.Succeeded)
    {
        return RedirectToLocal(returnUrl);
    }

    if (result.IsLockedOut)
    {
        var forgotPassLink = Url.Action(nameof(ForgotPassword),"Account", new { }, Request.Scheme);
        var content = string.Format("Your account is locked out, to reset your password, please click this link: {0}", forgotPassLink);

        var message = new Message(new string[] { userModel.Email }, "Locked out account information", content, null);
        await _emailSender.SendEmailAsync(message);

        ModelState.AddModelError("", "The account is locked out");
        return View();
    }
    else
    {
        ModelState.AddModelError("", "Invalid Login Attempt");
        return View();
    }
}
By setting the lockoutOnFailure parameter to true, we enable the lockout functionality, thus enable modification of the AccessFailedCount and LockoutEnd columns in the AspNetUsers table:

The AccessFailedCount column will increase for every failed login attempt and reset once the account is locked out. Additionally, the LockoutEnd column will have a DateTime value to represent the period until this account is locked out.
As we can see in the code, we check the IsLockedOut property, and if it is true, we send an email with the forgot password link and appropriate message, and return information about the locked out account, to the user.
About an Email Message
Sending an email message to inform a user about a locked-out account is a good practice. By doing that, we encourage the user to act proactively. That user can reset the password, or report that something is strange because they didn’t try to log in, which means that someone is trying to hack the account, etc.
Testing Time
Okay, let’s test this implementation.
If we try to log in with the wrong credentials, we will get the Invalid Login Attempt error and the AccessFailedCount column will increase:
![]()
Now, if we try the same credentials two more times:
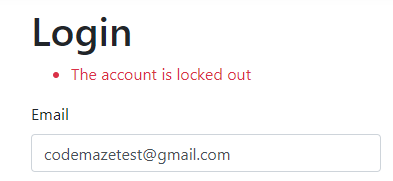
We can see the account locked out and we can confirm that in the database:
![]()
Also, we can see the AccessFailedCount is reset.
You can check your email, to find the link to the forgot password action. From there, everything is familiar because we talked about it in a previous article.
Custom Password Validation
As we can see from the previous example, the user gets an email with the link to reset the password. But, even though IdentityOptions already has different password configuration properties, we can add custom validations as well. For example, we don’t want a password to be the same as a username or we don’t want a password to contain the word password in it, etc.
You get the point.
Well, let’s see how to do that.
First, we are going to create a new folder CustomValdiators with a single class inside:
public class CustomPasswordValidator<TUser> : IPasswordValidator<TUser> where TUser : class
{
public async Task<IdentityResult> ValidateAsync(UserManager<TUser> manager, TUser user, string password)
{
var username = await manager.GetUserNameAsync(user);
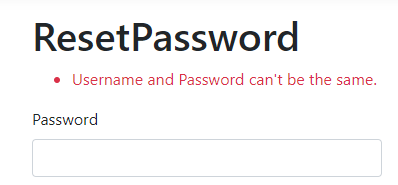
if (username.ToLower().Equals(password.ToLower()))
return IdentityResult.Failed(new IdentityError { Description = "Username and Password can't be the same.", Code = "SameUserPass" });
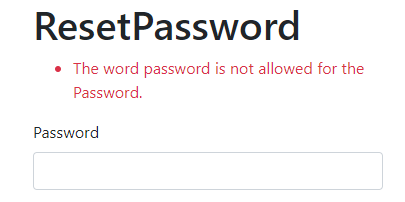
if (password.ToLower().Contains("password"))
return IdentityResult.Failed(new IdentityError { Description = "The word password is not allowed for the Password.", Code = "PasswordContainsPassword" });
return IdentityResult.Success;
}
}
We have to inherit from the IPasswordValidator<TUser> interface and implement the ValidateAsync method. Inside, we extract a username from a current user and then execute the required validations. If these validations check out, we return the Failed identity result, otherwise, we return success.
Now, we have to register this custom validator:
services.AddIdentity<User, IdentityRole>(opt =>
{
    //code removed for clarity reasons
})
 .AddEntityFrameworkStores<ApplicationContext>()
 .AddDefaultTokenProviders()
 .AddDefaultTokenProviders()
 .AddTokenProvider<EmailConfirmationTokenProvider<User>>("emailconfirmation")
 .AddPasswordValidator<CustomPasswordValidator<User>>();
And that’s it. With the help of the AddPasswordValidator method, we can register our custom validator class. So, the final step is to test this feature.
If we try to use the password with the „password“ word in it:
And if we try to use the same username and password:
Excellent. This also works for the Registration process.
Conclusion
In this article, we’ve learned:
- How to create a custom Lockout configuration
- The way to implement User Lockout functionality
- Why is a good practice to send an email message for lockout
- How to implement custom password validation
In the next article, we are going to talk about two-way authentication in ASP.NET Core Identity.
So, stay with us.
Which Email should have in Login and
i have this Smtp yet
Hi Umair. This article is the part of the series, and you can find all the articles here: https://code-maze.com/asp-net-core-identity-series/
If you go through them, you will see which email we used. But, you can use your own email for sure, just register your user first with that email. So, my advice is to follow all the articles from the start of the series and you will be guided step by step.
Thanx you so much But Your work is so impressive For all Reader…..
My issue Resolve When I Read all Tutorial….thanx mate.
Awesome. Thanks for letting us know that. I’m glad the tutorial was helpful to you.
If I need to lockout a user for undefinite untill it unlocks by admin, so how to do it?
You can always set this default value to your desired value: opt.Lockout.DefaultLockoutTimeSpan = TimeSpan.FromMinutes(2);
You don’t have to use minutes.
Once we set the configuration in AddIdentity(), while we create new user do we need to set the LockoutEnabled property explicitly to true? Or will it be done automatically by user manager based on the configuration settings?
I using:
services.Configure(opt =>
{
opt.Lockout.AllowedForNewUsers = true;
opt.Lockout.DefaultLockoutTimeSpan = TimeSpan.FromMinutes(2);
opt.Lockout.MaxFailedAccessAttempts = 3;
});
But it not working. Actually, when I make the 1st wrong password, it will run in services.Configure. when I make the 2nd wrong password. It doesn’t run on. I don’t know why. Can you help me. Thanks
I am not sure what are you trying you trying to do but this configuration triggers only once when your app starts and when it registers Identity services. I have explained what this configuration does. All you have to do is to try logging in three times with a wrong password and the account will be locked out for two minutes.
I means. Why is my account not locked when I entered incorrectly 3 times with this configuration. It just run 1 times when I login.
I am not sure. My suggestion is to download my siurce code and run the app. If the lockout works, and it should be working, compare my solution with yours. At this point, I really can’t help you more than that.
Yep. Tks you <3
My UserStore inheritance: IUserStore, IUserEmailStore, IUserPhoneNumberStore,
IUserTwoFactorStore, IUserPasswordStore, IUserRoleStore
I’ve a question about this article.
First of all, compliments for the article, it is very clear and I was able to implement everything without a problem.
The only thing it is missing is that, when the user is locked out and the identityserver sends the e-mail to reset the password, there is no place where the LockoutEnd field is reset to NULL, so even if I correctly reset my password, I’m still not able to login because the response is always “Lockedout”.
So my question is, where is the right place where to put a manual reset of the field “LockoutEnd”? Is it correct to set it soon after ResetPassword confirmation page?
One detail: I set the DefaultLockoutTimeSpan to 99999 days, so the user never be unlocked, unless he/she reset password or with manual intervention from an administrator.
Thanks.
Hello Luigi. You can add your logic to remove the lockout as soon as password is modified successfully. So, at the and of the ResetPassword action. Also, you don’t have to set the LockoutEnd to NULL, basically setting that column to any date in the past will unlock the account. For that you can use the expression like this: await _userManager.SetLockoutEndDateAsync(user, new DateTime(2000, 1, 1));
About the last note (“One detail” part), it is all up to you and your requirements. If this fits your needs, then go for it.
Thank you very much for the kind words.
Best regards.
password.ToLower().Contains(„password“) is a typo.
Somehow quotation marks were wrong. Now it is fixed. Thanks for the suggestion.
Funny quotes also in code in the ‘Implementing User Lockout in the Login Action’ section: “var message = new Message(new string[] { userModel.Email }, „Locked out account information“, content, null);”
Appreciate it. I really do.
Thank you man. You are the best
Thanks a lot. We are doing our best. Thanks for reading as well.
Thank you for great tutorials! For a newbie like me they are the easiest ones to follow that I could find.
Just a point to note that „ and “ characters have been used in a couple of places in this article. Should be ” and ”
🙂
Hello Serg. Thank you for your comment and for reading our articles. It is always a pleasure to hear something like that from our readers. Thank you for the suggestion as well, but I don’t understand (it’s pretty late here so don’t get me wrong). Does quotation marks play some role in your suggestion?
I sure am impressed with the quality of these tutorials.
Keep up the good work!
Thank you very much Jeff. Best regards.