I wanted to write about creating inspectable custom UITableViewCell, but I thought it might be better make a use case for it: data entry.

There is one big advantage of using UITableViewController over using your own implementation of UIScrollView and some more views: you don’t have to deal with Autolayout and keyboard notifications to align your inputs, you get them for free.
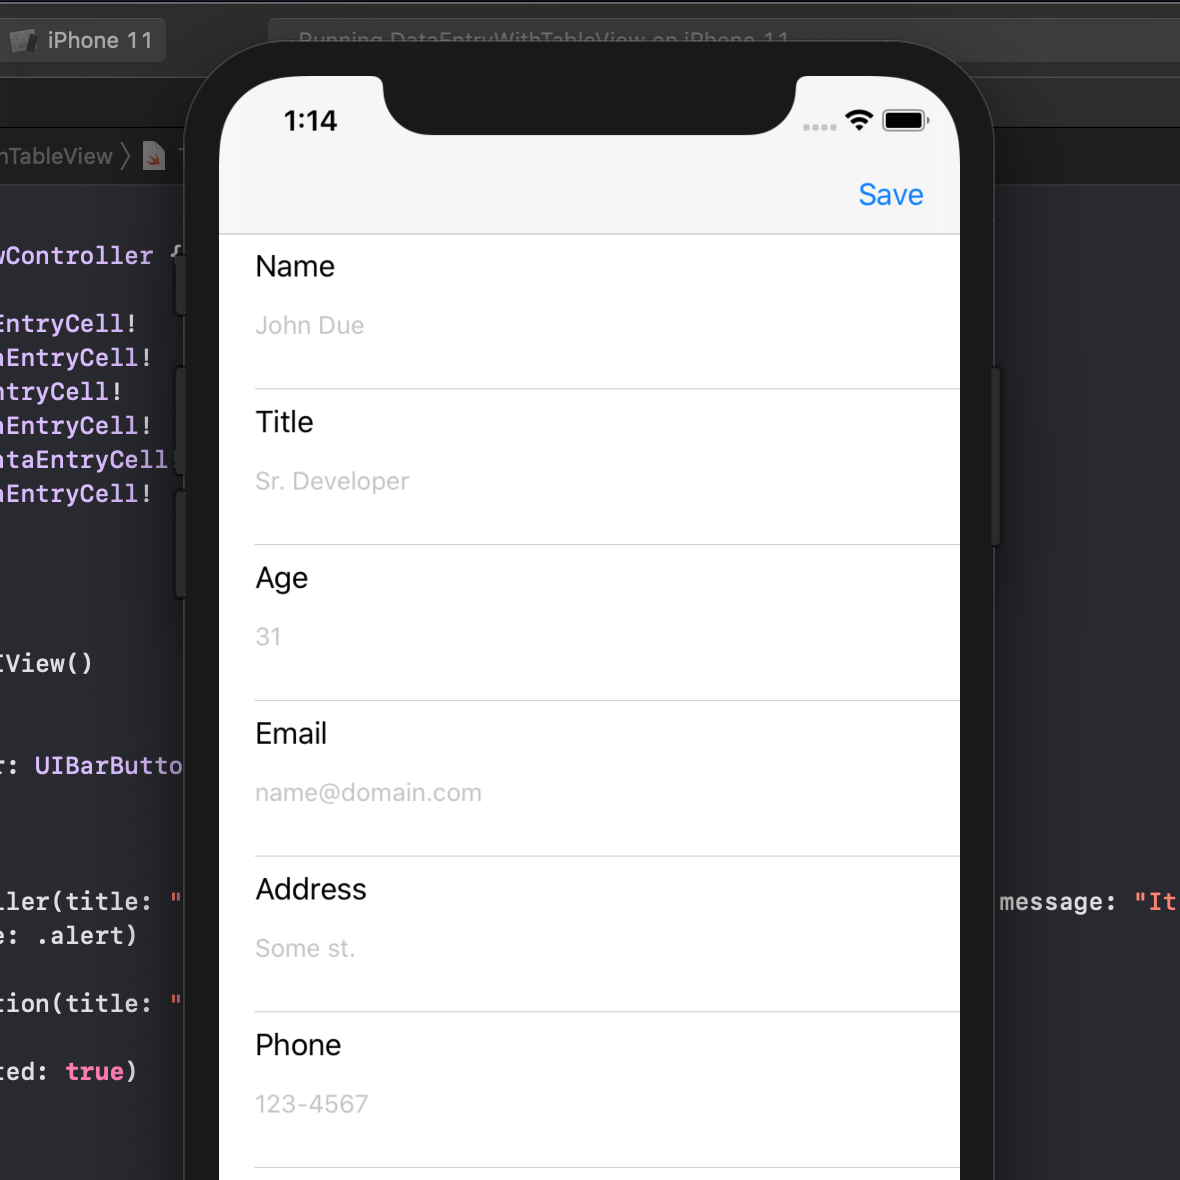
Let’s assume we have a fixed number of input data which makes the job easier and allows us to use a static table, for the sake of simplicity. Now we can create a reusable UITableViewCell which could become a handy in asset for our later projects too.
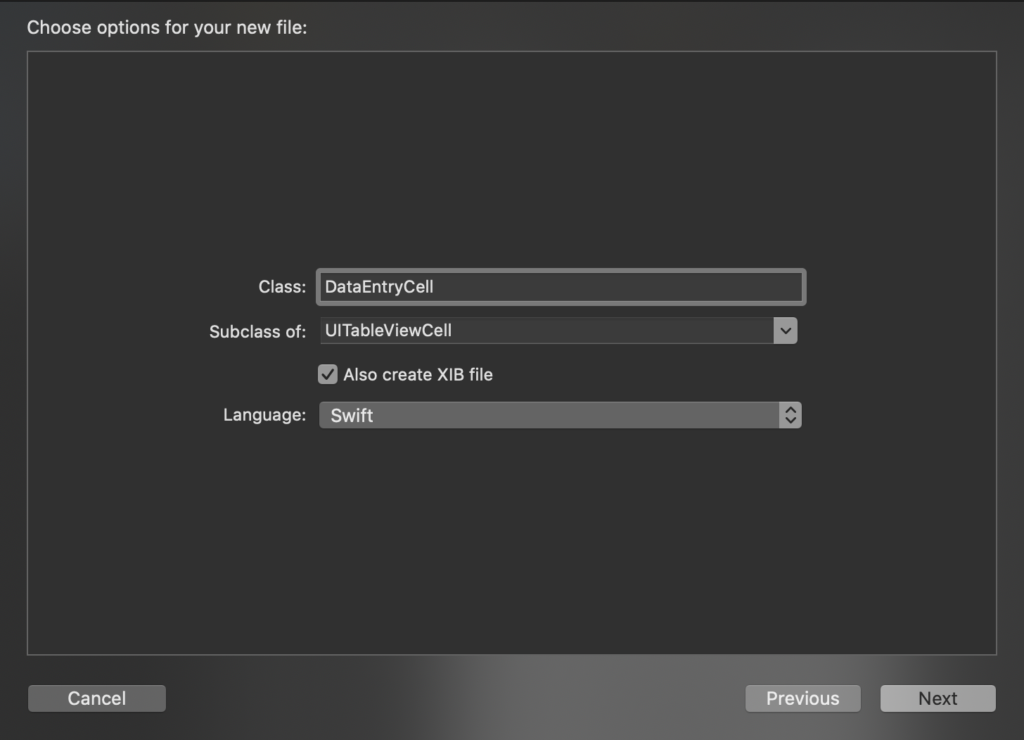
We can call the new custom cell DataEntryCell. In Xcode go to File > New > File and choose Cocoa Touch Class. In the class name type DataEntryCell and Choose UITableViewCell for subclass and check Also create XIB file.
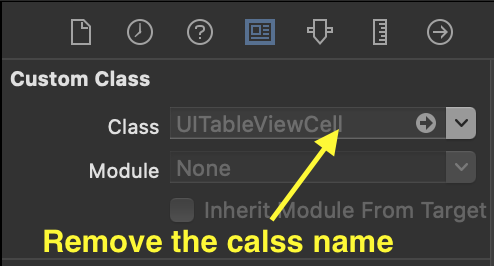
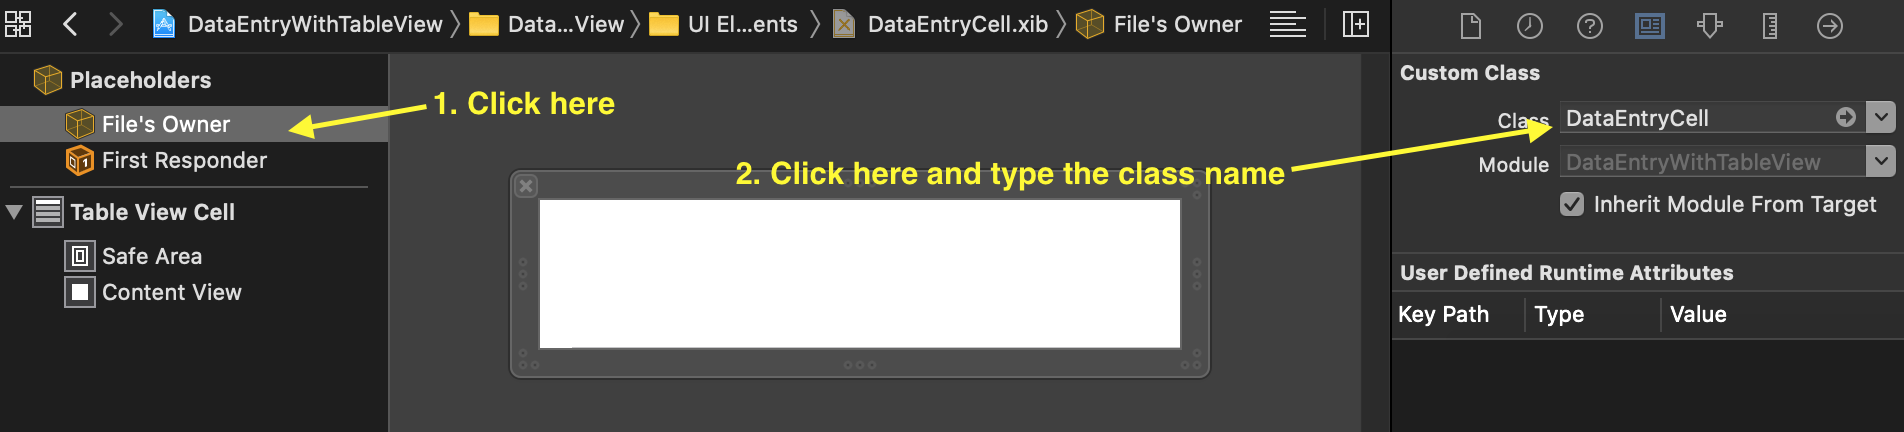
Now we have two new files, a xib file and a swift file. Now we have to setup the cell. First of all, in the Identity inspector remove the existing class name:
Note: make sure both .swift and .xib file have the same name.
Now from Document Outline, click on File’s Owner, open the Identity inspector and enter the class name there:
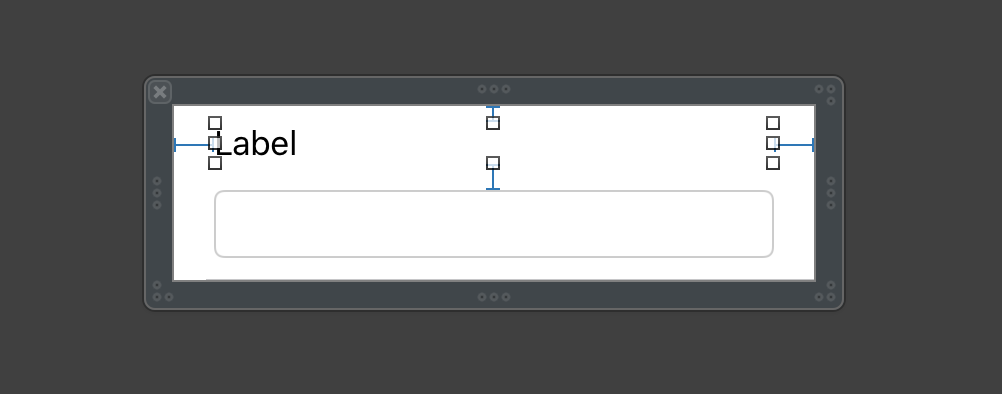
Now add a label and a text box and align them as you wish.
If you open DataEntryCell.swift, there are two functions prepared for you, but we don’t need them, since we are not using this class conventionally. Remove setSelected and add this snippet:
    private var view: UIView!

    public required init?(coder aDecoder: NSCoder) {
        super.init(coder: aDecoder)
        setup()
    }

    public override init(style: UITableViewCell.CellStyle, reuseIdentifier: String?) {
        super.init(style: style, reuseIdentifier: reuseIdentifier)
        layoutSubviews()
        setup()
    }

    private func setup() {
        let bundle = Bundle(for: type(of: self))
        let nib = UINib(nibName: String(describing: type(of: self)), bundle: bundle)
        let view = nib.instantiate(withOwner: self, options: nil).first as! UIView
        view.frame = bounds
        view.autoresizingMask = [
            UIView.AutoresizingMask.flexibleWidth,
            UIView.AutoresizingMask.flexibleHeight
        ]
        addSubview(view)
        self.view = view
        configureUI()
    }
These initializers allow us to treat our custom class like those of default iOS classes, we no longer need to register the nib.
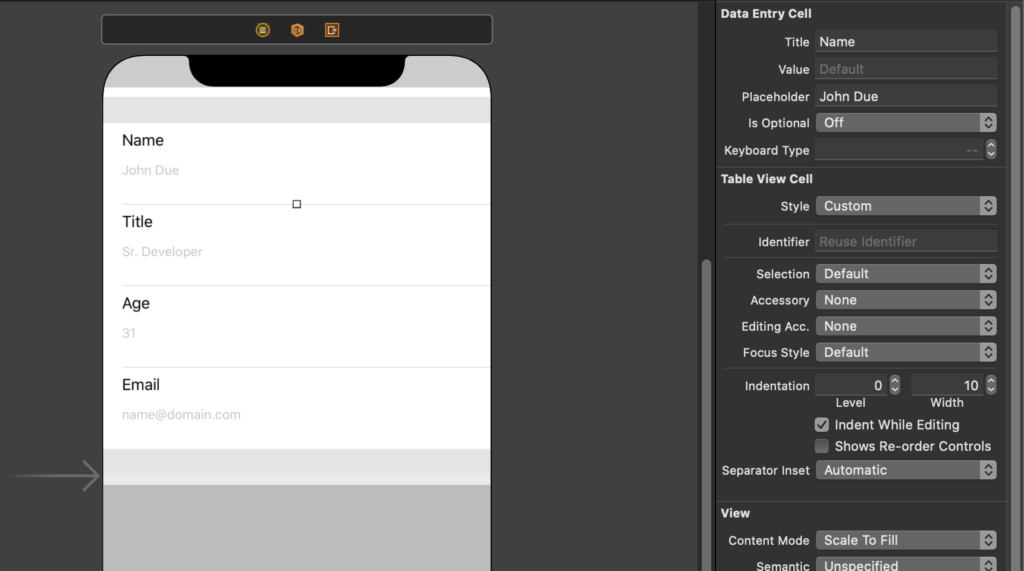
Now we can customize the cell according to our requirements, like adding validation, custom keyboard type, etc. You can see for yourself a simple implementation of validation and customizing keyboard type in the completed project files.
In the interface builder you can see the live preview of the custom cell:
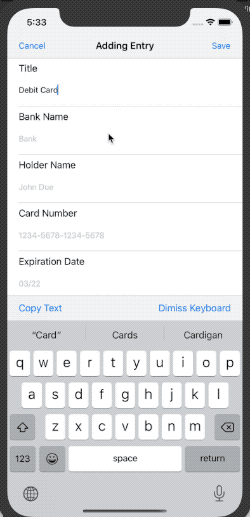
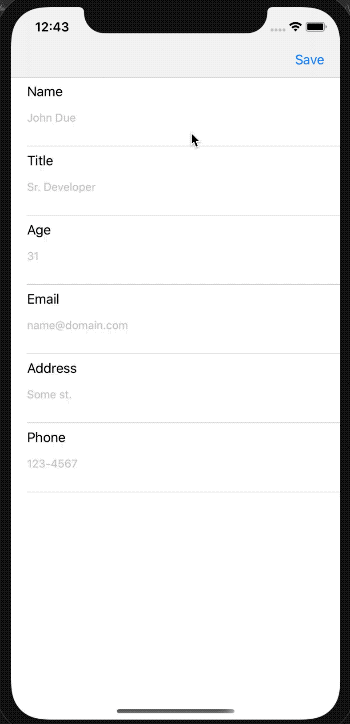
After wiring up the cells we are almost done. isValid can be used to validate fields individually and take appropriate measure to tell the user what’s wrong with their input, here the color of the label will be red in case of error.
Get the source code from github.