Deploying Your Docker Image to AWS
The last blog post showed how to create a Docker image and container locally. Verifying that a container works before deploying will save a developer many headaches..let me tell you. 😅 Without this step, one could easily build and deploy an image that doesn't start up properly, or is not properly connected to the database. As they say, measure twice, cut once.
Now let's take a look at AWS Elastic Container Service (ECS). AWS ECS works by defining appropriate cluster parameters, allowing the service to add or remove machines, based on bandwidth needs or user traffic. These containers need to be registered with AWS to be used. So, we must work with another AWS service, namely the Elastic Container Registry (ECR).
From here, our cluster will be configured to launch containers on Amazon's services, called Elastic Compute Cloud (EC2) machines. To get started, we'll need to create an IAM policy, an IAM user, and a container repository.
Setting up Identity and Access Management (IAM)
In order to use AWS ECR, you'll need to add permissions to your account. To do that, first go to your AWS web console.
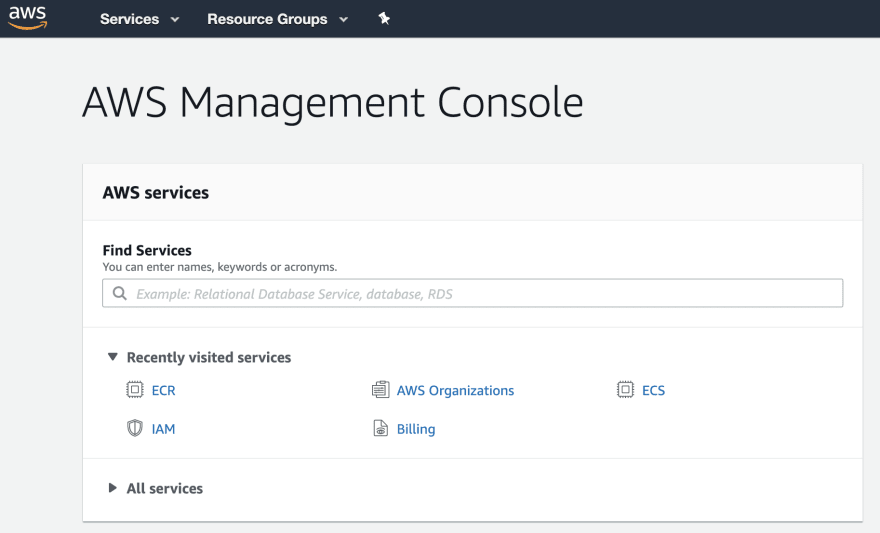
You should see a place to search for AWS services. Search for "IAM" and you should see the option for "Manage access to AWS services".

You'll know you're on the right page if it looks like this:

Click on "Policies" in the sidebar. Now you'll see this next screen, with a blue button called "Create Policy".

Creating the IAM Policy
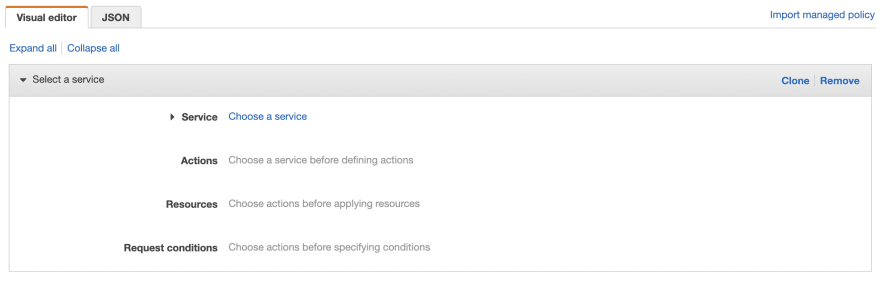
Click "Create Policy" and it will show you a new form with four different sections.
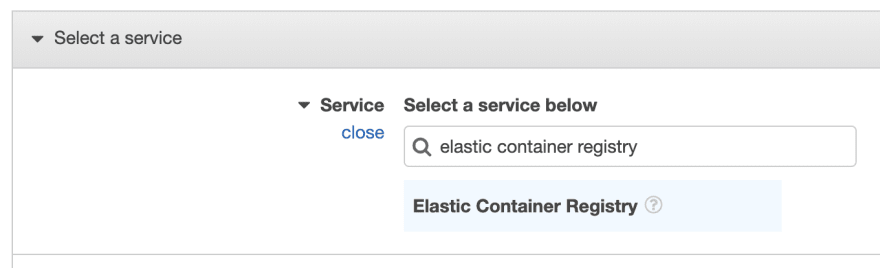
For the "Service" section, we'll search for "elastic container service" and choose it from the search results. It should highlight blue when you've clicked it.
For "Actions", we're going to pick the "All Elastic Container Registry actions" option. Notice that shows a warning. We're going to immediately fix that in the next step.
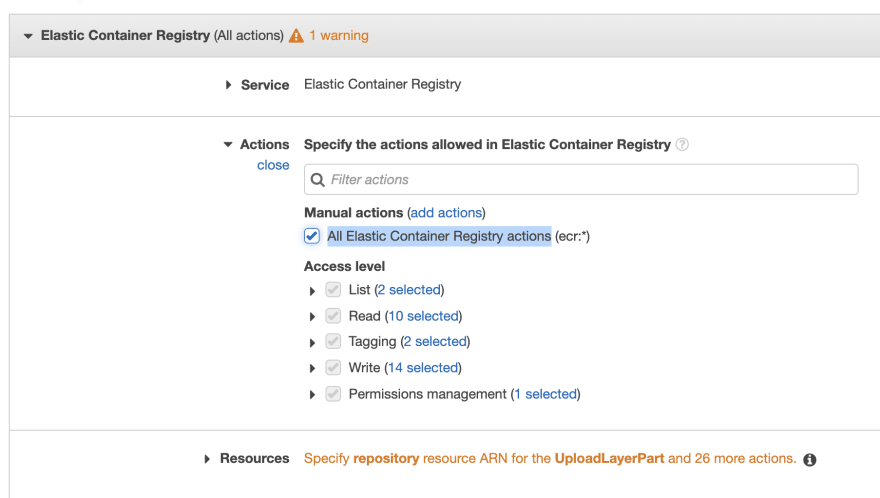
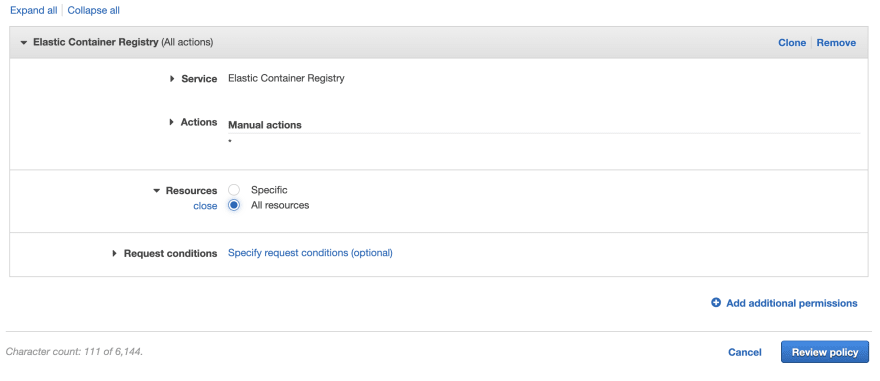
For "Resources", we pick "All resources".

When you're done, click the blue button labeled "Review policy".
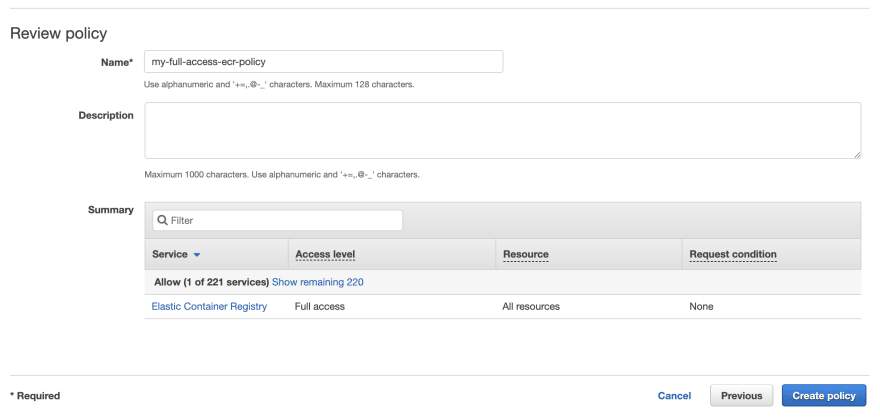
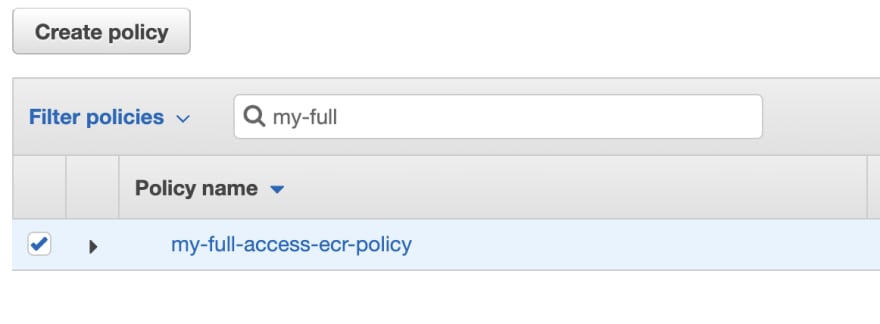
On this screen, the only necessary field is the name of the policy. The name doesn't matter, so long as you can remember it later. In my example, I call it "my-full-access-ecr-policy".
Creating the IAM User
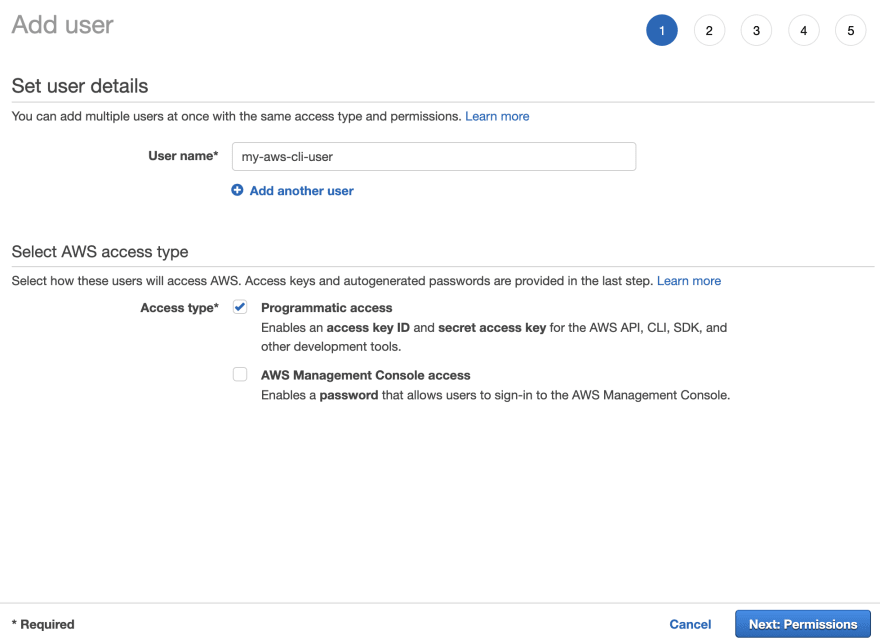
After we've got our policy, we need to attach it to a user. Go back to the sidebar and click on "Users". You should see a blue button "Add user".

Click on "Add user" and you'll get a form for adding a user. I used the name "my-aws-cli-user". Also, while the AWS console is a fine UI for many tasks, it is perhaps not as efficient as the AWS CLI. Let's enable "Programmatic access" here.
In the "Set permissions", we're going to add the policy we just created. Pick the "Attach existing policies directly" option at the top.
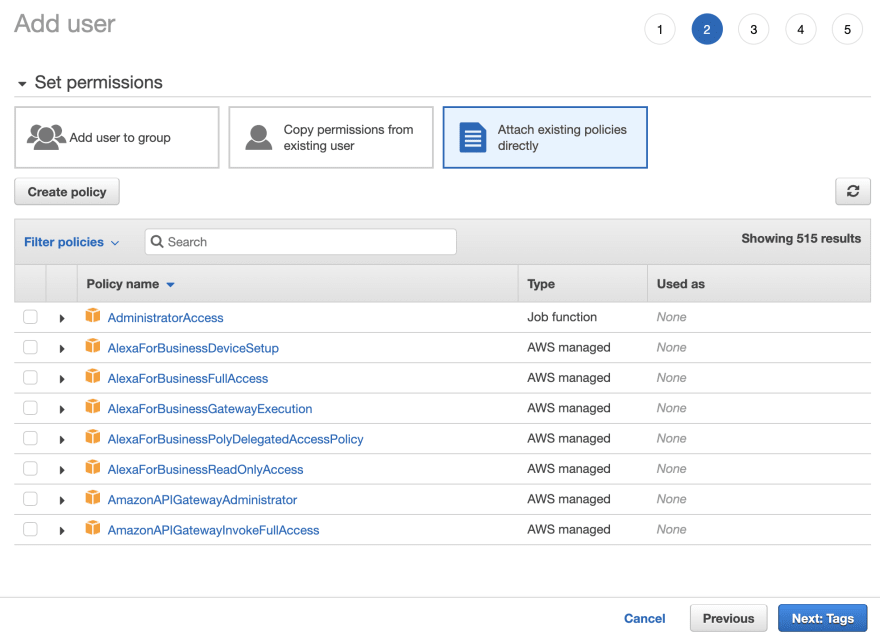
Next search for the policy you just created, check the box next to it.
Click the blue button "Next: Tags". You scan skip the "Add tags (optional)" step. The next step is just to review before actually creating the user.
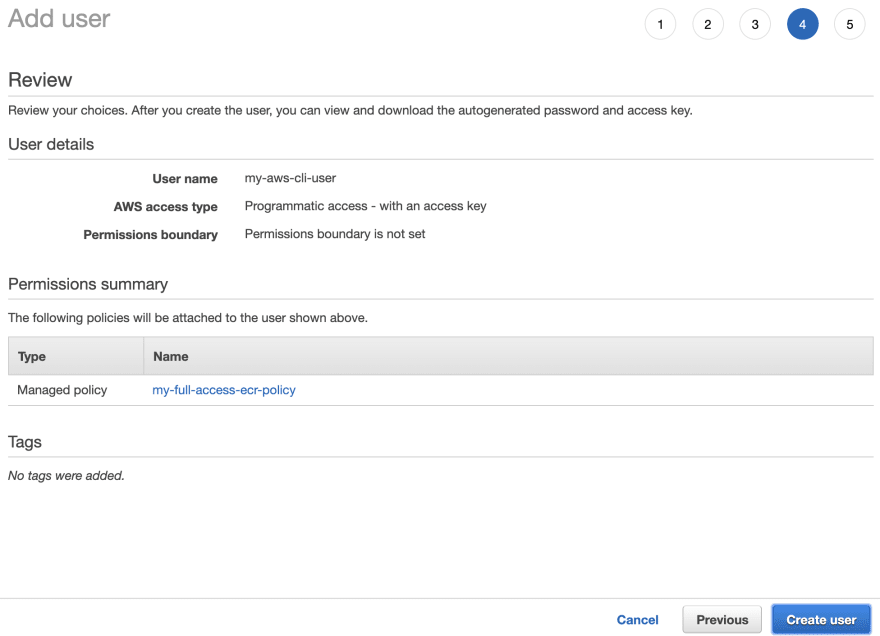
Hit "Create user" in the bottom right-hand corner. You'll get success screen and a chance to download the credentials (hopefully as credentials.csv).
MAKE SURE YOU DOWNLOAD THE CREDENTIALS FILE!
You will not get a second chance, so keep them ready for later.

Create a Repository
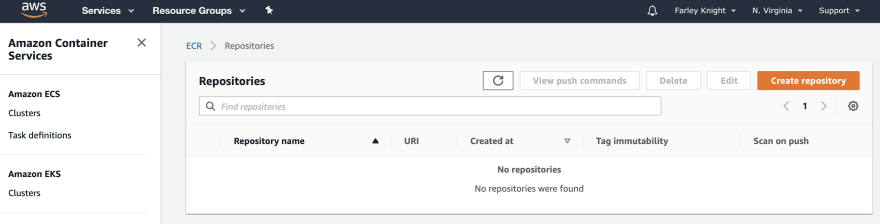
Just like for IAM, we're going to start this part at the AWS console. Search for "elastic container registry".

Once inside the ECR panel, you'll see an orange button labeled "Create repository".
Click on the orange button. You'll probably want to name your new repository after the name of your project. For the purposes of this tutorial, we'll go with "the-greatest-rails-app-ever".

Create the repository with the orange button in the lower right corner. Now you've got a new repository which can hold our Rails Docker image.

The URI on this screen is important for a pushing our Docker image to ECR. For my example, this is the URI that AWS ECR gave us to push to:
035513743183.dkr.ecr.us-east-1.amazonaws.com/the-greatest-rails-app-ever
Pushing to ECR
Pushing to ECR is a matter of tagging the image, logging into ECR via Docker, and then pushing the Docker image. Below is the first step: tagging the image.
$ docker tag the-greatest-rails-app-ever_web:latest 035513743183.dkr.ecr.us-east-1.amazonaws.com/the-greatest-rails-app-ever:latest
This command has no output, just in case you got confused. The next step is to login to ECR via Docker. To do that, we need AWS to give us the proper credentials. Run aws ecr get-login and you'll be given a really long response that will probably take up several lines in your console:
$ aws ecr get-login --no-include-email --region=us-east-1
docker login -u AWS -p eyJwYXlsb2FkIjoiVFVhaVpDbWlqR0NLSDZkYkxFUDJGaDd
...1ODI4ODU4NDB9 https://035513743183.dkr.ecr.us-east-1.amazonaws.com
Make sure it ends with a similar *.amazonaws.com domain. To run this docker login command, you can use the $ operator in the shell:
$ $(aws ecr get-login --no-include-email --region=us-east-1)
WARNING! Using --password via the CLI is insecure. Use --password-stdin.
Login Succeeded
With confirmation that the login was successful, we can tag our Docker image and push it to ECR.
$ docker push 035513743183.dkr.ecr.us-east-1.amazonaws.com/the-greatest-rails-app-ever:latest
The push refers to repository [035513743183.dkr.ecr.us-east-1.amazonaws.com/the-greatest-rails-app-ever]
31c727deda0b: Pushing [=============>                                     ]  13.89MB/50.29MB
With the new image on ECR, we can connect set up the connection to the database.
Connecting a Rails application to Amazon RDS
Ruby on Rails is a framework that thrives when it is paired with a relational database. Amazon provides the Relational Database Service (RDS), which is effectively a managed instance of MySQL or Postgres. We're using MySQL in this tutorial.
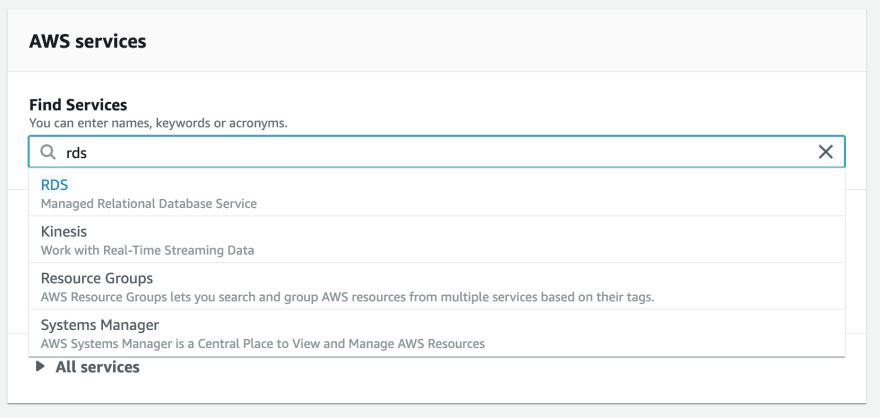
Open up your Amazon web console and search for "rds":
The big orange button labeled "Create database" is where we start the process.
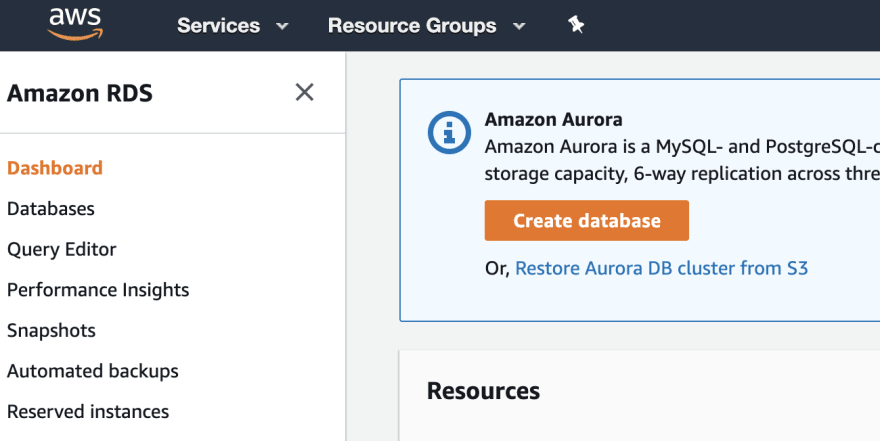
Click it and you'll see some options on the kind of database you'd like to create. To keep things simple, we will go with the "Easy Create" option and the "MySQL" engine type.

Further down, we have more options:
- The DB instance size can be kept small for testing purposes. Your application may require a larger instance. You should do load testing based on your anticipated needs.
- The DB instance identifier can be changed, and will be used later. It defaults to
database-1. I've chosen "the-greatest-rails-app-ever-db-1" as my database name. - The Master username should likely stay the default
admin. - Use a password generator like LassPass to create a Master password.
When you're done, hit the orange button "Create database" in the lower right-hand corner.

It takes a bit for AWS to start the instance.

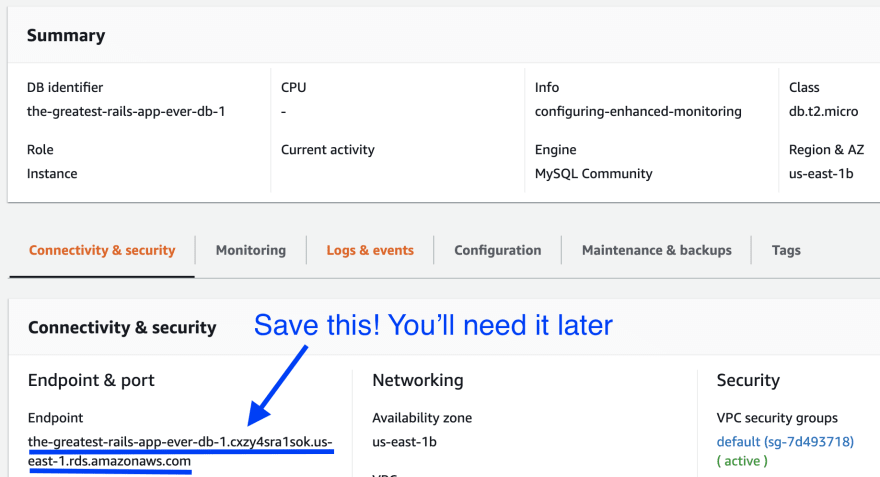
We will come back to RDS soon, when we need to provide the appropriate environment variables to our Rails Docker container, which includes the database endpoint. When you click on the database name (in my case "the-greatest-rails-app-ever-db-1"), you should be given a detailed view of your database instance:
The most important piece of information in this section is the database endpoint. Keep a reference to the endpoint for later in this tutorial.
Creating a Task Definition on AWS ECS
Amazon's Elastic Container Service (ECS) is what will be running our Rails Docker image. In order to run an image, we need to define what AWS calls a Task Definition.
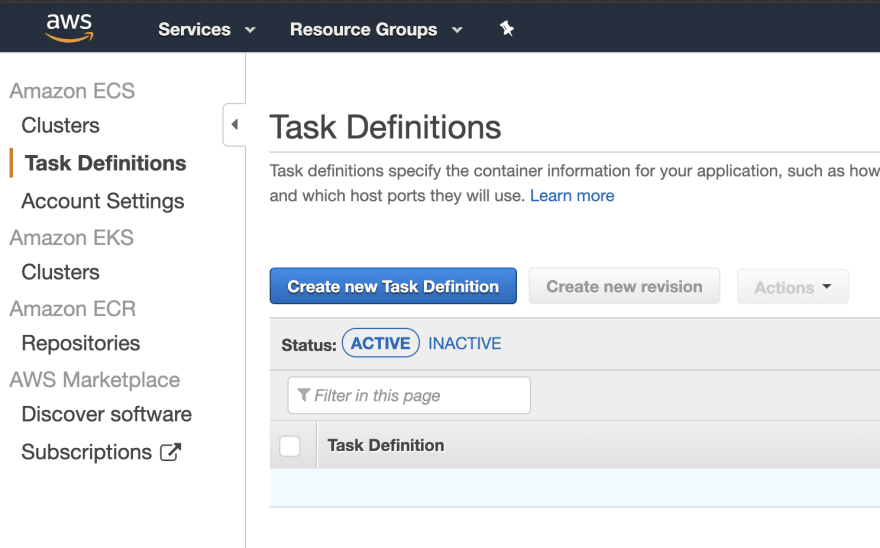
Go to the AWS console and search for "ecs" and click on "Run and Manage Docker Containers".

Once there, you should see a blue button labeled "Create new Task Definition".
Click the blue button and you'll be given two launch types to use. Fargate is a relatively new offering, while EC2 is a much more mature service. We're going to choose EC2 for now since there is more support for troubleshooting around more mature technologies.
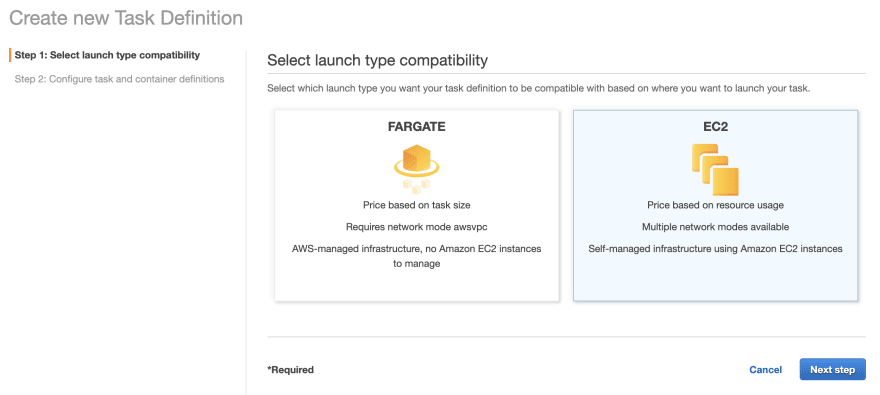
Hit "Next step" in the lower right corner. This is the meat of the Task Definition. I'm going with the same naming theme as previous sections, so my Task Definition will be called "the-greatest-rails-docker-app-ever".

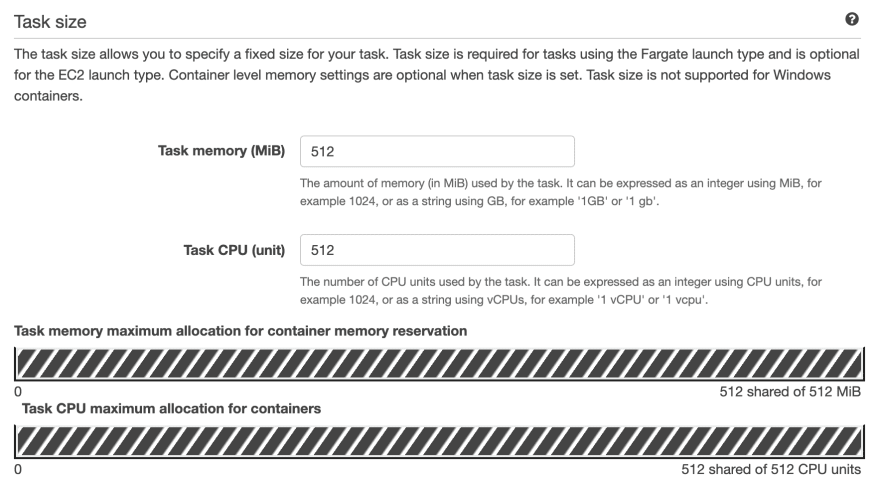
The next major section to configure is the Task size. We're going with 512 for both the memory and CPU units. We can reconfigure this if we find it's too small or too big.
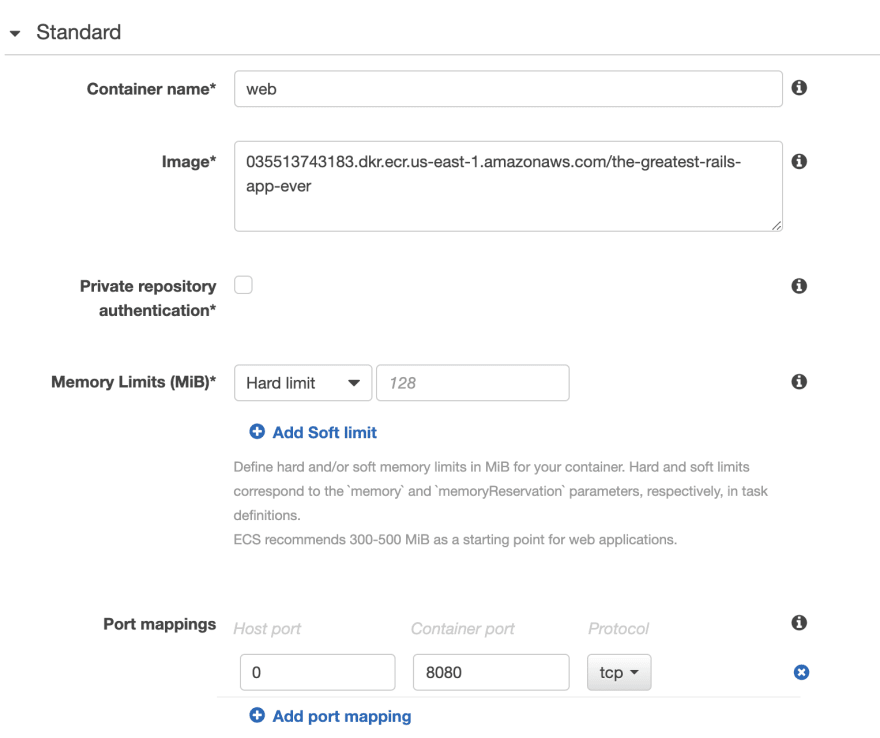
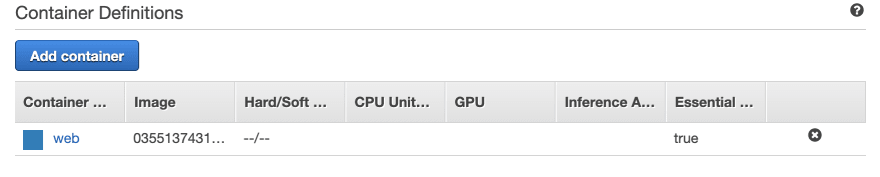
Task Definitions require container definitions to be spun up. The blue button labeled "Add container" will let us do that.

Click on "Add container" and a new form will pop up. A simple name for this container like "web" will suffice. In some setups, you'll also have another container be launched at the same time, like "db" or "job-queue". The Image should be the URI we got from ECR earlier in the tutorial. The Port mappings should be as shown: 0 for the Host port and 8080 for the Container port.
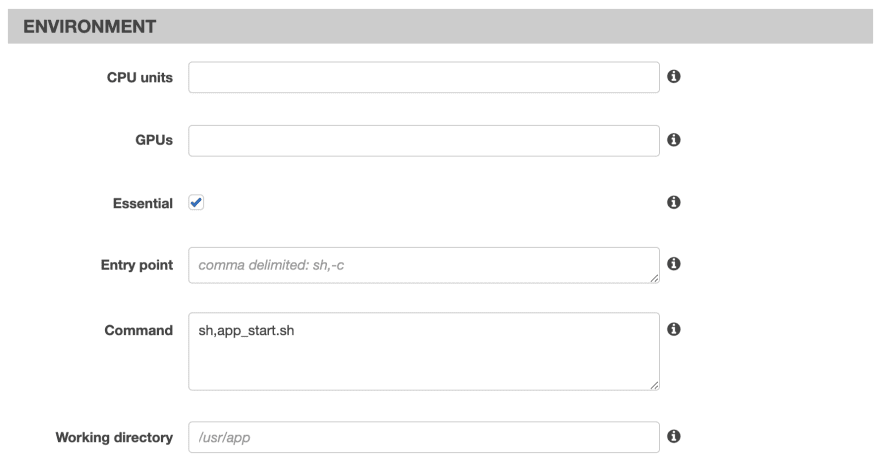
Scroll down and you'll see a section called "Environment" and add "sh,entrypoint.sh" in the Command section.
In the "Environment Variables" section, we must provide several for accessing the database. Here is what it looks like when I filled it out:

In summary:
-
MYSQL_HOSTis the endpoint we got from the RDS database. -
MYSQL_USERshould stayadmin. -
MYSQL_PASSWORDwill be the password you generated for the database. -
RAILS_ENVcould bestaging, orproduction. But, could also bedevelopmentif you're setting this up for the first time. -
RAILS_MASTER_KEYcan be found by runningcat config/master.key. -
RAILS_LOG_TO_STDOUTshould beENABLE.
Once you've got your environment variables set up, you can scroll down to the storage section. Since we've enabled Rails logging to STDOUT (via the RAILS_LOG_TO_STDOUT environment variable), we can use CloudWatch to collect our telemetry.

The logging configuration is the last step. You can now click the blue button "Add" to add the new container. You should now see it in the list of container definitions.
Now you can create the task definition. Click the blue button "Create" at the bottom of the page.
You should be greeted with a success notification.

FIN! 😃


Top comments (2)
For those who want to run Dockerized Rails on AWS but don't want to figure out how to set up a deployment pipeline, one could use Elastic Beanstalk has deployment mechanisms built-in.
Elastic Beanstalk (EB) Single Container Mode actually runs on ECS so its abstracts aways the infrastructure to some degree. Also you can just include a Dockerfile, not even build the docker image and put in a repo and EB will do the rest.
Though I think If you have the knowledge, It's great to not use and use ECS directly
Thanks for sharing your knowledge/ideas! This was helpful and once I learn more about Elastic Beanstalk, I'll see if I can write a post about it.