Almost all web applications require server-based data storage, and MySQL continues to be the most-used database solution. This article discusses various options for using MySQL on your local system during development.
MySQL is a free, open-source relational database. MariaDB is a fork of the database created in 2010 following concerns about the Oracle acquisition of MySQL. (It’s is functionally identical, so most of the concepts described in this article also apply to MariaDB.)
While NoSQL databases have surged in recent years, relational data is generally more practical for the majority of applications. That said, MySQL also supports NoSQL-like data structures such as JSON fields so you can enjoy the benefits of both worlds.
The following sections examine three primary ways to use MySQL in your local development environment:
- cloud-based solutions
- using Docker containers
- installing on your PC.
Cloud-based MySQL
MySQL services are offered by AWS, Azure, Google Cloud, Oracle, and many other specialist hosting services. Even low-cost shared hosts offer MySQL with remote HTTPS or tunneled SSH connections. You can therefore use a MySQL database remotely in local development. The benefits:
- no database software to install or manage
- your production environment can use the same system
- more than one developer can easily access the same data
- it’s ideal for those using cloud-based IDEs or lower-specification devices such as Chromebooks
- features such as automatic scaling, replication, sharding, and backups may be included.
The downsides:
- set-up can still take considerable time
- connection libraries and processes may be subtly different across hosts
- experimentation is more risky; any developer can accidentally wipe or alter the database
- development will cease when you have no internet connection
- there may be eye-watering usage costs.
A cloud-based option may be practical for those with minimal database requirements or large teams working on the same complex datasets.
Run MySQL Using Docker
Docker is a platform which allows you to build, share, and run applications in containers. Think of a container as an isolated virtual machine with its own operating system, libraries, and the application files. (In reality, containers are lightweight processes which share resources on the host.)
A Docker image is a snapshot of a file system which can be run as a container. The Docker Hub provides a wide range of images for popular applications, and databases including MySQL and MariaDB. The benefits:
- all developers can use the same Docker image on macOS, Linux, and Windows
- MySQL installation configuration and maintenance is minimal
- the same base image can be used in development and production environments
- developers retain the benefits of local development and can experiment without risk.
Docker is beyond the scope of this article, but key points to note:
- Docker is a client–server application. The server is responsible for managing images and containers and can be controlled via a REST API using the command line interface. You can therefore run the server daemon anywhere and connect to it from another machine.
- Separate containers should be used for each technology your web application requires. For example, your application could use three containers: a PHP-enabled Apache web server, a MySQL database, and an Elasticsearch engine.
- By default, containers don’t retain state. Data saved within a file or database will be lost the next time the container restarts. Persistency is implemented by mounting a volume on the host.
- Each container can communicate with others in their own isolated network. Specific ports can be exposed to the host machine as necessary.
- A commercial, enterprise edition of Docker is available. This article refers to the open-source community edition, but the same techniques apply.
Install Docker
Instructions for installing the latest version of Docker on Linux are available on Docker Docs. You can also use official repositories, although these are likely to have older editions. For example, on Ubuntu:
sudo apt-get update
sudo apt-get remove docker docker-engine docker.io
sudo apt install docker.io
sudo systemctl start docker
sudo systemctl enable docker
Installation will vary on other editions of Linux, so search the Web for appropriate instructions.
Docker CE Desktop for macOS Sierra 10.12 and above and Docker CE Desktop for Windows 10 Professional are available as installable packages. You must register at Docker Hub and sign in to download.
Docker on Windows 10 uses the Hyper-V virtualization platform, which you can enable from the Turn Windows features on or off panel accessed from Programs and Features in the the Control Panel. Docker can also use the Windows Subsystem for Linux 2 (WSL2 — currently in beta).
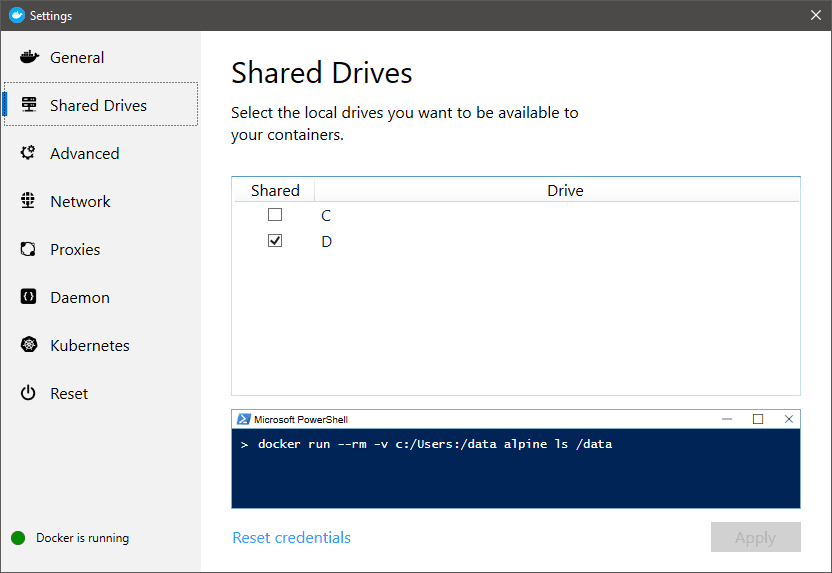
To ensure Docker can access the Windows file system, choose Settings from the Docker tray icon menu, navigate to the Shared Drives pane, and check which drives the server is permitted to use.
Check Docker has successfully installed by entering docker version at your command prompt. Optionally, try docker run hello-world to verify Docker can pull images and start containers as expected.
Run a MySQL Container
To make it easier for Docker containers to communicate, create a bridged network named dbnet or whatever name you prefer (this step can be skipped if you just want to access MySQL from the host device):
docker network create --driver bridge dbnet
Now create a data folder on your system where MySQL tables will be stored — such as mkdir data.
The most recent MySQL 8 server can now be launched with:
docker run -d --rm --name mysql --net dbnet -p 3306:3306 -e MYSQL_ROOT_PASSWORD=mysecret -v $PWD/data:/var/lib/mysql mysql:8
Arguments used:
-druns the container as a background service.--rmremoves the container when it stops running.--name mysqlassigns a name ofmysqlto the container for easier management.-p 3306:3306forwards the container port to the host. If you wanted to use port3307on the host, you would specify-p 3307:3306.-edefines an environment variable, in this case the default MySQL root user password is set tomysecret.-vmounts a volume so the/var/lib/mysqlMySQL data folder in the container will be stored at the current folder’sdatasubfolder on the host.
$PWD is the current folder, but this only works on macOS and Linux. Windows users must specify the whole path using forward slash notation — such as /c/mysql/data.
The first time you run this command, MySQL will take several minutes to start as the Docker image is downloaded and the MySQL container is configured. Subsequent restarts will be instantaneous, presuming you don’t delete or change the original image. You can check progress at any time using:
docker logs mysql
Using the Container MySQL Command-line Tool
Once started, open a bash shell on the MySQL container using:
docker exec -it mysql bash
Then connect to the MySQL server as the root user:
mysql -u root -pmysecret
-p is followed by the password set in Docker’s -e argument shown above. Don’t add a space!
Any MySQL commands can now be used — such as show databases;, create database new; and so on.
Use a MySQL client
Any MySQL client application can connect to the server on port 3306 of the host machine.
If you don’t have a MySQL client installed, Adminer is a lightweight PHP database management tool which can also be run as a Docker container!
docker run -d --rm --name adminer --net dbnet -p 8080:8080 adminer
Once started, open http://localhost:8080 in your browser and enter mysql as the server name, root as the username, and mysecret as the password:

Databases, users, tables, and associated settings can now be added, edited, or removed.
Stop Docker Containers
Containers can be stopped (and automatically removed) with the docker stop command followed by one or more container names. For example:
docker stop mysql adminer
Docker images and containers are lightweight when compared to virtual machines, but you can wipe all data using:
docker system prune -a
docker volume prune
Using docker-compose to Manage Containers
docker-compose can manage any number of containers without you having to enter long Docker commands. Create a docker-compose.yml file in your current folder:
version: '3.7'

services:

  mysql:
    environment:
      - MYSQL_ROOT_PASSWORD=mysecret
    image: mysql:8
    container_name: mysql
    volumes:
      - ./data:/var/lib/mysql
    networks:
      - dbnet
    ports:
      - "3306:3306"

  adminer:
    image: adminer
    container_name: adminer
    depends_on:
      - mysql
    networks:
      - dbnet
    ports:
      - "8080:8080"

networks:
  dbnet:
Then run:
docker-compose up
Both MySQL and Adminer containers are launched with the same configurations as used above. Press Ctrl + C to stop and remove the containers.
Run MySQL on Your OS
Installing MySQL on your local development machine may be practical if you want to use a single instance across multiple projects or require the service to run on boot.
All-in-one Packages
There are some excellent all-in-one macOS, Linux, and Windows distributions which contain Apache, PHP, MySQL, phpAdmin, SSL certificates, frameworks, and other applications in a single installation package. Options include:
Most are ideal for quick PHP and MySQL development set-ups and may offer multiple editions of each service. However:
- Updates are not guaranteed. Many packages still offer older editions of MySQL.
- Developers using different OSes or tweaking configurations can introduce compatibility issues in shared codebases.
- Development and production environments can be significantly different.
All-in-one packages are best for projects with a single programmer or those who are new to web development.
Install MySQL on Linux
There are numerous ways to install MySQL on a variety of Linux distros:
- Some distros such as Ubuntu Server provide MySQL by default.
- The official documentation provides details for installation using APT, Yum, and SLES package managers as well as RPM and Debian packages.
- Different versions of MySQL are available from the snap store.
Install MySQL on macOS
MySQL can be installed on macOS 10.13 and above by downloading the native package installer .dmg disk image. Double-click to mount the image then double-click the .pkg file to start the installation wizard.
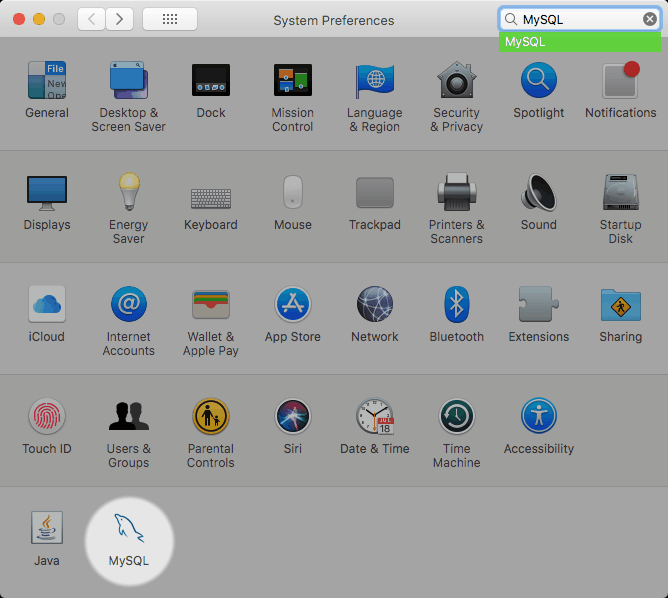
If you choose not to start MySQL automatically, it can be started from the icon in the System Preferences pane:
It is also possible to install MySQL on macOS using:
- homebrew:
brew install mysql - the DBngin management tool, or
- the generic binaries
Install MySQL on Windows
MySQL can be installed on 64-bit editions of Windows 10 and Windows 2012 Server R2 and above. You also require the following runtimes:
The MSI installer provides the server as well as tools such as MySQL Workbench. (The smaller “web” MSI installer will download packages when selected.)
Double-click the MSI file to launch the installation wizard and refer to the MySQL documentation for specific configuration options.
By default:
- program binaries and documentation is installed to
%PROGRAMFILES%\MySQL\MySQL Server V.v\(e.g.C:\Program Files\MySQL\MySQL Server 8.0\) - database data is stored at
%PROGRAMDATA%\MySQL\MySQL Server V.v\(e.g.C:\ProgramData\MySQL\MySQL Server 8.0\)
A no-install ZIP archive is also available. This can be copied to a USB drive or anywhere on a Windows system.
First, extract the contents of the ZIP to C:\mysql or a folder of your choice.
Then create a folder where database data will be stored, such as C:\mysqldata. Using a folder outside of C:\mysql is safer and allows you to upgrade application files.
Now create a my.ini file in C:\mysql which specifies the application and data folders. for example:
[mysqld]
# installation path
basedir=C:/mysql
# data directory
datadir=E:/mysqldata
(Forward path / slashes are required, although double \\ backslashes can also be used.)
Now initialize the data folder and create a default root user (without a password) by entering the following command at the console prompt:
C:\mysql\bin\mysqld.exe --initialize-insecure --user=mysql
The server can now be started with:
C:\mysql\bin\mysqld.exe --console
Use the MySQL client by entering C:\mysql\bin\mysql.exe -u root in another console. You can now issue SQL commands such as show databases; and quit by typing exit.
The server can be shut down with:
C:\mysql\bin\mysqladmin.exe -u root shutdown
Optionally, MySQL can be installed as an auto-starting Windows service:
C:\mysql\bin\mysqld.exe --install
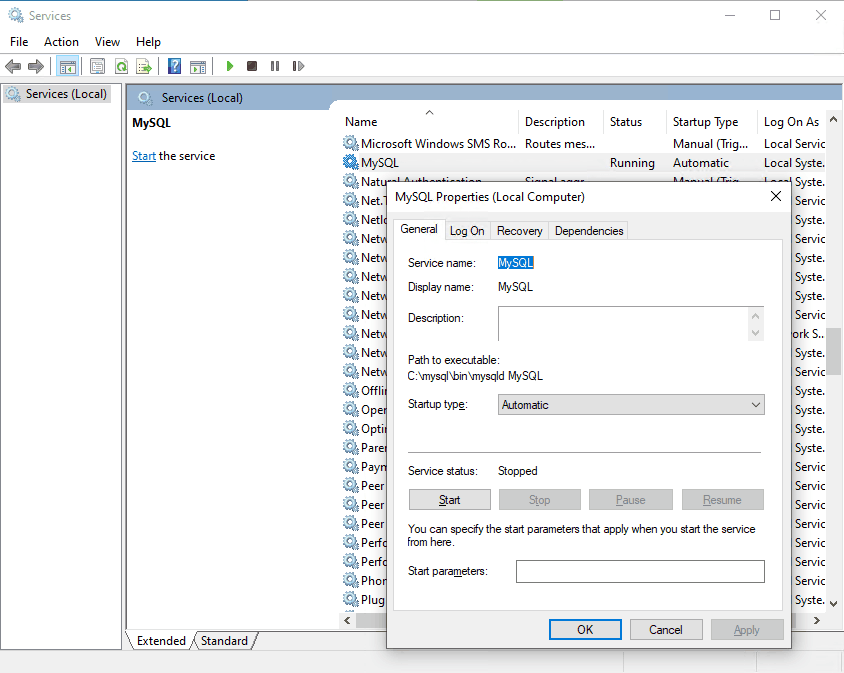
The service will launch on reboot or you can enter net start mysql to start it immediately. It can be stopped using net stop mysql or managed using the Services panel in Windows Administrative Tools:
The service can be fully removed using:
net stop mysql
C:\mysql\bin\mysqld.exe --remove
Overwhelming MySQL Options
There are multiple MySQL installation options no matter what OS you use.
For those learning about MySQL, a cloud provider or all-in-one package is likely to be the easiest way to start. As your application starts to grow, consider adopting Docker in your development workflow or managing a local MySQL installation. Docker becomes increasingly practical as multiple developers join the project. Eventually, you could return to cloud-based options as your successful product evolves.
Frequently Asked Questions (FAQs) about Installing MySQL
What are the system requirements for installing MySQL?
MySQL can be installed on a variety of operating systems including Windows, Linux, and macOS. The specific system requirements depend on the version of MySQL you are installing. However, generally, you will need at least 2GB of RAM and 2GB of disk space. It’s also recommended to have a processor speed of at least 2GHz. Please refer to the official MySQL documentation for the specific requirements of your version.
Can I install MySQL on a Chromebook?
Yes, you can install MySQL on a Chromebook. However, it’s a bit more complicated than installing it on a Windows or Mac computer. You will need to use the Linux (Beta) feature on your Chromebook to install and run MySQL. This involves enabling the Linux (Beta) feature, installing the Linux operating system, and then installing MySQL through the Linux terminal.
How do I install PHP and MySQL together?
PHP and MySQL are often used together in web development. To install them together, you first need to install a server stack such as XAMPP, WAMP, or MAMP. These server stacks include PHP, MySQL, and other necessary software in one package. After installing the server stack, you can start the servers and then access PHP and MySQL through your web browser.
How do I install MySQL Workbench?
MySQL Workbench is a visual tool for database architects, developers, and DBAs. To install it, you first need to download the installer from the official MySQL website. Then, run the installer and follow the on-screen instructions. After the installation is complete, you can start MySQL Workbench from your applications menu.
How do I install MySQL on Windows?
To install MySQL on Windows, you first need to download the MySQL installer from the official MySQL website. Then, run the installer and follow the on-screen instructions. During the installation, you will be asked to choose a setup type. It’s recommended to choose the “Developer Default” setup type for most users.
How do I install MySQL on Linux?
To install MySQL on Linux, you can use the package manager of your Linux distribution. For example, on Ubuntu, you can use the apt package manager. First, update the package manager with the command “sudo apt update”. Then, install MySQL with the command “sudo apt install mysql-server”.
How do I install MySQL on macOS?
To install MySQL on macOS, you first need to download the MySQL installer from the official MySQL website. Then, open the installer and follow the on-screen instructions. After the installation is complete, you can start MySQL from the System Preferences.
How do I configure MySQL after installation?
After installing MySQL, you need to configure it for your specific needs. This involves setting the root password, creating a database, and creating a user for the database. You can do this through the MySQL command-line client or a graphical interface like MySQL Workbench.
How do I uninstall MySQL?
To uninstall MySQL, you need to remove the MySQL server and other components. On Windows, you can do this through the Control Panel. On Linux, you can use the package manager. On macOS, you can use the MySQL installer.
How do I update MySQL?
To update MySQL, you can download and install the latest version from the official MySQL website. On Linux, you can also use the package manager to update MySQL. Before updating, it’s recommended to backup your databases to prevent data loss.
 Craig Buckler
Craig is a freelance UK web consultant who built his first page for IE2.0 in 1995. Since that time he's been advocating standards, accessibility, and best-practice HTML5 techniques. He's created enterprise specifications, websites and online applications for companies and organisations including the UK Parliament, the European Parliament, the Department of Energy & Climate Change, Microsoft, and more. He's written more than 1,000 articles for SitePoint and you can find him @craigbuckler.