
Written by Maciej Cieślar✏️
Creating a brand-new NestJS application is a breeze thanks to its awesome CLI. With a single command, nest new app-name, we have a fully functional, ready-to-go application.
The generated setup is fine for a simple application, but as it gets more complex and starts to rely on external services like Postgres or Redis, it could take quite a while for developers to set everything up themselves due to differences in the machines they’re using or whether they have all the necessary services already installed.
Ideally, our application should be started with a single command that guarantees it will work as expected regardless of the developer’s choice of machine/environment. The application should also ensure everything it depends on, like the aforementioned external services, is created during the start process. Here’s where Docker containerization becomes indispensable.
Note: This article assumes basic knowledge of Docker.
Creating a new project
We can easily create a new NestJS application with its dedicated CLI.
To install the CLI globally, run:
npm install -g @nestjs/cli
Now in order to create an application, we can execute:
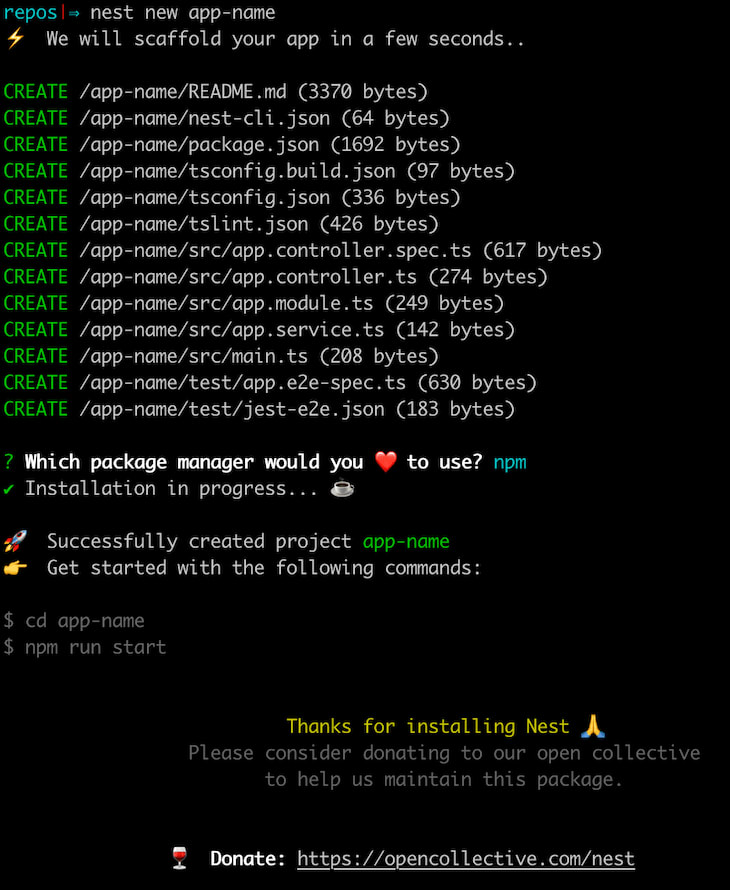
nest new app-name
Naturally, app-name is replaced by the actual name of the application. Keep in mind that the application will be generated in the app-name folder in the current directory.
The CLI wizard is going to ask us to choose between npm and yarn; in this guide, we will be using npm.
Now that our application is set up, let’s move on to adding Docker.

Adding Docker with multi-stage build
Containerizing our applications with Docker has many advantages. For us, the two most important are that the application will behave as expected regardless of the environment, and that it is possible to install all the external dependencies (in our case, Redis and PostgreSQL) automatically when starting the application.
Also, Docker images are easily deployable on platforms such as Heroku and work well with CI solutions like CircleCI.
As a bonus, we are going to use a recently added feature called multi-stage build. It helps us keep the built production image as small as possible by keeping all the development dependencies in the intermediate layer, which may, in turn, result in faster deployments.
With that said, at the root of our application, let’s create a Dockerfile that makes use of the multi-stage build feature:
FROM node:12.13-alpine As development

WORKDIR /usr/src/app

COPY package*.json ./

RUN npm install --only=development

COPY . .

RUN npm run build

FROM node:12.13-alpine as production

ARG NODE_ENV=production
ENV NODE_ENV=${NODE_ENV}

WORKDIR /usr/src/app

COPY package*.json ./

RUN npm install --only=production

COPY . .

COPY --from=development /usr/src/app/dist ./dist

CMD ["node", "dist/main"]
And let’s go through it line by line:
FROM node:12.13-alpine As development
First, we tell Docker to use an official Node.js image available in the public repository.
We specify the 12.13 version of Node and choose an Alpine image. Alpine images are lighter, but using them can have unexpected behavior.
Since we are using the multi-stage build feature, we are also using the AS statement to name the image development. The name here can be anything; it is only to reference the image later on.
WORKDIR /usr/src/app
After setting WORKDIR, each command Docker executes (defined in the RUN statement) will be executed in the specified context.
COPY package*.json ./

RUN npm install --only=development

COPY . .
First, we copy only package.json and package-lock.json (if it exists). Then we run, in the WORKDIR context, the npm install command. Once it finishes, we copy the rest of our application’s files into the Docker container.
Here we install only devDependencies due to the container being used as a “builder” that takes all the necessary tools to build the application and later send a clean /dist folder to the production image.
The order of statements is very important here due to how Docker caches layers. Each statement in the Dockerfile generates a new image layer, which is cached.
If we copied all files at once and then ran npm install, each file change would cause Docker to think it should run npm install all over again.
By first copying only package*.json files, we are telling Docker that it should run npm install and all the commands appearing afterwards only when either package.json or package-lock.json files change.
RUN npm run build
Finally, we make sure the app is built in the /dist folder. Since our application uses TypeScript and other build-time dependencies, we have to execute this command in the development image.
FROM node:12.13-alpine as production
By using the FROM statement again, we are telling Docker that it should create a new, fresh image without any connection to the previous one. This time we are naming it production.
ARG NODE_ENV=production
ENV NODE_ENV=${NODE_ENV}
Here we are using the ARG statement to define the default value for NODE_ENV, even though the default value is only available during the build time (not when we start the application).
Then we use the ENV statement to set it to either the default value or the user-set value.
WORKDIR /usr/src/app

COPY package*.json ./

RUN npm install --only=production

COPY . .
Now this part is exactly the same as the one above, but this time, we are making sure that we install only dependencies defined in dependencies in package.json by using the --only=production argument. This way we don’t install packages such as TypeScript that would cause our final image to increase in size.
COPY --from=development /usr/src/app/dist ./dist
Here we copy the built /dist folder from the development image. This way we are only getting the /dist directory, without the devDependencies, installed in our final image.
CMD ["node", "dist/main"]
Here we define the default command to execute when the image is run.
Thanks to the multi-stage build feature, we can keep our final image (here called production) as slim as possible by keeping all the unnecessary bloat in the development image.
The Dockerfile is ready to be used to run our application in a container. We can build the image by running:
docker build -t app-name .
(The -t option is for giving our image a name, i.e., tagging it.)
And then run it:
docker run app-name
And everything works just fine.
But this is not a development-ready solution. What about hot reloading? What if our application depended on some external tools like Postgres and Redis? We wouldn’t want to have each developer individually install them on their machine.
All these problems can be solved using docker-compose — a tool that wraps everything together for local development.
Adding docker-compose
Docker-compose is a tool that comes preinstalled with Docker. It was specifically made to help developers with their local development. Since our application is containerized and works the same on every machine, why should our database be dependent on the developer’s machine?
We are going to create a docker-compose config that will initiate and wire up three services for us. The main service will be responsible for running our application. The postgres and redis services will, as their names imply, run containerized Postgres and Redis.
In the application root directory, create a file called docker-compose.yml and fill it with the following content:
version: '3.7'

services:
  main:
    container_name: main
    build:
      context: .
      target: development
    volumes:
      - .:/usr/src/app
      - /usr/src/app/node_modules
    ports:
      - ${SERVER_PORT}:${SERVER_PORT}
      - 9229:9229
    command: npm run start:dev
    env_file:
      - .env
    networks:
      - webnet
    depends_on:
      - redis
      - postgres
  redis:
    container_name: redis
    image: redis:5
    networks:
      - webnet
  postgres:
    container_name: postgres
    image: postgres:12
    networks:
      - webnet
    environment:
      POSTGRES_PASSWORD: ${DB_PASSWORD}
      POSTGRES_USER: ${DB_USERNAME}
      POSTGRES_DB: ${DB_DATABASE_NAME}
      PG_DATA: /var/lib/postgresql/data
    ports:
      - 5432:5432
    volumes:
      - pgdata:/var/lib/postgresql/data
networks:
  webnet:
volumes:
  pgdata:
First, we specify that our file uses docker-compose version 3.7. We use this version specifically due to its support of multi-stage build.
Then we define three services: main, redis, and postgres.
Services
main
The main service is responsible for running our application.
container_name: main
build:
  context: .
  target: development
command: npm run start:dev
volumes:
  - .:/usr/src/app
  - /usr/src/app/node_modules
ports:
  - ${SERVER_PORT}:${SERVER_PORT}
  - 9229:9229
env_file:
  - .env
networks:
  - webnet
depends_on:
  - redis
  - postgres
Let’s go through its configuration line by line:
container_name: main
container_name tells docker-compose that we will be using the name main to refer to this service in various docker-compose commands.
build:
  context: .
  target: development
In the build config, we define the context, which tells Docker which files should be sent to the Docker daemon. In our case, that’s our whole application, and so we pass in ., which means all of the current directory.
We also define a target property and set it to development. Thanks to this property, Docker will now only build the first part of our Dockerfile and completely ignore the production part of our build (it will stop before the second FROM statement).
command: npm run start:dev
In our Dockerfile, we defined the command as CMD ["node", "dist/main"], but this is not a command that we would like to be run in a development environment. Instead, we would like to run a process that watches our files and restarts the application after each change. We can do so by using the command config.
The problem with this command is that due to the way Docker works, changing a file on our host machine (our computer) won’t be reflected in the container. Once we copy the files to the container (using the COPY . . statement in the Dockerfile), they stay the same. There is, however, a trick that makes use of volumes.
volumes:
  - .:/usr/src/app
  - /usr/src/app/node_modules
A volume is a way to mount a host directory in a container, and we define two of them.
The first mounts our current directory (.) inside the Docker container (/usr/src/app). This way, when we change a file on our host machine, the file will also be changed in the container. Now the process, while still running inside the container, will keep restarting the application on each file change.
The second volume is a hack. By mounting the first volume in the container, we could accidentally also override the node_modules directory with the one we have locally. Developers usually have node_modules on their host machine due to the dev tools Visual Studio Code relies on — packages such as eslint or @types, for example.
With that in mind, we can use an anonymous volume that will prevent the node_modules existing in the container to ever be overridden.
ports:
  - ${SERVER_PORT}:${SERVER_PORT}
  - 9229:9229
The ports config is rather self-explanatory.
Docker’s container has its own network, so by using ports, we are exposing them to be available to our host machine. The syntax is HOST_PORT:CONTAINER_PORT.
The ${SERVER_PORT} syntax means that the value will be retrieved from the environment variables.
We also add the 9229 port for debugging purposes, explained below.
env_file:
  - .env
When working with Node.js applications, we normally use the .env file to keep our environment variables in one place. Since we are using environment variables in our config (like we do above in ports), we also load the variables from the file just in case they were defined there.
networks:
  - webnet
Since each service has its own internal network (due to their being different containers), we also create our own network that will make it possible for them to communicate.
Note that the network is defined at the bottom of the file; here we are just telling docker-compose to use it in this particular service.
depends_on:
  - redis
  - postgres
Our two other services are named redis and postgres. When our application starts, we expect that both the Postgres database and the Redis storage are ready to be used. Otherwise, our application would probably crash.
redis
redis:
  container_name: redis
  image: redis:5
  networks:
    - webnet
The redis config is very simple. First, we define its container_name. Then we specify the image name, which should be fetched from the repository. We also have to define the network that is to be used to communicate with other services.
postgres
postgres:
  container_name: postgres
  image: postgres:12
  networks:
    - webnet
  environment:
    POSTGRES_PASSWORD: ${DB_PASSWORD}
    POSTGRES_USER: ${DB_USERNAME}
    POSTGRES_DB: ${DB_DATABASE_NAME}
    PG_DATA: /var/lib/postgresql/data
  volumes:
    - pgdata:/var/lib/postgresql/data
  ports:
    - 5432:5432
The postgres image makes use of a few environment variables that are described in the image’s documentation. When we define the specified variables, Postgres will use them (when starting the container) to do certain things.
Variables like POSTGRES_PASSWORD, POSTGRES_USER, and POSTGRES_DB are used to create the default database. Without them, we would have to write the SQL code ourselves and copy it into the container to create a database.
The PG_DATA variable is used to tell Postgres where it should keep all the Postgres-related data. We set it to /var/lib/postgresql/data.
If you take a look at the volumes config, you will see we mount the volume at the /var/lib/postgresql/data directory.
volumes:
  - pgdata:/var/lib/postgresql/data
What may confuse you is that the first part of the volume is not a directory, but rather something called pgdata.
pgdata is a named volume that is defined at the bottom of our file:
volumes:
  pgdata:
By using a named value, we make sure that the data stays the same even when the container is removed. It will stay there until we delete the volume ourselves.
Also, it’s always good to know where we keep the data instead of storing it at some random location in the container.
ports:
  - 5432:5432
Finally, we have to expose the 5432 port, which is the default Postgres port, to make it possible to connect to the database from our host machine with tools such as pgadmin.
Running the application in development
To run the application, we now have to use the following command:
docker-compose up
And Docker will take care of everything for us. Talk about a great developer experience.
Bonus: Adding npm packages
In the main service config, we defined node_modules as an anonymous volume to prevent our host files from overriding the directory. So if we were to add a new npm package by using npm install, the package wouldn’t be available in the Docker context, and the application would crash.
Even if you run docker-compose down and then docker-compose up again in order to start over, the volume would stay the same. It won’t work because anonymous volumes aren’t removed until their parent container is removed.
To fix this, we can run the following command:
docker-compose up --build -V
The --build parameter will make sure the npm install is run (during the build process), and the -V argument will remove any anonymous volumes and create them again.
Setting up a debugger in Visual Studio Code
A lot of Node.js developers use console.logs to debug their code. Most of the time it is a tedious process, to say the least. Visual Studio Code has its own debugger that can be easily integrated into our application.
Creating a VSC task
On the left panel of VS Code, click on the Debug and run panel and click create a launch.json file and choose Node.js in the modal.

Then, replace the contents of the .vscode/launch.json file with:
{
 "version": "0.2.0",
 "configurations": [
   {
     "type": "node",
     "request": "attach",
     "name": "Debug: app-name",
     "remoteRoot": "/usr/src/app",
     "localRoot": "${workspaceFolder}",
     "protocol": "inspector",
     "port": 9229,
     "restart": true,
     "address": "0.0.0.0",
     "skipFiles": ["<node_internals>/**"]
   }
 ]
}
We make sure that the remoteRoot is set to /usr/src/app (the path in the Docker container), port is set to 9229, and address is set to 0.0.0.0.
Adding the --debug parameter
Replace the start:debug script in the package.json with the following:
"start:debug": "nest start --debug 0.0.0.0:9229 --watch",
We specify the URL 0.0.0.0:9229, on which we are going to attach the debugger. That’s why, when we defined the docker-compose config for the main service, we exposed the 9229 port.
Changing the docker-compose.yml file
In order to use the debugger feature, we have to change the command of the main service from:
command: npm run start:dev
to
command: npm run start:debug
After starting the application, there should be a log:
Debugger listening on ws://0.0.0.0:9229/3e948401-fe6d-4c4d-b20f-6ad45b537587
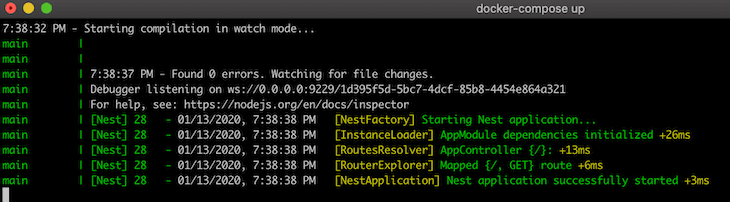
Here’s the debugger view in VS Code:

The debugger is going to reattach itself after each app restart.
Summary
The NestJS CLI does a great job of setting the basic boilerplate of a project for us. In order to get a fully fledged development environment, however, we must add tools such as Docker and docker-compose ourselves. To put a cherry on top, by configuring the Visual Studio Code internal debugger to work with Docker, we improve developer productivity.
200's only ✅: Monitor failed and show GraphQL requests in production
While GraphQL has some features for debugging requests and responses, making sure GraphQL reliably serves resources to your production app is where things get tougher. If you’re interested in ensuring network requests to the backend or third party services are successful, try LogRocket.

LogRocket is like a DVR for web apps, recording literally everything that happens on your site. Instead of guessing why problems happen, you can aggregate and report on problematic GraphQL requests to quickly understand the root cause. In addition, you can track Apollo client state and inspect GraphQL queries' key-value pairs.
LogRocket instruments your app to record baseline performance timings such as page load time, time to first byte, slow network requests, and also logs Redux, NgRx, and Vuex actions/state. Start monitoring for free.
The post Containerized development with NestJS and Docker appeared first on LogRocket Blog.


Top comments (1)
Great article, I've been stuck on hot reloading till I read your post. Thanks !