How to Install Visual Studio Code - Server IDE on Ubuntu 18.04 LTS
This tutorial exists for these OS versions
- Ubuntu 20.04 (Focal Fossa)
- Ubuntu 18.04 (Bionic Beaver)
On this page
Code-server is a Visual Studio (VS) Code that can be run remotely on the server and which is accessible through a web browser. It allows you to create and have a consistent development environment that can be accessed anytime and everywhere.
In this tutorial, we will show you how to install the Code-server with Nginx as a reverse proxy and SSL Letsencrypt on the latest Ubuntu 18.04 Server.
Prerequisites
For this guide, we will install the Code-server on the Ubuntu 18.04 server with 3GB of RAM, 25GB free disk space, and 2CPUs.
What we will do:
- Add User and Download Code-server Binary
- Setup Code-server as a Systemd Service
- Generate SSL Letsencrypt
- Setup Nginx as a Reverse Proxy for Code-server
- Testing
Step 1 - Add User and Download Code-Server Binary
First, we will add a new user and download the code-server binary file from GitHub.
Add a new user 'code' using the command below.
useradd -m -s /bin/bash code
passwd code
Now log in as 'code' user and download the code-server binary file.
su - code
wget https://github.com/cdr/code-server/releases/download/2.1692-vsc1.39.2/code-server2.1692-vsc1.39.2-linux-x86_64.tar.gz

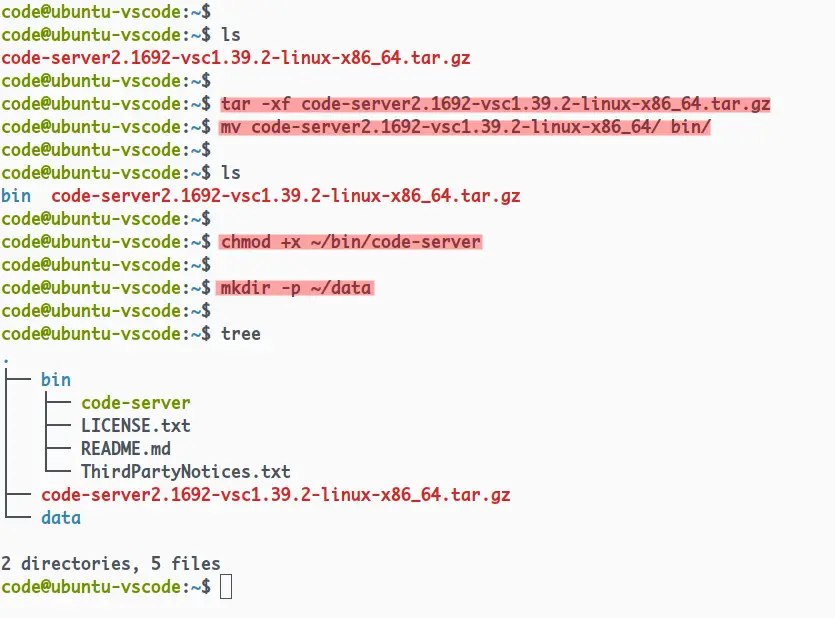
Extract the code-server and rename the directory as 'bin'.
tar -xf code-server2.1692-vsc1.39.2-linux-x86_64.tar.gz
mv code-server2.1692-vsc1.39.2-linux-x86_64/ bin/
Now make the code-server as an executable binary file.
chmod +x ~/bin/code-server
And create a new data directory for storing the user data.
mkdir -p ~/data
Now you've created a new user 'code' and downloaded the code-server binary to the home directory of user 'code'.
Step 2 - Setup Code-Server as a Systemd Service
In this step, we will set up the code-server to run as a system service.
The code-server service will run under the user 'code', with default port '8080' and enabled password authentication.
Go to the '/etc/systemd/system' directory and create a new service file 'code-server.service' using vim editor.
cd /etc/systemd/system/
vim code-server.service
Change the 'Environment' option for a password with your own and paste the configuration into it.
[Unit]
Description=code-server
After=nginx.service

[Service]
User=code
WorkingDirectory=/home/code
Environment=PASSWORD=hakasevscodeserv
ExecStart=/home/code/bin/code-server --host 127.0.0.1 --user-data-dir /home/code/data --auth password
Restart=always

[Install]
WantedBy=multi-user.target
Save and close.
Now reload the system manager.
systemctl daemon-reload
After that, start the code-server service and add it to the system boot using the following command.
systemctl start code-server
systemctl enable code-server

Now Check the code-server service.
netstat -plntu
systemctl status code-server
And the code-server service is up and running on default port '8080'.
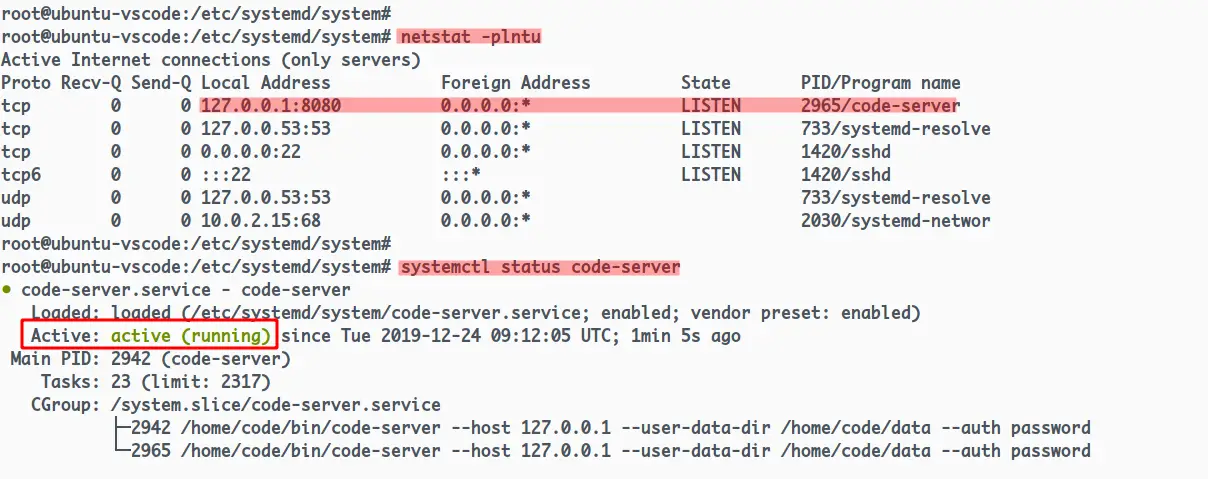
As a result, you've set up the code-server to run as a system service.
Step 3 - Generate SSL Letsencrypt
In this step, we will generate the SSL letsencrypt using the certbot tool for securing the code-server.
Install the certbot tool using the apt command below.
sudo apt install certbot -y
Once the installation is complete, generate the SSL letsencrypt using the certbot command below.
certbot certonly --standalone --agree-tos -m [email protected] -d vscode.hakase-labs.io
Once it's complete, your certificates will be located at the '/etc/letsencrypt/live/vscode.hakase-labs.io/' directory.
ls -lah /etc/letsencrypt/live/vscode.hakase-labs.io/
Now you've generated the SSL Letsencrypt for securing the code-server installation using the certbot tool.
Step 4 - Setup Nginx as a Reverse Proxy
In this step, we will install the Nginx web server and set up it as a reverse proxy for the code-server with SSL enabled on top of it.
Install Nginx package using the apt command below.
sudo apt install nginx -y
Once the installation is complete, go to the '/etc/nginx/sites-available' directory and create a new virtual host configuration 'code-server'.
cd /etc/nginx/sites-available/
vim code-server
Now change the domain name and path of SSL with your own and paste the configuration into it.
server {
 listen 80;
 server_name vscode.hakase-labs.io;
 # enforce https
 return 301 https://$server_name:443$request_uri;
}

server {
 listen 443 ssl http2;
 server_name vscode.hakase-labs.io;

 ssl_certificate /etc/letsencrypt/live/vscode.hakase-labs.io/fullchain.pem;
 ssl_certificate_key /etc/letsencrypt/live/vscode.hakase-labs.io/privkey.pem;

 location / {
 proxy_pass http://127.0.0.1:8080/;
 proxy_set_header Host $host;
 proxy_set_header Upgrade $http_upgrade;
 proxy_set_header Connection upgrade;
 proxy_set_header Accept-Encoding gzip;
 }
}
Save and close.
Now activate the 'code-server' virtual host, test the nginx configuration and make sure there is no error.
ln -s /etc/nginx/sites-available/code-server /etc/nginx/sites-enabled/
nginx -t

After that, restart the nginx service and add it to the system boot.
systemctl restart nginx
systemctl enable nginx
Now the Nginx service is up and running as a reverse proxy for the code-server. Check it using the command below.
netstat -plntu
systemctl status nginx
And you will get the result as below.
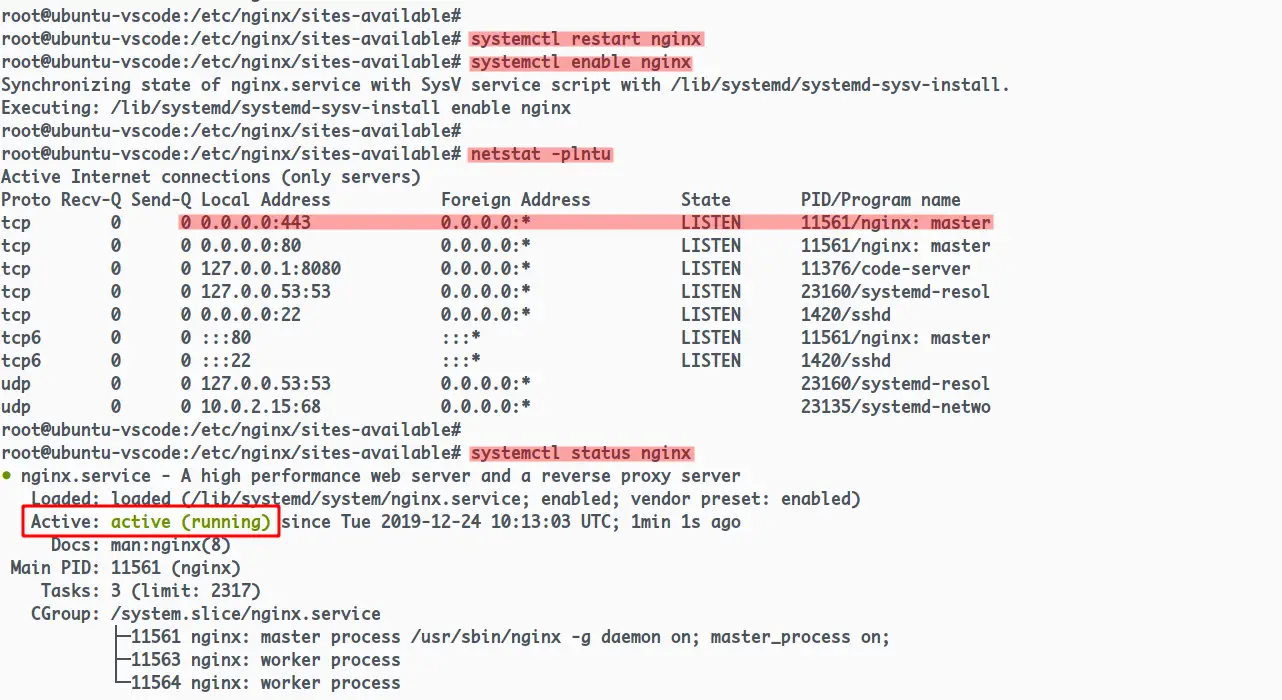
The Nginx service is up and running on the Ubuntu 18.04 server with the HTTP and HTTPS ports enabled on top of it.
Step 5 - Testing
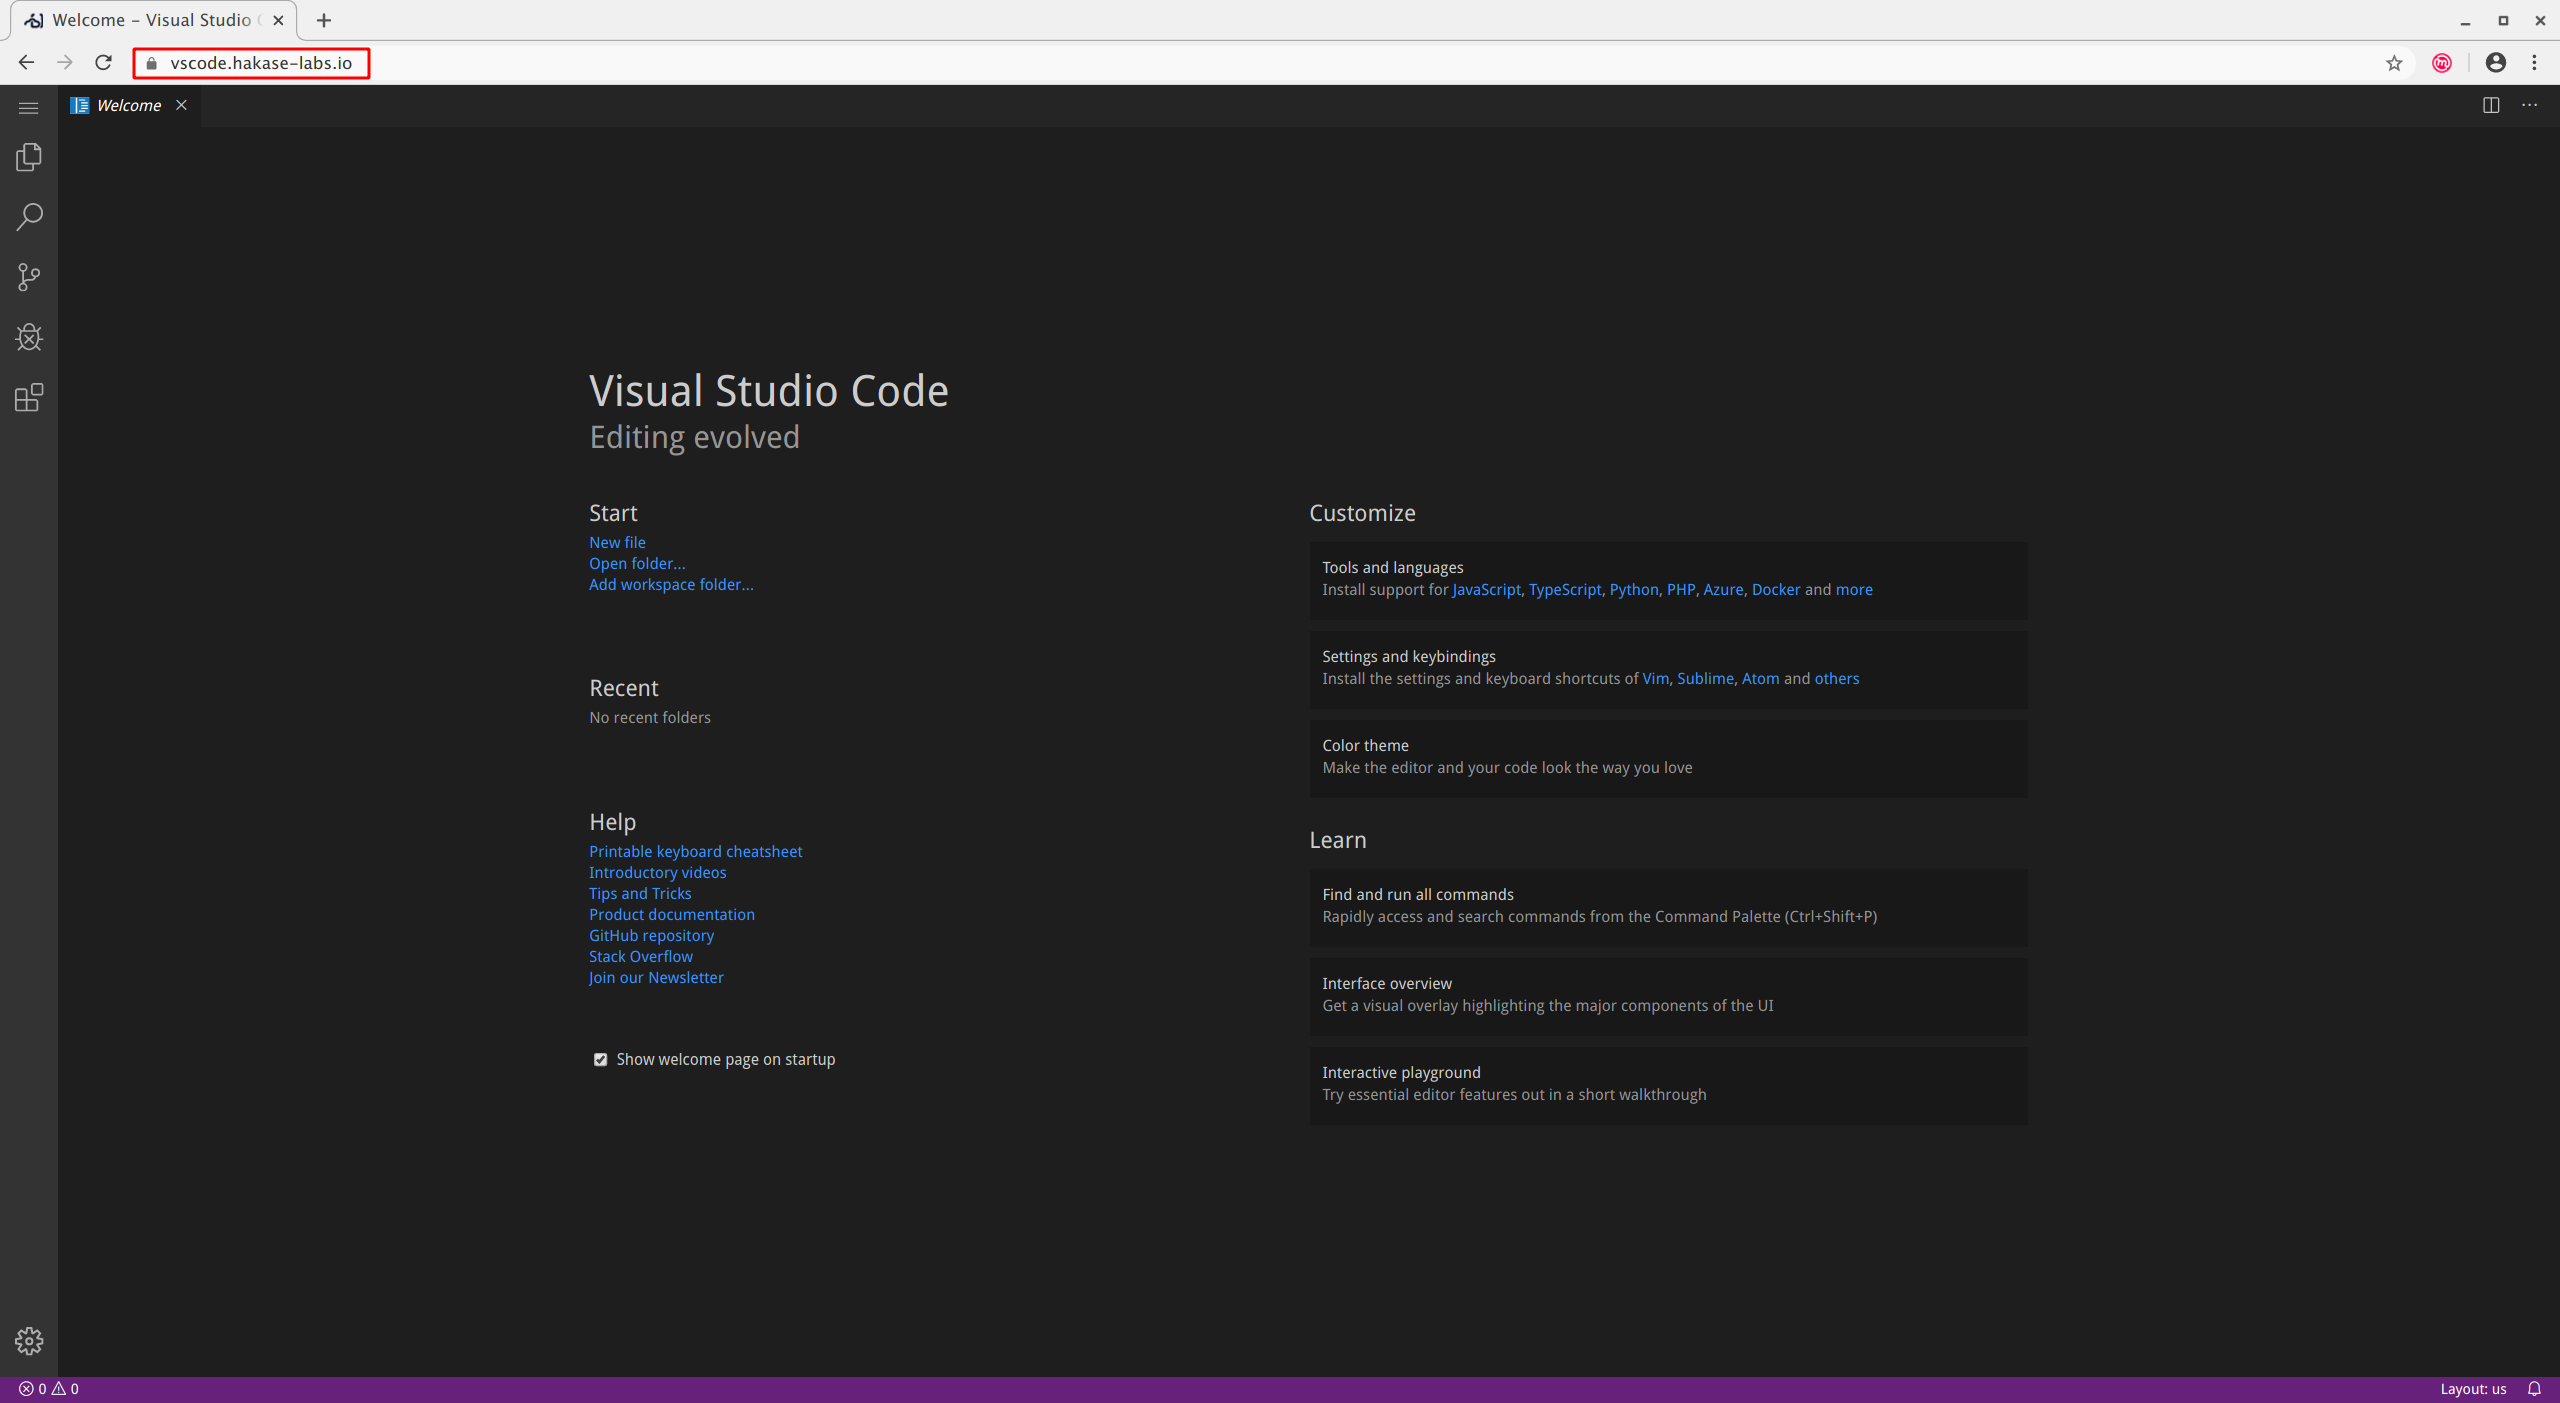
Open your web browser and type the URL of your code-server installation.
https://vscode.hakase-labs.io/
Log in with your password that you've configured at the code-server service file.
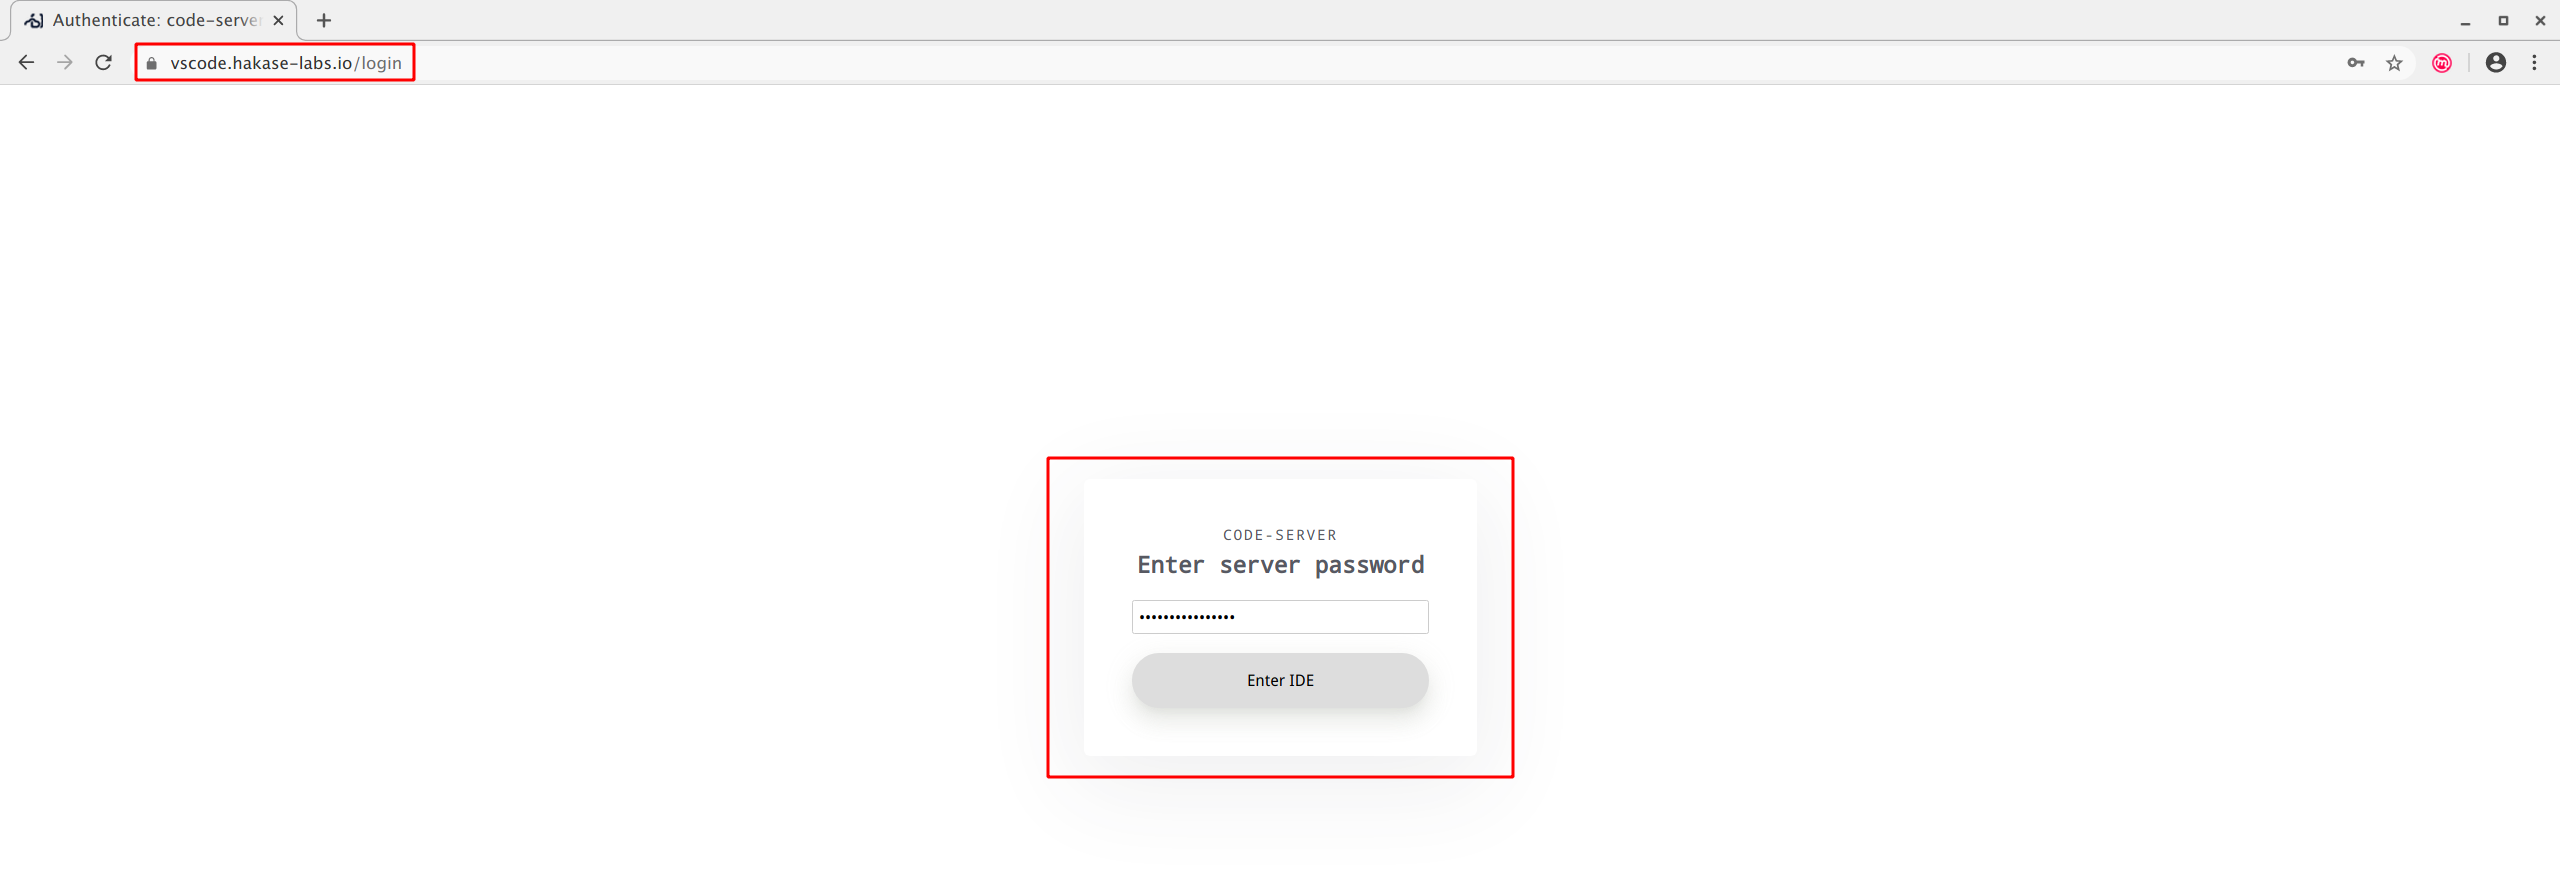
Once the password is correct, you will get the VS Code editor on your web browser as below.
As a result, you've installed the code-server on Ubuntu 18.04 server with Nginx as a reverse proxy and securing the code-server installation with SSL Letsencrypt.

