blog
Using OpenVPN to Secure Access to Your Database Cluster in the Cloud

The internet is a dangerous place, especially if you’re leaving your data unencrypted or without proper security. There are several ways to secure your data; all at different levels. You should always have a strong firewall policy, data encryption, and a strong password policy. Another way to secure your data is by accessing it using a VPN connection.
Virtual Private Network (or VPN) is a connection method used to add security and privacy to private and public networks, protecting your data.
OpenVPN is a fully-featured, open source, SSL VPN solution to secure communications. It can be used for remote access or communication between different servers or data centers. It can be installed on-prem or in the cloud, in different operating systems, and can be configured with many security options.
In this blog, we’ll create a VPN connection to access a database in the cloud. There are different ways to achieve this goal, depending on your infrastructure and how much hardware resources you want to use for this task.
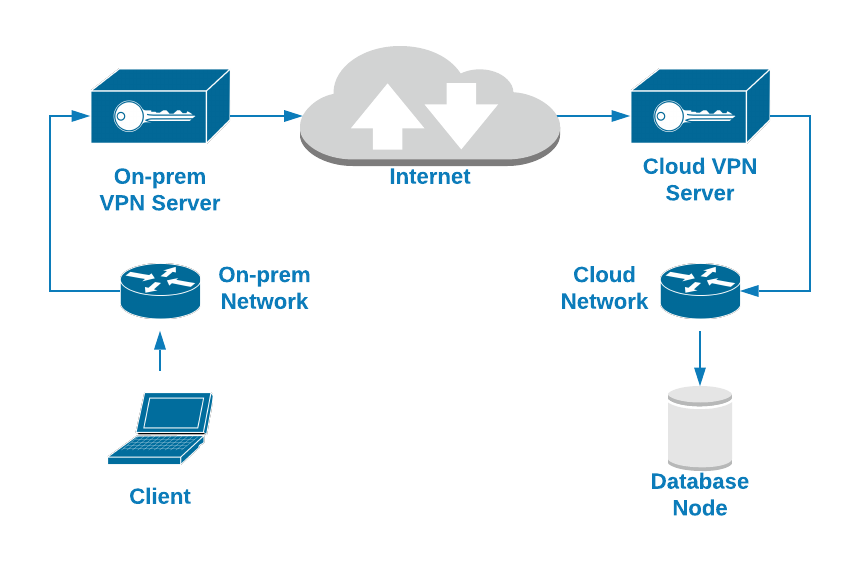
For example, you can create two VM, one on-prem and another one in the cloud, and they could be a bridge to connect your local network to the database cloud network through a Peer-to-Peer VPN connection.
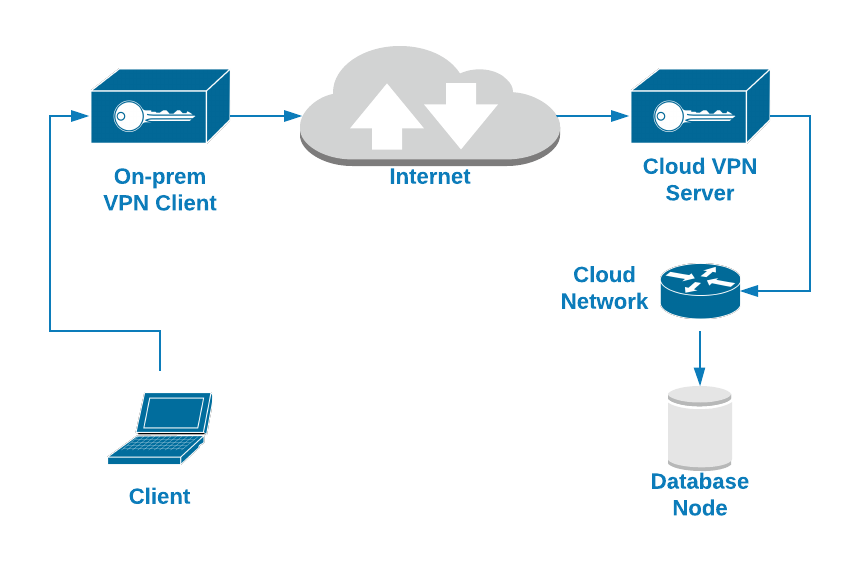
Another simpler option could be connecting to a VPN server installed in the database node using a VPN client connection configured in your local machine. In this case, we’ll use this second option. You’ll see how to configure an OpenVPN server in the database node running in the cloud, and you’ll be able to access it using a VPN client.
For the database node, we’ll use an Amazon EC2 instance with the following configuration:
- OS: Ubuntu Server 18.04
- Public IP Address: 18.224.138.210
- Private IP Address: 172.31.30.248/20
- Opened TCP ports: 22, 3306, 1194
How to Install OpenVPN on Ubuntu Server 18.04
The first task is to install the OpenVPN server in your database node. Actually, the database technology used doesn’t matter as we’re working on a networking layer, but for testing purposes after configuring the VPN connection, let’s say we’re running Percona Server 8.0.
So let’s start by installing the OpenVPN packages.
$ apt install openvpn easy-rsaAs OpenVPN uses certificates to encrypt your traffic, you’ll need EasyRSA for this task. It’s a CLI utility to create a root certificate authority, and request and sign certificates, including sub-CAs and certificate revocation lists.
Note: There is a new EasyRSA version available, but to keep the focus on the OpenVPN installation, let’s use the EasyRSA version available in the Ubuntu 18.04 repository atm (EasyRSA version 2.2.2-2).
The previous command will create the directory /etc/openvpn/ for the OpenVPN configuration, and the directory /usr/share/easy-rsa/ with the EasyRSA scripts and configuration.
To make this task easier, let’s create a symbolic link to the EasyRSA path in the OpenVPN directory (or you can just copy it):
$ ln -s /usr/share/easy-rsa /etc/openvpn/Now, you need to configure EasyRSA and create your certificates. Go to the EasyRSA location and create a backup for the “vars” file:
$ cd /etc/openvpn/easy-rsa

$ cp vars vars.bak
Edit this file, and change the following lines according to your information:
$ vi vars

export KEY_COUNTRY="US"

export KEY_PROVINCE="CA"

export KEY_CITY="SanFrancisco"

export KEY_ORG="Fort-Funston"

export KEY_EMAIL="[email protected]"

export KEY_OU="MyOrganizationalUnit"
Then, create a new symbolic link to the openssl file:
$ cd /etc/openvpn/easy-rsa

$ ln -s openssl-1.0.0.cnf openssl.cnf
Now, apply the vars file:
$ cd /etc/openvpn/easy-rsa

$ . vars
NOTE: If you run ./clean-all, I will be doing a rm -rf on /etc/openvpn/easy-rsa/keys
Run the clean-all script:
$ ./clean-allAnd create the Diffie-Hellman key (DH):
$ ./build-dh

Generating DH parameters, 2048 bit long safe prime, generator 2

This is going to take a long time

.....................................................................................................................................................................+
This last action could take some seconds, and when it’s finished, you will have a new DH file inside the “keys” directory in the EasyRSA directory.
$ ls /etc/openvpn/easy-rsa/keys

dh2048.pem
Now, let’s create the CA certificates.
$ ./build-ca

Generating a RSA private key

..+++++

...+++++

writing new private key to 'ca.key'

-----

You are about to be asked to enter information that will be incorporated

into your certificate request.

What you are about to enter is what is called a Distinguished Name or a DN.

There are quite a few fields but you can leave some blank

For some fields there will be a default value,

If you enter '.', the field will be left blank.

...
This will create the ca.crt (public certificate) and ca.key (private key). The public certificate will be required in all servers to connect to the VPN.
$ ls /etc/openvpn/easy-rsa/keys

ca.crt  ca.key
Now you have your CA created, let’s create the server certificate. In this case, we’ll call it “openvpn-server”:
$ ./build-key-server openvpn-server

Generating a RSA private key

.......................+++++

........................+++++

writing new private key to 'openvpn-server.key'

-----

You are about to be asked to enter information that will be incorporated

into your certificate request.

What you are about to enter is what is called a Distinguished Name or a DN.

There are quite a few fields but you can leave some blank

For some fields there will be a default value,

If you enter '.', the field will be left blank.

...

Certificate is to be certified until Dec 23 22:44:02 2029 GMT (3650 days)

Sign the certificate? [y/n]:y


1 out of 1 certificate requests certified, commit? [y/n]y


Write out database with 1 new entries

Data Base Updated
This will create the CRT, CSR, and Key files for the OpenVPN server:
$ ls /etc/openvpn/easy-rsa/keys

openvpn-server.crt  openvpn-server.csr openvpn-server.key
Now, you need to create the client certificate, and the process is pretty similar:
$ ./build-key openvpn-client-1

Generating a RSA private key

.........................................................................................+++++

.....................+++++

writing new private key to 'openvpn-client-1.key'

-----

You are about to be asked to enter information that will be incorporated

into your certificate request.

What you are about to enter is what is called a Distinguished Name or a DN.

There are quite a few fields but you can leave some blank

For some fields there will be a default value,

If you enter '.', the field will be left blank.

...

Certificate is to be certified until Dec 24 01:45:39 2029 GMT (3650 days)

Sign the certificate? [y/n]:y


1 out of 1 certificate requests certified, commit? [y/n]y


Write out database with 1 new entries

Data Base Updated
This will create the CRT, CSR, and Key files for the OpenVPN client:
$ ls /etc/openvpn/easy-rsa/keys

openvpn-client-1.csr  openvpn-client-1.crt openvpn-client-1.key
At this point, you have all the certificates ready. The next step will be to create both server and client OpenVPN configuration.
Configuring the OpenVPN Server
As we mentioned, the OpenVPN installation will create the /etc/openvpn directory, where you will add the configuration files for both server and client roles, and it has a sample configuration file for each one in /usr/share/doc/openvpn/examples/sample-config-files/, so you can copy the files in the mentioned location and modify them as you wish.
In this case, we’ll only use the server configuration file, as it’s an OpenVPN server:
$ cp /usr/share/doc/openvpn/examples/sample-config-files/server.conf.gz /etc/openvpn/

$ gunzip /etc/openvpn/server.conf.gz
Now, let’s see a basic server configuration file:
$ cat /etc/openvpn/server.conf

port 1194

# Which TCP/UDP port should OpenVPN listen on?

proto tcp

# TCP or UDP server?

dev tun

# "dev tun" will create a routed IP tunnel,"dev tap" will create an ethernet tunnel.

ca /etc/openvpn/easy-rsa/keys/ca.crt

# SSL/TLS root certificate (ca).

cert /etc/openvpn/easy-rsa/keys/openvpn-server.crt

# Certificate (cert).

key /etc/openvpn/easy-rsa/keys/openvpn-server.key

# Private key (key). This file should be kept secret.

dh /etc/openvpn/easy-rsa/keys/dh2048.pem

# Diffie hellman parameters.

server 10.8.0.0 255.255.255.0

# Configure server mode and supply a VPN subnet.

push "route 172.31.16.0 255.255.240.0"

# Push routes to the client to allow it to reach other private subnets behind the server.

keepalive 20 120

# The keepalive directive causes ping-like messages to be sent back and forth over the link so that each side knows when the other side has gone down.

cipher AES-256-CBC

# Select a cryptographic cipher.

persist-key

persist-tun

# The persist options will try to avoid accessing certain resources on restart that may no longer be accessible because of the privilege downgrade.

status /var/log/openvpn/openvpn-status.log

# Output a short status file.

log /var/log/openvpn/openvpn.log

# Use log or log-append to override the default log location.

verb 3

# Set the appropriate level of log file verbosity.
Note: Change the certificate paths according to your environment.
And then, start the OpenVPN service using the created configuration file:
$ systemctl start openvpn@serverCheck if the service is listening in the correct port:
$ netstat -pltn |grep openvpn

tcp        0 0 0.0.0.0:1194            0.0.0.0:* LISTEN   20002/openvpn
Finally, in the OpenVPN server, you need to add the IP forwarding line in the sysctl.conf file to allow the VPN traffic:
$ echo "net.ipv4.ip_forward=1" >> /etc/sysctl.confAnd run:
$ sysctl -p

net.ipv4.ip_forward = 1
Now, let’s see how to configure an OpenVPN client to connect to this new VPN.
Configuring the OpenVPN Client
In the previous point, we mentioned the OpenVPN sample configuration files, and we used the server one, so now let’s do the same but using the client configuration file.
Copy the file client.conf from /usr/share/doc/openvpn/examples/sample-config-files/ in the corresponding location and change it as you wish.
$ cp /usr/share/doc/openvpn/examples/sample-config-files/client.conf /etc/openvpn/You’ll also need the following certificates created previously to configure the VPN client:
ca.crt

openvpn-client-1.crt

openvpn-client-1.key
So, copy these files to your local machine or VM. You’ll need to add this files location in the VPN client configuration file.
Now, let’s see a basic client configuration file:
$ cat /etc/openvpn/client.conf

client

# Specify that we are a client

dev tun

# Use the same setting as you are using on the server.

proto tcp

# Use the same setting as you are using on the server.

remote 18.224.138.210 1194

# The hostname/IP and port of the server.

resolv-retry infinite

# Keep trying indefinitely to resolve the hostname of the OpenVPN server.

nobind

# Most clients don't need to bind to a specific local port number.

persist-key

persist-tun

# Try to preserve some state across restarts.

ca /Users/sinsausti/ca.crt

cert /Users/sinsausti/openvpn-client-1.crt

key /Users/sinsausti/openvpn-client-1.key

# SSL/TLS parms.

remote-cert-tls server

# Verify server certificate.

cipher AES-256-CBC

# Select a cryptographic cipher.

verb 3

# Set log file verbosity.
Note: Change the certificate paths according to your environment.
You can use this file to connect to the OpenVPN server from different Operating Systems like Linux, macOS, or Windows.
In this example, we’ll use the application Tunnelblick to connect from a macOS client. Tunnelblick is a free, open source graphic user interface for OpenVPN on macOS. It provides easy control of OpenVPN clients. It comes with all the necessary packages like OpenVPN, EasyRSA, and tun/tap drivers.
As the OpenVPN configuration files have extensions of .tblk, .ovpn, or .conf, Tunnelblick can read all of them.
To install a configuration file, drag and drop it on the Tunnelblick icon in the menu bar or on the list of configurations in the ‘Configurations’ tab of the ‘VPN Details’ window.
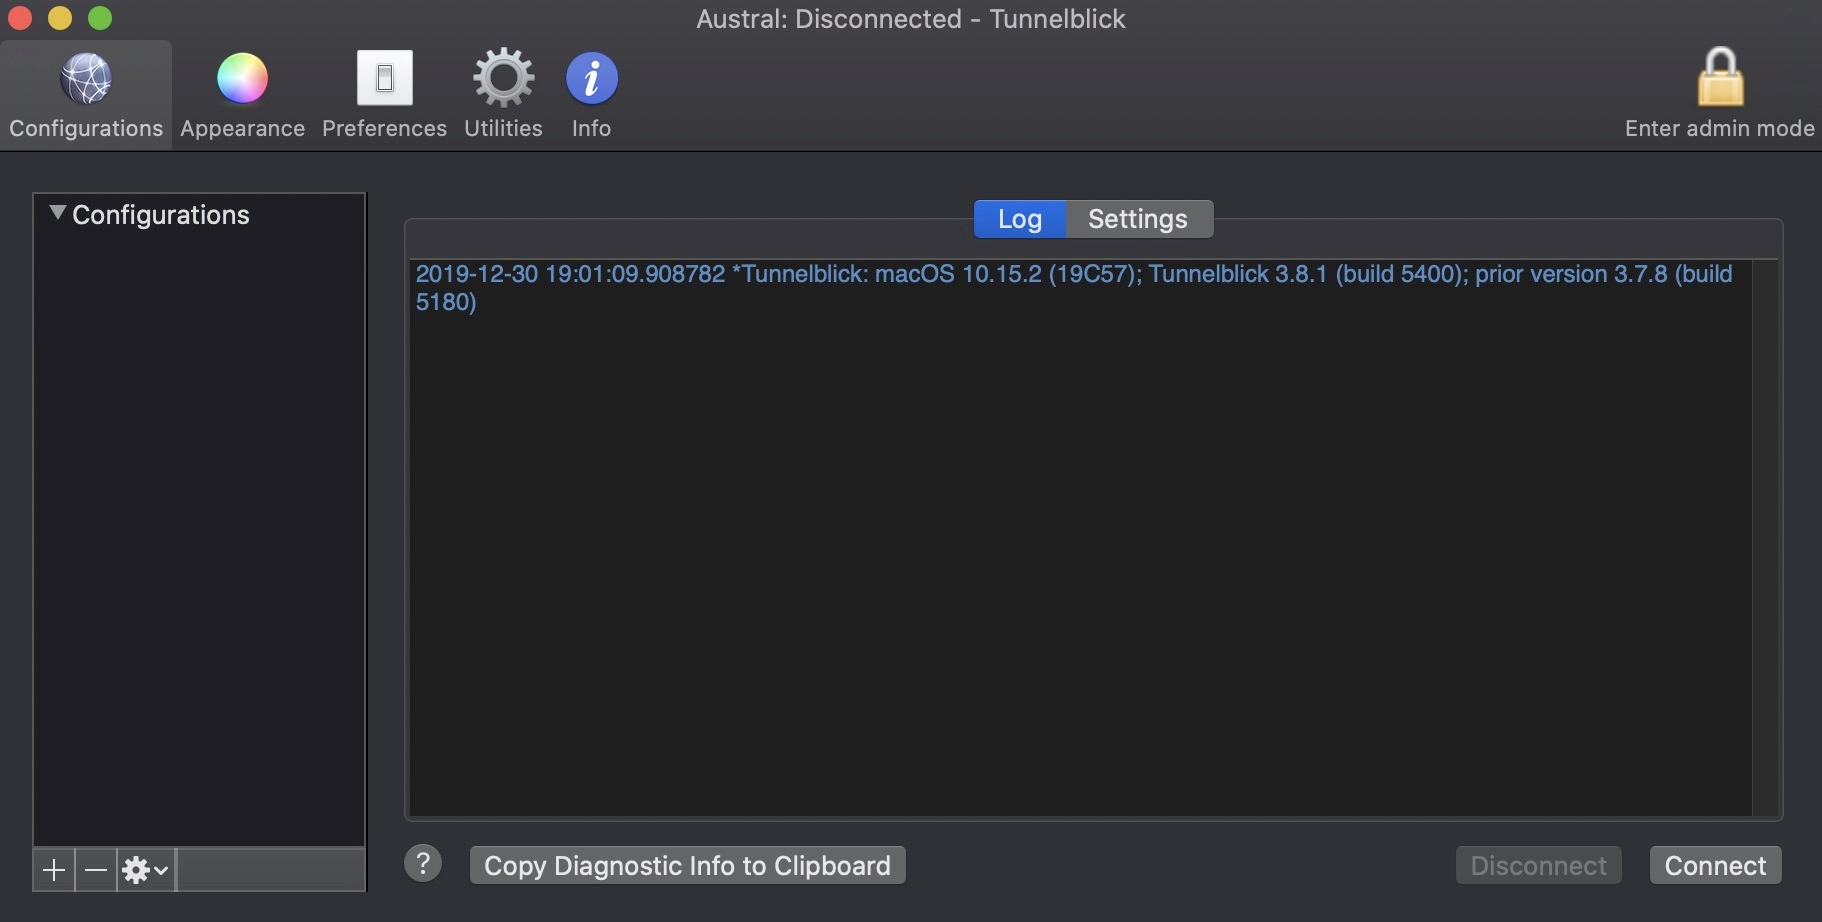
And then, press on “Connect”.
Now, you should have some new routes in your client machine:
$ netstat -rn # or route -n on Linux OS

Destination        Gateway Flags        Netif Expire

10.8.0.1/32        10.8.0.5 UGSc         utun5

10.8.0.5           10.8.0.6 UH           utun5

172.31.16/20       10.8.0.5 UGSc         utun5
As you can see, there is a route to the local database network via the VPN interface, so you should be able to access the database service using the Private Database IP Address.
$ mysql -p -h172.31.30.248

Enter password:

Welcome to the MySQL monitor.  Commands end with ; or g.

Your MySQL connection id is 13

Server version: 8.0.18-9 Percona Server (GPL), Release '9', Revision '53e606f'


Copyright (c) 2000, 2019, Oracle and/or its affiliates. All rights reserved.


Oracle is a registered trademark of Oracle Corporation and/or its

affiliates. Other names may be trademarks of their respective

owners.


Type 'help;' or 'h' for help. Type 'c' to clear the current input statement.


mysql>
It’s working. Now you have your traffic secured using a VPN to connect to your database node.
Conclusion
Protecting your data is a must if you’re accessing it over the internet, on-prem, or on a mixed environment. You must know how to encrypt and secure your remote access.
As you could see, with OpenVPN you can reach the remote database using the local network through an encrypted connection using self-signed certificates. So, OpenVPN looks like a great option for this task. It’s an open source solution, and the installation/configuration is pretty easy. We used a basic OpenVPN server configuration, so you can look for more complex configuration in the OpenVPN official documentation to improve your OpenVPN server.