
Azure Tips and Tricks 112 - Quick and Dirty User Authentication with Azure Web Apps and MVC5
Azure Tips and Tricks Videos are NOW Available! : Get all the goodness of Azure Tips and Tricks in video form. Read more about it here
Intro
Most folks aren’t aware of how powerful the Azure platform really is. As I’ve been presenting topics on Azure, I’ve had many people say, “How did you do that?” So I’ll be documenting my tips and tricks for Azure in these posts.
The Complete List of Azure Tips and Tricks
What is Quick and Dirty User Authentication?
When I’m building out a website with MVC5 and Azure, it typically lands on *.azurewebsites.net and generally I don’t need any user authentication. But if I need it, I typically need 1 administrator account and 0 users. So why didn’t I just go to Settings -> Authentication/Authorization and turn on AAD or create a gmail, twitter, etc. login? Turns out that I could have set something like that up (after spending time researching how), but I really just needed a layer of authentication for myself (the one and only administrator) and prevent anyone else without that password to my site. I didn’t want to use any of the built-in authentications methods of ASP.NET either as I didn’t want/need a database to maintain.
My Requirements
- My requirements are a login page that has a username and password.
- I will store the actual username and password as a setting in Azure App Settings for my web app.
- I’ll use Forms authentication.
- I want to do this with the FREE Tier of Azure Web App Service
How I roll Single User Authentication with Azure Web Apps and MVC5
Part 1:
- I create a new MVC5 App in Visual Studio.
- In my web.config, I add the following lines inside my System.Web tags to turn on forms-based authentication configuration.
<authentication mode="Forms">
    <forms loginUrl="~/Account/LogOn" timeout="30"/>
</authentication>
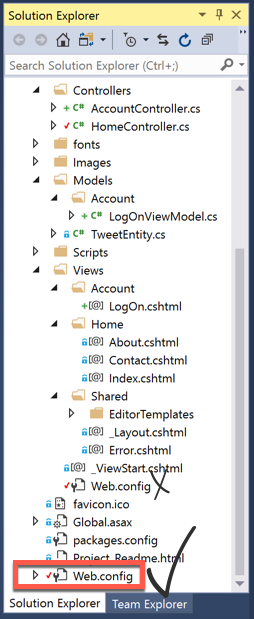
Note: Make sure you are using the root web.config.
Part 2:
- Add the following filter to register the AuthorizeAttribute inside the
~\App_Start\FilterConfig.cs.
filters.Add(new AuthorizeAttribute());
Part 3:
- Create a ViewModel and give it the name of LogOnViewModel.
- I would put this in the following folder
Models\Account\LogOnViewModel.cs. - We’ll use DataAnnotations and require a Username and Password.
using System.ComponentModel.DataAnnotations;

namespace MVCMobileApp.Models.Account
{
    public class LogOnViewModel
    {
        [Required]
        [Display(Name = "User name")]
        public string UserName { get; set; }

        [Required]
        [DataType(DataType.Password)]
        [Display(Name = "Password")]
        public string Password { get; set; }
    }
}
Part 4:
- We need to add a controller named AccountController in our Controllers folder.
- We’ll allow anonymous access to this controller and validate rather the user typed in the proper username and passsword as defined by our App Settings Stored in Azure.
- If they are successful, then redirect to our Home page else, display an error.
- By using the CloudConfigurationManager, I can also commit this to GitHub without worry if my secrets are revealed.
 public class AccountController : Controller
    {
        [AllowAnonymous]
        public ActionResult LogOn()
        {
            LogOnViewModel model = new LogOnViewModel();

            return View(model);
        }

        [AllowAnonymous]
        [HttpPost]
        public ActionResult LogOn(LogOnViewModel model, string returnUrl)
        {
            if (ModelState.IsValid)
            {
                if (model.UserName == CloudConfigurationManager.GetSetting("UName") && model.Password == CloudConfigurationManager.GetSetting("UPw"))
                {
                    FormsAuthentication.SetAuthCookie(model.UserName, false);
                    return RedirectToAction("Index", "Home");

                }
                else
                {
                    ModelState.AddModelError("", "Incorrect username or password");
                }
            }

            return View(model);
        }

        public ActionResult LogOff()
        {
            Request.Cookies.Remove("UserName");
            FormsAuthentication.SignOut();
            return RedirectToAction("Index", "Home");
        }
    }
Part 5:
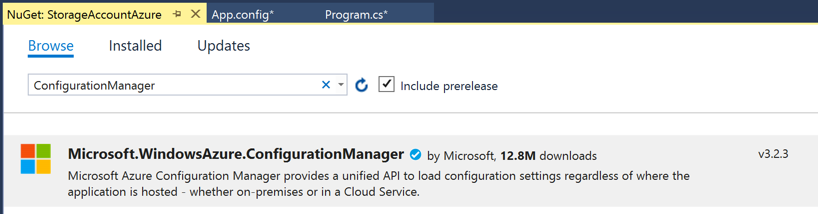
- You’ll need to use NuGet to pull in references to : Microsoft.WindowsAzure.ConfigurationManager inside of Visual Studio.
Part 6:
- Go into your Azure Web App -> Settings -> Application Settings and define two keys with whatever name you want along with the value you want for your username and password.

Part 7:
- Finally add your view in named LogOn.cshtml. I typically put it inside another folder like
Views\Account - This will simply create our form with a username and password. After the user types in the information, it validates it with the values with what is in our Azure App Service settings.
<meta name="viewport" content="width=device-width, initial-scale=1.0">

@model MVCMobileApp.Models.Account.LogOnViewModel
@{
    Layout = null;
    ViewBag.Title = "Log On";

    ViewBag.ReturnUrl = Request["ReturnUrl"];
}
<div class="login">
    @using (Html.BeginForm(null, null, new { returnUrl = ViewBag.ReturnUrl }, FormMethod.Post))
    {
        @Html.AntiForgeryToken()
        @Html.ValidationSummary(true)<br />
        @Html.TextBoxFor(m => m.UserName, new { placeholder = Html.DisplayNameFor(m => m.UserName) })<br />
        @Html.PasswordFor(m => m.Password, new { placeholder = Html.DisplayNameFor(m => m.Password) })<br />
        <button type="submit" class="btn btn-primary btn-block btn-large">Log On</button>
    }
</div>
Part 8:
On the page that I want to protect (for example my Index page in Home) on the controller I’d do the following:
[Authorize]
public class HomeController : Controller
...
Part 9:
Add a Sign Out Action link inside the _Layouts.cshtml in the Shared folder.
<li>@Html.ActionLink("Log Off", "LogOn", "Account", null, new { @class = "actnclass" })</li>
Nice! Our single user authentication is now in place. See the quick demo below and keep in mind that this really is for quick and dirty user authencation.
Thanks for reading!
Want more Azure Tips and Tricks?
If you’d like to learn more Azure Tips and Tricks, then follow me on twitter or stay tuned to this blog! I’d also love to hear your tips and tricks for working in Azure, just leave a comment below.
Leave a Comment