How to create an alarm for an EC2 instance with Cloudwatch
Cloudwatch falls under “Management & Governance” service in AWS (Amazon Web Services). Cloudwatch is a monitoring and management service which can be used to monitor services on AWS and manage them when a particular condition meets. Cloudwatch can be used to collect performance and operational data (CPU, RAM, Network_IN, Network_Out, etc) of the services available on AWS .
In terms of billing, Cloudwartch comes with 2 different options, Free Tier and Paid Tier. Free Tier comes with Basic Monitoring Metrics at 5-minute frequency and Paid Tier allows you to monitor at 1-minute frequency. This is just a small difference between Free Tier and Paid Tier. To understand more about billing, click here.
Before we proceed, let's understand a few terms which we are going to see later in this article.
Alarm: Alarm is used to perform one more actions based on the value of the metric or expression relative to a threshold over a number of time periods
- OK: When the metric is within the range that we have specified, the alarm is in the OK state
- IN ALARM: When the metric crosses the threshold value the alarm transits to the “IN ALARM” state
- INSUFFICIENT_DATA: If the data required to make the decision is missing or incomplete, the alarm transits to the “INSUFFICIENT_DATA” state.
SNS Topic: It is a logical communication channel in AWS where notifications are sent. Here, we will use email as our SNS(Simple Notification Service) Topic
EC2 Action: Cloudwatch alarms can be used to take a particular action. Here we will stop an EC2 instance when the alarm goes into “In Alarm” State.
In this article, we will see how to monitor an EC2 instance for its CPU Load. We will create an alarm and see how that can be triggered when CPU Load crosses the specified limit. When this limit reaches, we will turn the EC2 instance off to understand how to take action when the alarm triggers.
Pre-requisites
- AWS Account (Create if you don’t have one)
- EC2 Instance (Click here to learn to create an EC2 instance if you don’t have one or if you want to learn )
What we will do?
- Login to AWS.
- Create an SNS Topic.
- Create an Alarm.
- Increase CPU Load on EC2 instance.
Login to AWS
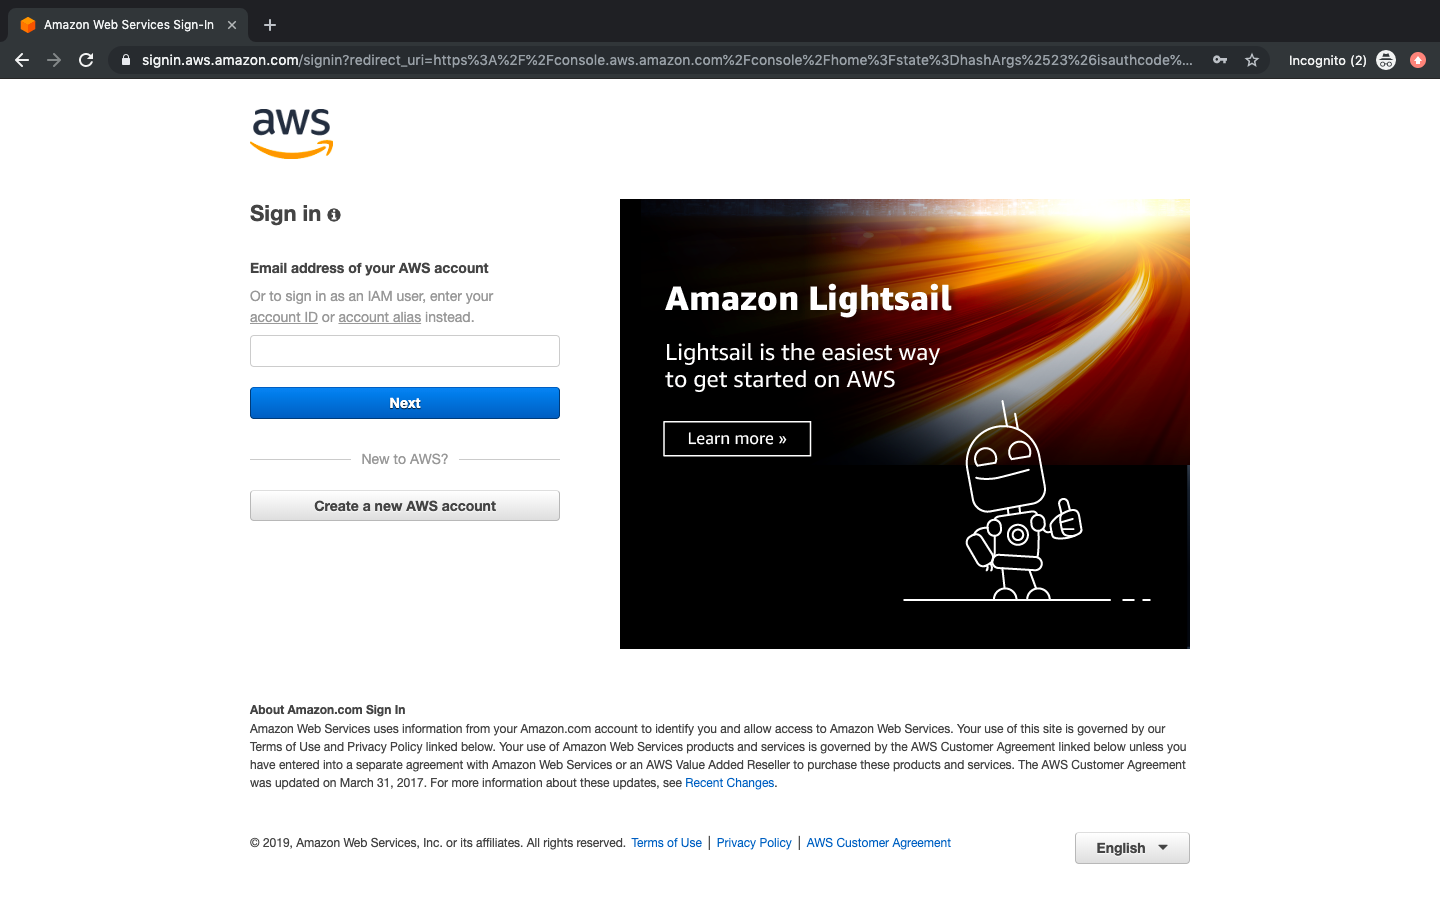
- Click here to go to AWS Login Page.
When we hit the above link, we will see a web page as follows where we are required to login using our login details.
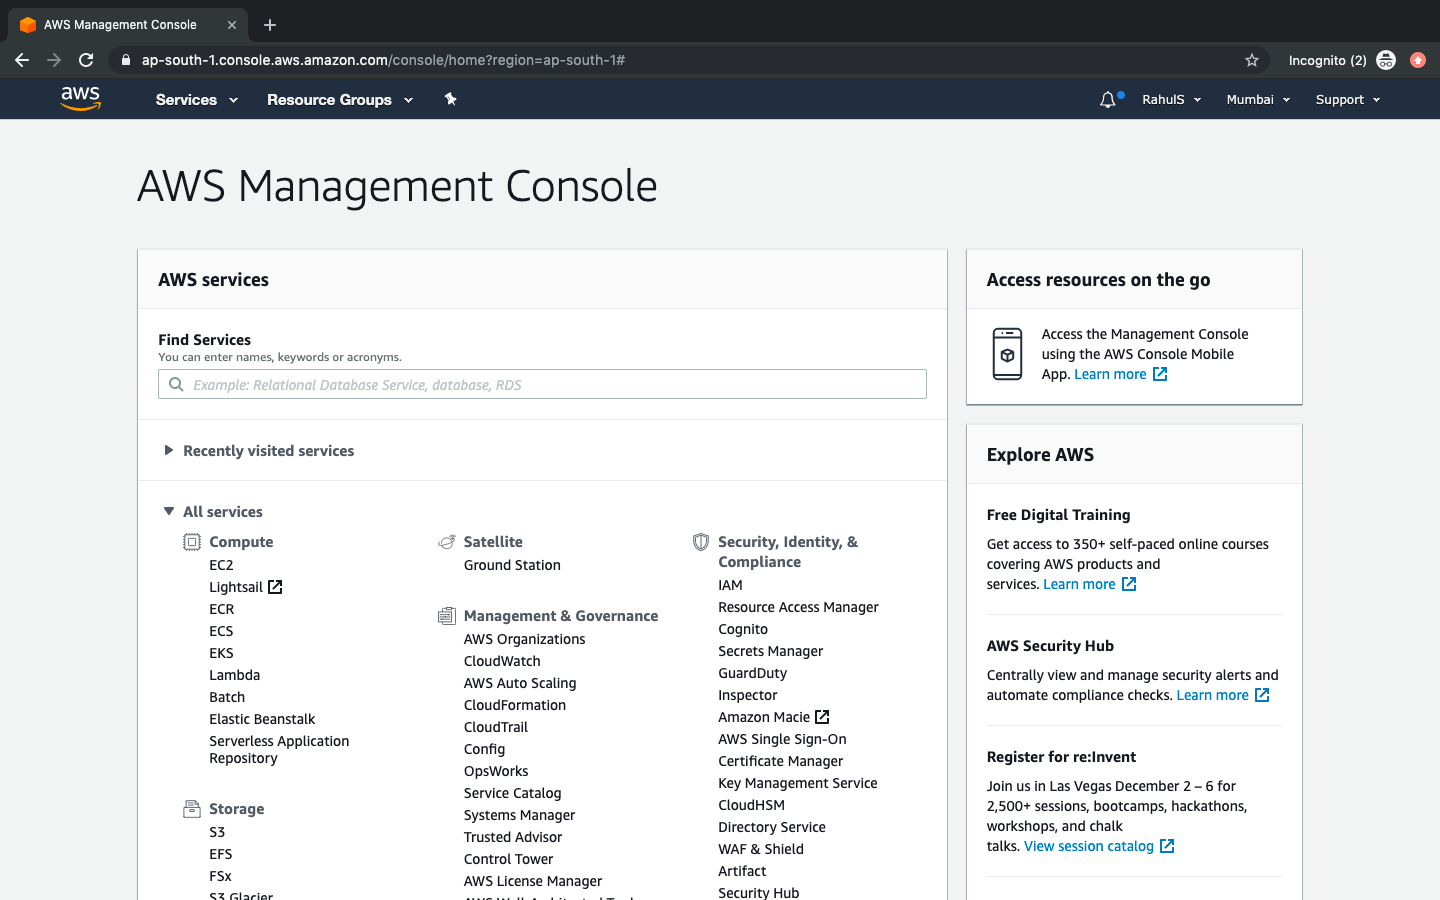
Once we login into AWS successfully, we will see the main console with all the services listed as follows.
Create an SNS Topic
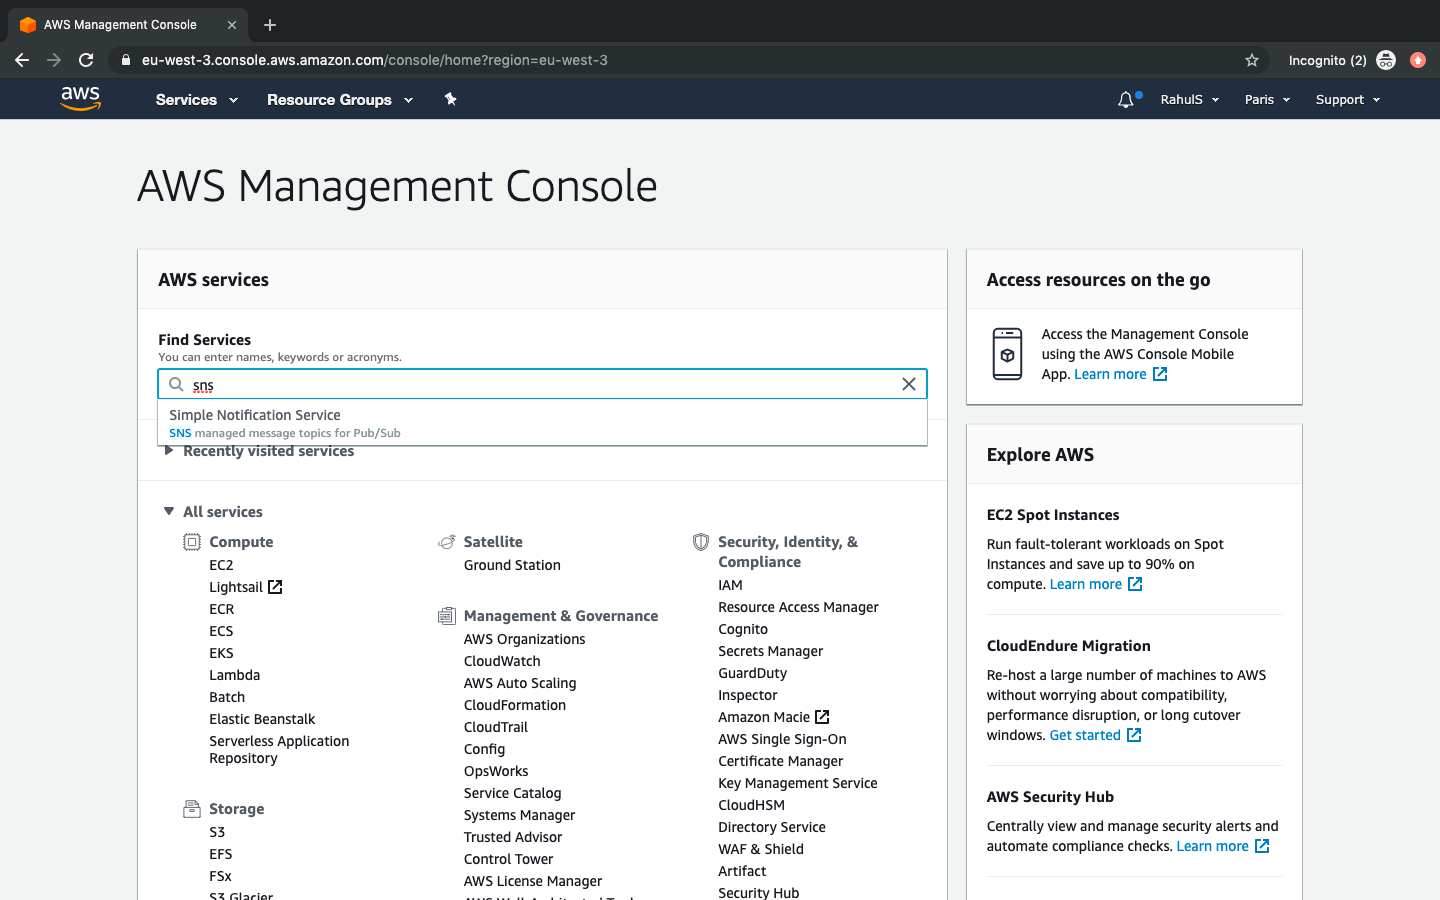
To create an SNS topic to which we will send a notifications, click on “Services” and search for SNS. Click on “Simple Notification Service”. Here we will create an SNS topic and add Email on which notifications will be sent. Remember the name of the topic that we are going to give, this will be required in the next step.
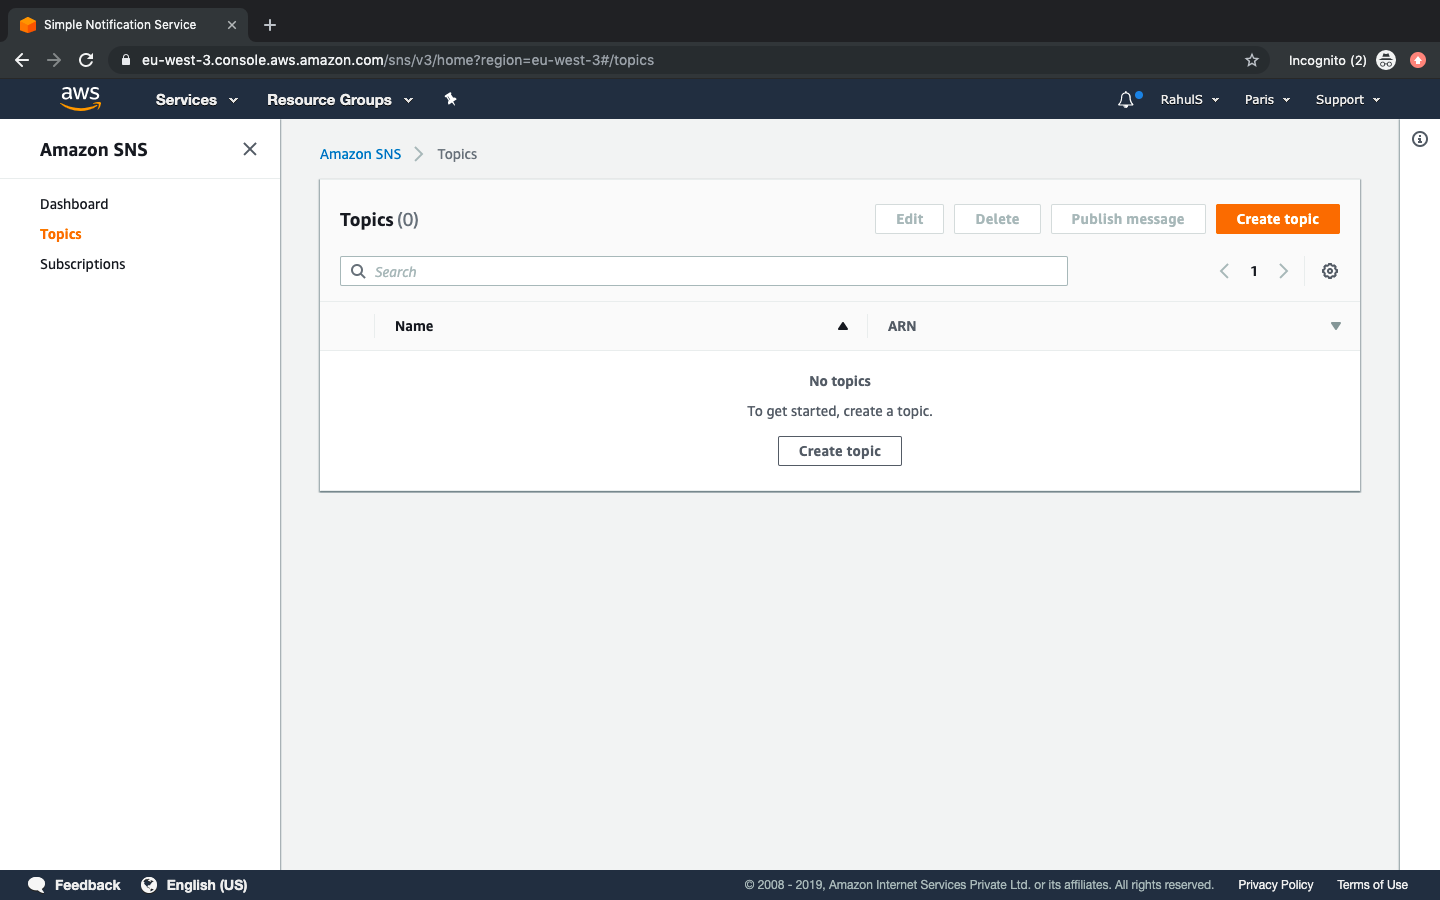
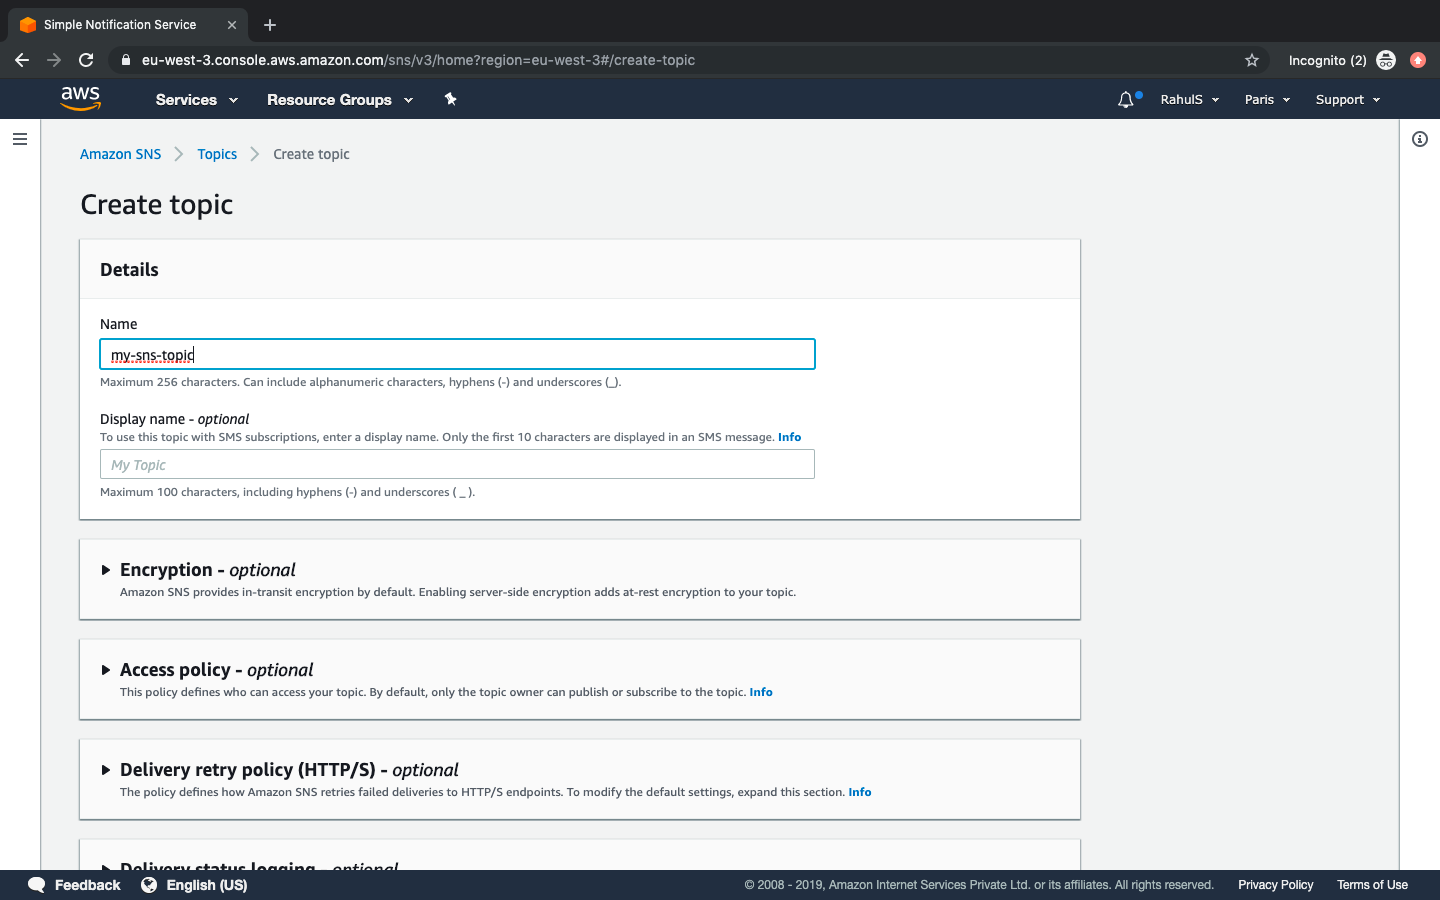
Click on “Create Topic” to create a “Simple Notification Service” topic.
Give a name to the topic to be created, here it is “my-sns-topic” on which notifications will be sent. Display name is optional and can be left as is. Other settings like Encryption, Access Policy, etc are advanced and we won't see them in this article and can be ignored for creating a simple Alarm. Scroll down the page and click on “Create Topic”. This will just create a topic. We are left to add the communication channel.
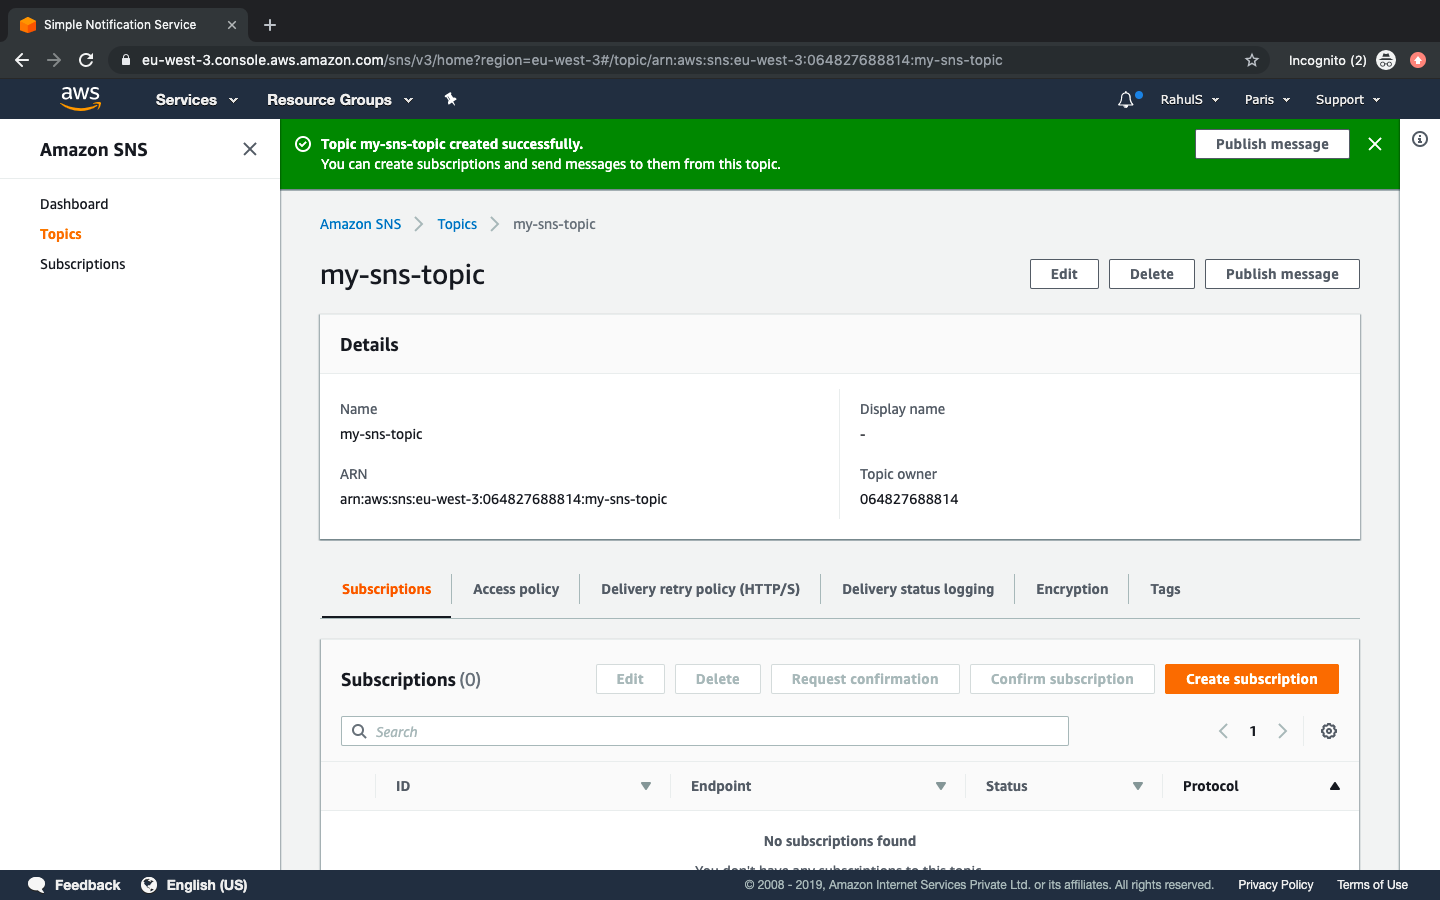
We have just created a topic and not specified and communication medium yet. We will add email as our communication medium, to do so we need to create a subscription.
To create a subscription, click on “Create Subscription”.
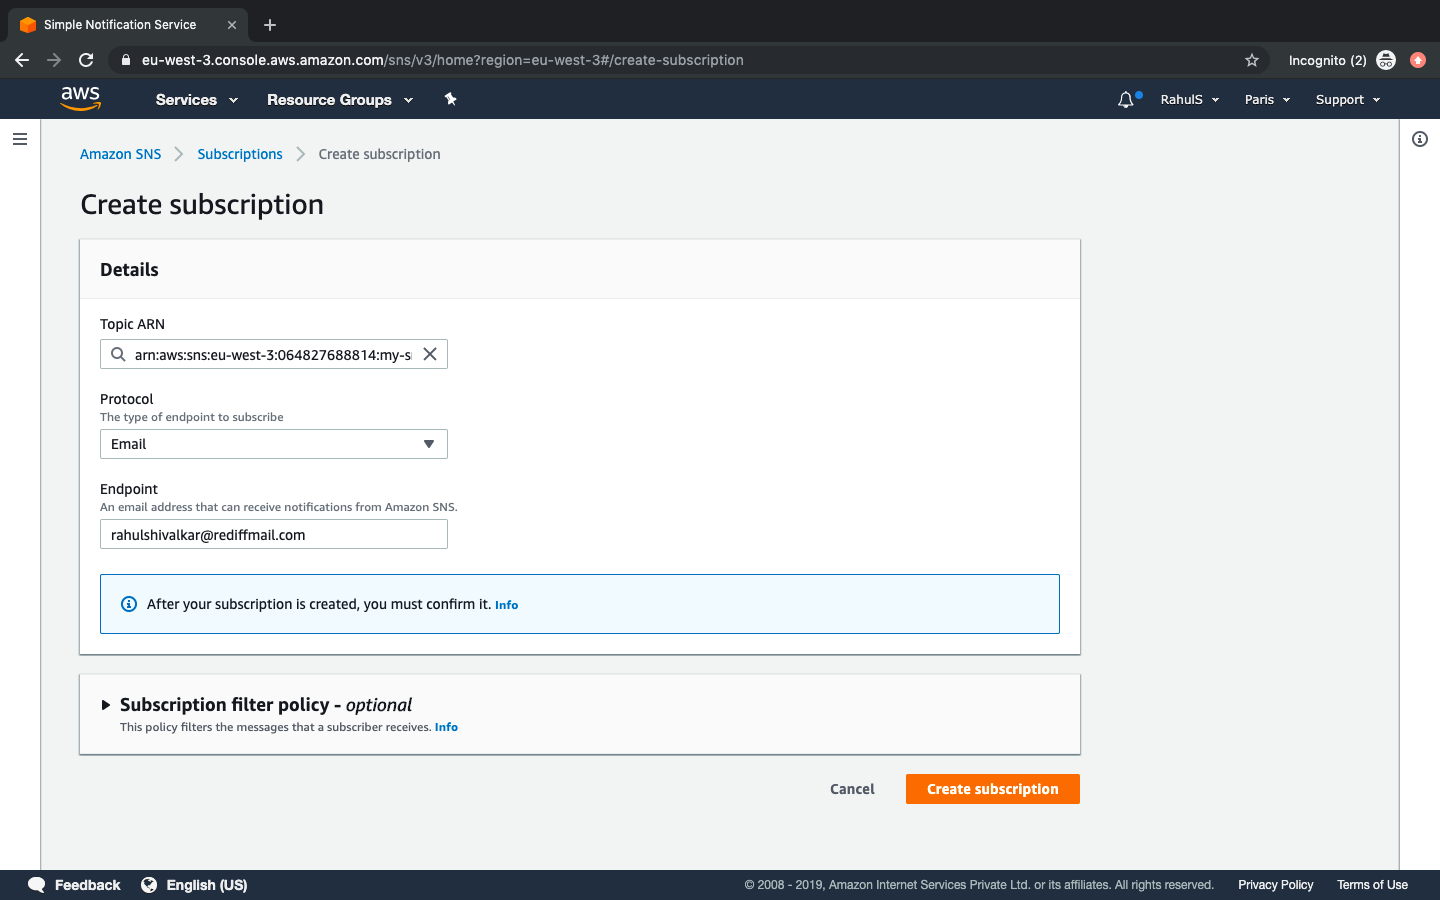
Select an ARN of the topic that we created in the previous step and choose the protocol as email (medium) from the drop down menu. Specify your email address where notifications need to be sent. Click on “Create Subscription” to finish this step. Once you have your subscription in place, you will get an email from AWS to subscribe the topic. Unless we subscribe, we won't get notifications on our email. So do not forget to subscribe to the topic.
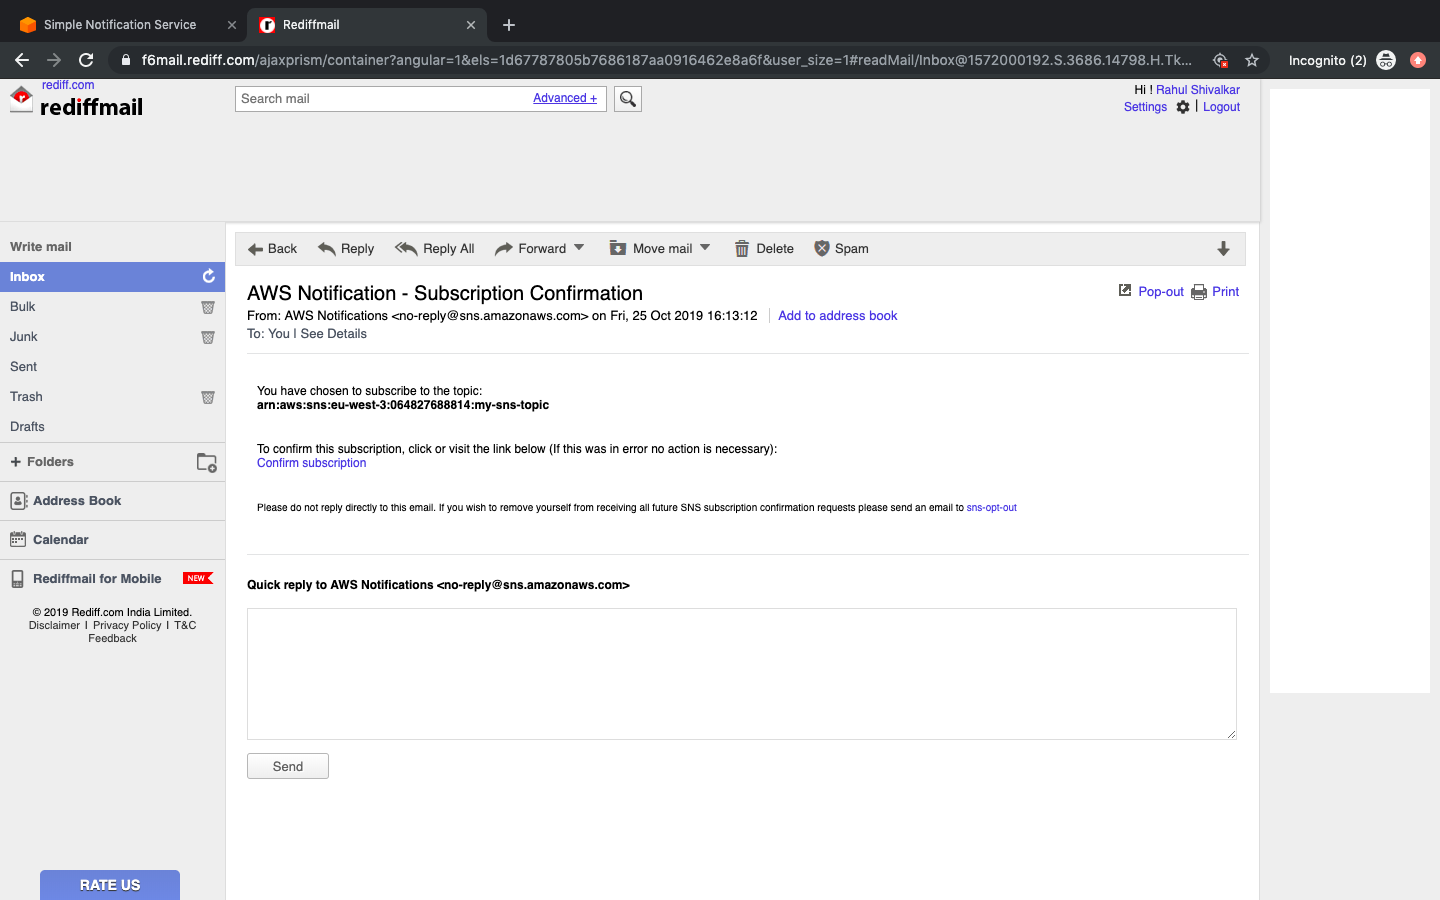
To subscribe to the topic you just created, open your email box and click on confirm subscription. Here ends the process of creating a topic and subscription.
Create an Alarm
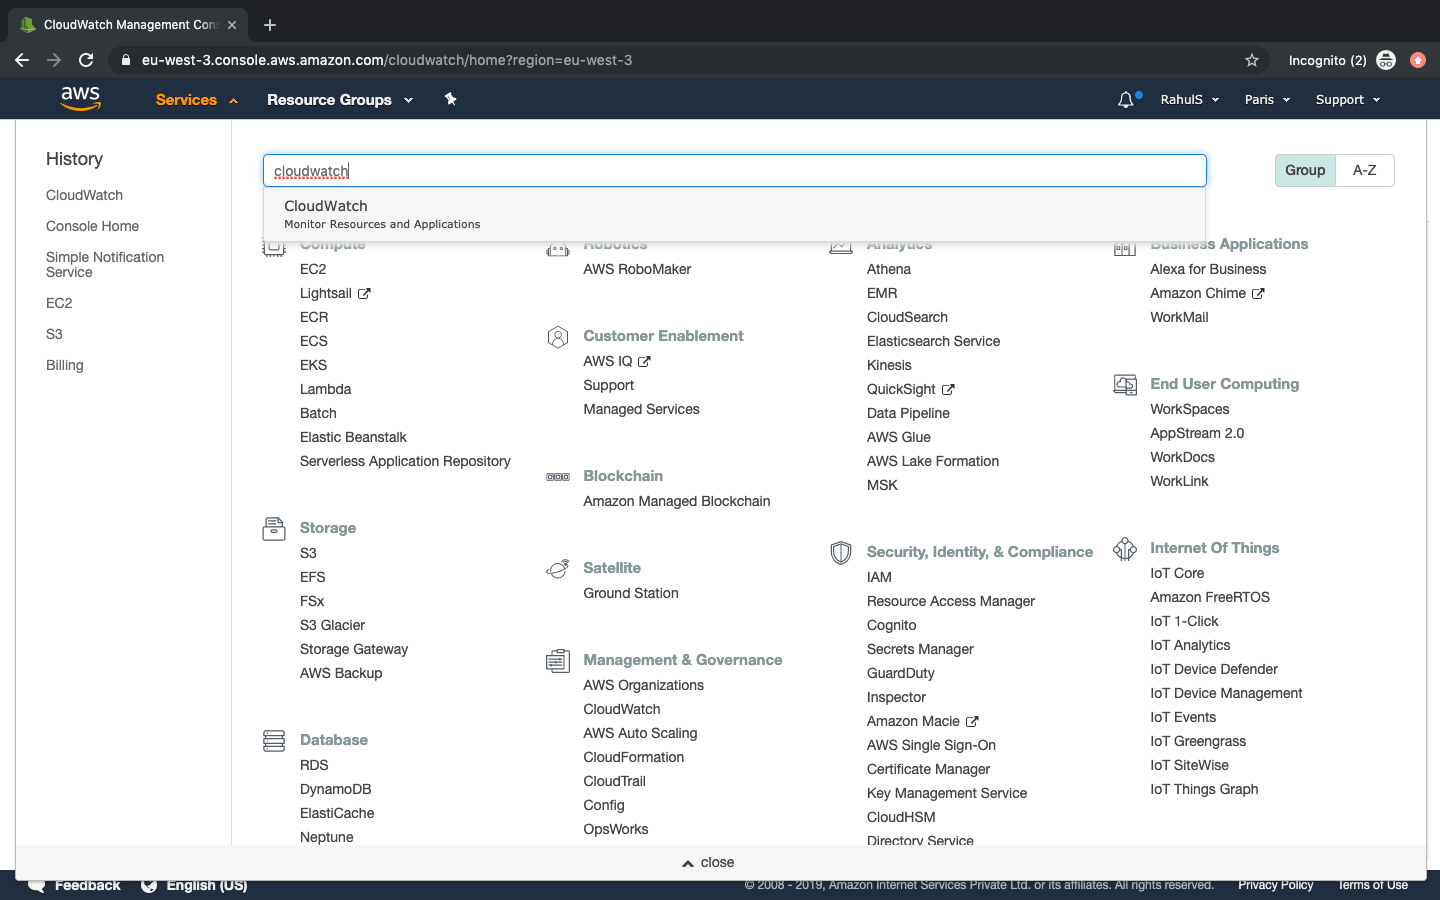
Now, to create an alarm click on “Services” and search for “Cloudwatch”, click on it to select.
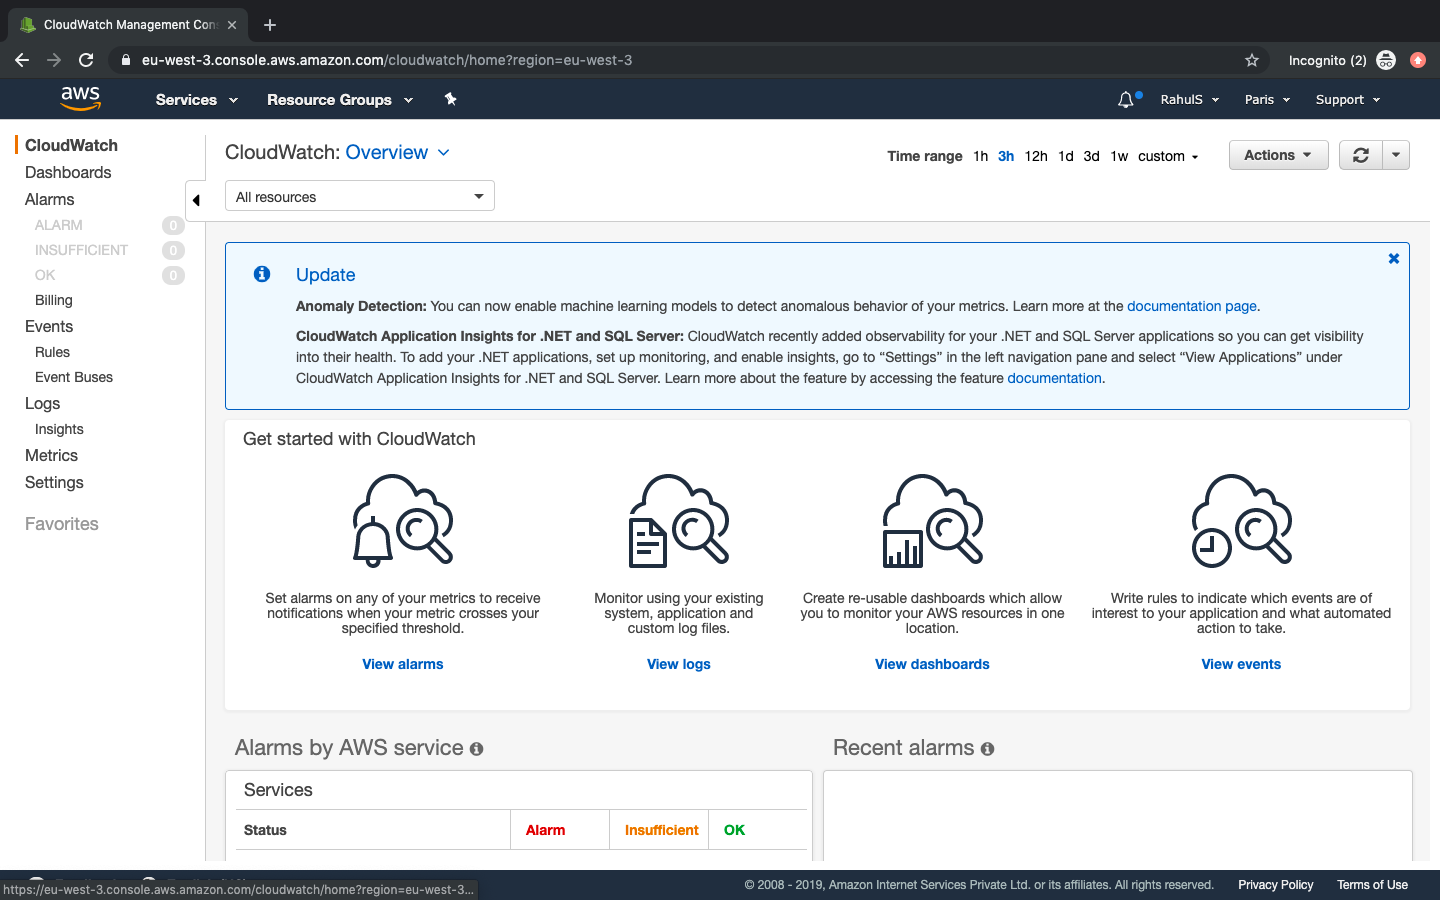
You will see a screen as follows. Now click on “Alarms” on the left panel.
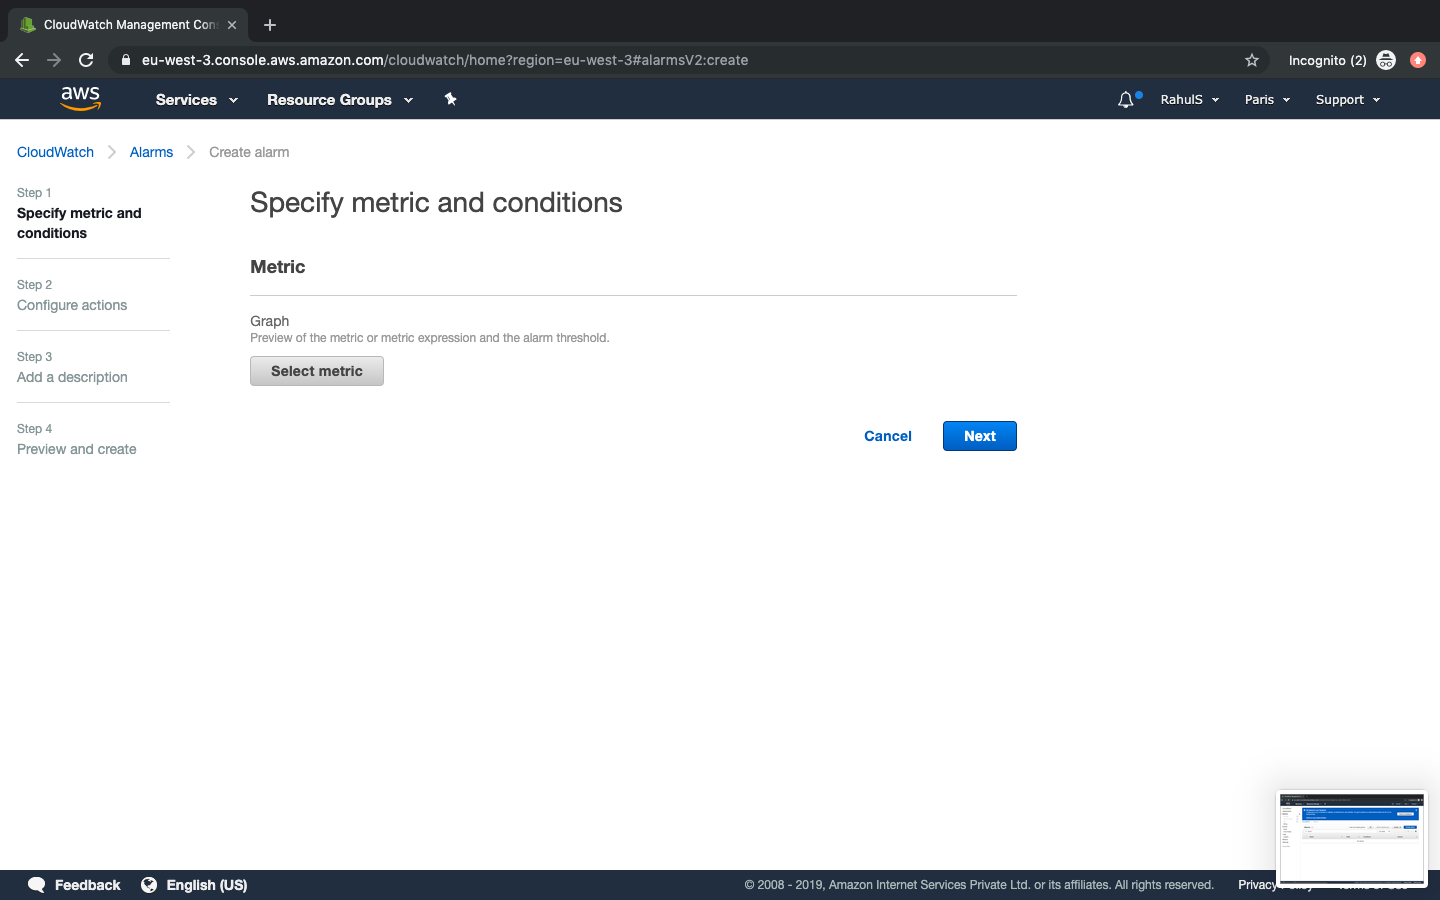
Click on “Create alarm”.

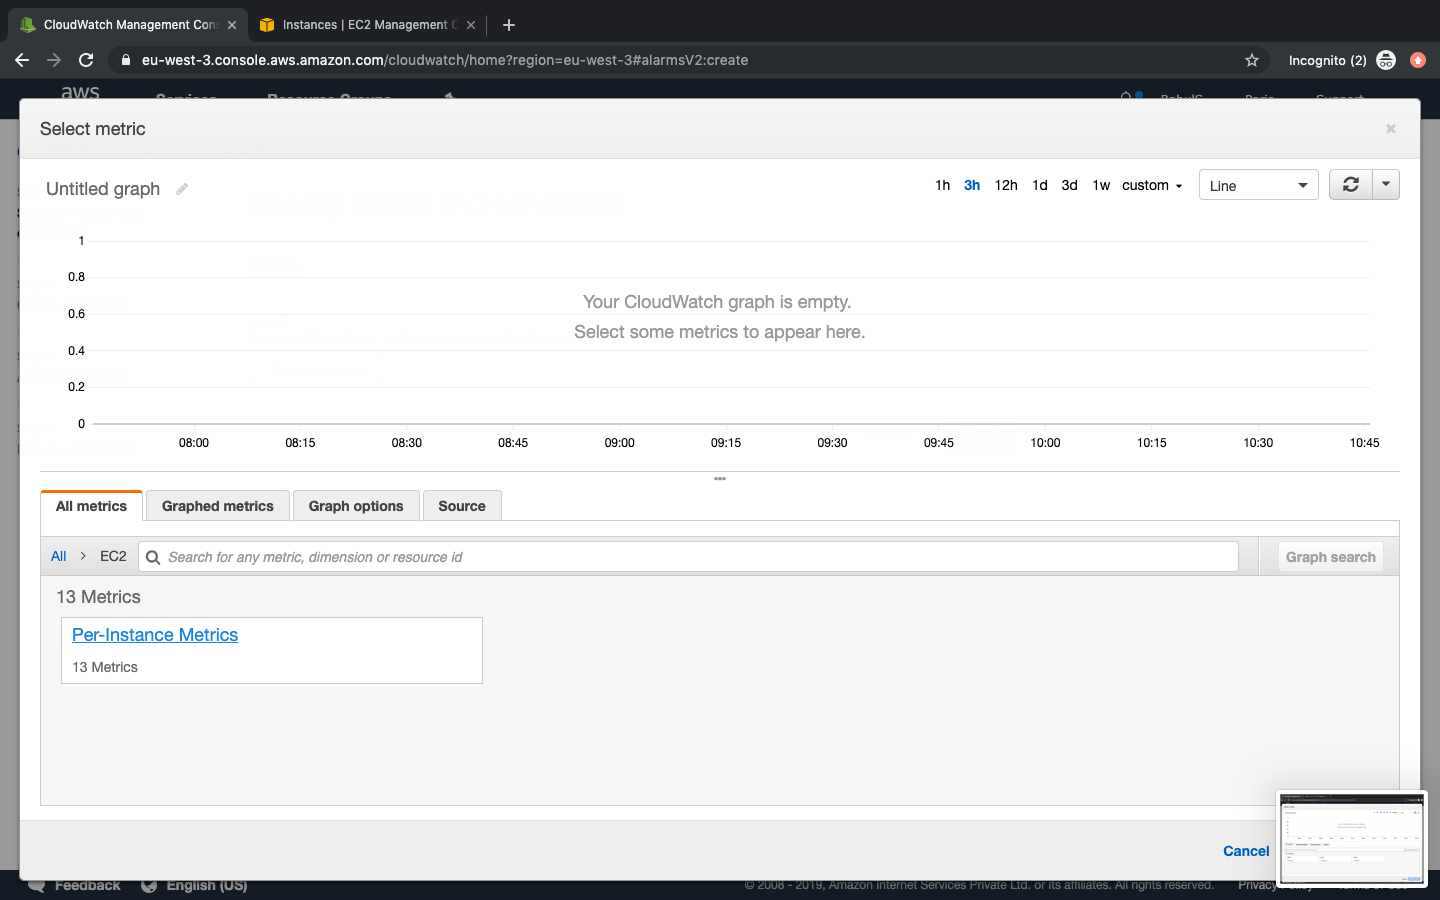
Click on “Select metrics”
Under “All metrics”, select EC2.
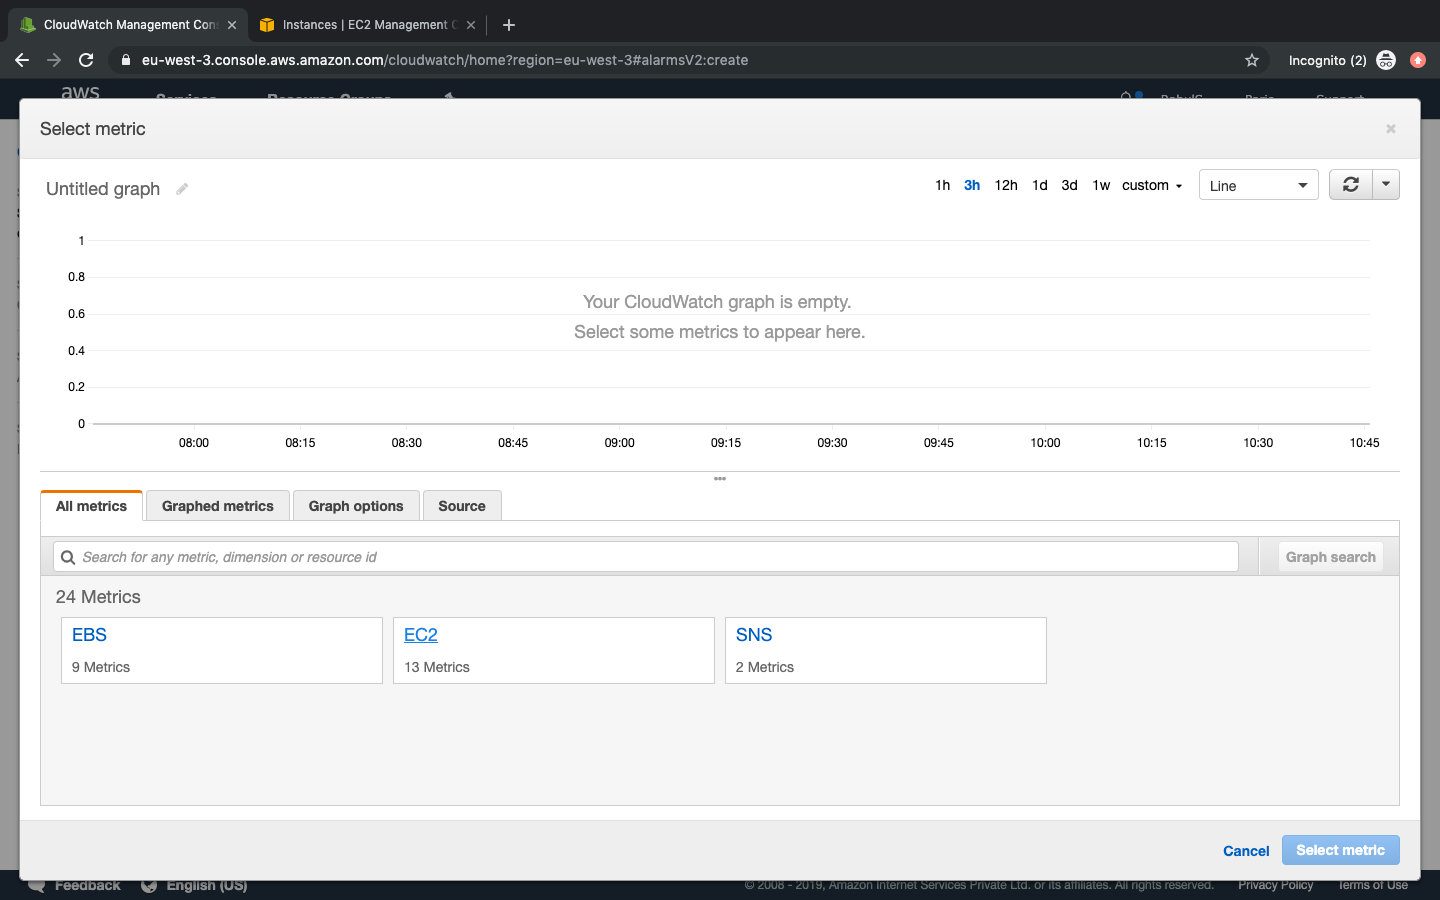
Click on “Pre-Instance Metrics”.
Select “CPUUtilization” and then click on “Select metric”.
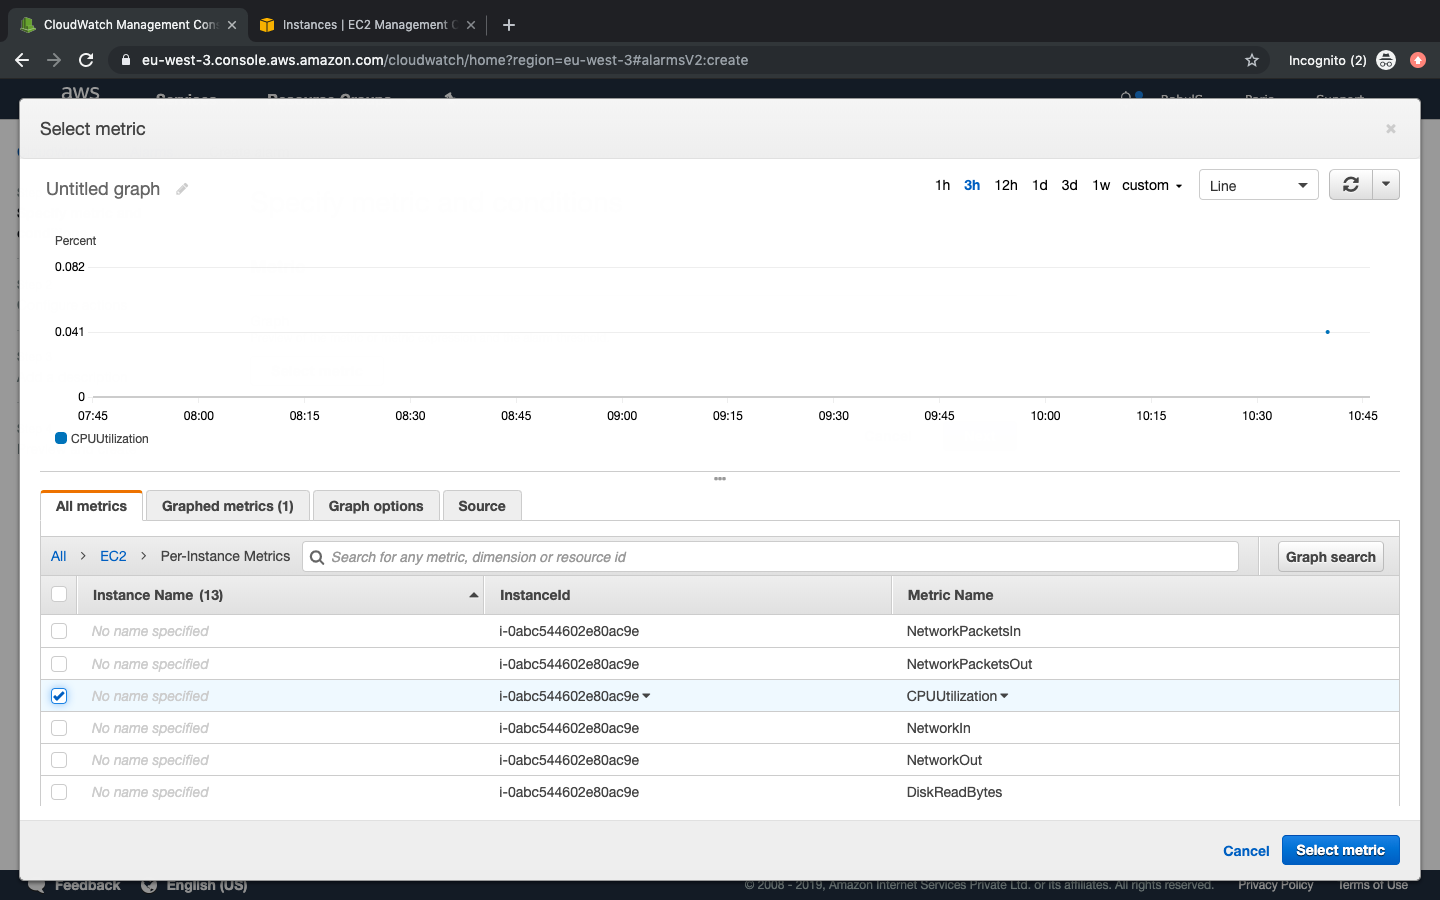
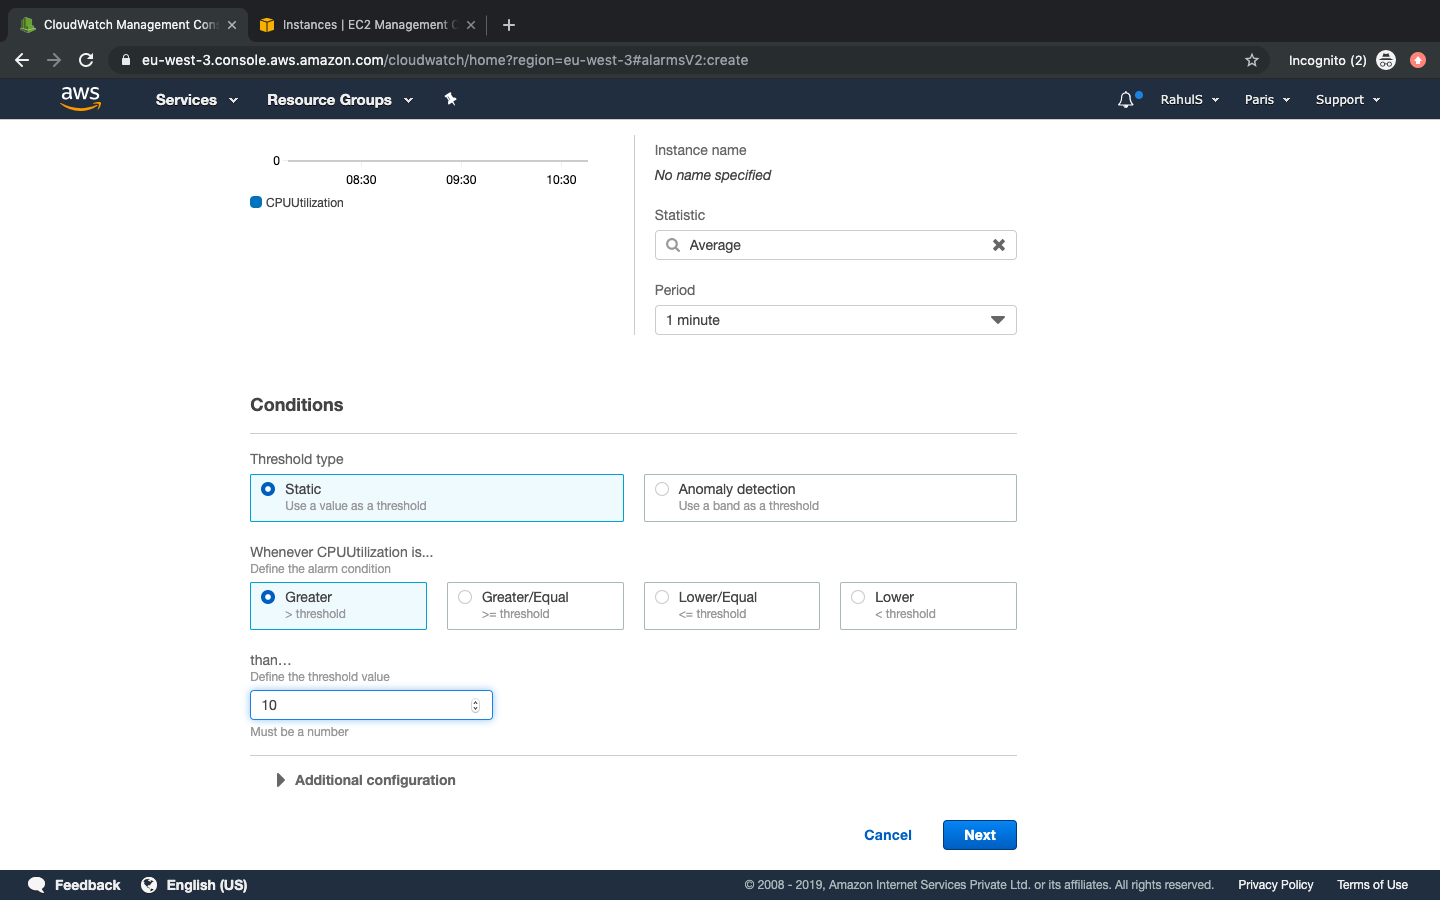
Now, select the Instance ID on which alarm needs to be set and change the period to 1 minute so that we can test the alarm without wasting much of time.
You can try different metrics and settings once you get familiar with this process.

Here comes the part which lets us set the condition, here we will define the threshold value as ‘10’. It means, if the CPU Utilization goes beyond 10% for the perdion of 1 minute the alarm will be triggered.
Once the alarm is triggered, we need to send a notification when alarm goes into “In Alarm” state on the topic we created in the previous state so select that topic name.
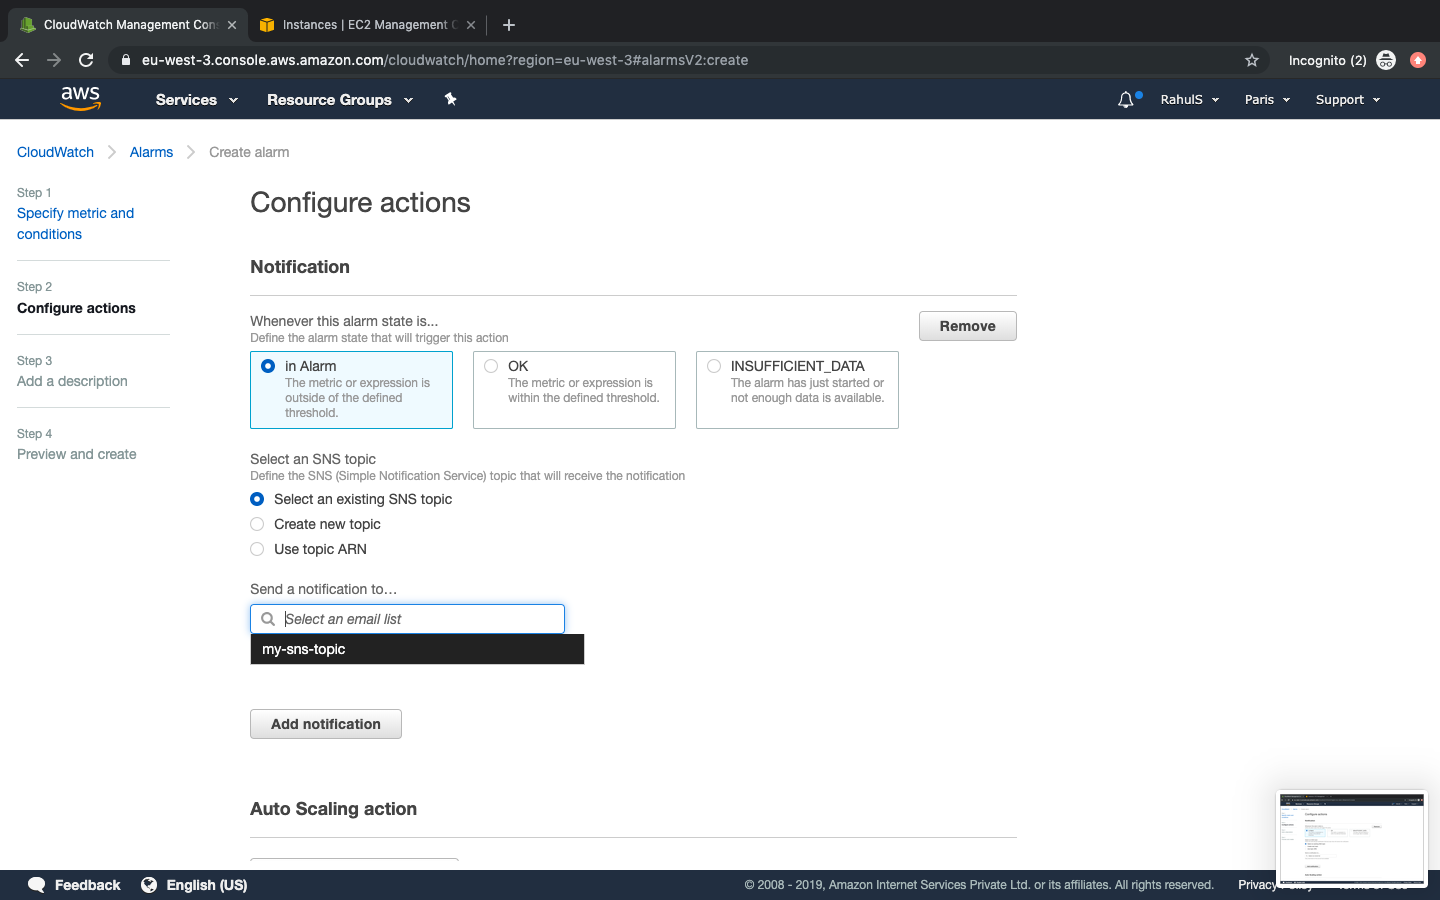
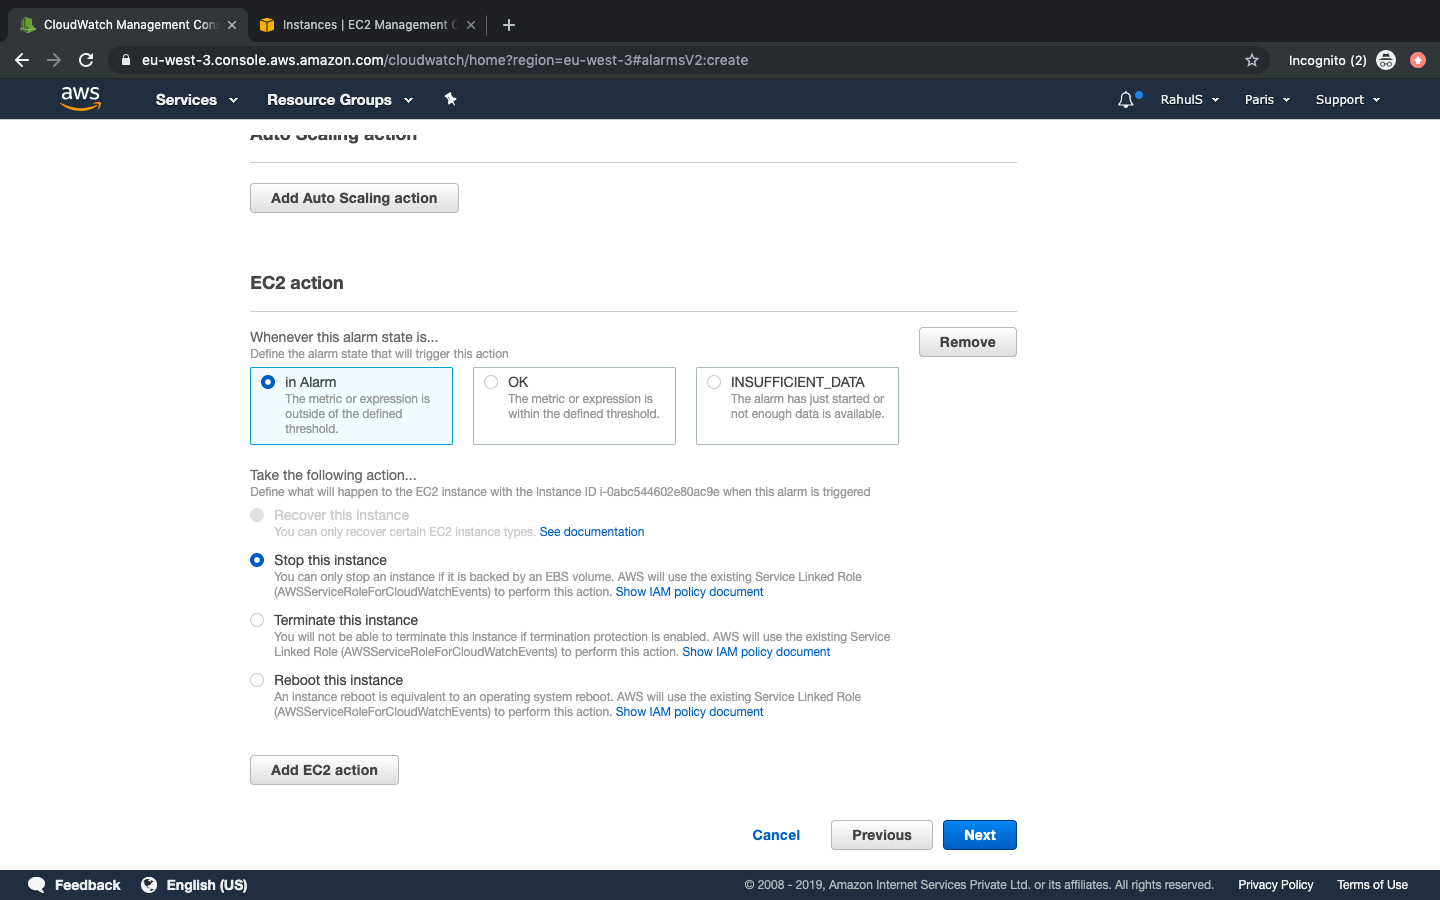
Along with sending a notification, we will also take a particular action on that EC2 instance, here we will stop the instance when the alarm goes into “In Alarm” state. You can select any action of your choice. Click on “Next”.
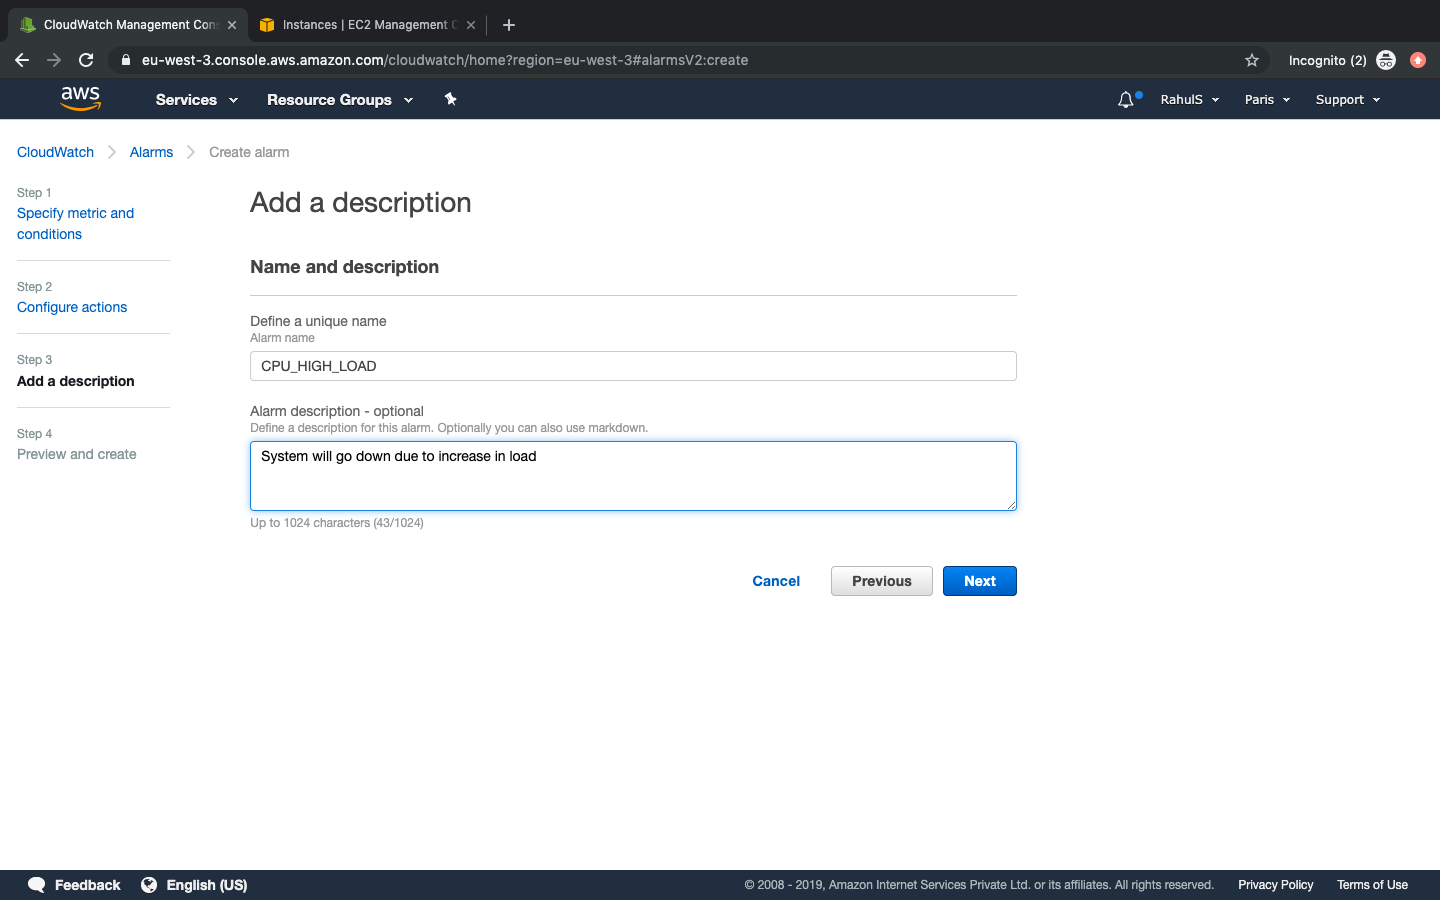
Add Alarm name which will be sent as an email subject, additionally more information can also be sent. Click on “Next”.
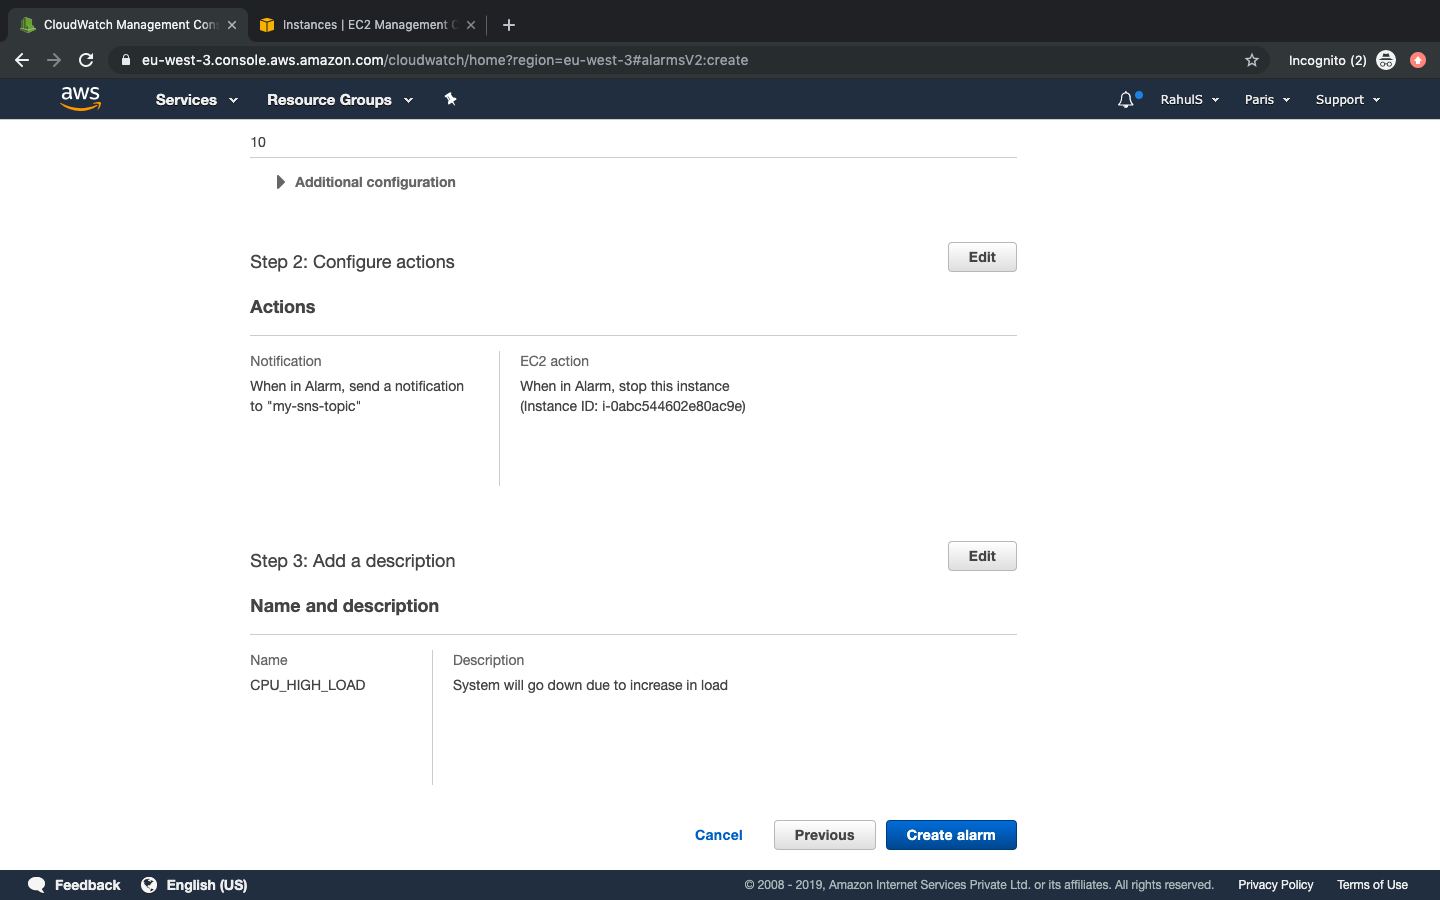
Review the configuration and click on “Create alarm” .
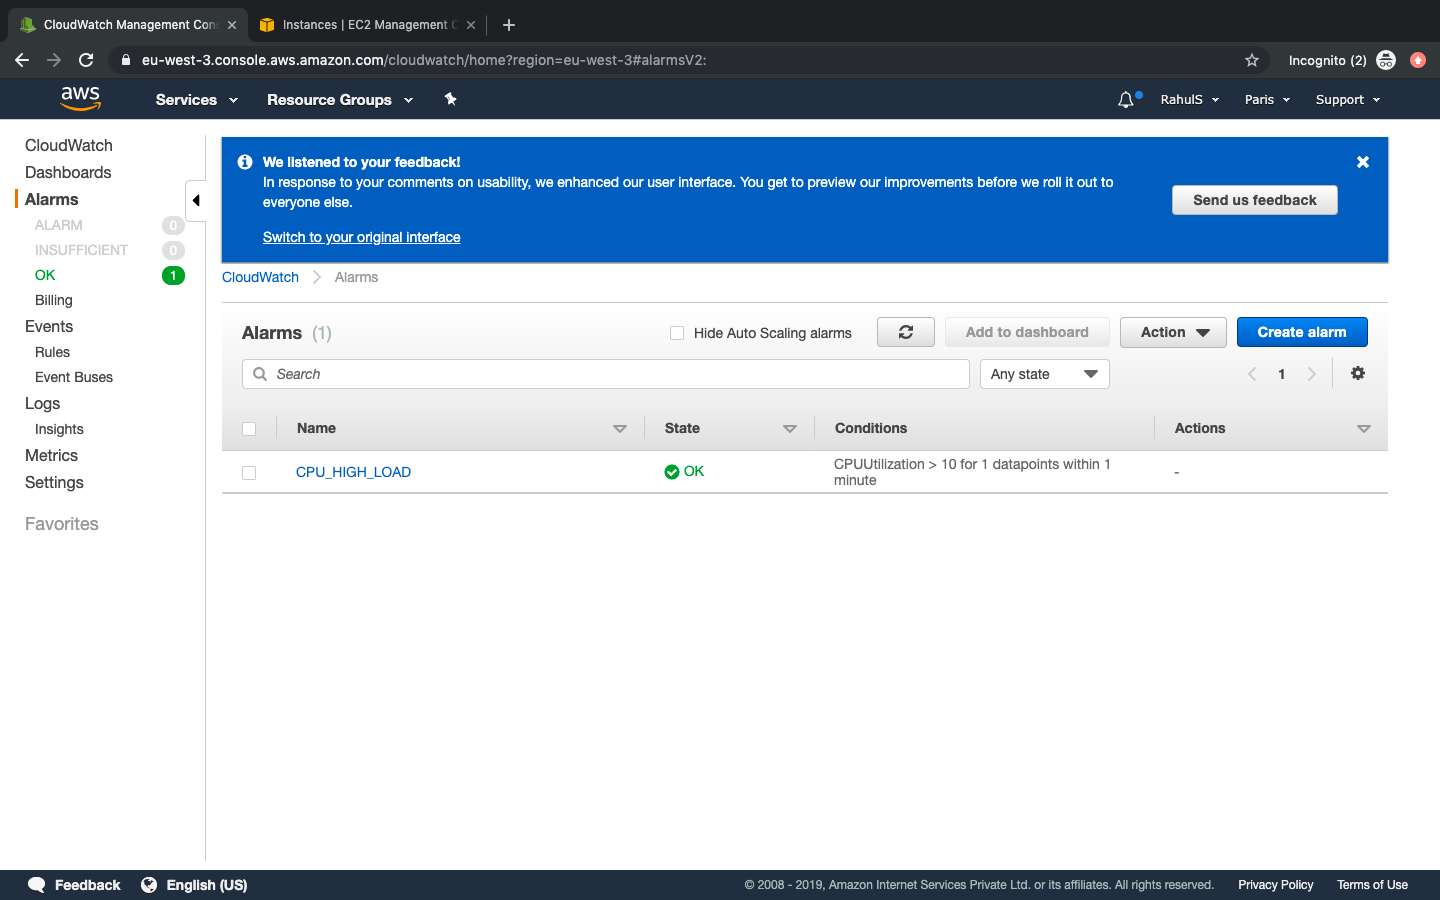
And here ends the complete configuration of setting up the alarm which will send a notification to an SNS topic when the condition meets. Wait for some time and the alarm will be ready to monitor the EC2 instance.
Testing: Increase CPU Load on EC2 instance
To trigger the alarm manually, we will increase the load on the EC2 instance.
To do so, first we need to install a required, stress, package. Find the following steps to install ‘stress’ on ubuntu 18.04.
sudo apt-get update
apt-get install stress
We will now increase the load to 50% for 60 consecutive seconds. This will trigger the alarm and bring down the EC2 instance.
stress --cpu 50 --timeout 120

As soon as the condition meets you will get notified and the instance will be taken down.
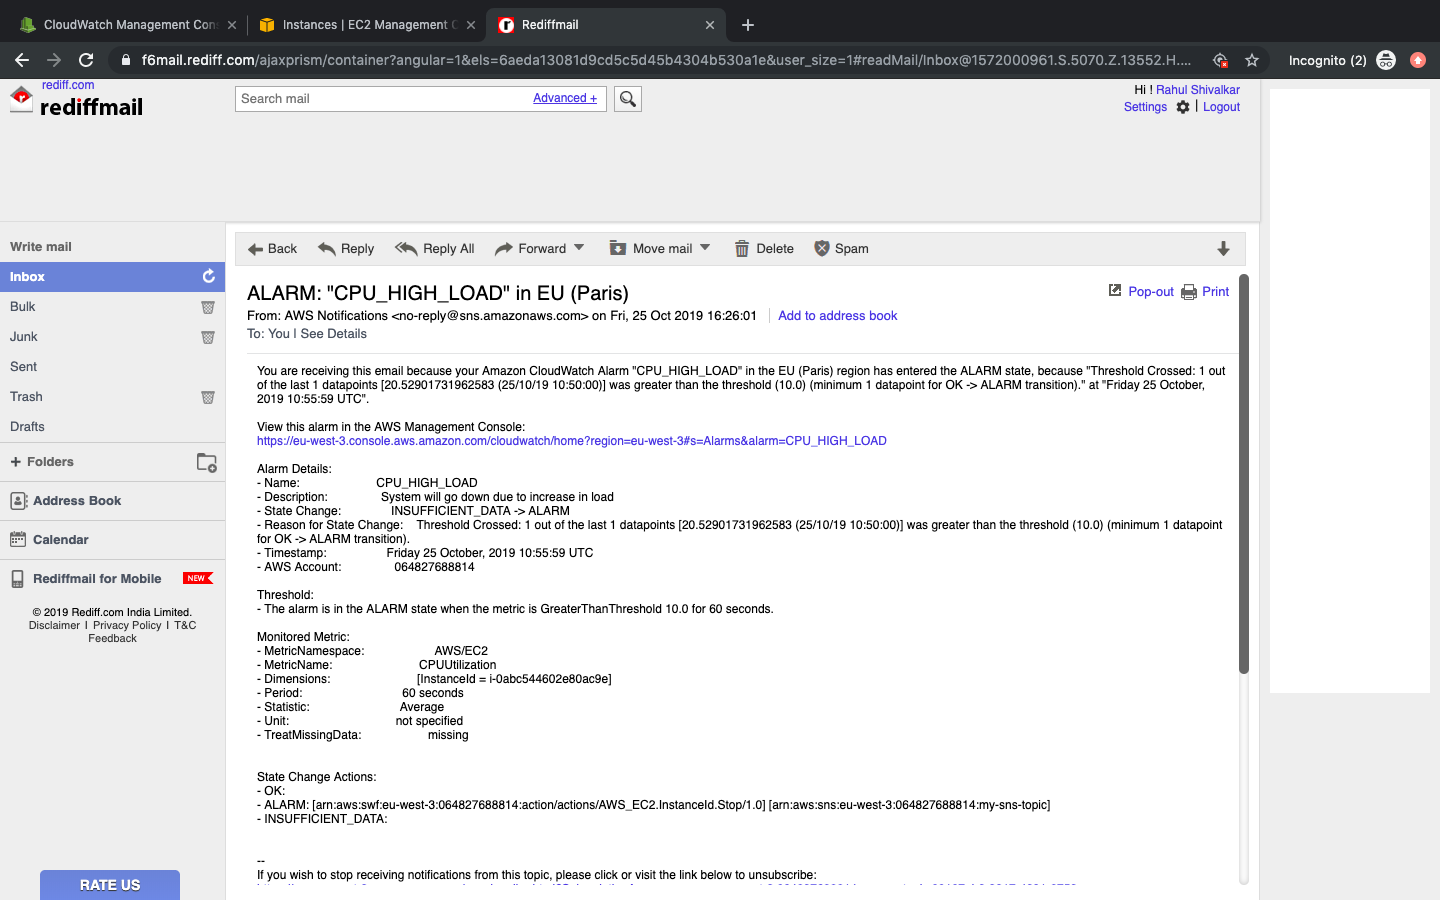
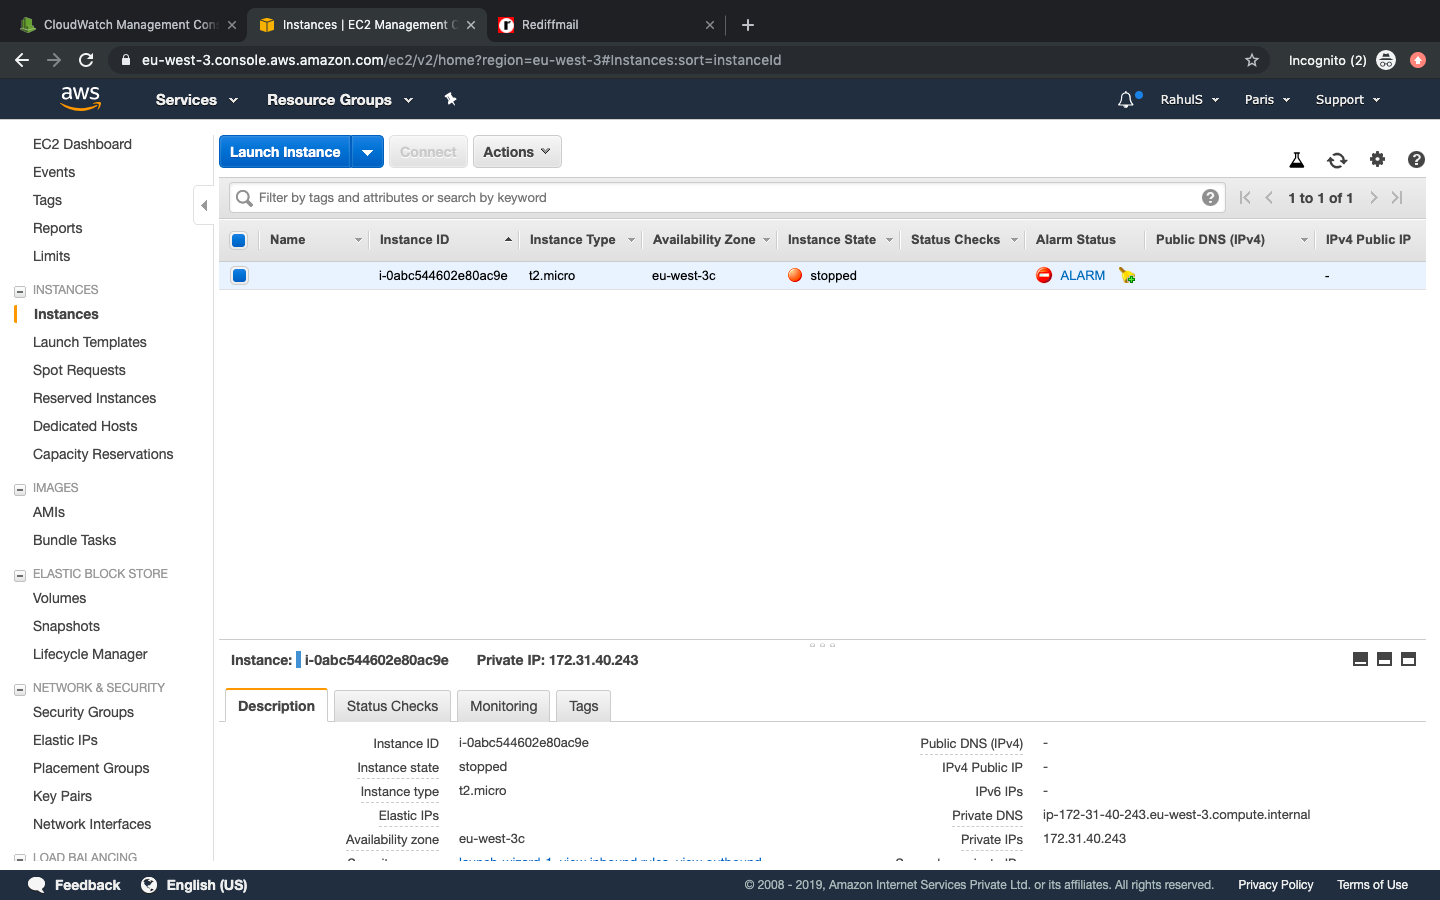
Now you can see in Alarms the state of the alarm that we had created in the previous steps is “In Alarm” and this ends the article.

As a result of this and due to the action that we specified in the previous steps, the EC2 instance gets terminated.
Conclusion
In this article, we learnt to create an SNS Topic, a subscription and an alarm. We also saw how CPU Load can be increased manually to trigger the alarm which in return sends a notification on Email Channel.

