Alamofire Tutorial with Swift (Quickstart)

Alamofire is a third party networking library that helps with tasks such as working with APIs, downloading feeds and more!
Written by

Chris C

Updated on

Apr 29 2024

If you have been diving deep into iOS development you may have already come across accessing data/databases using URLSession, this is fine and all but sometimes it gets annoying to use, this is where Alamofire comes in. So what is Alamofire?

What is Alamofire?

Alamofire is an elegant and composable way to interface to HTTP network requests. It builds on top of Apple’s URL Loading System provided by the Foundation framework. At the core of the system is URLSession and the URLSessionTask subclasses. Alamo fire wraps these APIs, and many others, in an easier to use interface and provides a variety of functionality necessary for modern application development using HTTP networking. 

Part 1: Installation

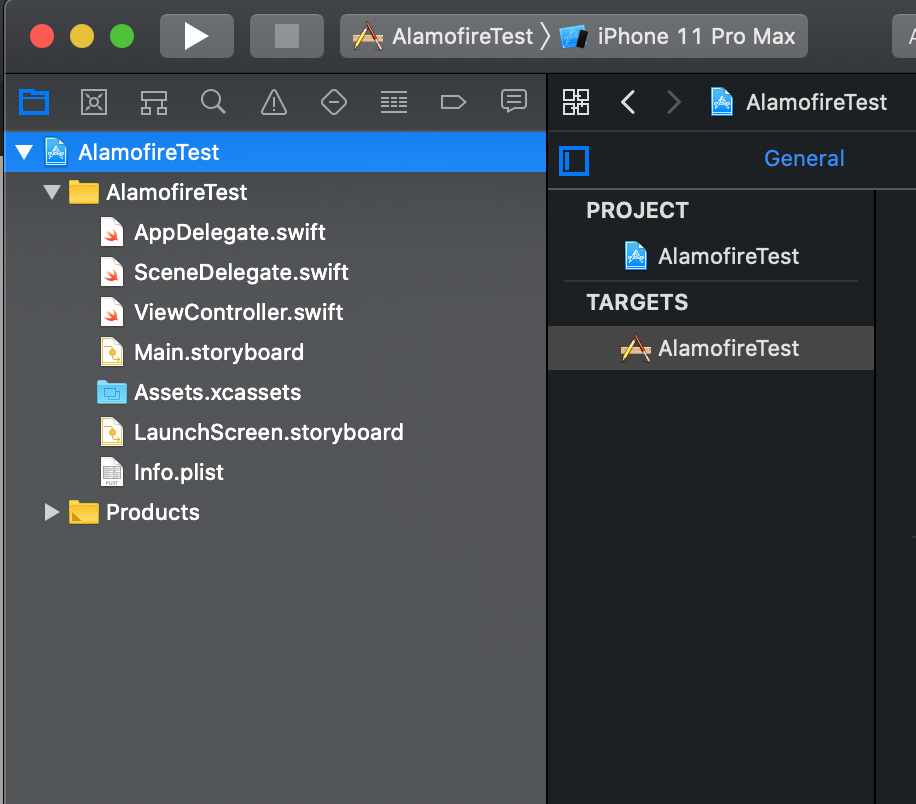
You need to have cocoapods installed for this, once that is ready, let’s create our xcode project. For this example we have created an xcode project called AlamofireTest.

We need to install the Alamofire Cocoapod

We’ll be using Cocoapods to install the Alamofire library. If need to set up Cocoapods on your system first, check out my Cocoapods tutorial.

Now navigate to your project folder and open a terminal window, also navigate the terminal window to the project location.

Navigate to your project directory and type pod init to create your podfile

Once there you should do a “pod init” in your terminal

It will then output a file named Podfile.

Add the Alamofire pod to your podfile

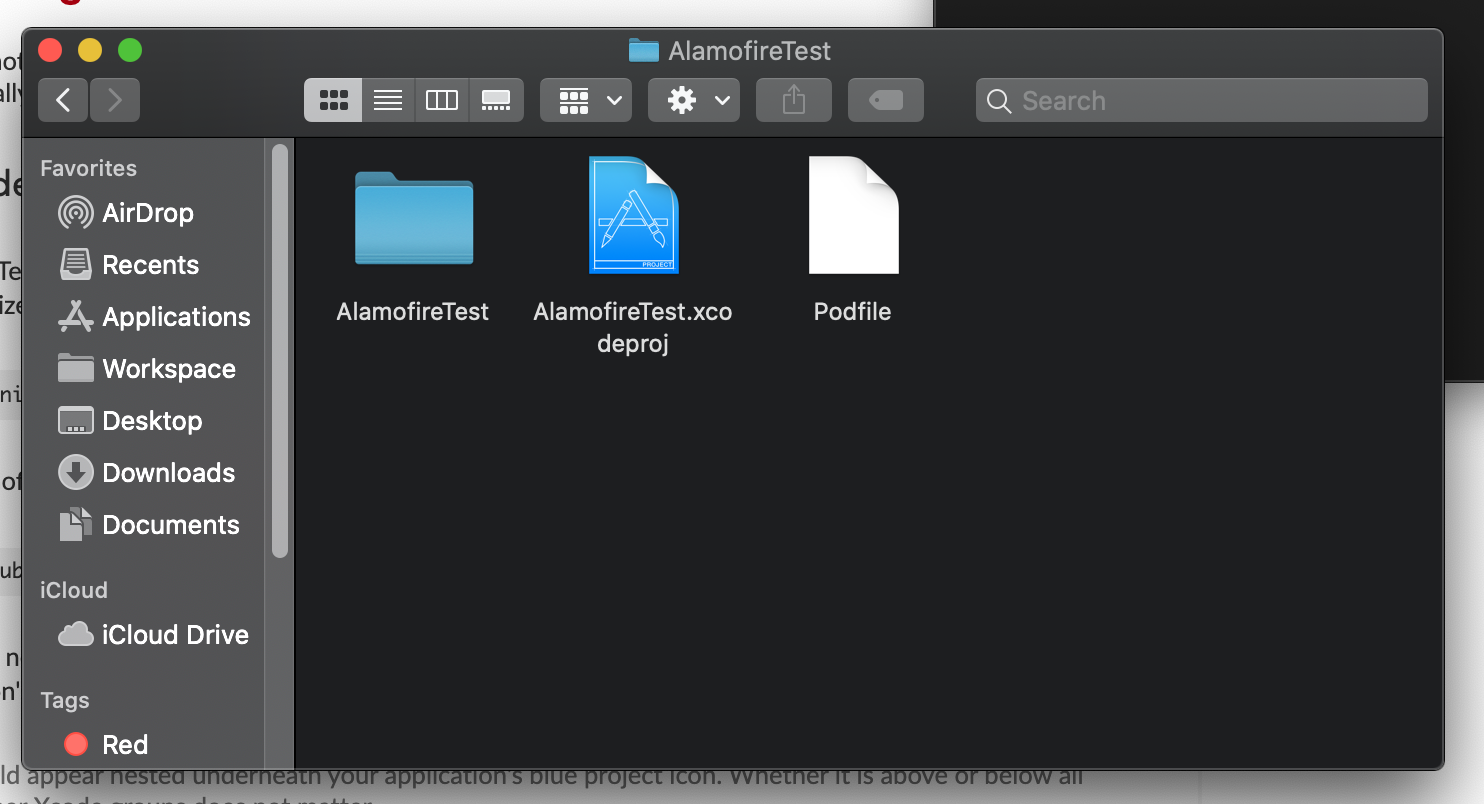
Open the Podfile in Textedit and add the line pod “Alamofire”, “[version number]” or just simply pod “Alamofire”

Save the file and in your terminal do a pod install, once it has finished installation it should have created a Pods folder, [projectname].xcworkspace, and a Podfile.lock.

Save your podfile and run pod install

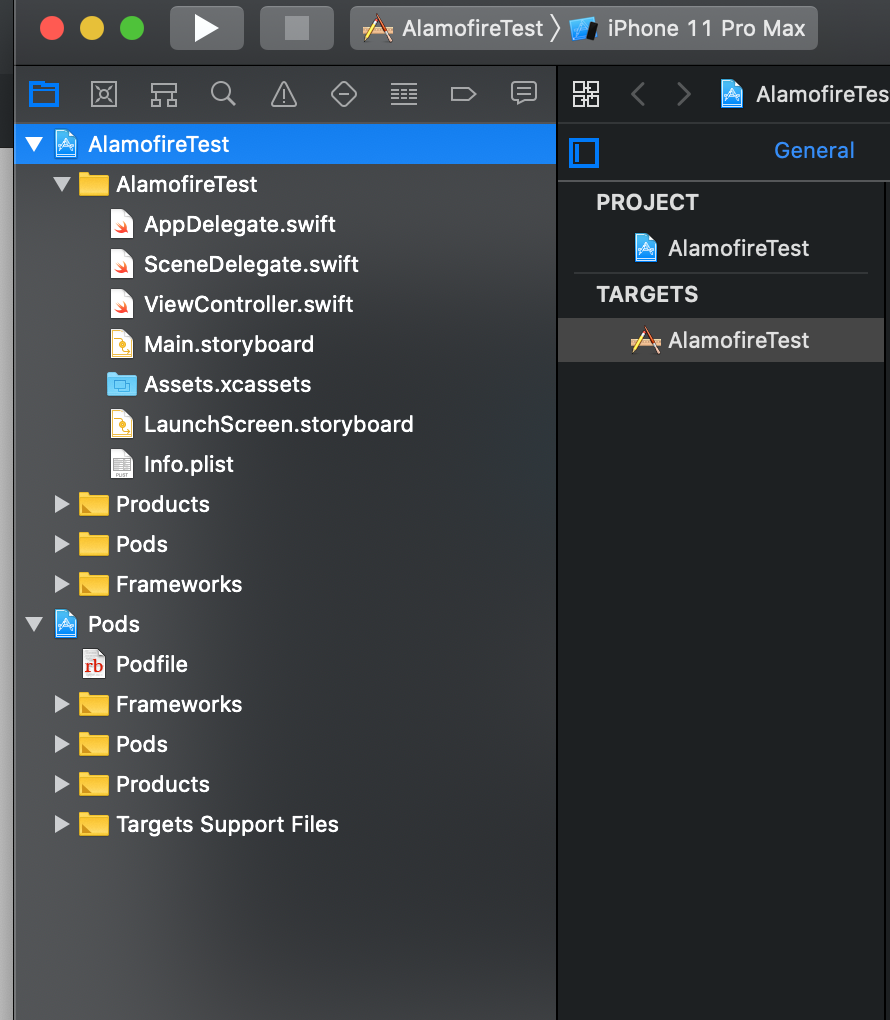
Open the file named [projectname.xcworkspace] and your project should have Alamofire installed and ready to go

Open the xcworkspace file and check that the Alamofire libraries are there

Part 2: Using Alamofire

Simple Request

For this example we will be using httpbin.org to simulate our http calls.

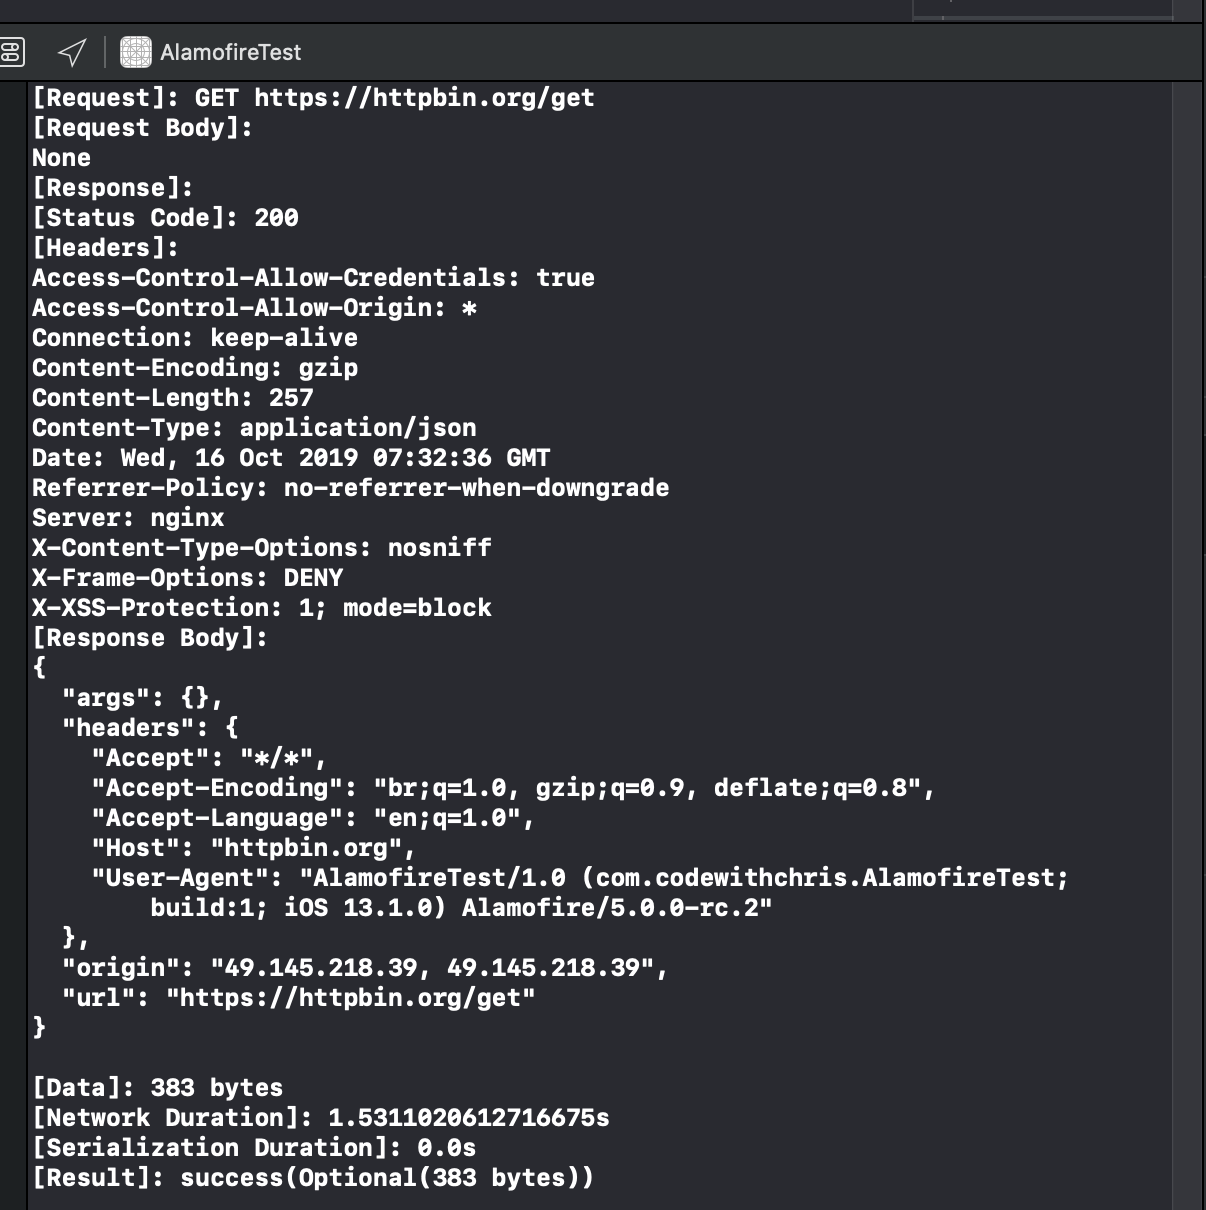
For starters let’s do a simple GET request, in your ViewController.swift type the following:

An Alamofire request

Save and run the program, once it runs it should print out in the debug log like this

Debug output
Debug output

Its as simple as that!. There are also other HTTP Method calls like POST, PUT, DELETE, ETC. 

To do so its as simple as adding a method in the Alamofire request by using their already pre-built enums for it. Just simply type:

Plain text
Copy to clipboard
Open code in new window
EnlighterJS 3 Syntax Highlighter
// POST
AF.request("https://httpbin.org/post", method: .post)
// PUT
AF.request("https://httpbin.org/put", method: .put)
// DELETE
AF.request("https://httpbin.org/delete", method: .delete)
// POST AF.request("https://httpbin.org/post", method: .post) // PUT AF.request("https://httpbin.org/put", method: .put) // DELETE AF.request("https://httpbin.org/delete", method: .delete)
// POST
AF.request("https://httpbin.org/post", method: .post)
// PUT
AF.request("https://httpbin.org/put", method: .put)
// DELETE
AF.request("https://httpbin.org/delete", method: .delete)

Request with Parameters

Not all HTTP Requests are plain and simple, most pages need information like account information, page information, category, etc. these can be easily done in Alamofire by doing so:

Plain text
Copy to clipboard
Open code in new window
EnlighterJS 3 Syntax Highlighter
let parameters = ["category": "Movies", "genre": "Action"]
AF.request("https://httpbin.org/get", parameters: parameters).response { response in
debugPrint(response)
}
//this is equivalent to https://httpbin.org/get?category=Movies&genre=Action
let parameters = ["category": "Movies", "genre": "Action"] AF.request("https://httpbin.org/get", parameters: parameters).response { response in debugPrint(response) } //this is equivalent to https://httpbin.org/get?category=Movies&genre=Action
let parameters = ["category": "Movies", "genre": "Action"]

        	AF.request("https://httpbin.org/get", parameters: parameters).response { response in
            debugPrint(response)
        	} 
//this is equivalent to https://httpbin.org/get?category=Movies&genre=Action

Nice and easy right?

HTTP Headers

Alamofire has its own support for HTTP Headers which are a great way to let the client and the server pass additional information with an HTTP request or response. It can be easily added to our Alamofire Request easily by just adding an HTTPHeaders value:

Plain text
Copy to clipboard
Open code in new window
EnlighterJS 3 Syntax Highlighter
let headers: HTTPHeaders = [
.authorization(username: "test@email.com", password: "testpassword"),
.accept("application/json")
]
AF.request("https://httpbin.org/headers", headers: headers).responseJSON { response in
debugPrint(response)
}
let headers: HTTPHeaders = [ .authorization(username: "test@email.com", password: "testpassword"), .accept("application/json") ] AF.request("https://httpbin.org/headers", headers: headers).responseJSON { response in debugPrint(response) }
 let headers: HTTPHeaders = [
            .authorization(username: "test@email.com", password: "testpassword"),
            .accept("application/json")
        ]

        AF.request("https://httpbin.org/headers", headers: headers).responseJSON { response in
            debugPrint(response)
        }

It can also be easily combined with other options like sending parameters:

Plain text
Copy to clipboard
Open code in new window
EnlighterJS 3 Syntax Highlighter
let headers: HTTPHeaders = [
.authorization(username: "test@email.com", password: "testpassword"),
.accept("application/json")
]
let parameters = ["category": "Movies", "genre": "Action"]
AF.request("https://httpbin.org/headers", headers: headers, parameters: parameters).responseJSON { response in
debugPrint(response)
}
let headers: HTTPHeaders = [ .authorization(username: "test@email.com", password: "testpassword"), .accept("application/json") ] let parameters = ["category": "Movies", "genre": "Action"] AF.request("https://httpbin.org/headers", headers: headers, parameters: parameters).responseJSON { response in debugPrint(response) }
let headers: HTTPHeaders = [
            .authorization(username: "test@email.com", password: "testpassword"),
            .accept("application/json")
        ]

let parameters = ["category": "Movies", "genre": "Action"]

AF.request("https://httpbin.org/headers", headers: headers, parameters: parameters).responseJSON { response in
            debugPrint(response)
        }

Handling Authorization

There are a few ways to handle authentication using Alamofire, one of them is via Header as shown in the example above, the others are more direct or make use of the URLCredential data type, here are some examples:

Plain text
Copy to clipboard
Open code in new window
EnlighterJS 3 Syntax Highlighter
// Normal way to authenticate using the .authenticate with username and password
let user = "test@email.com"
let password = "testpassword"
AF.request("https://httpbin.org/basic-auth/\(user)/\(password)")
.authenticate(username: user, password: password)
.responseJSON { response in
debugPrint(response)
}
// Authentication using URLCredential
let credential = URLCredential(user: user, password: password, persistence: .forSession)
AF.request("https://httpbin.org/basic-auth/\(user)/\(password)")
.authenticate(with: credential)
.responseJSON { response in
debugPrint(response)
}
// Normal way to authenticate using the .authenticate with username and password let user = "test@email.com" let password = "testpassword" AF.request("https://httpbin.org/basic-auth/\(user)/\(password)") .authenticate(username: user, password: password) .responseJSON { response in debugPrint(response) } // Authentication using URLCredential let credential = URLCredential(user: user, password: password, persistence: .forSession) AF.request("https://httpbin.org/basic-auth/\(user)/\(password)") .authenticate(with: credential) .responseJSON { response in debugPrint(response) }
// Normal way to authenticate using the .authenticate with username and password
let user = "test@email.com"
let password = "testpassword"

AF.request("https://httpbin.org/basic-auth/\(user)/\(password)")
            .authenticate(username: user, password: password)
            .responseJSON { response in
                debugPrint(response)
            }

	// Authentication using URLCredential

let credential = URLCredential(user: user, password: password, persistence: .forSession)
        
        AF.request("https://httpbin.org/basic-auth/\(user)/\(password)")
            .authenticate(with: credential)
            .responseJSON { response in
            debugPrint(response)
            }

Response Handling

Alamofire support different ways on how to handle a response. A response is expected  to provide the client with the resource it requested, or inform the client that the action it requested has been carried out; or else to inform the client that an error occurred in processing its request.

Basic Response

This basic response does not evaluate any of the response data it just forwards information directly from URLSessionDelegate. Think of it as the Alamofire equivalent of cURL to execute a request.

Plain text
Copy to clipboard
Open code in new window
EnlighterJS 3 Syntax Highlighter
AF.request("https://httpbin.org/get").response { response in
debugPrint("Response: \(response)")
}
AF.request("https://httpbin.org/get").response { response in debugPrint("Response: \(response)") }
AF.request("https://httpbin.org/get").response { response in
    debugPrint("Response: \(response)")
}

JSON Response

The responseJSON handler uses a JSONResponseSerializer to convert the Data returned by the server into an Any type using the specified JSONSerialization.ReadingOptions.

Plain text
Copy to clipboard
Open code in new window
EnlighterJS 3 Syntax Highlighter
AF.request("https://httpbin.org/get").responseJSON { response in
debugPrint("Response: \(response)")
}
AF.request("https://httpbin.org/get").responseJSON { response in debugPrint("Response: \(response)") }
AF.request("https://httpbin.org/get").responseJSON { response in
    debugPrint("Response: \(response)")
}

Data Response

The responseData handler uses a DataResponseSerializer to extract and validate the Data returned by the server.

Plain text
Copy to clipboard
Open code in new window
EnlighterJS 3 Syntax Highlighter
AF.request("https://httpbin.org/get").responseData { response in
debugPrint("Response: \(response)")
}
AF.request("https://httpbin.org/get").responseData { response in debugPrint("Response: \(response)") }
AF.request("https://httpbin.org/get").responseData { response in
    debugPrint("Response: \(response)")
}

String Response

The responseString handler uses a StringResponseSerializer to convert the Data returned by the server into a String with the specified encoding.

Plain text
Copy to clipboard
Open code in new window
EnlighterJS 3 Syntax Highlighter
AF.request("https://httpbin.org/get").responseString { response in
debugPrint("Response: \(response)")
}
AF.request("https://httpbin.org/get").responseString { response in debugPrint("Response: \(response)") }
AF.request("https://httpbin.org/get").responseString { response in
    debugPrint("Response: \(response)")
}

Decodable Response

The responseDecodable handler uses a DecodableResponseSerializer to convert the Data returned by the server into the passed Decodable type using the specified DataDecoder

Plain text
Copy to clipboard
Open code in new window
EnlighterJS 3 Syntax Highlighter
struct HTTPBinResponse: Decodable { let url: String }
AF.request("https://httpbin.org/get").responseDecodable(of: HTTPBinResponse.self) { response in
debugPrint("Response: \(response)")
}
struct HTTPBinResponse: Decodable { let url: String } AF.request("https://httpbin.org/get").responseDecodable(of: HTTPBinResponse.self) { response in debugPrint("Response: \(response)") }
struct HTTPBinResponse: Decodable { let url: String }

AF.request("https://httpbin.org/get").responseDecodable(of: HTTPBinResponse.self) { response in
   	     debugPrint("Response: \(response)")
}

File Download/Handling

Alamofire supports multiple ways of handling data, some data is fine by just fetching by memory, but for larger sets of data Session.download, DownloadRequest, and DownloadResponse is also supported. 

Fetch in Memory

Basic fetching of an image by memory, it is not saved and will require loading again if being fetched again. 

Plain text
Copy to clipboard
Open code in new window
EnlighterJS 3 Syntax Highlighter
AF.download("https://httpbin.org/image/png").responseData { response in
if let data = response.value {
self.imageView.image = UIImage(data: data)
}
}
AF.download("https://httpbin.org/image/png").responseData { response in if let data = response.value { self.imageView.image = UIImage(data: data) } }
AF.download("https://httpbin.org/image/png").responseData { response in
            if let data = response.value {
                self.imageView.image = UIImage(data: data)
            }
        	}

Download locally

Alamofire supports downloading of file to make it easier to access, think of it as a copy for faster loading like a cache:
=

Plain text
Copy to clipboard
Open code in new window
EnlighterJS 3 Syntax Highlighter
let destination: DownloadRequest.Destination = { _, _ in
let documentsURL = FileManager.default.urls(for: .picturesDirectory, in: .userDomainMask)[0]
let fileURL = documentsURL.appendingPathComponent("image.png")
return (fileURL, [.removePreviousFile, .createIntermediateDirectories])
}
AF.download("https://httpbin.org/image/png", to: destination).response { response in
debugPrint(response)
if response.error == nil, let imagePath = response.fileURL?.path {
let image = UIImage(contentsOfFile: imagePath)
}
}
let destination: DownloadRequest.Destination = { _, _ in let documentsURL = FileManager.default.urls(for: .picturesDirectory, in: .userDomainMask)[0] let fileURL = documentsURL.appendingPathComponent("image.png") return (fileURL, [.removePreviousFile, .createIntermediateDirectories]) } AF.download("https://httpbin.org/image/png", to: destination).response { response in debugPrint(response) if response.error == nil, let imagePath = response.fileURL?.path { let image = UIImage(contentsOfFile: imagePath) } }
 let destination: DownloadRequest.Destination = { _, _ in
            let documentsURL = FileManager.default.urls(for: .picturesDirectory, in: .userDomainMask)[0]
            	let fileURL = documentsURL.appendingPathComponent("image.png")

            	return (fileURL, [.removePreviousFile, .createIntermediateDirectories])
        }

        AF.download("https://httpbin.org/image/png", to: destination).response { response in
            debugPrint(response)

            if response.error == nil, let imagePath = response.fileURL?.path {
                let image = UIImage(contentsOfFile: imagePath)
            }
        }

Uploading Data/Files

Uploading data is somewhat easy, you just need to specify what kind of Data you are sending and let alamofire do the rest, it works the same as a POST.

Plain text
Copy to clipboard
Open code in new window
EnlighterJS 3 Syntax Highlighter
let data = Data("data".utf8)
AF.upload(data, to: "https://httpbin.org/post").responseJSON { response in
debugPrint(response)
}
let data = Data("data".utf8) AF.upload(data, to: "https://httpbin.org/post").responseJSON { response in debugPrint(response) }
let data = Data("data".utf8)

AF.upload(data, to: "https://httpbin.org/post").responseJSON { response in
    debugPrint(response)
}


It is also possible to send a multipart form data like so:

Plain text
Copy to clipboard
Open code in new window
EnlighterJS 3 Syntax Highlighter
AF.upload(multipartFormData: { multipartFormData in
multipartFormData.append(Data("one".utf8), withName: "one")
multipartFormData.append(Data("two".utf8), withName: "two")
}, to: "https://httpbin.org/post")
.responseJSON { response in
debugPrint(response)
}
AF.upload(multipartFormData: { multipartFormData in multipartFormData.append(Data("one".utf8), withName: "one") multipartFormData.append(Data("two".utf8), withName: "two") }, to: "https://httpbin.org/post") .responseJSON { response in debugPrint(response) }
AF.upload(multipartFormData: { multipartFormData in
    multipartFormData.append(Data("one".utf8), withName: "one")
    multipartFormData.append(Data("two".utf8), withName: "two")
}, to: "https://httpbin.org/post")
    .responseJSON { response in
        debugPrint(response)
}

You can also upload files via Alamofire by simply specifying the file name and it’s extension:

Plain text
Copy to clipboard
Open code in new window
EnlighterJS 3 Syntax Highlighter
let fileURL = Bundle.main.url(forResource: "video", withExtension: "mp4")!
AF.upload(fileURL, to: "https://httpbin.org/post").responseJSON { response in
debugPrint(response)
}
let fileURL = Bundle.main.url(forResource: "video", withExtension: "mp4")! AF.upload(fileURL, to: "https://httpbin.org/post").responseJSON { response in debugPrint(response) }
let fileURL = Bundle.main.url(forResource: "video", withExtension: "mp4")!

AF.upload(fileURL, to: "https://httpbin.org/post").responseJSON { response in
    debugPrint(response)
}

Upload/Download Progress

We now know that Alamofire supports both downloading and uploading of files, but how do we track the progress of our upload/download as it happens? There is an option for that, just simply add a .downloadProgress or .uploadProgress just before your response like so:

Plain text
Copy to clipboard
Open code in new window
EnlighterJS 3 Syntax Highlighter
// For downloadProgress
let destination: DownloadRequest.Destination = { _, _ in
let documentsURL = FileManager.default.urls(for: .picturesDirectory, in: .userDomainMask)[0]
let fileURL = documentsURL.appendingPathComponent("image.png")
return (fileURL, [.removePreviousFile, .createIntermediateDirectories])
}
AF.download("https://httpbin.org/image/png", to: destination)
.downloadProgress { progress in
print("Download Progress: \(progress.fractionCompleted)")
}
.response { response in
debugPrint(response)
if response.error == nil, let imagePath = response.fileURL?.path {
let image = UIImage(contentsOfFile: imagePath)
}
}
// For uploadProgress
let fileURL = Bundle.main.url(forResource: "video", withExtension: "mp4")!
AF.upload(fileURL, to: "https://httpbin.org/post")
.uploadProgress { progress in
print("Upload Progress: \(progress.fractionCompleted)")
}
.responseJSON { response in
debugPrint(response.response)
}
// For downloadProgress let destination: DownloadRequest.Destination = { _, _ in let documentsURL = FileManager.default.urls(for: .picturesDirectory, in: .userDomainMask)[0] let fileURL = documentsURL.appendingPathComponent("image.png") return (fileURL, [.removePreviousFile, .createIntermediateDirectories]) } AF.download("https://httpbin.org/image/png", to: destination) .downloadProgress { progress in print("Download Progress: \(progress.fractionCompleted)") } .response { response in debugPrint(response) if response.error == nil, let imagePath = response.fileURL?.path { let image = UIImage(contentsOfFile: imagePath) } } // For uploadProgress let fileURL = Bundle.main.url(forResource: "video", withExtension: "mp4")! AF.upload(fileURL, to: "https://httpbin.org/post") .uploadProgress { progress in print("Upload Progress: \(progress.fractionCompleted)") } .responseJSON { response in debugPrint(response.response) }
// For downloadProgress

     let destination: DownloadRequest.Destination = { _, _ in
            let documentsURL = FileManager.default.urls(for: .picturesDirectory, in: .userDomainMask)[0]
            	let fileURL = documentsURL.appendingPathComponent("image.png")

            	return (fileURL, [.removePreviousFile, .createIntermediateDirectories])
        }

        AF.download("https://httpbin.org/image/png", to: destination)
.downloadProgress { progress in
       		 print("Download Progress: \(progress.fractionCompleted)")
    	}
.response { response in
            debugPrint(response)

            if response.error == nil, let imagePath = response.fileURL?.path {
                let image = UIImage(contentsOfFile: imagePath)
            }
        }

// For uploadProgress

 let fileURL = Bundle.main.url(forResource: "video", withExtension: "mp4")!

               AF.upload(fileURL, to: "https://httpbin.org/post")
                .uploadProgress { progress in
                     print("Upload Progress: \(progress.fractionCompleted)")
                }
                .responseJSON { response in
                    debugPrint(response.response)
               }

Conclusion

That’s about it for this essential guide to Swift Alamofire, with these information you should be equipped enough to utilize Alamofire in your swift project, if you ever need extra info you can check out the official guide and documentation here. Good luck and have fun coding! 🙂


Further Reading


Get started for free

Join over 2,000+ students actively learning with CodeWithChris