GSD
Creating a Static Website with Hugo and ButterCMS!
Posted by Arek Nawo on October 2, 2023
Table of contents
A static website refers to a website that is served to the client in the form of static HTML files—already-stored files that are just waiting to be served to the user. When the user navigates to a certain page, the corresponding HTML file is then matched and sent back, ready to be displayed by the browser.
With advantages over dynamic or client-side rendered websites, enhanced SEO and improved performance, static websites are positioning themselves as a growing power in the web development community. With a growing amount of tools, such as static site generators (SSG) and headless CMSs, creating such websites has become easier than ever before!
In this tutorial, we’ll learn how to create a static website using Hugo — a blazing-fast SSG written in Go, and ButterCMS — a Headless CMS that will help you manage the content of your future website.

Setup
Before we jump right into the code, we have to set up a few things first.
Hugo
Let’s start with Hugo. It’s a fast and easy-to-use SSG written in Go. It has a powerful templating system and a vibrant community.
To have it installed without a hitch, go to the project's official website and download the precompiled binary for your OS. Optionally, if you’re using a supported package manager, you can install Hugo using it instead.
You can verify if the process was successful with a simple command:
hugo versionAfter verifying the installation, we can proceed to create a folder structure for our project. To do this, let’s use a Hugo-provided command:
hugo new site [path]In place of [path], you should provide the name of a new or empty directory to initiate the project in. After using the command, inside the project's folder, you should notice that a number of (mostly) empty folders have been created, together with a configuration file — config.toml. We’ll take a deeper look at all this stuff in a minute. Now, let’s configure our Headless CMS!
ButterCMS
There are many Headless CMSs to choose from — both self-hosted and service-like ones — ButterCMS stands out from the crowd through its friendly API and seamless usability.
To get started, we’ll create a ButterCMS account. ButterCMS allows you to try it out fully for a limited amount of time, or use it for free for non-commercial use-cases.
Right off the bat, you’ll be greeted with a nice dashboard. The navigation bar in the right corner of the website, allows you to quickly navigate through the dashboard. It houses multiple sections, which you can freely explore on your own. For now, we’ll concentrate on the blog posts section.
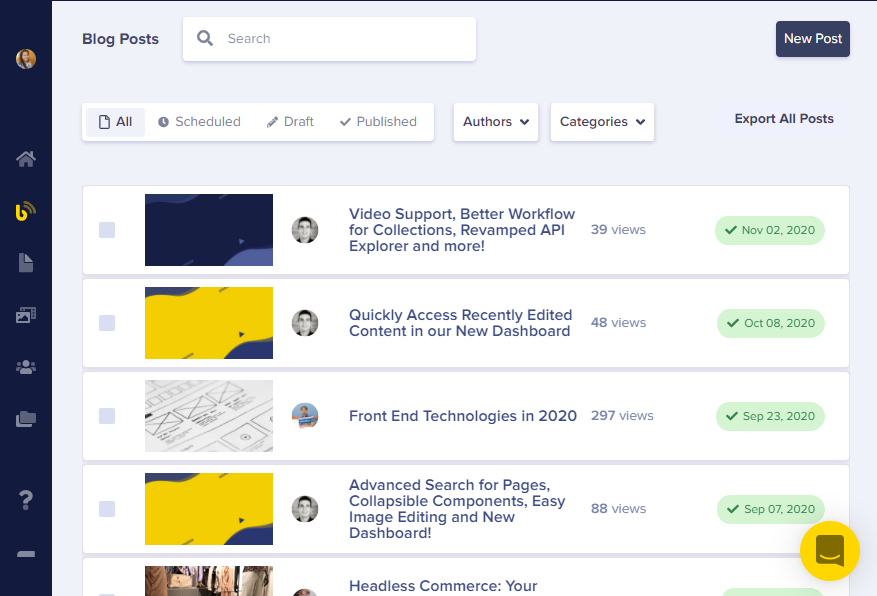
Here, we’ve got the chance to add, edit, remove and just work with our blog posts. When you sign up for the first time, ButterCMS will set up an example post for you to get familiar with the editing experience it provides. Also, we’ll be using this post further down the line, so don’t remove it just yet.
If you want to edit the post, you simply click on it and will be transported into the WYSIWYG editor, where you can change the content of your post, its metadata and SEO properties.
Once you’re done with all your edits, you can simply press the Publish (or Update) button, and the post will go live.
And when you click on the gear icon, there’s the API Explorer button, which provides you with some great overview of how you can access the given post through ButterCMS API calls.

The interactive API overview ButterCMS provides is meant to ensure the user knows and utilizes the API to its full extent.
We’ll come back to ButterCMS and it’s API later when we’ll be connecting it with our SSG. Now, let’s get back to Hugo and learn some basics.
Hugo basics
Hugo allows you to customize your static website through the use of templates. Hugo's templates are based on the underlying Go html/template and text/template libraries. Given that, and the fact that Hugo has some really strict rules about the project’s folder structure, your templates must be placed within the layouts folder and have .html extension. Furthermore, as there are multiple types of templates, special subfolder for each type is also required. I’ll let you know in advance when we’ll need these.
Content
To make a website, some content is surely required. In Hugo, there aren’t as many strict rules when it comes to content, as there are with templates. To keep things simple, all your content-related files must be placed inside the content folder. There, the most common types of your resources you’ll be dealing with are static files and Markdown (or HTML), in which all your texts will be written in.
Hugo themes
Multiple Hugo templates and assets can be combined to form a theme. Such a theme can later be easily reused across multiple Hugo-based websites. It also can be designed to be configurable through the use of custom variables in the config file. Such versatility allows themes to be shared freely between developers. The best example of that is Hugo’s themes collection — a vast collection of Hugo themes, accessible to everyone for free.
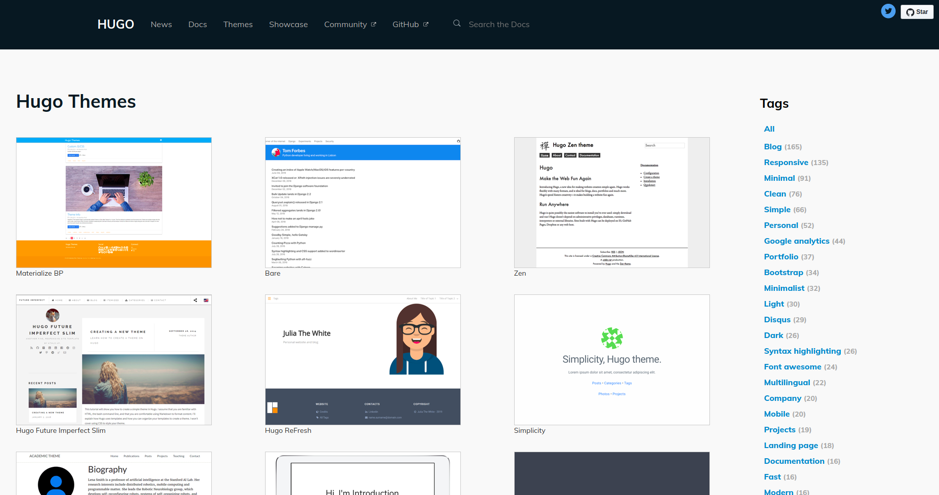
Because creating a whole theme can be a very time-consuming process, for the purpose of this tutorial, we will use one of the themes available through Hugo’s collection, to get a glimpse of what Hugo has to offer.
Creating a static website
First, we have to download our theme-of-choice. For example, the Tale Hugo theme — a port of a minimalistic Jekyll theme of the same name. To set it up properly, you can either download the theme directly from its GitHub repo and place it within the themes folder, or use Git submodules:
git init
git submodule add https://github.com/EmielH/tale-hugo.git themes/tale
Now, to let Hugo know that we’ll be using this particular theme, we need to indicate it in the config.toml file:
languageCode = "en-us"
title = "Example website"
theme = "tale"
The theme key should have the same value, as the name of the folder that houses the theme. A configuration file is also a place for configuring other Hugo settings or setting some custom options for the specific theme. For now, I’ll leave it only with a title and the language of our website.
Content
Before we test our current setup, let’s create some content first. To keep things organized, we’ll keep our posts in the posts folder. We’ll also need an about page, which Tale will use in its navigation bar. You can create the appropriate folders and files “by hand”, but I suggest a different approach:
hugo new posts/example-post.md
hugo new about/_index.md
In this way, we’re creating both all the files and posts folder using only 2 commands! hugo new creates the requested files directly inside the content folder. What’s more, the created files should already have some content inside:
---
title: "Example Post"
date: 2019-10-05T23:29:59+02:00
draft: true
---
What you see above is called front matter — a piece of TOML, YAML or JSON code, that’s placed above all other contents of the file, and provides meaningful metadata to Hugo and the used theme. In our case, this means a title, date and a boolean value, indicating that the post is currently in the draft state. Now, to get a better understanding of the front matter, let’s utilize a unique feature of our theme — the summary field, to provide a brief, custom overview of our post to the reader:
summary: "Example Post summary..."After this little edit, feel free to add some Markdown content below the front matter, to later see it on the page.
Now, I’d also want to notice a little detail regarding the about page. As you’ve seen in the snippet above, we’ve created our about page as about/_index.md file. _index.md has a special meaning in Hugo — it serves as the main file of its parent folder — a feature especially useful when dealing with list templates or content organization. But, in our case, it simply excludes the file from being listed in the post section, while still being accessible through /about URL. It’s a theme-specific limitation, as Tale Hugo allows us to organize our posts in any way we want (not necessarily inside the posts folder) while excluding only the [directory]/_index.md files.
Testing
With some content in place, we can now test and see how our website looks like. To do this, let’s run Hugo’s web server:
hugo server -DThe -D flag indicates that we want Hugo to render pages indicated as drafts, thus we need this flag to render our content in its current state. You can also change the draft field of the front matter and omit the flag entirely.
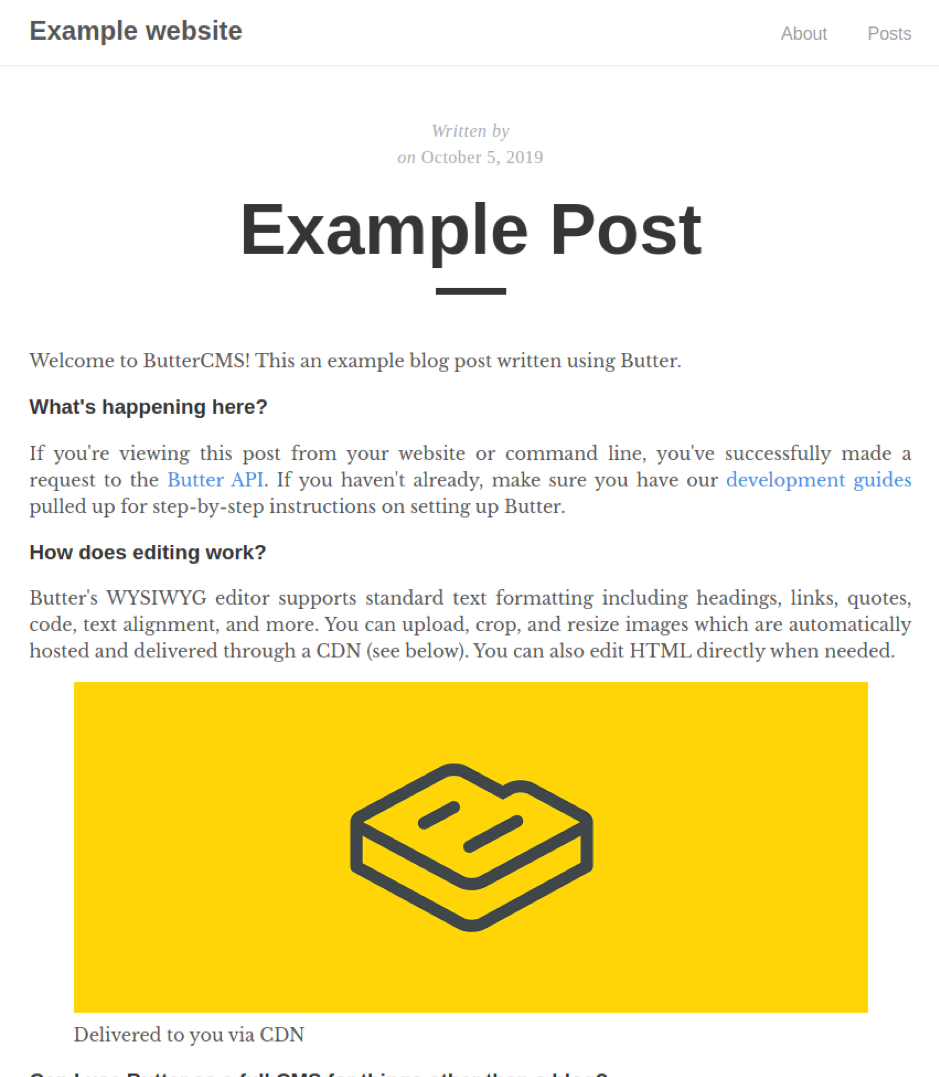
Finally, to see what the website looks like, go to localhost:1313. If everything was set up correctly, you should see the following page:
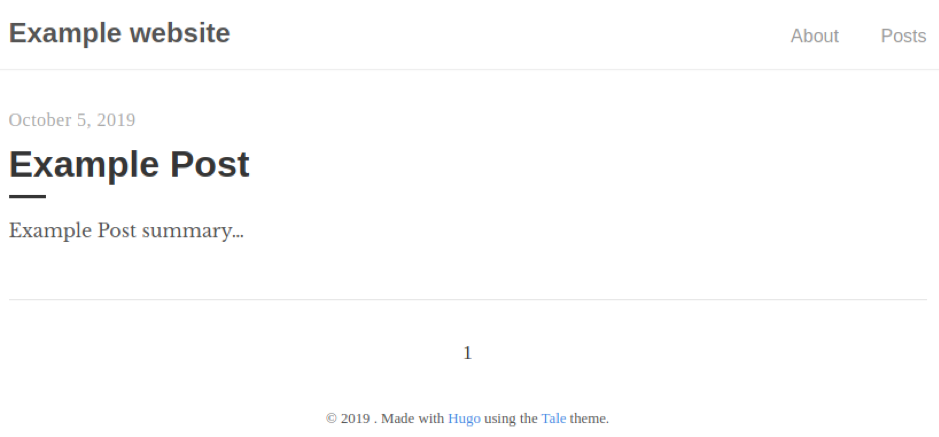
Go ahead and play with it! Visit the about page, the post, and all other stuff. When you think your website is ready, just use the command:
hugo...and all the generated static files for your website will appear in the public folder.
Integrating with ButterCMS
So, now we know the basics of working with Hugo and can populate our website with Markdown content, but what about our Headless CMS? In Hugo, all your website’s content must have its corresponding file in the content folder. Thus, you cannot access your CMS resources directly. Instead, you’ll need to have a specific local file, that would represent and fetch your CMS resource.
Creating shortcodes
We’ll start by creating a new shortcode — a specific type of template that can be used directly inside our Markdown files. Inside the shortcode, we have access to all the functionalities of a “usual” Hugo templates. Let’s create one at layouts/shortcodes/post.html, and be sure that you place it in the exact folder as written! Now, let’s get inside and write some code!
{{ $slug := .Get "slug"}}
{{ $url := printf "%s%s%s" "https://api.buttercms.com/v2/posts/" $slug "?auth_token=[YOUR AUTH TOKEN HERE]"}}
{{ $resource := getJSON $url }}
{{ safeHTML $resource.data.body }}
What you see above is a Hugo template with all it’s goodness - variables and functions included. If you’ve used Go templates before, this might feel familiar. If not, let’s analyze the code line by line.
We’re starting by creating a $slug variable. In Hugo, all custom variable names are required to start with $. To the variable, we assign the value of the slug parameter, which we retrieve with the .Get method that’s available to us in any Hugo shortcode. We’ll return to parameters later when we’ll be discussing how we can use our shortcode.
Next, we’re defining the $url variable, which will store the URL to our post hosted on ButterCMS. The string (URL) itself is created by joining multiple substrings with Hugo-provided printf function. At its core, printf uses Go’s fmt.Sprintf function to format provided string/strings according to the supplied format string ("%s%s%s" in this case).
Now, in the code above, you should take a closer look at the way that we’re integrating the previously-defined $slug variable into our ButterCMS API call. Just like the ButterCMS API Explorer has shown us, we’re accessing the /v2/posts/ followed by the post slug, stored inside the variable. The call also needs to contain the correct ButterCMS Auth Token, which is unique for every ButterCMS user. Just place yours (which can be found in the ButterCMS dashboard Home or through API Explorer) and you’re good to go!
In the third line, we’re using the getJSON function and fetching the post from ButterCMS, using our URL. The resulting data is then assigned to the $resource variable and made accessible with the data property ($resource.data)
Finally, at the end of the file, we’re using the safeHTML function, which parses our HTML string and renders it properly on the resulting page.
To leave nothing unexplained, I’ll just say that any use of function or variable access within Go templates has to be wrapped inside double brackets ({{ }}). Also, the := symbol is used to assign values to the variables at the time of their creation.
Using shortcodes
With our shortcode ready, it’s time to put it to the test. We’ll do this by simply inserting it inside our example-post.md file with the following code:
{{< post slug="example-post" >}}Notice how the shortcode is referenced by the name of its source file (in this case post.html), just without the .html extension. After the name, we supply the slug parameter (the one that is used for the $slug variable) with a string value. Know that the slug string must reference a post that is available from your ButterCMS instance. As we’ve already set up ours and left it with the Example Post present, we’ll use it now by supplying "example-post" slug.
You should remember that every shortcode should be wrapped up inside a pair of double brackets, plus a pair of angle brackets (<>)! Now, save the file, run the Hugo server and you should see your post be full of content!
Simplifying things
Now, maybe our Headless CMS content was rendered properly, but it doesn’t change the fact that we had to manually insert the shortcode inside our Markdown file and supply it with the correct parameter. We already need to create a Markdown file for every ButterCMS post we want to process, so let’s not add ourselves even more work, right? Let’s try to simplify a thing or two!
Parameterless shortcode
Let’s work on our shortcode first. How about making it detect the correct slug automatically, without the need for a parameter? Take a look at the snippet below.
{{ $slug := urlize .Page.Title}}With the above code, we change the value of the $slug variable (inside post.html shortcode) to something different. We make use of a .Page.Title variable available in our context (accessed with the dot at the beginning of the variable). In this way, the slug will be determined by the title of our post, which can be set in the front matter and is usually similar to the name of the housing Markdown file. In our scenario, such behavior is intended and we can use it to our advantage.
But, before we use the title as a slug, we need to make it URL-compliant first. This can be done with the urlize function, which you can see in action above.
With this little change to our snippet, we can now use it only with the following piece of code:
{{< post >}}Just remember that the title (and the slug in the result) needs to be the same both locally and on the ButterCMS.
Automatic shortcode placement
Now, we can simplify our work even further and make the shortcode be placed inside our Markdown files automatically! To do this, we’ll need to create our own archetype — Hugo’s name for templates used to create new content. First, let's take a look at what an example archetype looks like. To do that, open the archetypes/default.md file.
---
title: "{{ replace .Name "-" " " | title }}"
date: {{ .Date }}
draft: true
---
As you can see, the default.md archetype clearly resembles the default content of an unaltered file, created with hugo new command (with some additional variable front matter values). Content created with this command always uses one of the available archetypes. By default the default.md archetype is used, but, as the archetype is determined by the path of the created file, we can create a dedicated posts.md archetype (remember that it has to be in the archetypes folder), which will be used by all of our files located within content/posts folder.
---
title: "{{ replace .Name "-" " " | title }}"
date: {{ .Date }}
draft: true
---
{{< post >}}
All we changed here, in comparison to the default.md archetype is the addition of the post.html shortcode (yes, archetypes can — apart from the front matter — contain the actual content!
Now, you can just call the hugo new command, and any content file that’s meant to be placed inside the posts folder will have the correct front matter and shortcode right from the start! Together with a matching title, you'll have a correctly set up page, just after calling the command.
Now, calling the command can still feel like a lot of work - especially when considering a large number of posts! But, because this is a very repetitive process, it can be easily automated through the use of Continuous Integration (CI) or a standalone script, depending on your needs. Either way, this is a topic for another day…
Deployment
When you decide that your website is ready to be deployed, just run hugo and get the files. Remember that static websites are extremely easy and cost-efficient when it comes to their hosting. Netlify or Github Pages will host them for completely free! Just grab your static files, and do your job! If you’re curious to learn more about deploying your content with Netlify, you can read two previous tutorials from this blog: Gatsby with ButterCMS for your blog or Hugo with ButterCMS for your website.
Finally, I trust that this tutorial allowed you to discover some new information about Hugo and ButterCMS. Now go and make this website of yours! ;)
Related content
- Static Site Generator vs. CMS: Which is Right for You?
- A Complete, Dead-Simple Guide to SEO for Static Site Generators
- Building Your Personal Brand with Your Developer Blog
ButterCMS is the #1 rated Headless CMS


Related articles
Don’t miss a single post
Get our latest articles, stay updated!
Hobbyist. Programmer. Dreamer. JavaScript and TypeScript lover. World-a-better-place maker.