In this brif post I explain how I do visual facilitation and visual recording with an iPad, Mac Book and Zoom. You can probably use a PC instead of a Mac Book but I haven’t tried.
iPad screen sharing
- Connect the iPad with a USB cable to the Mac Book pro
- Make sure you accept whatever prompt about trusting computer etc.
- Open quicktime and select “New Movie Recording”, choose iPad from the drop down. If you don’t see iPad listed the connection failed and you’ll have to truble shoot that first. In my experience unplugging and re-connecting the USB cable helps.
At this point you are “seeing” what’s on the iPad from your Mac Book. Open your visual facilitation app of choice and confirm its as responsive as you would like.
I use Zoom to screen share with remote participants. If you know of other tools that allow for multiple screen sharing leave a comment.
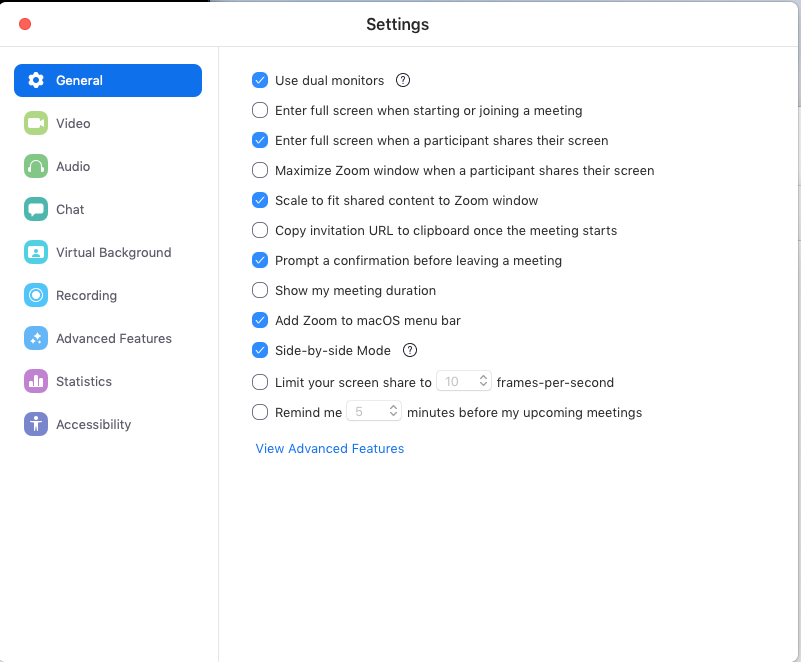
Zoom
- open the Zoom settings and update to use dual monitors
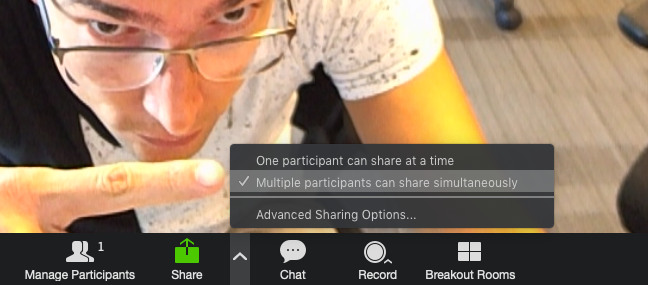
- Once you start your meeting ensure your meeting sharing option is set to the correct option: “Multiple participant can share simultaneously”
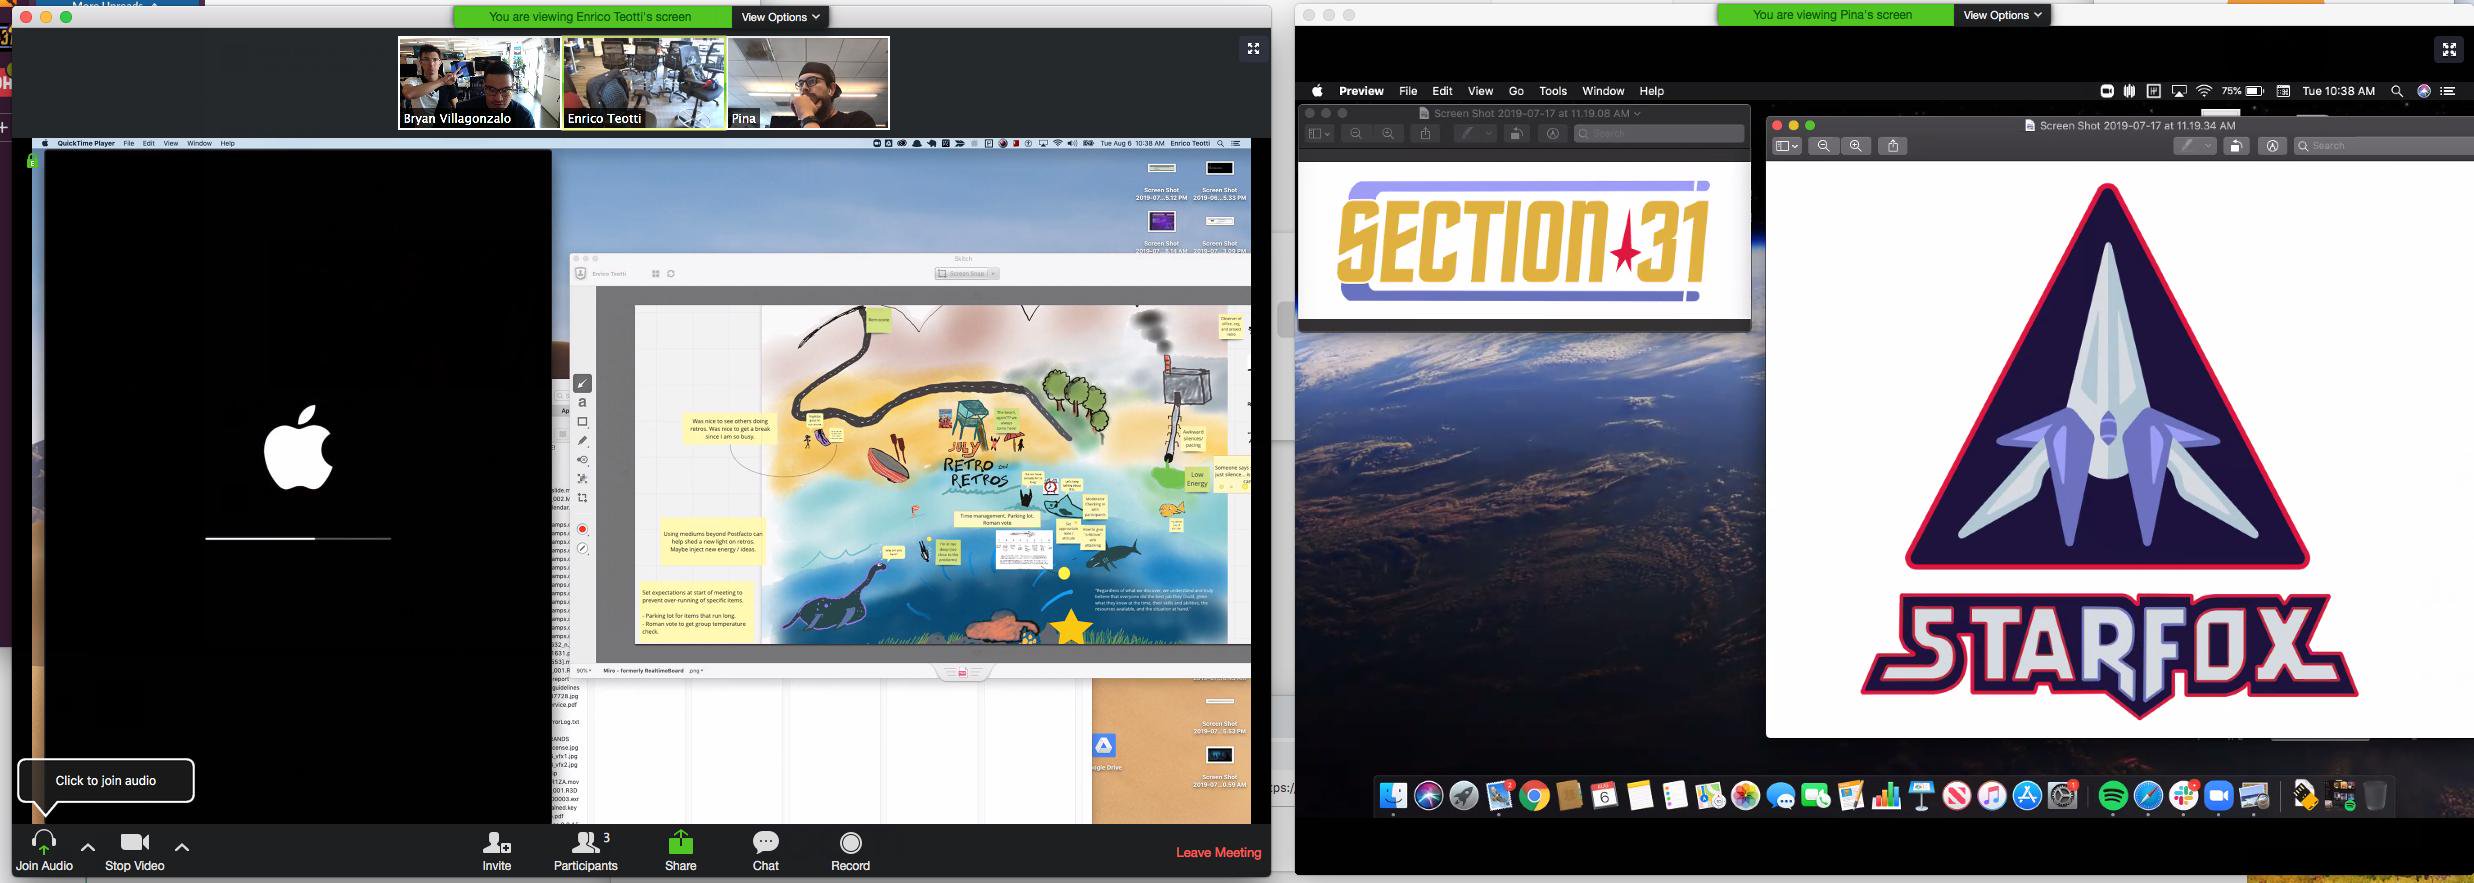
- At this point multiple participants can share their screen, here I am using it with two folks
Conclusions
This solution is working for me today when I do visual recording–aka scribing–and lead remote visual facilitation for meetings.
One downside in the latter is participants can’t interact with your whiteboard. I use an interactive online tool–like Miro aka RealTimeBoard–to promote and allow participation, potentially you could export the note to your online board when you need to be more interactive.
Leave us a comment if you have a similar strategy and different tools.