How to setup a VPN Server using Pritunl on Ubuntu 18.04 LTS
This tutorial exists for these OS versions
- Ubuntu 20.04 (Focal Fossa)
- Ubuntu 18.04 (Bionic Beaver)
On this page
Pritunl is a VPN Server Software based on the popular OpenVPN platform. In this tutorial, you will learn how to set up and use Pritunl on your Ubuntu 18.04 LTS based server.
Requirements
You will need an Ubuntu 18.04 based server. If you are running server software, you will need to stop them because Pritunl requires both 80 and 443 ports to run.
Make sure your system is upgraded.
$ sudo apt update
$ sudo apt upgrade
If you are using ufw firewall, use the following commands. You can learn more about how to install and use the UFW firewall from our tutorial.
$ sudo ufw allow http
$ sudo ufw allow https
$ sudo ufw allow 10447/udp
$ sudo ufw reload
If you look carefully, we have opened port 10447 over UDP. We will be using this port for running our VPN. So note down the port number. You can choose any port number you like though.
Install Pritunl
Step 1: Add Pritunl Repository.
$ echo "deb http://repo.pritunl.com/stable/apt bionic main" | sudo tee /etc/apt/sources.list.d/pritunl.list
Step 2: Add Mongodb Repository.
$ sudo nano /etc/apt/sources.list.d/mongodb-org-4.0.list
Paste the following line in the Nano editor.
deb https://repo.mongodb.org/apt/ubuntu bionic/mongodb-org/4.0 multiverse
Save the file by pressing Ctrl + X and then selecting Y.
Step 2: Add Public Keys for Pritunl and Mongodb repositories.
$ sudo apt-key adv --keyserver hkp://keyserver.ubuntu.com --recv 9DA31620334BD75D9DCB49F368818C72E52529D4
$ sudo apt-key adv --keyserver hkp://keyserver.ubuntu.com --recv 7568D9BB55FF9E5287D586017AE645C0CF8E292A
$ sudo apt update
Step 3: Install Pritunl and Mongodb.
$ sudo apt --assume-yes install pritunl mongodb-server
$ sudo systemctl start pritunl mongodb
$ sudo systemctl enable pritunl mongodb
Configure Pritunl
Your Pritunl server is up and running. We need to configure it before we can start using it. Pritunl's admin page is protected by a self signed SSL certificate. Your browser will raise objection for the first time. Add as an exception and it should work fine from thereon.
You will be greeted by the following screen when you first launch Pritunl on browser.
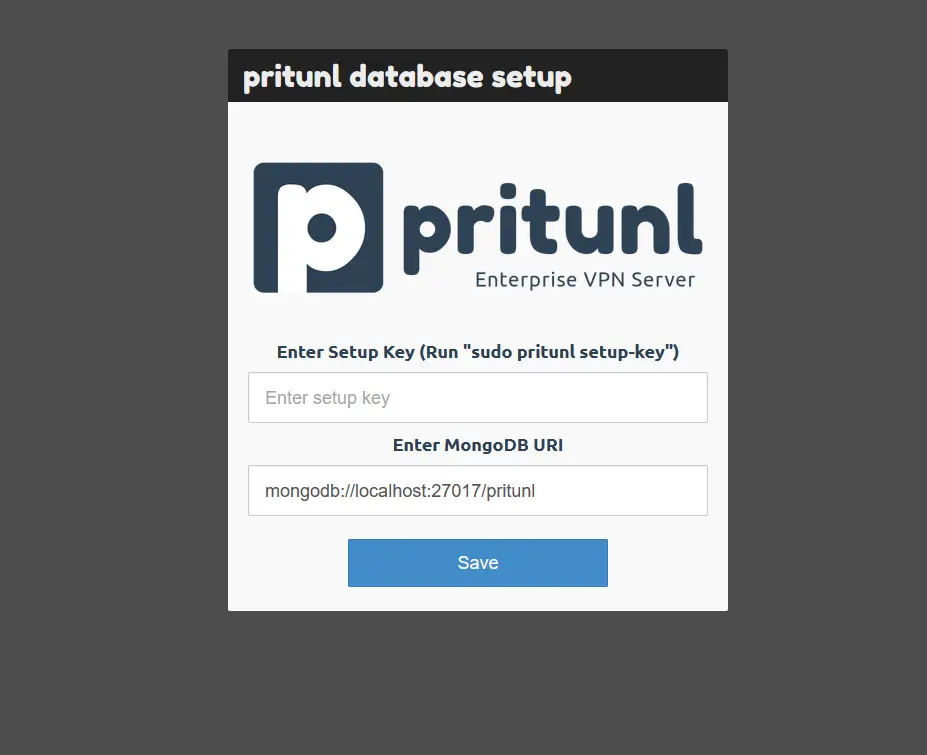
You need a setup key here. To generate your setup key, run the following command.
$ sudo pritunl setup-key
Paste the key that is generated in the box and press Save. You will be greeted by the following screen.
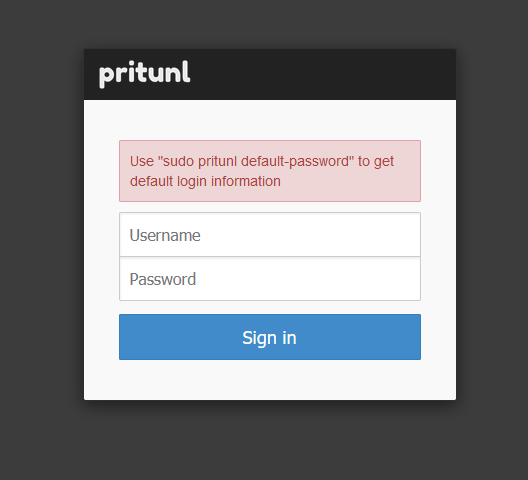
As per the instruction given, run the following command to get your login credentials.
$ sudo pritunl default-password
Sign in to proceed to the Initial Setup screen. Enter the domain you have registered for your VPN site in the Lets Encrypt domain text field. If you want to change your password, you can enter a new password. You can also change your username here. Press Save to continue.

Go to the Users tab. To connect to the VPN, you would need to create an organization and a user. Click on Add Organization first. Once you have created that, Add a user to that organization by clicking on Add User.


It is time to create a server to which your users can connect. Go to the Servers tab and click on Add a Server.

Choose a name for your server. Select the Protocol as UDP and the Port as 10447 which we added earlier to our firewall. You can, of course, use whatever port you had added to your firewall.
If you want to control how many clients and how many devices can connect to your server, you can configure that by clicking the Advanced button. Here's how it will look. Make sure Allow multiple devices is selected first.

Click Add to proceed.
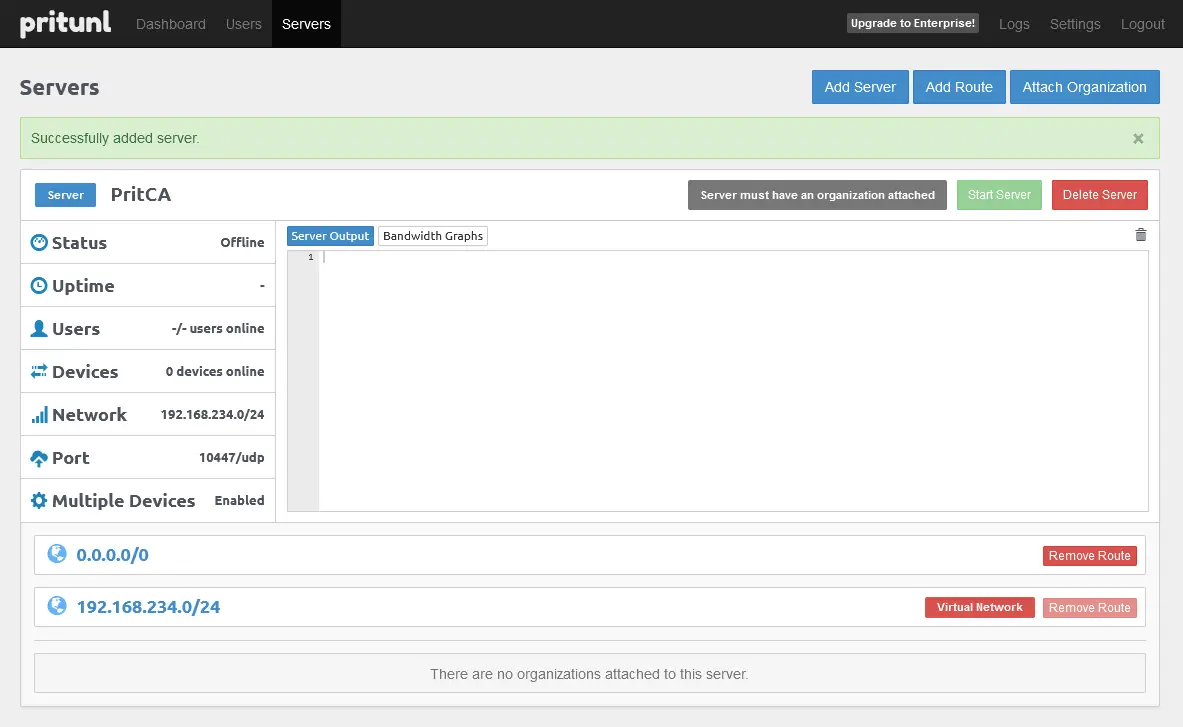
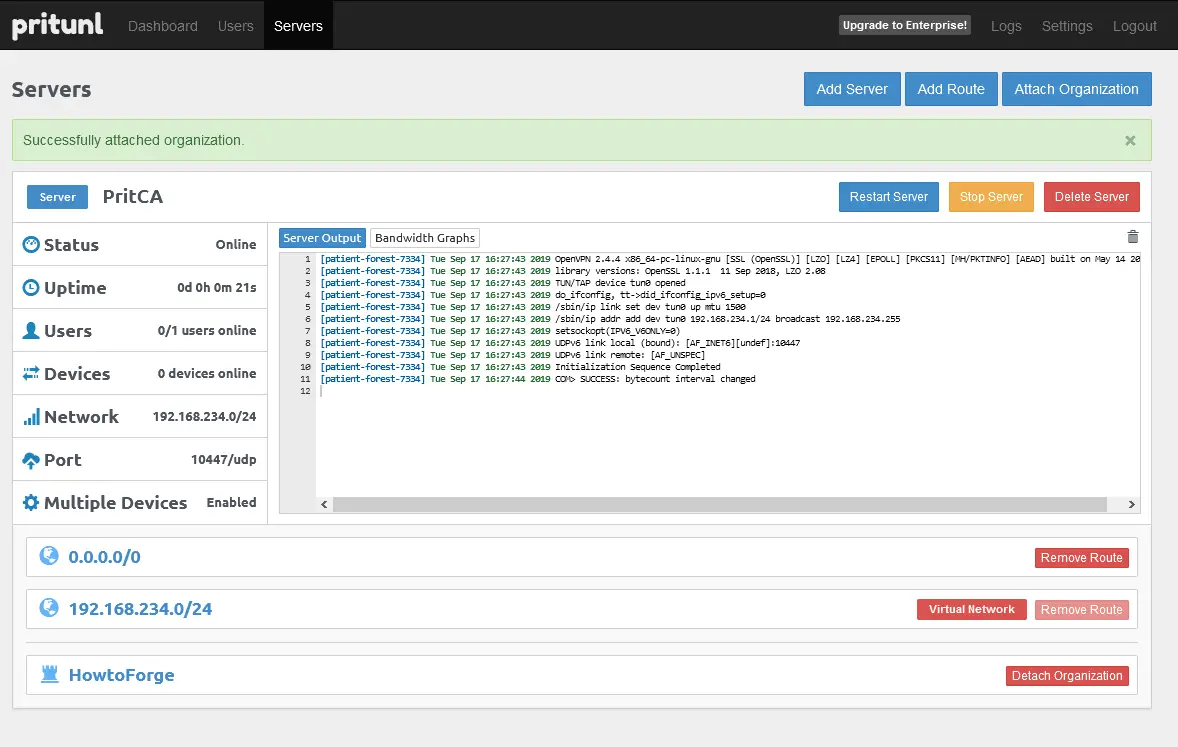
The next step is to attach the server we just created to our Organization. Click Attach Organization to do that.

Once that is done, click on Start Server to start your VPN service.
You have completed the configuration of your Pritunl VPN server.
Connect to Pritunl
Since Pritunl is an OpenVPN based software you can use any OpenVPN compatible client to connect. Pritunl provides clients for Linux, macOS, and Windows. You can use any of them.
To connect via OpenVPN client, you will need the configuration file for it. Switch to the Users tab and click on the Download button.

You can extract the configuration file and import it into your OpenVPN client to connect. To confirm whether you are connected successfully via the VPN, one of the ways is to visit whatismyip.com. It will show your changed IP and location if your connection is successful.
Pritunl Commandline
Pritunl VPN comes with a command-line tool that allows you to perform certain tasks like resetting the password, resetting SSL, resetting version in case of a downgrade, reconfiguring and repairing the database, viewing logs and changing properties.
View Version
To check which version of Pritunl you are running, use
$ sudo pritunl version
Repair Database
In case, Pritunl's database becomes corrupted, you can repair it by running the following commands.
$ sudo systemctl stop pritunl
$ sudo pritunl repair-database
$ sudo systemctl start pritunl
Reset Password
In case you forget the login details of the web console, reset the credentials using the following commands.
$ sudo pritunl reset-password
Changing Web Console Port
By default, Pritunl runs on port 443. If you want to change it, use the following command.
$ sudo pritunl set app.server_port 443
Change the number 443 with whatever port you want to choose. Pritunl also runs a web server on port 80 for Let's Encrypt verification and redirecting HTTP requests to HTTPS. If you don't want it to run, use the following command.
$ sudo pritunl set app.redirect_server false
There is a lot more stuff you can do with the command line. Check the official docs for more.
That's all to this tutorial. If you have any questions, ask in the comments below.

