How to Install WildFly with Nginx as a Reverse Proxy on Debian 10
WildFly is a free, open-source and cross-platform application runtime written in Java and developed by Red Hat that allows you to develop great applications from a single IDE. It is lightweight, fast, flexible and based on pluggable subsystems. It runs on Windows and Linux operating system and aims to provide users with a fast and stable Java runtime environment. Wildfly comes with a rich set of features including, Fast, Customizable Runtime, Scalability, Unified configuration & Management, Concurrent Loading, Fast Linking, Domain Management and many more.
In this tutorial, we will show you the steps to install Wildfly with Nginx as a reverse proxy on Debian 10.
Requirements
- A server running Debian 10.
- A root password is set up to your server.
Getting Started
Before starting, you will need to update your system with the latest version. You can do this by running the following command:
apt-get update -y
apt-get upgrade -y
Once your server is updated, restart your server to apply the changes.
Install Java
WildFly requires Java version 8 to be installed on your server. By default, Java 8 is not available in the Debian 10 default repository. So, you will need to download Java 8 from their official website.
After downloading Java 8, extract the Java source to /usr/lib/jvm directory with the following command:
mkdir /usr/lib/jvm/
tar -zxvf jdk-8u221-linux-x64.tar.gz -C /usr/lib/jvm/
Next, run the following command to change the default Java version:
update-alternatives --config java
Select Java version 8 and hit Enter. You should see the following output:
There are 2 choices for the alternative java (providing /usr/bin/java). Selection Path Priority Status ------------------------------------------------------------ * 0 /usr/lib/jvm/java-11-openjdk-amd64/bin/java 1111 auto mode 1 /usr/lib/jvm/java-11-openjdk-amd64/bin/java 1111 manual mode 2 /usr/lib/jvm/jdk1.8.0_221/bin/java 1 manual mode Pressto keep the current choice[*], or type selection number: 2 update-alternatives: using /usr/lib/jvm/jdk1.8.0_221/bin/java to provide /usr/bin/java (java) in manual mode
Next, check the Java version using the following command:
java -version
You should get the following output:
java version "1.8.0_221"
Java(TM) SE Runtime Environment (build 1.8.0_221-b11)
Java HotSpot(TM) 64-Bit Server VM (build 25.221-b11, mixed mode)
Install Wildfly
First, you will need to create a user and group for Wildfly. You can create it with the following command:
groupadd -r wildfly
useradd -r -g wildfly -d /opt/wildfly -s /sbin/nologin wildfly
Next, download the latest version of Wildfly with the following command:
wget https://download.jboss.org/wildfly/17.0.1.Final/wildfly-17.0.1.Final.zip
Once the download is completed, extract the downloaded file with the following command:
unzip wildfly-17.0.1.Final.zip
Next, copy the extracted directory to /opt/ with the following command:
cp -r wildfly-17.0.1.Final /opt/wildfly
Next, change the ownership of the wildfly directory to wildfly user as shown below:
chown -RH wildfly:wildfly /opt/wildfly
Once you have finished, you can proceed to the next step.
Configure Wildfly
Next, you will need to copy the necessary files to configure WildFly.
First, copy WildFly configuration file to /etc/wildfly directory:
mkdir /etc/wildfly
cp /opt/wildfly/docs/contrib/scripts/systemd/wildfly.conf /etc/wildfly/
Next, copy launch.sh file to /opt/wildfly/bin/ directory with the following command:
cp /opt/wildfly/docs/contrib/scripts/systemd/launch.sh /opt/wildfly/bin/
Next, give execution permission to launch.sh file:
sh -c 'chmod +x /opt/wildfly/bin/*.sh'
Next, copy Wildfly systemd unit file to /etc/systemd/system/ directory:
cp /opt/wildfly/docs/contrib/scripts/systemd/wildfly.service /etc/systemd/system/
Next, reload the systemd daemon with the following command:
systemctl daemon-reload
Next, start the WildFly service and enable it to start on boot time with the following command:
systemctl start wildfly
systemctl enable wildfly
You can now check the status of Wildfly service with the following command:
systemctl status wildfly
You should get the following output:
? wildfly.service - The WildFly Application Server
   Loaded: loaded (/etc/systemd/system/wildfly.service; disabled; vendor preset: enabled)
   Active: active (running) since Tue 2019-09-10 00:19:27 EDT; 1s ago
 Main PID: 1142 (launch.sh)
    Tasks: 7 (limit: 1138)
   Memory: 24.7M
   CGroup: /system.slice/wildfly.service
           ??1142 /bin/bash /opt/wildfly/bin/launch.sh standalone standalone.xml 0.0.0.0
           ??1143 /bin/sh /opt/wildfly/bin/standalone.sh -c standalone.xml -b 0.0.0.0
           ??1200 java -D[Standalone] -server -Xms64m -Xmx512m -XX:MetaspaceSize=96M -XX:MaxMetaspaceSize=256m -Djava.net.preferIPv4Stack=true -

Sep 10 00:19:27 debian systemd[1]: Started The WildFly Application Server.
Configure WildFly Authentication
Next, you will need to create an administrator user for Wildfly to access the WildFly admin console. You can create it with the following command:
/opt/wildfly/bin/add-user.sh
You should see the following output:
What type of user do you wish to add?
 a) Management User (mgmt-users.properties)
 b) Application User (application-users.properties)
(a): a
Type a and hit Enter to create a Management user. During the user creation process, you will need to provide username, password and group name as shown below:
Enter the details of the new user to add.
Using realm 'ManagementRealm' as discovered from the existing property files.
Username : wildflyadmin
Password recommendations are listed below. To modify these restrictions edit the add-user.properties configuration file.
 - The password should be different from the username
 - The password should not be one of the following restricted values {root, admin, administrator}
 - The password should contain at least 8 characters, 1 alphabetic character(s), 1 digit(s), 1 non-alphanumeric symbol(s)
Password :
Re-enter Password :
What groups do you want this user to belong to? (Please enter a comma separated list, or leave blank for none)[  ]:
About to add user 'wildflyadmin' for realm 'ManagementRealm'
Is this correct yes/no? yes
Added user 'wildflyadmin' to file '/opt/wildfly/standalone/configuration/mgmt-users.properties'
Added user 'wildflyadmin' to file '/opt/wildfly/domain/configuration/mgmt-users.properties'
Added user 'wildflyadmin' with groups  to file '/opt/wildfly/standalone/configuration/mgmt-groups.properties'
Added user 'wildflyadmin' with groups  to file '/opt/wildfly/domain/configuration/mgmt-groups.properties'
Is this new user going to be used for one AS process to connect to another AS process?
e.g. for a slave host controller connecting to the master or for a Remoting connection for server to server EJB calls.
yes/no? yes
To represent the user add the following to the server-identities definition
Once you have done, you can proceed to the next step.
Configure WildFly to Accessible from Remote System
By default, Wildfly is accessible only from the local system. So, you will need to configure it to access from the remote system. You can do it by editing the file /etc/wildfly/wildfly.conf:
nano /etc/wildfly/wildfly.conf
Add the following line at the end of the file:
WILDFLY_CONSOLE_BIND=0.0.0.0
Save and close the file when you are finish. Then, open /opt/wildfly/bin/launch.sh file as shown below:
nano /opt/wildfly/bin/launch.sh
Change the file as shown below:
if [ "x$WILDFLY_HOME" = "x" ]; then
    WILDFLY_HOME="/opt/wildfly"
fi

if [[ "$1" == "domain" ]]; then
    $WILDFLY_HOME/bin/domain.sh -c $2 -b $3 -bmanagement $4
else
    $WILDFLY_HOME/bin/standalone.sh -c $2 -b $3 -bmanagement $4
fi
Save and close the file. Then, open the file /etc/systemd/system/wildfly.service.
nano /etc/systemd/system/wildfly.service
Change the file as shown below:
[Unit]
Description=The WildFly Application Server
After=syslog.target network.target
Before=httpd.service

[Service]
Environment=LAUNCH_JBOSS_IN_BACKGROUND=1
EnvironmentFile=-/etc/wildfly/wildfly.conf
User=wildfly
LimitNOFILE=102642
PIDFile=/var/run/wildfly/wildfly.pid
ExecStart=/opt/wildfly/bin/launch.sh $WILDFLY_MODE $WILDFLY_CONFIG $WILDFLY_BIND $WILDFLY_CONSOLE_BIND
StandardOutput=null

[Install]
WantedBy=multi-user.target
Save the file. Then, create the /var/run/wildfly directory and set correct permissions
mkdir /var/run/wildfly/
chown wildfly:wildfly /var/run/wildfly/
Finally, reload the systemd daemon and restart Wildfly service to apply the changes:
systemctl daemon-reload
systemctl restart wildfly
Once you have done, you can proceed to the next step.
Access Wildfly
Wildfly is now installed and configured to access from the remote system. By default, Wildfly management console is listening on port 9990. You can access it by visiting the URL http://192.168.0.4:9990. You will be redirected to the following page:

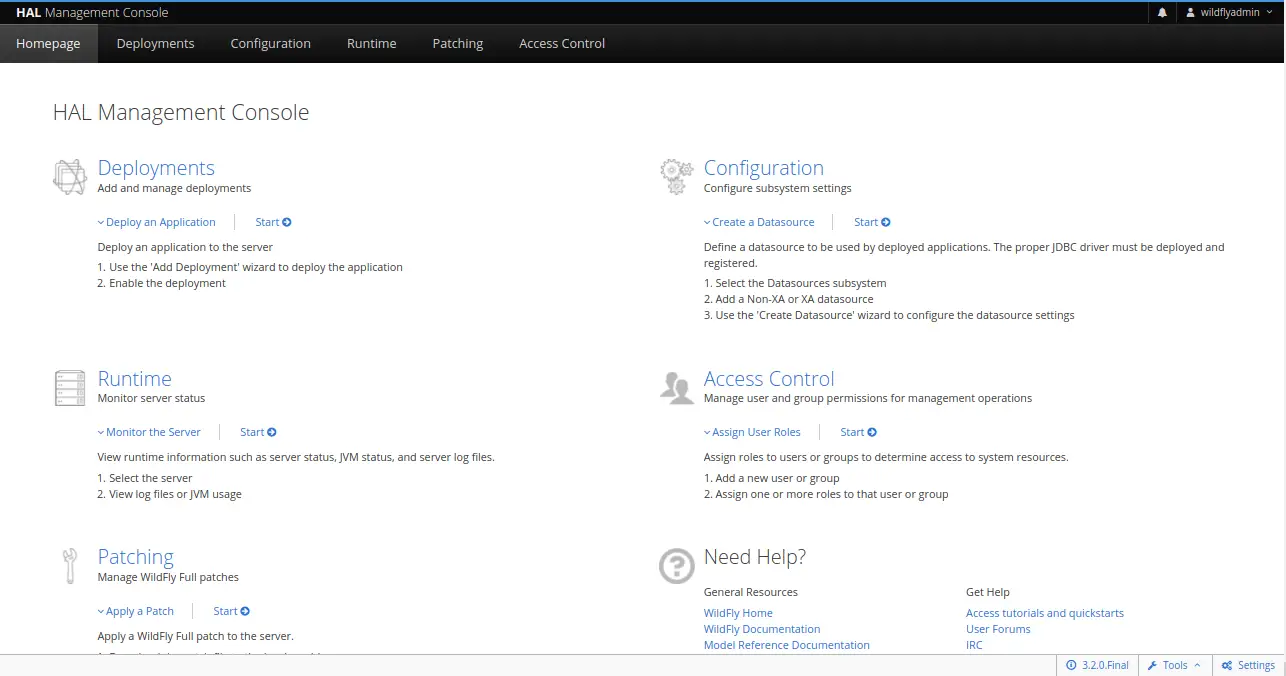
Now, provide your admin username and password, and click on the Sign in button. You should see the Wildfly management console in the following screen:
You can also access Wildfly application by visiting the URL http://192.168.0.4:8080. You should see the following page:

Configure Nginx as a Reverse Proxy for Wildfly
Next, you will need to configure Nginx as a reverse proxy to proxy request comming on port 80 to 8080.
First, install Nginx with the following command:
apt-get install nginx -y
Once Nginx has been installed, create a new virtual host file for Nginx with the following command:
nano /etc/nginx/sites-available/wildfly.conf
Add the following lines:
upstream wildfly {
  server 127.0.0.1:8080 weight=100 max_fails=5 fail_timeout=5;
}

server {
  listen          80;
  server_name     192.168.0.4;

  location / {
        proxy_set_header X-Forwarded-Host $host;
        proxy_set_header X-Forwarded-Server $host;
        proxy_set_header X-Forwarded-For $proxy_add_x_forwarded_for;
        proxy_pass http://wildfly/;
  }
}
Save and close the file when you are finished. Then, check Nginx for any syntax error with the following command:
nginx -t
You should get the following output:
nginx: the configuration file /etc/nginx/nginx.conf syntax is ok
nginx: configuration file /etc/nginx/nginx.conf test is successful
Next, enable the Nginx virtual host and restart Nginx with the following command:
ln -s /etc/nginx/sites-available/wildfly.conf /etc/nginx/sites-enabled/
systemctl restart nginx
You can now access the Wildfly application without specifying the port 8080.
That's it. You have successfully installed and configured Wildfly with Nginx as a reverse proxy on Debian 10. Feel free to ask me if you have any questions.

