How to Install PostgreSQL and pgAdmin4 on Ubuntu 18.04 LTS
pgAdmin4 is an open source PostgreSQL management tool designed for multiple PostgreSQL database versions. pgAdmin4 has been created with all of the features that can be found on the PostgreSQL server. Written in python and jquery and can be installed on Windows, Mac, and Linux. It provides multiple deployment models, can be installed as a desktop application or a server application running behind the webserver such as Apache2.
In this tutorial, we're going to show you the installation and configuration of pgAdmin4 'Server Mode' on Ubuntu 18.04 server. The pgAdmin4 will be running as a uWSGI service behind the Apache web server, and we're covering both pgAdmin4 installations from the repository and from the source.
Prerequisites
- Ubuntu 18.04 Server
- Root privileges
- Basic Knowledge PostgreSQL Installation
Install PostgreSQL on Ubuntu 18.04 Server
Firstly, we're going to show you the basic installation and configuration of PostgreSQL database itself. It's can be installed from the Official PostgreSQL repository and from the default Ubuntu repository.
If you want to install the PostgreSQL database from the official repository, add the Postgres key and repository by running following commands.
wget --quiet -O - https://www.postgresql.org/media/keys/ACCC4CF8.asc | sudo apt-key add -
 sudo sh -c 'echo "deb http://apt.postgresql.org/pub/repos/apt/ `lsb_release -cs`-pgdg main" >> /etc/apt/sources.list.d/pgdg.list'
After that, update all repositories and install PostgreSQL.
sudo apt update
 sudo apt -y install postgresql postgresql-contrib
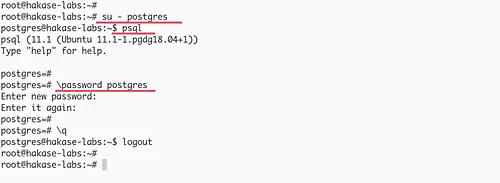
After the installation, log in to the default user called 'postgres' and run the 'psql' PostgreSQL command-line interface.
su - postgres
 psql
Now add a new password for the Postgres user by running the following query to the psql interface.
\password postgres
 TYPE YOUR PASSWORD
Install pgAdmin4 From Repository
By default, the PostgreSQL provides its own repository for installing the pgAdmin4 packages.
1. Add PostgreSQL Repository
Download the PostgreSQL key and add the repository by running the following command.
wget --quiet -O - https://www.postgresql.org/media/keys/ACCC4CF8.asc | sudo apt-key add -
 sudo sh -c 'echo "deb http://apt.postgresql.org/pub/repos/apt/ `lsb_release -cs`-pgdg main" >> /etc/apt/sources.list.d/pgdg.list'
2. Install pgadmin4
After that, update all available repositories and install the pgAdmin4 packages using the apt command below.
sudo apt update
 sudo apt install pgadmin4 pgadmin4-apache2 -y
During the installation, you will be prompted the email username configuration and the password configuration.
Type your own email address that will be used as a username.

Then type the password.

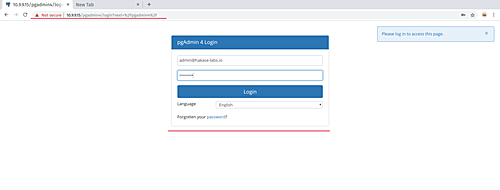
Once the installation is complete, open your web browser and type the server IP address as below.
And you will be shown the pgAdmin4 login page. Log in with your email address and password.
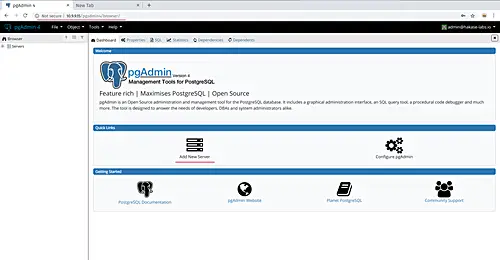
And you will get the pgAdmin dashboard.
Install pgAdmin4 from Source
In order to install the pgAdmin4 from source, we need to install some packages dependencies to the system and configure the Apache web server manually to serve the pgAdmin4 uWSGI service.
- Create User and Directories
First of all, we want to install the pgAdmin4 on the non-root user. So we need to create a new user and create some directories for pgAdmin4.
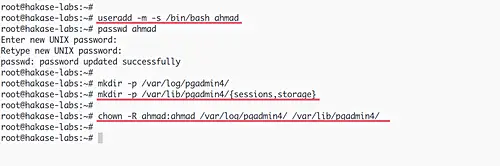
Create a new user called 'ahmad' by running the following command.
useradd -m -s /bin/bash ahmad
 passwd ahmad
Now create the pgAdmin4 log directory and data directories for the 'sessions' and 'storage'.
mkdir -p /var/log/pgadmin4/
 mkdir -p /var/lib/pgadmin4/{sessions,storage}
After that, change the owner of all those directories to the 'ahmad' user.
chown -R ahmad:ahmad /var/log/pgadmin4/ /var/lib/pgadmin4/
- Install Dependencies
Install all packages dependencies needed such as Python, Python pip, and virtualenv for pgAdmin4 installation by running following commands.
sudo apt install build-essential libssl-dev libffi-dev libgmp3-dev virtualenv python-pip libpq-dev python-dev -y
After that, install the Apache2 web server and the mod_wsgi.
sudo apt install apache2 apache2-utils libapache2-mod-wsgi libexpat1 ssl-cert python -y
- Create Virtual Environment Python
For this guide, we're going to install the pgAdmin4 inside python virtual environment.
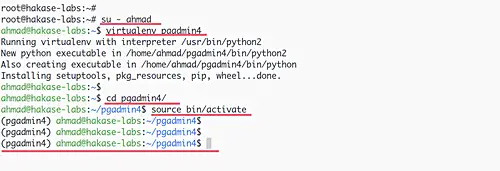
Log in to the 'ahmad' user and create a new python virtual environment named 'pgamdin4'.
su - ahmad
 virtualenv pgadmin4
Now go to the 'pgadmin4' directory and activate the virtual environment.
cd pgadmin4/
 source bin/activate
- Install pgadmin4
Inside the python virtual environment, download the pgAdmin4 whl package file.
wget https://ftp.postgresql.org/pub/pgadmin/pgadmin4/v3.6/pip/pgadmin4-3.6-py2.py3-none-any.whl
Then install the package using the pip command.
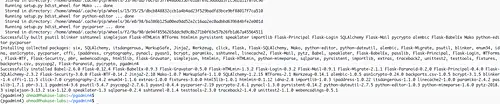
pip install pgadmin4-3.6-py2.py3-none-any.whl
Wait for the pgAdmin4 installation.
In order to run the pgAdmin4 on 'Server Mode', we need to add an additional configuration to the python site-packages directory.
Go to the 'lib/python-version/site-packages/pgadmin4' directory and create new configuration file named 'config_local.py'.
cd lib/python2.7/site-packages/pgadmin4/
 vim config_local.py
Paste configuration below.
LOG_FILE = '/var/log/pgadmin4/pgadmin4.log'
SQLITE_PATH = '/var/lib/pgadmin4/pgadmin4.db'
SESSION_DB_PATH = '/var/lib/pgadmin4/sessions'
STORAGE_DIR = '/var/lib/pgadmin4/storage'
SERVER_MODE = True
Save and close.
After that, run the 'setup.py' script.
python setup.py
And you will be prompted for the admin email and password configuration. Type your details and the pgAdmin installation is completed.
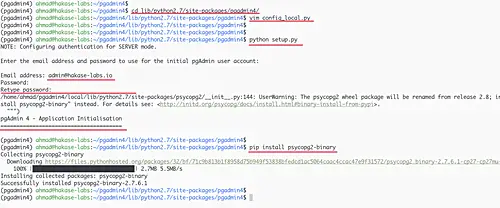
Note:
If you get a notification about the 'psycopg2' package will be renamed on the next release, just install the binary version of the package.
pip install psycopg2-binary
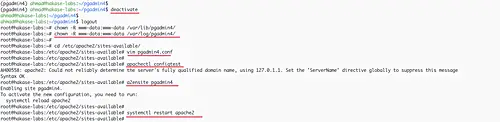
After that, deactivate the python virtual environment and change the owner of the pgAdmin4 log and data directories to the 'www-data' user.
deactivate
chown -R www-data:www-data /var/lib/pgadmin4/
 chown -R www-data:www-data /var/log/pgadmin4/
- Configure Apache2
For this guide, the Apache2 web server will be used as a reverse proxy for the uWSGI application pgAdmin4.
Go to the '/etc/apache2/sites-available' directory and create new virtual host file named 'pgadmin4.conf'.
cd /etc/apache2/sites-available/
 vim pgadmin4.conf
Change the 'ServerName' with your own domain name and paste into it.
<VirtualHost *:80>
    ServerName pgadmin.ahmad-labs.io
    LogLevel debug
    ErrorLog ${APACHE_LOG_DIR}/pgadmin-error.log
    CustomLog ${APACHE_LOG_DIR}/pgadmin-access.log combined

    LoadModule wsgi_module modules/mod_wsgi.so
    WSGIDaemonProcess pgadmin processes=1 threads=25 python-home=/home/ahmad/pgadmin4
    WSGIScriptAlias / /home/ahmad/pgadmin4/lib/python2.7/site-packages/pgadmin4/pgAdmin4.wsgi

    <Directory "/home/ahmad/pgadmin4/lib/python2.7/site-packages/pgadmin4/">
        WSGIProcessGroup pgadmin
        WSGIApplicationGroup %{GLOBAL}
        Require all granted
    </Directory>
</VirtualHost>
Save and close.
Now test the configuration and activate the pgAdmin4 virtual hosts.
apachectl configtest
 a2ensite pgadmin4
Make sure there is no error, then restart the Apache2 service.
systemctl restart apache2
Finally, the pgAdmin4 is now up and running as a uWSGI service behind the Apache web browser.
Now open your web browser and type the pgadmin domain name.
http://pgadmin.hakase-labs.io/
And you will get the pgAdmin4 Login page as below.

Connect to the PostgreSQL Database with pgAdmin4
Log in to the pgAdmin4 Dashboard using your email address and password.

Now click the 'Add Server' button, type the PostgreSQL Server details that you want to connect.
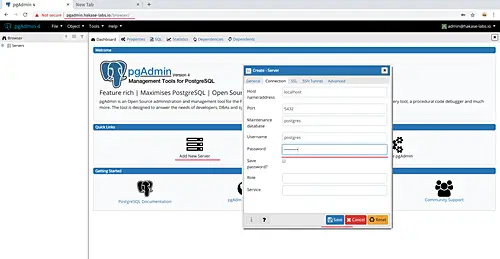
And click 'Save'.
After that, you will get details about your PostgreSQL database on the left panel side.
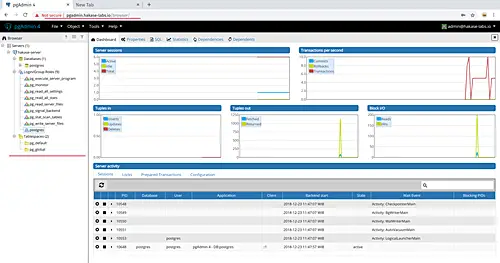
Finally, the pgAdmin4 is now installed on Ubuntu 18.04

