How to Install GitBucket with Nginx on Ubuntu 18.04 LTS
This tutorial exists for these OS versions
- Ubuntu 20.04 (Focal Fossa)
- Ubuntu 18.04 (Bionic Beaver)
On this page
GitBucket is a free and open-source Git platform powered by Scala with Github API compatibility. It is simple, lightweight and alternative to Github or BitBucket. It comes with reach set of features including, support for GitLFS, issues, pull request, notifications, plug-in system, Public and Private Git repositories. It can be easily integrated with LDAP for accounts and groups management.
In this tutorial, we will learn how to install and configure GitBucket on Ubuntu 18.04 server.
Requirements
- A fresh server with Ubuntu 18.04.
- A root password is configured on your instance.
Getting Started
Before starting, update your system with the latest stable version. You can do it with the following command:
apt-get update -y
 apt-get upgrade -y
Once updated, restart your server to apply all the configuration changes.
Install Java
GitBucket requires Java 8 or newer to be installed on your server. So, you will need to install Java on your server.
To install Java run the following command:
apt-get install default-jdk -y
Once the Java is installed, you can check the version of Java using the following command:
java -version
You should see the following output:
openjdk version "10.0.2" 2018-07-17
OpenJDK Runtime Environment (build 10.0.2+13-Ubuntu-1ubuntu0.18.04.2)
OpenJDK 64-Bit Server VM (build 10.0.2+13-Ubuntu-1ubuntu0.18.04.2, mixed mode)
Once you have finished, you can proceed to the next step.
Install GitBucket
Before installing GitBucket, you will need to create an unprivileged user to run GitBucket.
Run the following command to create a system user called gitbucket.
groupadd -g 555 gitbucket
 useradd -g gitbucket --no-user-group --home-dir /opt/gitbucket --no-create-home --shell /usr/sbin/nologin --system --uid 555 gitbucket
Next, download the GitBucket from the Git repository with the following command:
wget https://github.com/gitbucket/gitbucket/releases/download/4.31.2/gitbucket.war
Once the download is completed, create a directory for GitBucket inside /opt
mkdir /opt/gitbucket
Next, move the downloaded file in gitbucket directory:
mv gitbucket.war /opt/gitbucket
Next, give proper permission to the gitbucket directory with the following command:
chown -R gitbucket:gitbucket /opt/gitbucket
Once you have finished, you can proceed to the next step.
Create Systemd Service file for GitBucket
Next, you will need to create a Systemd service file for GitBucket to manage GitBucket service. You can create it with the following command:
nano /etc/systemd/system/gitbucket.service
Add the following lines:
# GitBucket Service
[Unit]
Description=Manage Java service

[Service]
WorkingDirectory=/opt/gitbucket
ExecStart=/usr/bin/java -Xms128m -Xmx256m -jar gitbucket.war
User=gitbucket
Group=gitbucket
Type=simple
Restart=on-failure
RestartSec=10

[Install]
WantedBy=multi-user.target
Save and close the file. Then, reload the Systemd with the following command:
systemctl daemon-reload
Next, start gitbucket service and enable it to start on boot time with the following command:
systemctl enable gitbucket
 systemctl start gitbucket
You can now check the status of gitbucket with the following command:
systemctl status gitbucket
You should see the following output:
? gitbucket.service - Manage Java service
   Loaded: loaded (/etc/systemd/system/gitbucket.service; disabled; vendor preset: enabled)
   Active: active (running) since Tue 2019-08-09 09:43:42 UTC; 5s ago
 Main PID: 17835 (java)
    Tasks: 18 (limit: 1113)
   CGroup: /system.slice/gitbucket.service
           ??17835 /usr/bin/java -Xms128m -Xmx256m -jar gitbucket.war

Aug 09 09:43:42 ubuntu1804 systemd[1]: Started Manage Java service.
Aug 09 09:43:45 ubuntu1804 java[17835]: 2019-07-09 09:43:45.102:INFO::main: Logging initialized @2700ms to org.eclipse.jetty.util.log.StdErrLog
Aug 09 09:43:46 ubuntu1804 java[17835]: 2019-07-09 09:43:46.134:INFO:oejs.Server:main: jetty-9.4.z-SNAPSHOT; built: 2018-11-14T21:20:31.478Z; g
lines 1-11/11 (END)
Once you have finished, you can proceed to the next step.
Configure Database Connection for GitBucket
GitBucket comes with an embedded H2 database. To configure the database connection open database.conf file with your favourite text editor:
nano /opt/gitbucket/database.conf
Add the following lines:
db {
  url = "jdbc:h2:${DatabaseHome};MVCC=true"
  user = "sa"
  password = "sa"
}
Once you have finished, you can proceed to the next step.
Configure Nginx as a Reverse Proxy
By default, GitBucket runs on port 8080. So, you will need to configure Nginx as a reverse proxy to improve performance and enable other features like, HTTP/2 and TLS encryption.
To do so, first install Nginx with the following command:
apt-get install nginx -y
Next, create a reverse proxy for GitBucket by creating the following file:
nano /etc/nginx/sites-available/gitbucket.conf
Add the following lines:
upstream gitbucket {
  server 127.0.0.1:8080 weight=100 max_fails=5 fail_timeout=5;
}

server {
  listen          80;
  server_name     your-domain.com;

  location / {
        proxy_set_header X-Forwarded-Host $host;
        proxy_set_header X-Forwarded-Server $host;
        proxy_set_header X-Forwarded-For $proxy_add_x_forwarded_for;
        proxy_pass http://gitbucket/;
  }
}
Save and close the file. Then, enable Nginx virtual host using the following command:
ln -s /etc/nginx/sites-available/gitbucket.conf /etc/nginx/sites-enabled/
Next, check the Nginx for any syntax errors and restart the Nginx service with the following command:
nginx -t
You should see the following output:
nginx: the configuration file /etc/nginx/nginx.conf syntax is ok
nginx: configuration file /etc/nginx/nginx.conf test is successful
systemctl restart nginx
Once you ahve finished, you can proceed to the next step.
Access GitBucket Web Interface
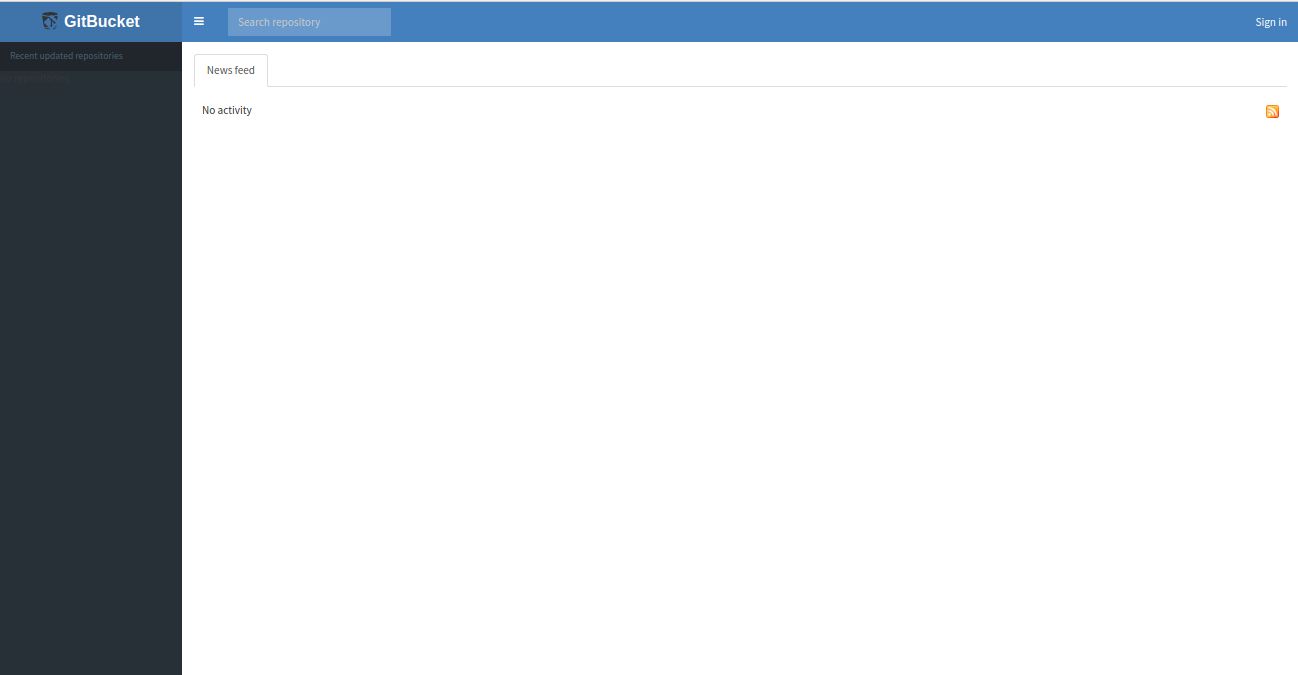
GitBucket is now installed and configured. Open your web browser and type the URL http://your-domain.com. You will be redirected to the following page:
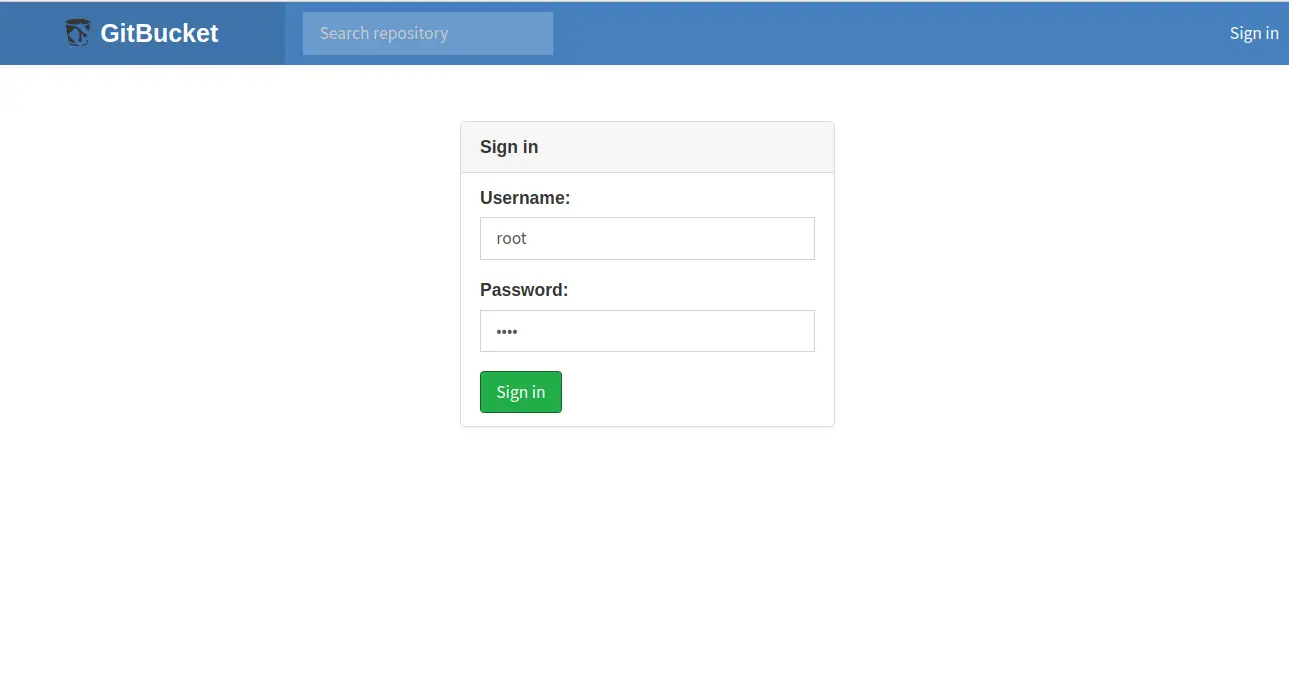
Now, click on the Sign in button. You will be redirected to the login page as shown below:
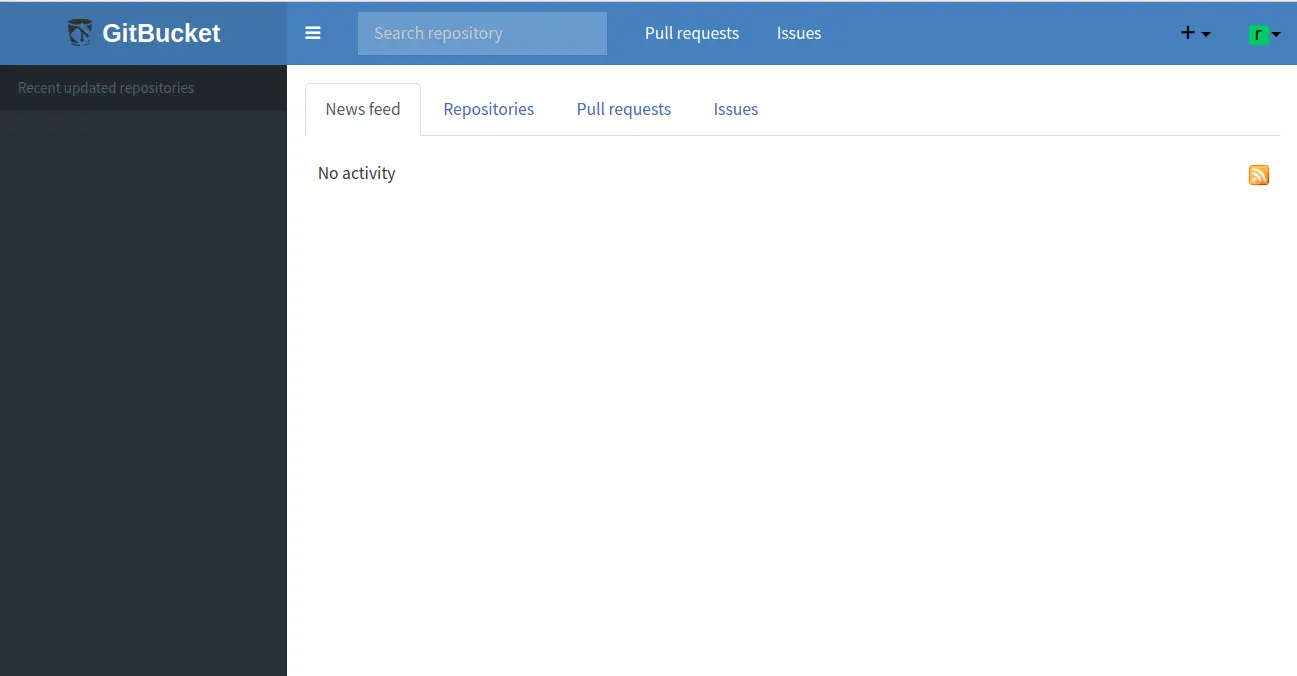
Now, provide the default username and password as root / root and click on the Sign in button. You should see the GitBucket dashboard in the following page:
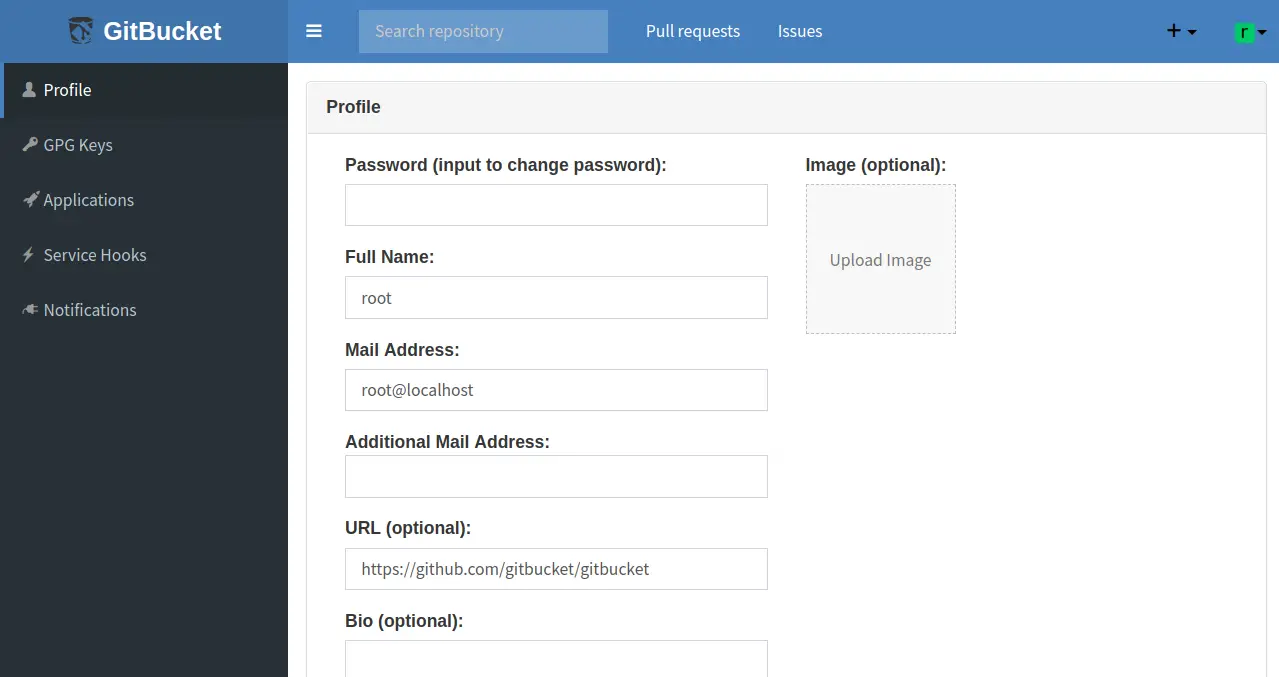
Next, go to the Account Settings to change the default root password as shown in the following page:
Congratulations! you have successfully installed and configured GitBucket on Ubuntu 18.04 LTS server. Feel free to ask me if you have any questions.

