There's a lot of Mobile Apps use the Google maps direction service as their requirements. One of them uses for Google map as driving direction in their application. This time, we will show you how easy to make that kind of application that involves Google maps and their services.
Jumps to the steps:
- Create New Ionic 3 and Angular 4 App
- Setup Google Maps and Google Maps Directions Service on Google Developer Console
- Implement Google Maps and Google Maps Directions Service on The Ionic 3 App
- Run Ionic 3 Angular 4 App on The Browser and Device
The comprehensive step by step tutorial of Ionic 3, Angular 4 and Google Maps Directions Service using Google Maps Javascript API. Why using Google Maps Javascript API? because it's an easier implementation for Ionic 3 and Angular 4. For using Ionic 2 Native Google Maps, you can refer to this tutorial.
Create New Ionic 3 and Angular 4 App
As usual, we are starting our tutorial from scratch. We assume that your computer or environment already have Node.js installed. Now, open the terminal or Node.js command line then type this command to install new Ionic 3 and Cordova.
sudo npm install -g cordova ionicNow, go to project folders then type this command to make a new Ionic 3 App.
ionic start ionic3-googlemaps-directions blank --v2Or if you are using the latest Ionic CLI, type this command.
ionic start ionic3-googlemaps-directions blank --type ionic-angularGo to the newly created app folder.
cd ionic3-googlemaps-directionsThis time we will modify few default files to implements lazy loading pages. Open and edit 'src/app/app.module.ts' then remove imports, NgModule-declaration and NgModule-entryComponents of page Home. So, this file will look like this.
import { BrowserModule } from '@angular/platform-browser';
import { ErrorHandler, NgModule } from '@angular/core';
import { IonicApp, IonicErrorHandler, IonicModule } from 'ionic-angular';
import { SplashScreen } from '@ionic-native/splash-screen';
import { StatusBar } from '@ionic-native/status-bar';

import { MyApp } from './app.component';

@NgModule({
  declarations: [
    MyApp
  ],
  imports: [
    BrowserModule,
    IonicModule.forRoot(MyApp)
  ],
  bootstrap: [IonicApp],
  entryComponents: [
    MyApp
  ],
  providers: [
    StatusBar,
    SplashScreen,
    {provide: ErrorHandler, useClass: IonicErrorHandler}
  ]
})
export class AppModule {}
Add new file 'src/pages/home/home.module.ts'.
touch src/pages/home/home.module.tsOpen and edit that file then add these lines of codes.
import { NgModule } from '@angular/core';
import { HomePage} from './home';
import { IonicPageModule } from 'ionic-angular';

@NgModule({
  declarations: [HomePage],
  imports: [IonicPageModule.forChild(HomePage)],
  entryComponents: [HomePage]
})
export class HomePageModule { }
Now, open and edit 'src/pages/home/home.ts' then add this import.
import { IonicPage } from 'ionic-angular';Then add annotation of IonicPage before component annotation.
@IonicPage()
@Component({
  selector: 'page-home',
  templateUrl: 'home.html'
})
Next, open and edit 'src/app/app.component.ts' then remove the import of HomePage and change reference to HomePage component to be 'HomePage' string.
import { Component } from '@angular/core';
import { Platform } from 'ionic-angular';
import { StatusBar } from '@ionic-native/status-bar';
import { SplashScreen } from '@ionic-native/splash-screen';

@Component({
  templateUrl: 'app.html'
})
export class MyApp {
  rootPage: string = 'HomePage';

  constructor(platform: Platform, statusBar: StatusBar, splashScreen: SplashScreen) {
    platform.ready().then(() => {
      // Okay, so the platform is ready and our plugins are available.
      // Here you can do any higher level native things you might need.
      statusBar.styleDefault();
      splashScreen.hide();
    });
  }
}
Now, run the app.
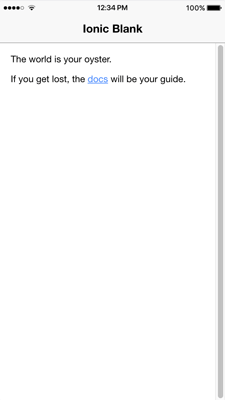
ionic serve -lYou should see this page in the browser.
Setup Google Maps and Google Maps Directions Service on Google Developer Console
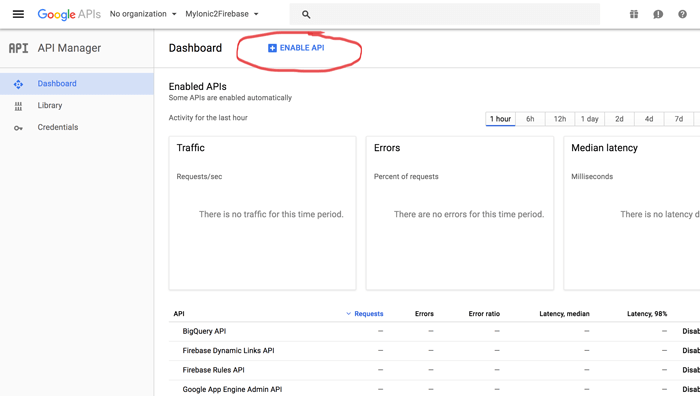
Before setup Google Maps and Directions Service in the Ionic 3 and Angular 4 app, we have to make sure that Google Maps Javascript API and Google Maps Directions Service is enabled on the Google Developer console.
Open your browser then go to Google Developer Console then click Enable API to enable Google Maps Javascript API and Google Maps Directions.
After enabling Google Maps and Google Maps Directions then Go to Credentials page by click on Credentials left the menu. Make sure that you have Browser Key, if not create Browser key by click on Create Credentials button.
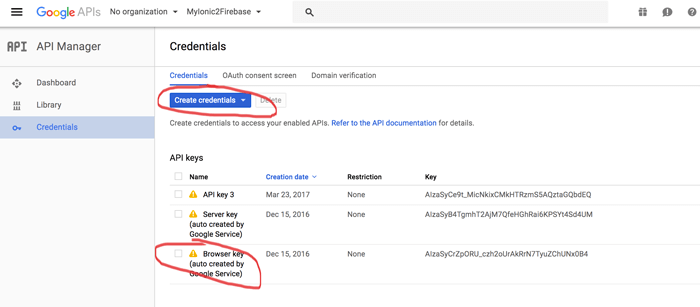
Write down the key on a notepad or any text editor, because we will use it later on the app.
Implement Google Maps and Google Maps Directions Service on The Ionic 3 App
Now, it's time to implement Google Maps and Google Maps Directions Service on the Ionic 3 app. Starting with reference Javascript library of Google Maps in 'src/index.html'. Open and edit 'src/index.html' then add this script reference before the closing of the body tag.
<script src="https://maps.googleapis.com/maps/api/js?key=YOUR_API_KEY"></script>Change 'YOUR_API_KEY' with the key that previously written in the text editor.
Next, open and edit 'src/pages/home/home.html' then replace all tags inside 'ion-content' with these lines of tags.
<ion-content>
  <div id="floating-panel">
    <b>Start: </b>
    <select [(ngModel)]="start" id="start" (change)="calculateAndDisplayRoute()">
      <option value="chicago, il">Chicago</option>
      <option value="st louis, mo">St Louis</option>
      <option value="joplin, mo">Joplin, MO</option>
      <option value="oklahoma city, ok">Oklahoma City</option>
      <option value="amarillo, tx">Amarillo</option>
      <option value="gallup, nm">Gallup, NM</option>
      <option value="flagstaff, az">Flagstaff, AZ</option>
      <option value="winona, az">Winona</option>
      <option value="kingman, az">Kingman</option>
      <option value="barstow, ca">Barstow</option>
      <option value="san bernardino, ca">San Bernardino</option>
      <option value="los angeles, ca">Los Angeles</option>
    </select><br>
    <b>End: </b>
    <select [(ngModel)]="end" id="end" (change)="calculateAndDisplayRoute()">
      <option value="chicago, il">Chicago</option>
      <option value="st louis, mo">St Louis</option>
      <option value="joplin, mo">Joplin, MO</option>
      <option value="oklahoma city, ok">Oklahoma City</option>
      <option value="amarillo, tx">Amarillo</option>
      <option value="gallup, nm">Gallup, NM</option>
      <option value="flagstaff, az">Flagstaff, AZ</option>
      <option value="winona, az">Winona</option>
      <option value="kingman, az">Kingman</option>
      <option value="barstow, ca">Barstow</option>
      <option value="san bernardino, ca">San Bernardino</option>
      <option value="los angeles, ca">Los Angeles</option>
    </select>
    </div>
    <div #map id="map"></div>
</ion-content>
The most important thing when using Google Maps in HTML is specifying the height of the map element 'DIV', otherwise, the maps will never be shown. For that, open and edit 'src/pages/home/home.scss' then make it like this.
page-home {
  #floating-panel {
    position: absolute;
    top: 10px;
    right: 5px;
    z-index: 5;
    background-color: #fff;
    padding: 5px;
    border: 1px solid #999;
    text-align: center;
    font-family: 'Roboto','sans-serif';
    line-height: 30px;
    padding-left: 10px;
  }
  #map {
    height: 100%;
  }
}
Open and edit 'src/pages/home/home.ts' then replace all codes with these codes.
import { Component, ViewChild, ElementRef } from '@angular/core';
import { IonicPage } from 'ionic-angular';
import { NavController } from 'ionic-angular';

declare var google;

@IonicPage()
@Component({
  selector: 'page-home',
  templateUrl: 'home.html'
})
export class HomePage {

  @ViewChild('map') mapElement: ElementRef;
  map: any;
  start = 'chicago, il';
  end = 'chicago, il';
  directionsService = new google.maps.DirectionsService;
  directionsDisplay = new google.maps.DirectionsRenderer;

  constructor(public navCtrl: NavController) {

  }

  ionViewDidLoad(){
    this.initMap();
  }

  initMap() {
    this.map = new google.maps.Map(this.mapElement.nativeElement, {
      zoom: 7,
      center: {lat: 41.85, lng: -87.65}
    });

    this.directionsDisplay.setMap(this.map);
  }

  calculateAndDisplayRoute() {
    this.directionsService.route({
      origin: this.start,
      destination: this.end,
      travelMode: 'DRIVING'
    }, (response, status) => {
      if (status === 'OK') {
        this.directionsDisplay.setDirections(response);
      } else {
        window.alert('Directions request failed due to ' + status);
      }
    });
  }

}
Run Ionic 3 Angular 4 App on The Browser and Device
To run the Ionic 3 Angular 4 app on the browser, type this command.
ionic serve -lYou should see this page.
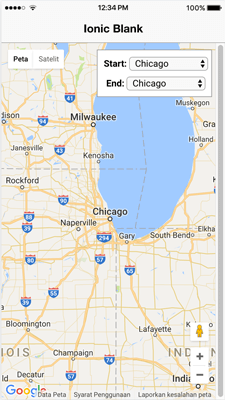
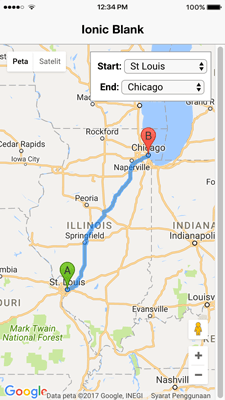
When you change to start, end or both select box, the map should show directions like this.
To run the Ionic 3 app on the device, don't forget to re-add platforms.
ionic cordova platform rm ios
ionic cordova platform add ios
ionic cordova platform rm android
ionic cordova platform add android
Finally, run the Ionic 3 app on the device.
ionic cordova run androidor
ionic cordova run iosIf you see the same as the browser, then everything is working properly.
You can find the source code on our GitHub.
We know that building beautifully designed Ionic apps from scratch can be frustrating and very time-consuming. Check Ionic 4 - Full Starter App and save development and design time. Android, iOS, and PWA, 100+ Screens and Components, the most complete and advance Ionic Template.
That just the basic. If you need more deep learning about Ionic, Angular, and Typescript, you can take the following cheap course:
- IONIC 4 Design Hybrid Mobile Applications IOS & Android
- Wordpress Rest API and Ionic 4 (Angular) App With Auth
- Mobile App from Development to Deployment - IONIC 4
- Ionic 4 Crash Course with Heartstone API & Angular
- Ionic 4 Mega Course: Build 10 Real World Apps
Thanks!