¿Español? Puedes encontrar la versión traducida de este artículo aquí: Tú, yo, y package.json
If you have worked in a Node.js or client-side JavaScript project, there is a pretty good chance that you have seen a file called package.json, and that you've poked around its contents. Even though there is a lot of stuff in there that you probably are very familiar with, you may have run into some stuff that is not completely sure what it means or even how it got in there in the first place.
In this article, we'll go over the details of what each thing inside this file means, what kind of stuff you can put in there and how it can help you become even more productive while developing your projects.
But first things first:
What is the package.json file?
Historically, Node has been using a tool called npm to manage package and dependencies. This tool, which is usually installed along Node, has two main jobs:
- Publishing your project to npm's public registry (so other users can download it as a dependency for their projects).
- Manage the dependencies of your own project.
To be able to do this, the npm client creates and uses a file called package.json. This file contains information about the project such as:
- Name.
- Version.
- Dependencies.
- Repository.
- Author(s).
- License.
And more.
Additionally, as well as keeping a record, by using this file the integrity of the project can be guaranteed for everyone that gets a copy. This means that any user, at any point in time, will be able to access the same set of similar compatible dependencies. In a way, we can think of the package.json file as our project's manifesto. One thing to keep in mind here is that while the dependencies listed in a package.json file should be similar and compatible to the original ones, is not guaranteed that the project will be able to run without any issues if a considerable time has passed since the original declaration _(could be cases where changes were introduced in a different version of the package that is also considered compatible but could break some functionality). For this, is the use of lock files is recommended.
Let's look at an example by considering the following scenario:
Two devs are working on the same project, with independent copies in their own computers. Dev #1 decides that in order to complete the new feature, he'll need to use a new library inside the project.
Without any dependency management, he would need to do one of two things:
- Manually download the library into the project's directory and keep a copy in there that has to be included wherever the project is being stored, potentially increasing the amount of data that needs to be transferred anytime a new Dev gets a copy.
- Download a copy of the library without keeping a copy, but letting every person working on the project (present and future) know that they'll need to get a copy of it and making sure they're using the exact same version. (Good way to make new friends, but not so good in terms of time management).
With a dependency management tool, such as npm, neither of these steps are necessary anymore. Anyone that gets a copy of the project, now and forever (as long as the package hasn't been unpublished), will be able to install each and every one of the dependencies without the need to transfer the actual copies of them. As a result, the actual project that it's stored in a repository, and shared, is a lot lighter and redundant data is not being transferred.
It's worth mentioning that, even though a lot of the information contained inside a package.json file seems to be specific for publishing projects in the npm registry, we can still use npm to manage other kinds of projects that will never be published in there, such as Web and/or mobile apps, games, and others.
As a final note about dependency management, a while back, my very good friends at Facebook (note: They don't really know we're friends... yet :() launched a similar tool called yarn, which for all intents and purposes of this article is able to do the same two tasks we mentioned above, and its use of the package.json file is the same, unless explicitly stated.
How to create a package.json file
One rule, to ring them all (?)
Before creating a package.json file, there's one rule to know: The file must be in a valid JSON format and must abide by the JSON style spec.
With that in mind, there are 2 different ways to create the file: Manually or using the npm/yarn cli:
Creating the package.json manually
If for any reason the option of using the npm/yarn cli is not available and we really need to create a file manually, we'll need to add a new file (named package.json) to the root of the project containing the following fields:
-
name. -
version.
Every other field (listed in the next section) is optional, though recommended.
Creating a package.json using the npm/yarn cli
This is the recommended way to do it. Creating a package.json file can be done by running any of these commands (depending on which package manager you're using) in the root directory of the project:
npm init
or
yarn init
Depending on whether npm or yarn is being used, certain information will have to be provided before the file is created:


Once finished, a brand new package.json file will be created in the root directory of the project.
Quick tip: If you need to quickly create a package.json file with default values, you can run:
npm init -y
or
yarn init -y
The sections of the package.json file
After creating the package.json file, either manually or using the cli, we'll find inside a big object with different keys and values (like the initial image of this article). Also, as time passes and new dependencies/configurations are included, new keys and values will also be included here. The following is a list of the most common ones that we'll probably run into at some point in time:
Note: This list only includes properties officially declared and supported by npm. There are multiple external libraries that also support keys to read from the package.json file (ie. Jest and the property “jest”)
name
This is one of the two required fields that need to be included in the file (along with version). It's a string that represents the name of the current project and also works as a unique identifier in case the project is published in the registry.
Rules:
- The name must be lowercase and cannot start with a period or an underscore.
- The maximum length of the name is 214 characters and must be URL safe (more info about URL safe characters can be found here, section 2.3).
A few other things to keep in mind:
- If the project will be published in the npm registry, the name must be unique and available (no other projects published before using the same name).
- Even though it's considered a good practice to use related names if the package belongs to a certain technology (like using react-{something} for React libraries), it's also recommended to not use node or js in the name.
version
The other required field, along with the name. It's a string indicating the current version of the project. Node.js and JavaScript projects usually abide by the conventions defined in Semantic Versioning (or semver), which defines the following structure for versions:
MAJOR.MINOR.PATCH
description
A string with a short explanation of what the project is about. If the package is ever published, this text will also be relevant for search results.
keywords
Same as description, but instead of text, it's an array of strings that includes relevant terms that can be used to search the package.
homepage
A string with a valid URL for the project's Website.
bugs
A string with a valid URL where users can report issues found in the project. Usually, the issues repository URL is used for this.
license
A string that specifies the type of license under which this project is being released. This can be personal, commercial, open, or private.
More info on available licenses.
author
It can either be a string or an object with information about the creator of the project.
If it's an object, must be in the following format:
- name.
- email.
- URL.
And if it's a string:
"Name <email> (URL)"
contributors
Similar to author, it's an array of objects (or an array of strings) with the information of the contributors of the project.
files
An array of strings or patterns (such as *.js) of the files that will be included in the project if it's ever published in the registry. If this section is not defined, every file (that is not explicitly excluded in a file like .gitignore) will be included.
Some things to keep in mind about this:
- By default, every file listed inside .gitignore will be excluded from publishing.
- Instead of adding a files section, a .npmignore file can be included in the root of the project with a list of files to exclude from publishing (similar as what .gitignore does).
- Some files will always be included, regardless of explicit exclusion. Amongst these files are: package.json, README, CHANGES / CHANGELOG / HISTORY, LICENSE / LICENCE, NOTICE and the file defined as an entry point of the app (more about this in the following section)
- Some files will always be ignored, regardless of explicit inclusion. A list of these files can be found here.
main
A string that defines the entry point of the project. If the project is a package/library, this is the file that will be imported whenever someone requires it. For instance:
If your project is called super-awesome-library and a user installs it and then inside their app they do:
const superAwesomeLibrary = require("super-awesome-library");
the superAwesomeLibrary variable will have the contents of whatever your main file is exporting, so if your package.json file has a declaration such as:
{
  "main": "lib/foo.js"
}
then the superAwesomeLibrary variable will contain the content that is exported in lib/foo.js.
If this section is omitted, then the contents of the index.js file that lives in the root directory of the project will be used.
bin
A string (if it's only one) or an object (if it's multiple) defining scripts that will be installed and will be available as commands in the PATH. After the package is installed, a symbolic link will be created from /usr/local/bin to the respective file inside the project and will be available as a command-line program.
For instance, let's say we have a file called cli.js inside our project, and we wanna make it available for users to call it directly from their terminals. The way to achieve it would be to include a single string as bin inside package.json as follows:
{
  "name": "super-awesome-library",
  "bin": "cli.js"
}
Now the contents of cli.js can be used by running whatever we put as name of the project in the terminal:
super-awesome-library
While the user is running that friendly name, in reality, something like this is happening "behind the scenes":
node cli.js
And then whatever is on that file will be run.
If instead of that, we have multiple files that we want to turn into executable scripts, we can use the object format instead. This will add a symbolic link for every key-value pair, using the key as the command that will be available afterward:
{
  "bin": {
    "script-1": "super-h4x0r-script1.js",
    "script-2": "on-your-left.js"
  }
}
With that object, both “script-1” and “script-2” will be included in the PATH, each pointing to the respective .js file that was their pair inside the bin object.
This is what many known packages, such as nodemon or react-native, include so we can use them as terminal commands directly without having to run node whatever-the-path-to-the-file-is.
man
A string, or an array of strings, defining one (or many) file(s) that will be available/shown if the man command is run for this project.
directories
An object defining the structure of the project and where every folder is located for certain sections. The most common ones are bin, doc, example, lib, man, test.
{
  "bin": "./bin",
  "doc": "./doc",
  "lib": "./lib"
}
repository
An object defining where this project is stored and can be found for contribution. The object has the following format:
{
  "type": string,
  "url": string
}
Where type refers to the type of repository (such as svn or git) and URL is a valid URL where it can be found.
Example:
{
  "type": "git",
  "url": "https://github.com/my-user/super-awesome-project"
}
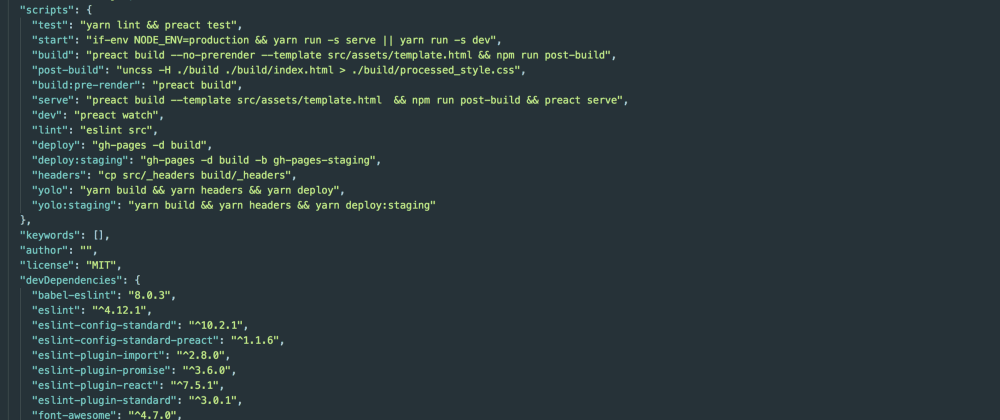
scripts
An object defining commands that can be used with the npm/yarn cli for the project. Some scripts are predefined and reserved and can be used without defining them, such as start, install, preinstall, pretest, test, and posttest amongst others. (a full list can be found here).
In the same way, we can define our own scripts and use custom names and instructions for them. This is very useful to create shortcuts and/or combined tasks without having to remember the full commands and/or params every time.
For instance, let's pretend that we have an app that needs to run a task to minify the JS files before creating a new version, and we do that with a script that lives in tasks/minify.js and passing a flag or param that uses internally. Usually, we would run node tasks/minify.js --someflag --maybeanother every time we want to achieve this (and we would need to remember the name of the flags as well). However, if we instead add it to the npm scripts, we could do something like:
"scripts": {
  "minify": "node tasks/minify.js --someflag --maybeanother"
}
And then run:
npm run minify
This achieves the exact same result. The cool thing about this is not only not having to remember the exact commands we need to run each time, but also that npm scripts can be combined and executed sequentially, so we can create complex tasks and even trigger some automatically if we use any of the pre hooks (like pretest or prepublish).
For instance, let's say that we want to run that same minify task, as well as run our code through a linter, right before we run the tests of our app. For that, we could add something like this (pretending our app code lives in the src folder):
"scripts": {
  "pretest": "node tasks/minify.js --someflag --maybeanother && eslint src"
}
Or we could include it directly as part of the test script (this example uses jest, but you can replace that with mocha/ava/tape/etc or the tool of your choice):
"scripts": {
  "test": "node tasks/minify.js --someflag --maybeanother && eslint src && jest"
}
As a final note about this, these scripts need to be run as npm run 'script' unless it's one of the predefined/reserved by npm (listed at the beginning of this section). However, if you are using yarn, you can omit the run part completely and just do yarn 'script', regardless of it it's a predefined script or not.
config
An object where values can be set to use as environment variables that can be later accessed from within your code.
To set a config value, we can do this inside the package.json file:
{
  "name": "my-app",
  "config": {
    "port": 8000
  }
}
And then, values can be referenced from within the code using process.env.npm_package_config_{value}, like this:
const express = require('express');
const app = express();
const port = process.env.npm_package_config_port;

app.get('/', (req, res) => res.send('Hello!'));

app.listen(port, () => console.log(`App listening on port ${port}!`));
These config values can be changed from outside the package.json file at any time by executing:
npm config set {name of the project}:{config key} {config value}
For our previous example, we could do something like this:
npm config set my-app:port 3000
dependencies
An object that stores the name and version of each dependency installed (and saved) during the project's history. Every time that someone gets a new copy of this project and runs npm install, all of these dependencies will be installed (with the newest compatible version). These dependencies, as well as the next two categories, are defined with the following format:
"name-of-the-dependency": "(^|~|version)|url"
Some examples:
"dependencies": {
  "backbone": "1.0.0",
  "lodash": "^4.6.1",
  "mocha": "~3.5.3",
  "super-mega-library": "https://example.com/super-mega-library-4.0.0.tar.gz"
}
These dependencies can have either the version installed and saved or a valid URL where the package with the current version can be obtained (this URL can also be a local path inside the same computer).
What are the ^ and ~ symbols at the beginning of the versions?
Every dependency installed can have a character defining the range of acceptable compatible versions. These 2 are the most commons, but a full list can be found here.
In other words, these characters add instructions on how this dependency should be treated the next time an npm install happens:
-
If the version has a caret
(^): Allow installing a different version, as long as it's just a minor change (the second number of the version). If no different minor versions are found, the same version will be installed. -
If the version has a tilde
(~): Allows installing a different version, as long as it's just a patch change (the last number of the version). If no different patches are found, the same version will be installed. - If the version just has the number and no characters: The exact same version defined has to be installed.
For instance, with the dependencies specified above, if we run npm install and new versions are available:
- backbone and super-mega-library would stay using the same versions (1.0.0 and 4.0.0 respectively).
- lodash could either install the same version, or any versions between 4.6.1 and 4.9.9, but never anything equal to 5.x.x or above.
- mocha could either install the same version, or any versions between 3.5.3 and 3.5.9, but never anything above that.
devDependencies
The same format as the dependencies listed above, but this section will include all the dependencies that the project uses but are not needed for a production environment (like testing tools, local dev servers, optimization tools, etc.). Any computer that gets a copy of this project and has production set as the NODE_ENV variable will not install the dependencies listed in this section.
peerDependencies
This uses the same format as well, but these dependencies while not necessarily installed, define the compatibility required for this app/package to work correctly. For instance, if we are developing a library that is only compatible with version 16 of React, we would need to do something like this:
"peerDependencies": {
  "react": "16.0.0"
}
Older versions of npm (1 and 2) used to install these peerDependencies automatically, but that's not the case anymore. As of version 3, if a compatible version is not found when this project is installed, a warning will be triggered.
engines
An object where we can define the minimum versions of node and npm that this project supports. It's defined in the following format:
"engines": {
  "node": ">= 6.0.0",
  "npm": ">= 3.0.0"
}
When the project is installed, a check will be run to assure the compatibility. If this is not met, the install process will stop.
As is the case with dependencies, we can use ranges (like **>=**, **^**, **~**, etc.) to define compatible versions.
More information
Even though these are the most common things we'll find and use inside a package.json file, there is still some additional ones that can be interesting or useful to check. For additional references, I'd recommend reviewing the official docs of npm on a regular basis, since it's constantly being updated anytime a new version is released.
Useful links:
Originally published on my blog at xabadu.dev


Top comments (14)
You might not know this. 🔥
Package JSON files can have internal variables. Anything you place in any field can be referenced to interpolate anything else in your package.json.
$npm_package_{field}where field is a field in the top level. Just add more underscores to drill deeper. I commonly store constants in the config field to cut repetition within package.json AND get values in process env as mentioned in post.I did not know that indeed! That's an awesome tip, thanks for sharing! ✌️
This won't work in Windows, unfortunately. Need to use cross-var (npmjs.com/package/cross-var)
2 / 3 cases, what about Linux subsystem?
Thank you, a nice concise, useful article that's going to help me with my node work.
Something you didn't really touch on, but when would you use yarn vs npm on a new project? I always use what a project was created with, and npm for anything I create, but when should I use yarn for my own projects?
Thanks, Robert! Glad to hear the article was helpful :)
On yarn vs npm, while initially there were noticeable differences in performance and features, I guess at this time is more of a personal preference and what works best with your setup, since you can get pretty much the same with both.
I've seen a lot of projects adding lock files for both, which to be honest, seems like a bit of pain to maintain and could potentially lead to having those files off sync regarding the correct versions of dependencies, but it's definitely a possibility.
In general, I'd say, if you're publicly sharing your project, npm would be a more appropriate way to go, since it's the one that most devs, especially beginners, are most familiar with.
Nice article! Although I use npm for several years, I still learnt new things :)
Why using node or js in the name is not recommended?
Thanks! Glad to hear it was useful :)
For the most part, it's considered redundant. According to npm and their recommendation, users can infer that it supports JS by being on npm and having a package.json file, and if you need to specify that it's specifically for Node, you can do so by adding an "engine" entry in your package file.
I would also add, though this is purely personal opinion, that adding js and/or node to the name might lead less experienced users to believe that it's an official package.
My attempt to document package.json github.com/stereobooster/package.json
Nice! Thanks for sharing :)
This was super helpful. Thanks for writing!!!!
Awesome, thanks! Glad to hear it was helpful :)
Nice write-up Fernando!
Thanks!