How to install ProFTPD with TLS on Ubuntu 18.04 LTS
This tutorial exists for these OS versions
- Ubuntu 22.04 (Jammy Jellyfish)
- Ubuntu 18.04 (Bionic Beaver)
On this page
ProFTPD is a free, open source, and the most popular FTP server for Unix-like operating systems. ProFTPD allows you to create an FTP connection between your local computer and the remote server. It is a versatile FTP server that supports TLS (SSL) for secure connections.
Features
- Supports IPv4 and IPv6.
- Supports .ftpaccess to secure per directory.
- Allow us to configure multiple virtual FTP servers and anonymous FTP services.
- Provide support for shadow password, utmp/wtmp, SSL/TLS encryption, and RADIUS.
- Can run either as a stand-alone server or from inetd/xinetd.
In this tutorial, we will learn how to install ProFTPD and secure it with TLS on Ubuntu 18.04 server
Requirements
- A server running Ubuntu 18.04.
- A static IP address 192.168.0.101 is set up on server.
- A root password is set up on your server.
Getting Started
Before starting, you will need to update your system with the latest version. You can do this by running the following command:
apt-get update -y
 apt-get upgrade -y
Once your server is updated, restart your server to apply the changes.
Install ProFTPD
By default, ProFTPD is available in the Ubuntu 18.04 default repository. You can install it by just running the following command:
apt-get install proftpd -y
After installing ProFTPD, start ProFTPD service and enable it to start on boot time with the following command:
systemctl start proftpd
 systemctl enable proftpd
You can check the status of ProFTPD service with the following command:
systemctl status proftpd
You should see the following output:
? proftpd.service - LSB: Starts ProFTPD daemon
   Loaded: loaded (/etc/init.d/proftpd; generated)
   Active: active (running) since Sat 2019-05-25 09:18:19 UTC; 31s ago
     Docs: man:systemd-sysv-generator(8)
    Tasks: 1 (limit: 1114)
   CGroup: /system.slice/proftpd.service
           ??1927 proftpd: (accepting connections)

May 25 09:18:19 ubuntu1804 systemd[1]: Starting LSB: Starts ProFTPD daemon...
May 25 09:18:19 ubuntu1804 proftpd[1906]:  * Starting ftp server proftpd
May 25 09:18:19 ubuntu1804 proftpd[1906]:    ...done.
May 25 09:18:19 ubuntu1804 systemd[1]: Started LSB: Starts ProFTPD daemon.
The Default configuration files of ProFTPD is located at /etc/proftpd/proftpd.conf. You can see it with the following command:
cat /etc/proftpd/proftpd.conf
You should see the following output:
#
# /etc/proftpd/proftpd.conf -- This is a basic ProFTPD configuration file.
# To really apply changes, reload proftpd after modifications, if
# it runs in daemon mode. It is not required in inetd/xinetd mode.
#

# Includes DSO modules

Include /etc/proftpd/modules.conf

# Set off to disable IPv6 support which is annoying on IPv4 only boxes.
UseIPv6                         on
# If set on you can experience a longer connection delay in many cases.
IdentLookups                    off

ServerName                      "Debian"
# Set to inetd only if you would run proftpd by inetd/xinetd.
# Read README.Debian for more information on proper configuration.
ServerType                              standalone
DeferWelcome                    off

MultilineRFC2228                on
DefaultServer                   on
ShowSymlinks                    on

TimeoutNoTransfer               600
TimeoutStalled                  600
TimeoutIdle                     1200

DisplayLogin                    welcome.msg
DisplayChdir                    .message true
ListOptions                     "-l"

DenyFilter                      \*.*/

# Use this to jail all users in their homes
# DefaultRoot                   ~
# Port 21 is the standard FTP port.
Port                            21
MaxInstances                    30
# Set the user and group that the server normally runs at.
User                            proftpd
Group                           nogroup
# Umask 022 is a good standard umask to prevent new files and dirs
# (second parm) from being group and world writable.
Umask                           022  022
# Normally, we want files to be overwriteable.
AllowOverwrite                  on
TransferLog /var/log/proftpd/xferlog
SystemLog   /var/log/proftpd/proftpd.log
You can change the above setting as per your requirement as shown below:
- ServerName: You can change it as your default server name.
- UseIPV6: You can disable it by changing it to off.
- DefaultRoot: You can uncomment this line to restrict users with their home folders.
- Port: You can define your own port by changing it.
- SystemLog: The default location of the log file. You can change it as per your requirements.
Once you have done, you can proceed to the next step.
Secure ProFTPD with TLS
ProFTPD is now installed. Now, you will need to configure ProFTPD with TLS for secure FTP connections.
Before starting, you will need to install OpenSSL to your server. You can install it by just running the following command:
apt-get install openssl -y
Once the installation has been completed, generate SSL certificates for ProFTPd with the following command:
openssl req -x509 -newkey rsa:1024 -keyout /etc/ssl/private/proftpd.key -out /etc/ssl/certs/proftpd.crt -nodes -days 365
Answer all the questions as shown below:
Generating a 1024 bit RSA private key
.++++++
.......................++++++
writing new private key to '/etc/ssl/private/proftpd.key'
-----
You are about to be asked to enter information that will be incorporated
into your certificate request.
What you are about to enter is what is called a Distinguished Name or a DN.
There are quite a few fields but you can leave some blank
For some fields there will be a default value,
If you enter '.', the field will be left blank.
-----
Country Name (2 letter code) [AU]:IN
State or Province Name (full name) [Some-State]:GUJ
Locality Name (eg, city) []:Junagadh
Organization Name (eg, company) [Internet Widgits Pty Ltd]:IT
Organizational Unit Name (eg, section) []:IT
Common Name (e.g. server FQDN or YOUR name) []:HITESH
Email Address []:[email protected]
The above command will generate two files /etc/ssl/private/proftpd.key and /etc/ssl/certs/proftpd.crt.
Next, provide proper permissions to the generated files with the following command:
chmod 600 /etc/ssl/private/proftpd.key
 chmod 600 /etc/ssl/certs/proftpd.crt
Once you have done, you can proceed to the next step.
Configure ProFTPD to Use SSL
Next, you will need to configure ProFTPD to use SSL certificates. You can do it by editing /etc/proftpd/proftpd.conf file:
nano /etc/proftpd/proftpd.conf
Uncomment the following line:
Include /etc/proftpd/tls.conf
Save and close the file, when you are finished. Then, open /etc/proftpd/tls.conf file:
nano /etc/proftpd/tls.conf
Change the following lines:
TLSRSACertificateFile /etc/ssl/certs/proftpd.crt
TLSRSACertificateKeyFile /etc/ssl/private/proftpd.key
TLSEngine on
TLSLog /var/log/proftpd/tls.log
TLSProtocol SSLv23
TLSRequired on
TLSOptions NoCertRequest EnableDiags NoSessionReuseRequired
TLSVerifyClient off
Save and close the file, when you are finished. Then, restart the ProFTPD service with the following command:
systemctl restart proftpd
Once you have done, you can proceed to the next step.
Create User for ProFTPD
Next, you will need to create a ProFTPD user to access the server. You can do it with the following command:
adduser ftp1
Answer all the questions as shown below:
Adding user `ftp1' ...
Adding new group `ftp1' (1006) ...
Adding new user `ftp1' (1002) with group `ftp1' ...
Creating home directory `/home/ftp1' ...
Copying files from `/etc/skel' ...
Enter new UNIX password:
Retype new UNIX password:
passwd: password updated successfully
Changing the user information for ftp1
Enter the new value, or press ENTER for the default
	Full Name []:
	Room Number []:
	Work Phone []:
	Home Phone []:
	Other []:
Is the information correct? [Y/n] Y
Once you have done, you can proceed to the next step.
Access ProFTPD Server using FileZilla
ProFTPD is now installed and configured, it's time to access ProFTPD through FileZilla from the Client system.
First, you will need to install FileZilla on your Client system. You can install it by just running the following command:
apt-get install filezilla -y
Once the installation has been completed, you can open the FileZilla from Unity dash as shown below:
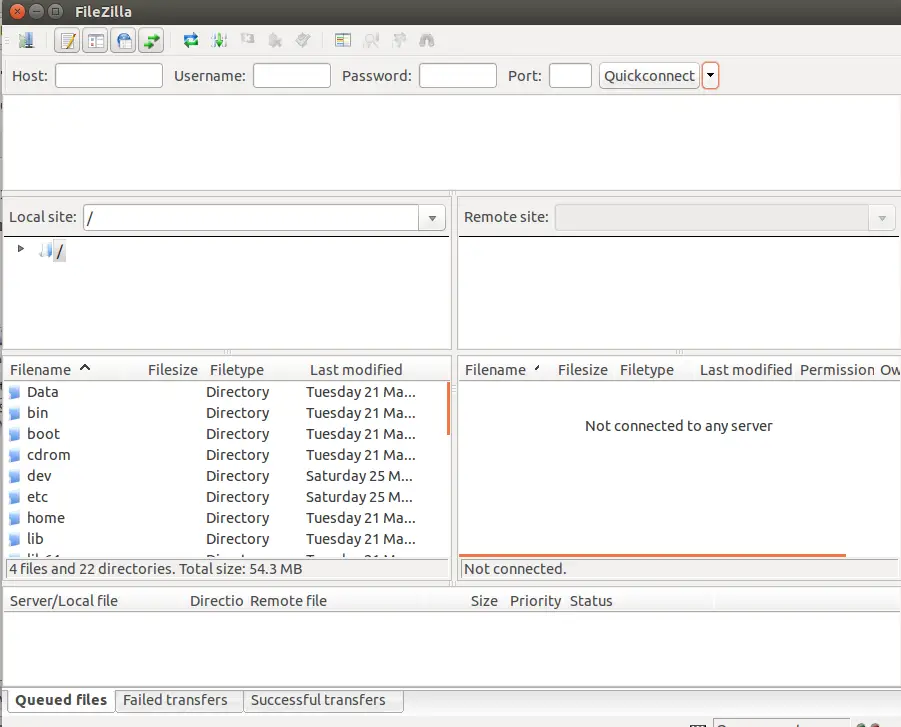
Now, click on the Site Manager on the left side panel and create a new site. You should see the following page:
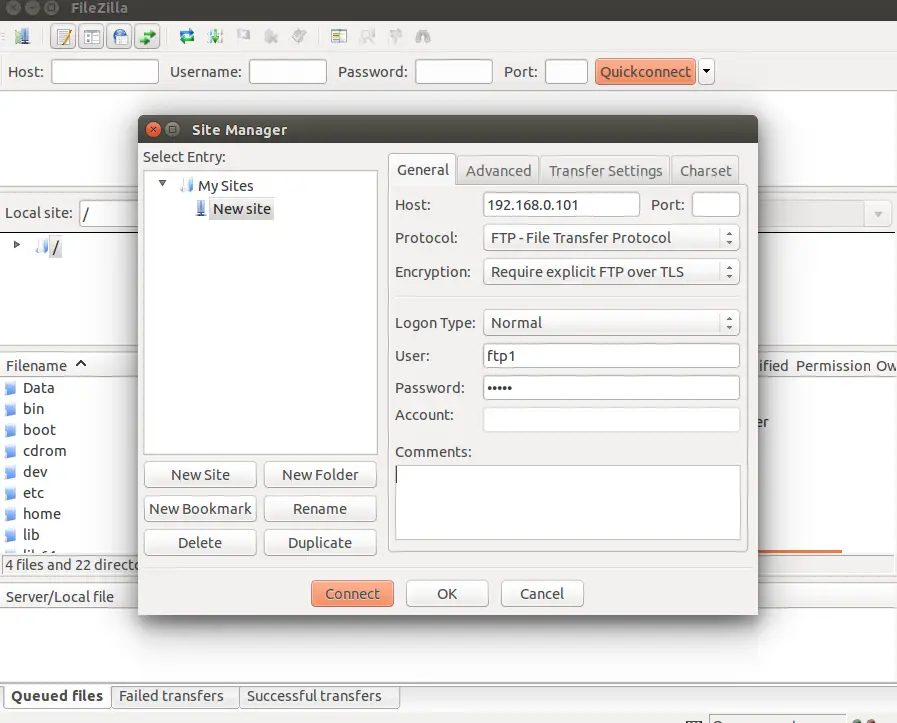
Now, provide your FTP server IP address, select protocol, select Encryption, select logon type, provide username and password. Then, click on the Connect button. You should see the following page:
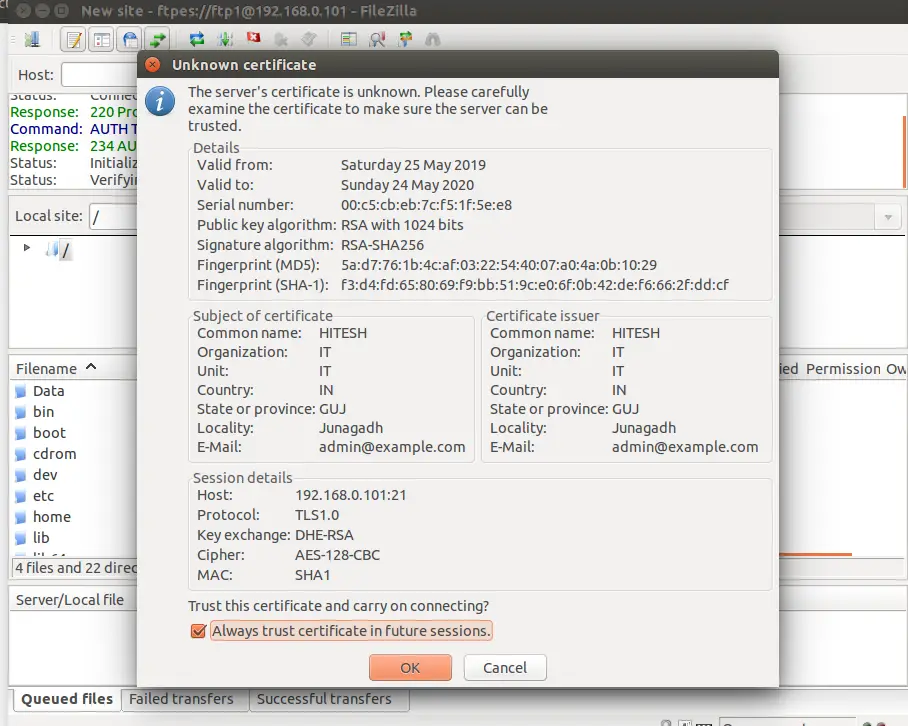
Now, accept the certificate, tick mark "Always trust certificate in future sessions" and click on the OK button. After successful login, you should see the following page:
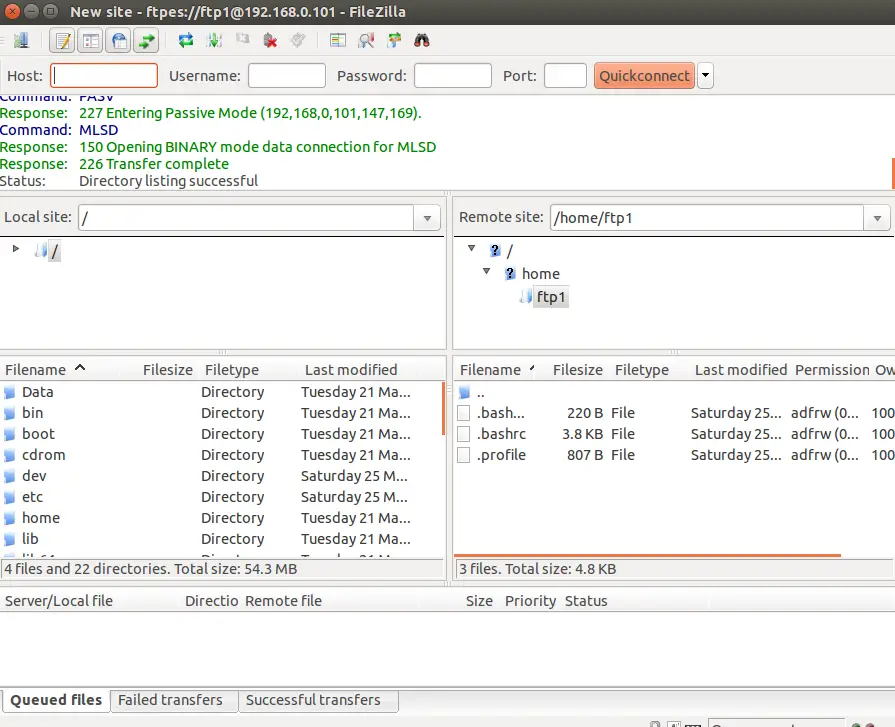
You are now able to transfer files securely via SSL/TLS.
Congratulations! you have successfully installed and configured ProFTPD server and secure it with SSL/TLS encryption. You can now transfer your file from your local computer to FTP server easily with secure encryption. Feel free to ask me if you have any questions.

