
When building a chat application, your head tends to spin in terms of what functionality you need. When building in-house, this process can turn into a nightmare.Thankfully, there are companies out there such as Stream that provide chat as a service as an API.
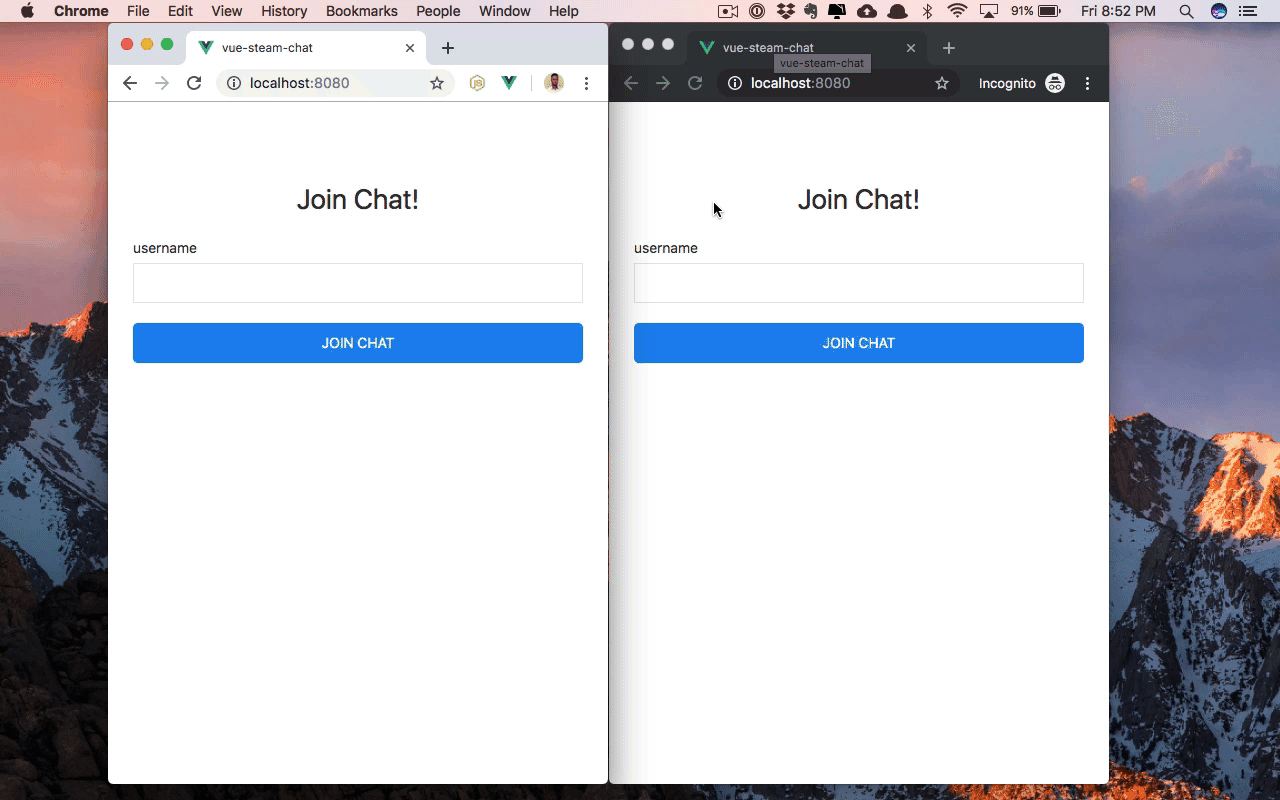
In this tutorial, we will explore how to build a real-time chat app with Vue. I’ll show you how to implement basic chat functionality using Chat powered by Stream. It will be real-time, easy to understand, and we’ll use Vue as our JavaScript framework. Before we get started, take a look at a demo of the application (image below) of what we’ll be building.
Prerequisites
This tutorial assumes the following:
- A basic understanding of JavaScript and Node.js
- A basic understanding of Vue.js
- You should also have Node.js installed on your system (version 8.9 or above, preferably 12.x)
- You should have npm or yarn installed on your system
Creating a Stream Chat App
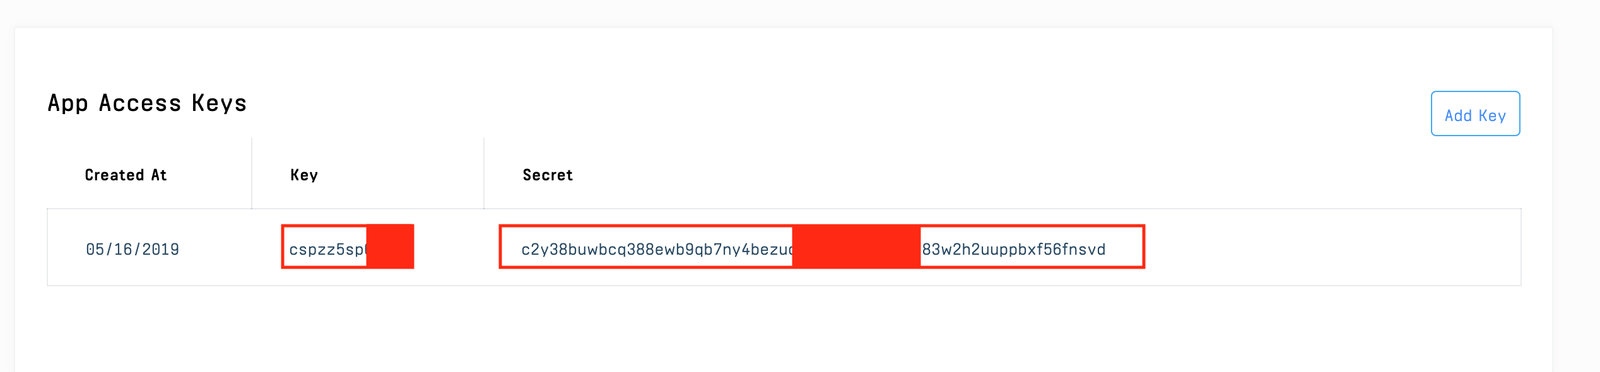
To start using Stream Chat, we need need to have an API key, which we can get by creating a Stream Chat app. If you don't have one already, create an account or login to your dashboard. Once you’re logged in, you can use the app that's automatically created for you. Or, if you prefer, go to the dashboard, hit the blue “Create App” button at the top right of the screen and give your app a name as shown below: 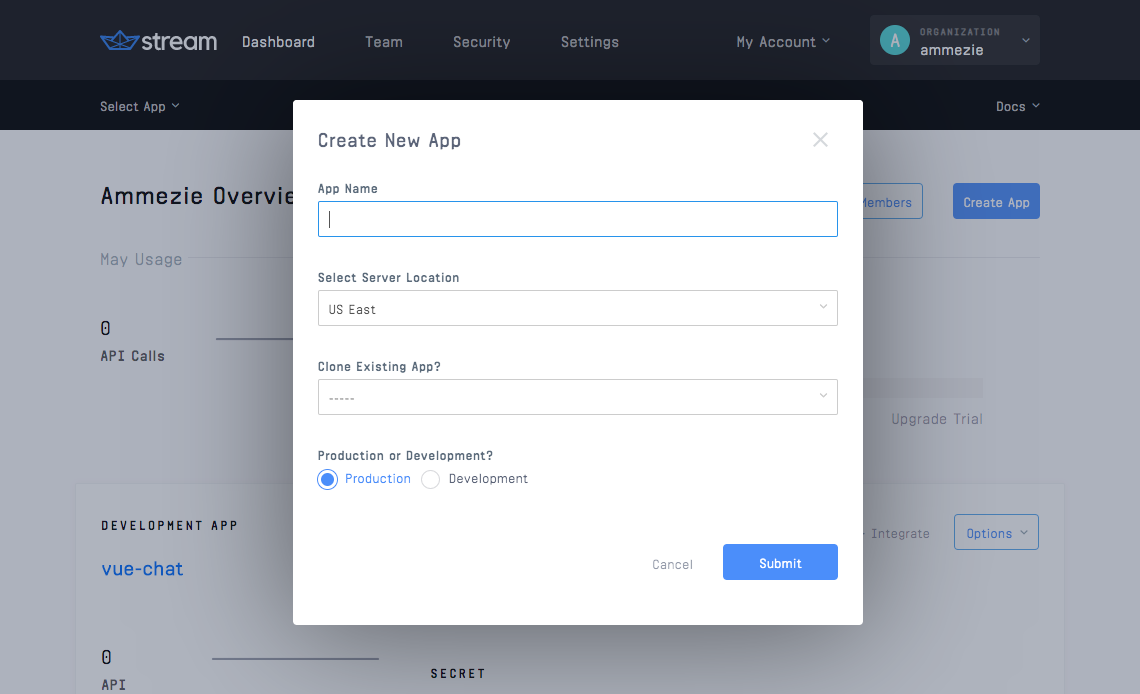 Once the app is created, click on the app from the dashboard overview you will be provided with a few options within your dashboard. Click on Chat to go the Stream Chat dashboard.
Building a Simple API for Capturing Stream Tokens
While the tutorial will be more focused on Vue.js, we still need a simple API, which we’ll use for generating a Stream Chat token that will be used to authenticate users in the Vue app. So, let’s spin up a dead simple API.
$ mkdir stream-chat-tutorial-api
$ cd stream-chat-tutorial-api
$ yarn init -y
Next, we need to install a couple of dependencies:
$ yarn add express cors body-parser dotenv stream-chat
As you might have guessed from the list of dependencies we installed, we’ll be using Express for the API. We also installed the Stream Chat Node.js SDK, which we’ll use to generate the authentication tokens. Create an index.js file and paste the following:
// index.js

const express = require('express')
const cors = require('cors')
const bodyParser = require('body-parser')
const { StreamChat } = require('stream-chat')
require('dotenv').config()

const app = express()
const port = 3000

app.use(cors())
app.use(bodyParser.json())
app.use(bodyParser.urlencoded({ extended: true }))
The API has just one endpoint, which accepts a users username. Using the Stream Chat Node.js SDK, we’ll generate a token from the username, and return a JSON object containing a user object and the generated token. Next, we’ll create a .env file and add the snippet this snippet of code to it:
// .env

STREAM_API_KEY=YOUR_API_KEY
STREAM_APP_SECRET=YOUR_APP_SECRETNote: Remember to update these details with your own details.
Finally, start the API with the following command:
$ node index.js
Once the API is up and running onhttp://localhost:3000, you’re all set to continue on.
Building the Vue App
With the API out of the way, let’s start building the Vue app. For this, we’ll be making use of the Vue CLI.
$ vue create vue-steam-chatWhen prompted, press enter to select the default preset. Once the Vue app is created, let’s install the necessary dependencies that we’ll be using in the Vue app:
$ cd vue-steam-chat
$ yarn add stream-chat axios
Here, we install the Stream Chat JavaScript SDK and Axios, which will be used for making HTTP requests. Next, create a .env file and add the snippet below:
// .env

VUE_APP_API_KEY=YOUR_API_KEY
VUE_APP_SERVER_API_ENDPOINT=http://localhost:3000Note: Remember to update these details with your own details.
Start the app and leave it running while we continue to build (the UI will automatically update with changes):
$ yarn serve
Note that the app should be running on http://localhost:8080 For quick prototyping the design of our application, we’ll be using a CSS framework called UIKit. Let’s pull it from a CDN. Add the line below to head section of your index.html:
<! -- public/index.html -->

<link rel="stylesheet" href="https://cdnjs.cloudflare.com/ajax/libs/uikit/3.1.5/css/uikit.min.css" />
Updating the App component
Now, we can start building the Vue real-time chat app. To keep things simple and straightforward, we’ll be using a single component, which is App.vue. The component will be comprised of two sections: login and chats. Update App.vue as below:
// src/App.vue

<template>
  <section class="uk-section">
    <div class="uk-container uk-container-small">
      <div class="uk-flex uk-flex-center">
        <div class="uk-width-large uk-margin-large-top">
          <template v-if="hasJoinedChat">
            <!-- chats and chat form will be here -->
          </template>

          <template v-else>
            <!-- login form will be here -->
          </template>
</div>hasJoinedChat will be updated accordingly once a user joins chat, and it determines what users see (login form vs. chats). We’ll get to the other data properties in subsequent sections.
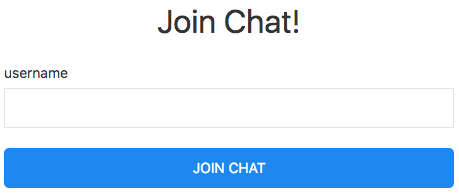
Building the Login
For the login interface, replace the with the code below:
// src/App.vue

<h2 class="uk-text-center">Join Chat!</h2>

<form @submit.prevent="joinChat" method="post" class="uk-form-stacked">
  <div class="uk-margin-small-top uk-width-1-1@s">
    <label class="uk-form-label">username</label>
    <div class="uk-form-controls">
      <input class="uk-input" type="text" v-model="username" required>
    </div>
  </div>
  <div class="uk-margin-top uk-width-1-1@s">
    <button type="submit" class="uk-button uk-button-primary uk-width-1-1 uk-border-rounded uk-text-uppercase">Join Chat</button>
  </div>
</form>
his view contains a form for joining a chat. The form has just one field, which is for the username. Once the form is submitted, a joinChat method will be called. So let’s create the method. Update the script section of App.vue as follows:
// src/App.vue

[...]
  methods: {
    async joinChat() {
      const { data } = await axios.post(
        `${process.env.VUE_APP_SERVER_API_ENDPOINT}/join`,
        {
          username: this.username
        }
      );
      this.username = "";
      this.hasJoinedChat = true;
      this.user = data.user;
this.token = data.token;Here, we make a request to our API passing along the user’s username. We set hasJoinedChat to true. Also, we set user and token to their respective values gotten for our API. Lastly, we call two methods. The initializeStream method creates a new instance of Stream Chat, using our API key. Then we specify the current user and pass along the user token. Here, we set only the id and name fields for the user. Of course, you can add other fields as well.
Check the docs for other supported fields. The initializeChannel method creates a new messaging channel. Lastly, we fetch the channel’s messages and subscribe to the channel for future messages.
Building the Chat
Now that users can join a chat, let’s allow them to see previous chat messages as well as add and send new messages. Replace the with the code below:
// src/App.vue

<h2 class="uk-text-center">Chats</h2>

<div class="uk-panel uk-panel-scrollable">
  <ul class="uk-list uk-list-divider">
    <li v-for="message in messages" :key="message.id">
      <div
        :class="{ 'uk-text-right': message.user.id === user.username }"
      >{{ message.text }}</div>
    </li>
  </ul>
</div>
This is comprised of two parts: chat messages and form to send a new message. For the list of messages, we loop through the messages array and display an individual message. We add a few tweaks to how the messages are displayed. If the user is the sender of a message, we align the message to the right, and on the flip side, we align the user to the left. To send a new message, the sendMessage method is called once the form is submitted. To create the method, add the following code inside the methods object:
// src/App.vue

[...]
  async sendMessage() {
      await this.channel.sendMessage({
        text: this.newMessage
      });

      this.newMessage = "";
    }
[...]
Using the channel instance created earlier, we call a sendMessage method on it, which accepts an object of the message content. In our case, we are only sending a text. For a full list of what can be sent as the message object, check out the docs on sending a message. Lastly, we clear the form field.

Listening for New Messages
As it stands, when we send a new message we don't see the message immediately, the same goes for the other person we're chatting with.This is because our app currently lacks real-time interactivity. That’s bad! Not to worry, Stream Chat has our back on this. So let’s fix it. Add the code below inside the joinChat method immediately below where we call the initializeChannel method:
// src/App.vue

[...]
this.channel.on("message.new", event => {
  this.messages.push({
    text: event.message.text,
    user: event.message.user
  });
});
[...]
Stream Chat provides a handful of events which we can listen to and perform some actions accordingly. The one we are interested in our case it the message.new event, which is triggered every time a new message is sent. So we listen for that event and update the messages array with the new message, which is passed along with the event.
Testing the App
Now, let’s test what we’ve been building so far. Navigate to http://localhost:8080 and open the app in two separate windows and login and start chatting.

Conclusion & Final Thoughts
In this tutorial, we learned how to build a real-time chat app with Vue, using functionality provided by Stream Chat. Considering that our application is as basic as it gets, we’ve barely scratched the surface of what’s possible with Stream Chat. In [this tutorial on how to build a chatroom with Laravel, Vue.js and Stream Chat](https://getstream.io/blog/building-a-chatroom-with-laravel-vue-js-and-stream-chat/ Stay tuned for future posts and tutorials on additional functionality), you can learn how to build a chatroom where users can join and chat with other users. Additionally, to learn more about Stream Chat, have a look here. You can find the complete code of the Vue App as well as the API on GitHub.
Happy coding!
