Introduction
This blog is about On Demand Resources. Nowadays our apps are loaded with high-resolution artwork, images and resources. So much so that we need to constantly keep an eye on the IPA size of the app throughout its development life cycle. Sometimes we download some static content from the server even if it can be easily packed into our app bundle.
Apple introduced on-demand resources in iOS 9. It enables apps to load assets dynamically. You assign tags to some assets, then when you upload a build to the App Store, Apple hosts the tagged assets so that they are downloaded separately from the app. The app requests the assets when required, and can discard them when they are not needed anymore. This is a great way to save space on devices.
Why Does the IPA Size Matter?
Of course, it matters!!!!. At the end of the day, iOS developers are focused on delivering top of the class user experience. Longer download times for the app kills that for you. I mean the first impression is always the best impression.
Is There a Solution?
Well yes, the secret to keeping ipa size smaller is On Demand Resources. I’ll also outline a few pointers you should keep in my mind while organizing your slices.
On Demand Resources.
As the name suggests, iOS delivers some content for you ( images, pdf etc. ) as and when you require in your app.
The main idea behind using ODR is that you pack minimal slices into your bundle for the basic presentation of your app and request for any high-resolution images you might need as when they are to be presented to the user.
How is this different from downloading slices from Server?
Well if your content is static (for ex. A static image), there is technically no need for server setup to only download your content. You can still have it all jammed in your bundle and get the advantage of smaller IPAs as well.
How Can It Be Done?
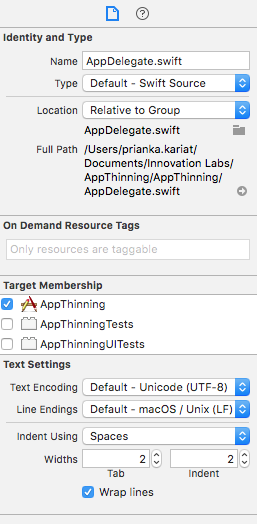
Well first off, head straight to your xcode projects and click on a file to view its file inspector on the right-hand side.
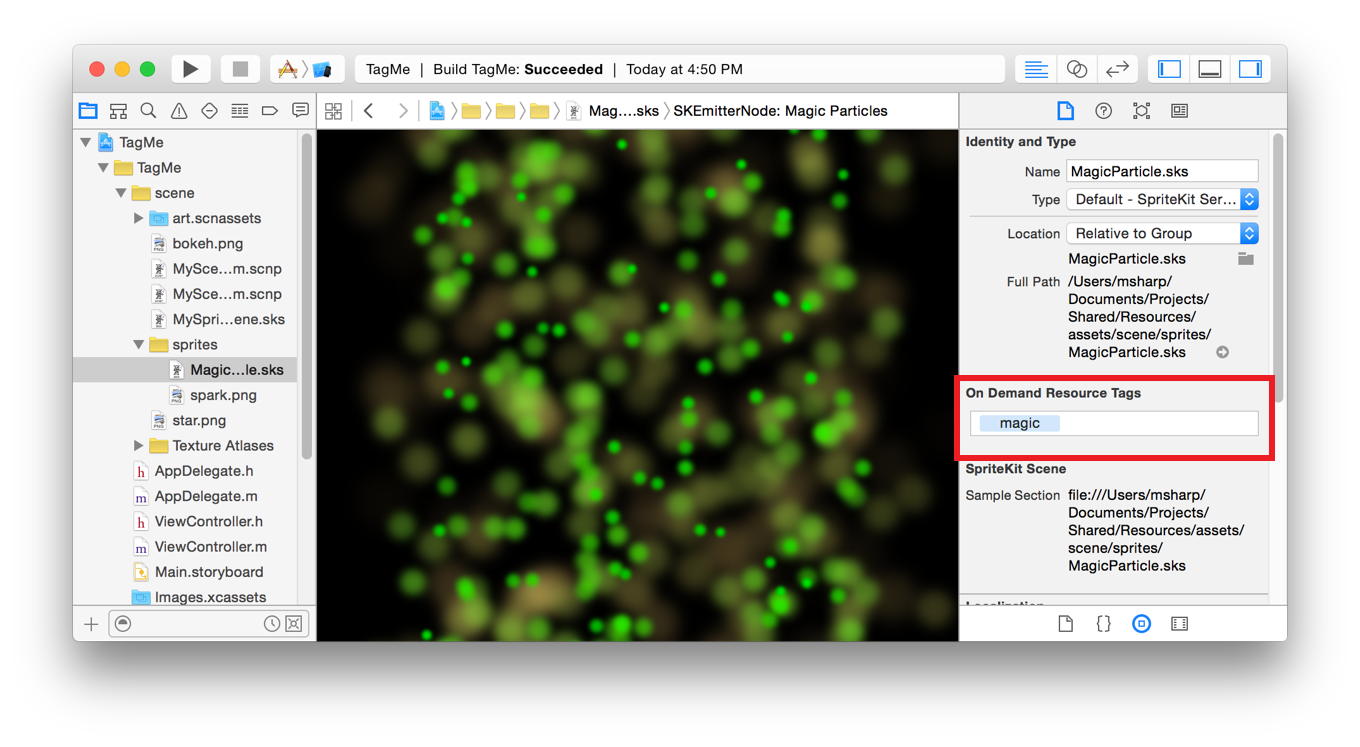
There is the field for On Demand Resource tags.
The same field is also present in the attributes inspector when clicking on one of the images in the asset catalog.
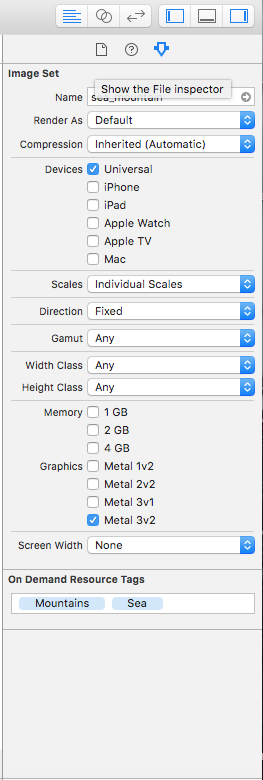
You can add certain tags to your images in the asset catalog or any resource files. NSBundleResourceRequest has an APIs to fetch these resources using tags we specify. This is the core of ODR.
How Tags Work
You identify on-demand resources during development by assigning them one or more tags. A tag is a string identifier you create. You can use the name of the tag to identify how the included resources are used in your app.
At runtime, you request access to remote resources by specifying a set of tags. The operating system downloads any resources marked with those tags and then retains them in storage until the app finishes using them. When the operating system needs more storage, it purges the local storage associated with one or more tags that are no longer retained. Tagged sets of resources may remain on the device for some time before they are purged.
Creating and Assigning Tags
Usually, the operating system starts downloading resources associated with a tag when the tag is requested by an app and the resources are not already on the device. Some tags contain resources that are important the first time the app launches or are required soon after the first launch. For example, a tutorial is important the first time the app is launched, but it is unlikely to be used again.
You assign tags to one of three prefetch categories in the Prefetched view in the Resource Tags pane: Initial Install Tags, Prefetched Tag Order, and Download Only On Demand.
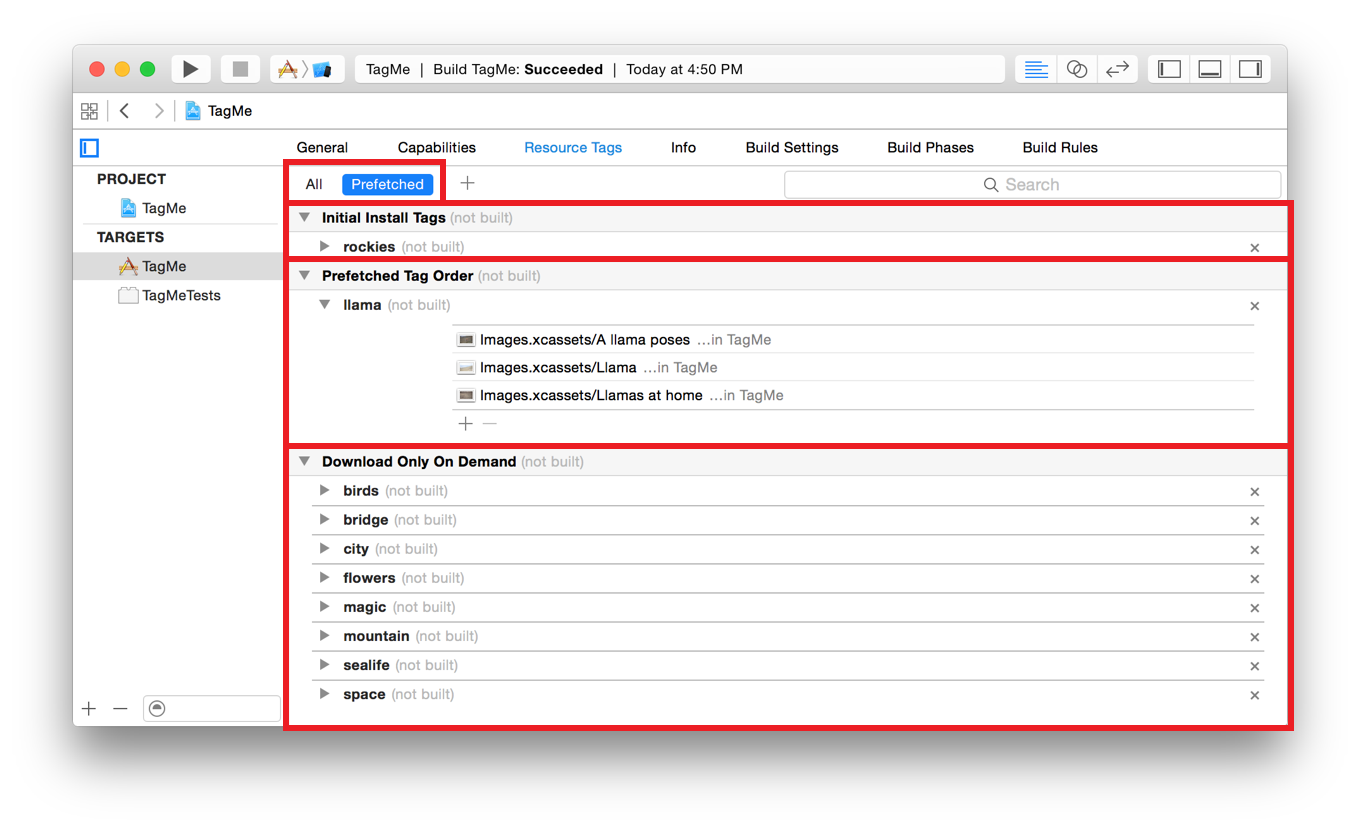
The default category for a tag is Download Only On Demand. The view displays the tags grouped by their prefetch category and the total size for each category. The size is based on the device that was the target of the last build. Tags can be dragged between categories.
- Initial install tags. The resources are downloaded at the same time as the app. The size of the resources is included in the total size for the app in the App Store. The tags can be purged when they are not being accessed by at least one NSBundleResourceRequest
- Prefetch tag order. The resources start downloading after the app is installed. The tags will be downloaded in the order in which they are listed in the Prefetched tag order group.
- Downloaded only on demand. The tags are downloaded when requested by the app.
Code for ODR
NSBundleResourceRequest is used for requesting the ODR content. In viewDidLoad() of the TableViewController class( that displays the images respective to a category ), we call the following method.
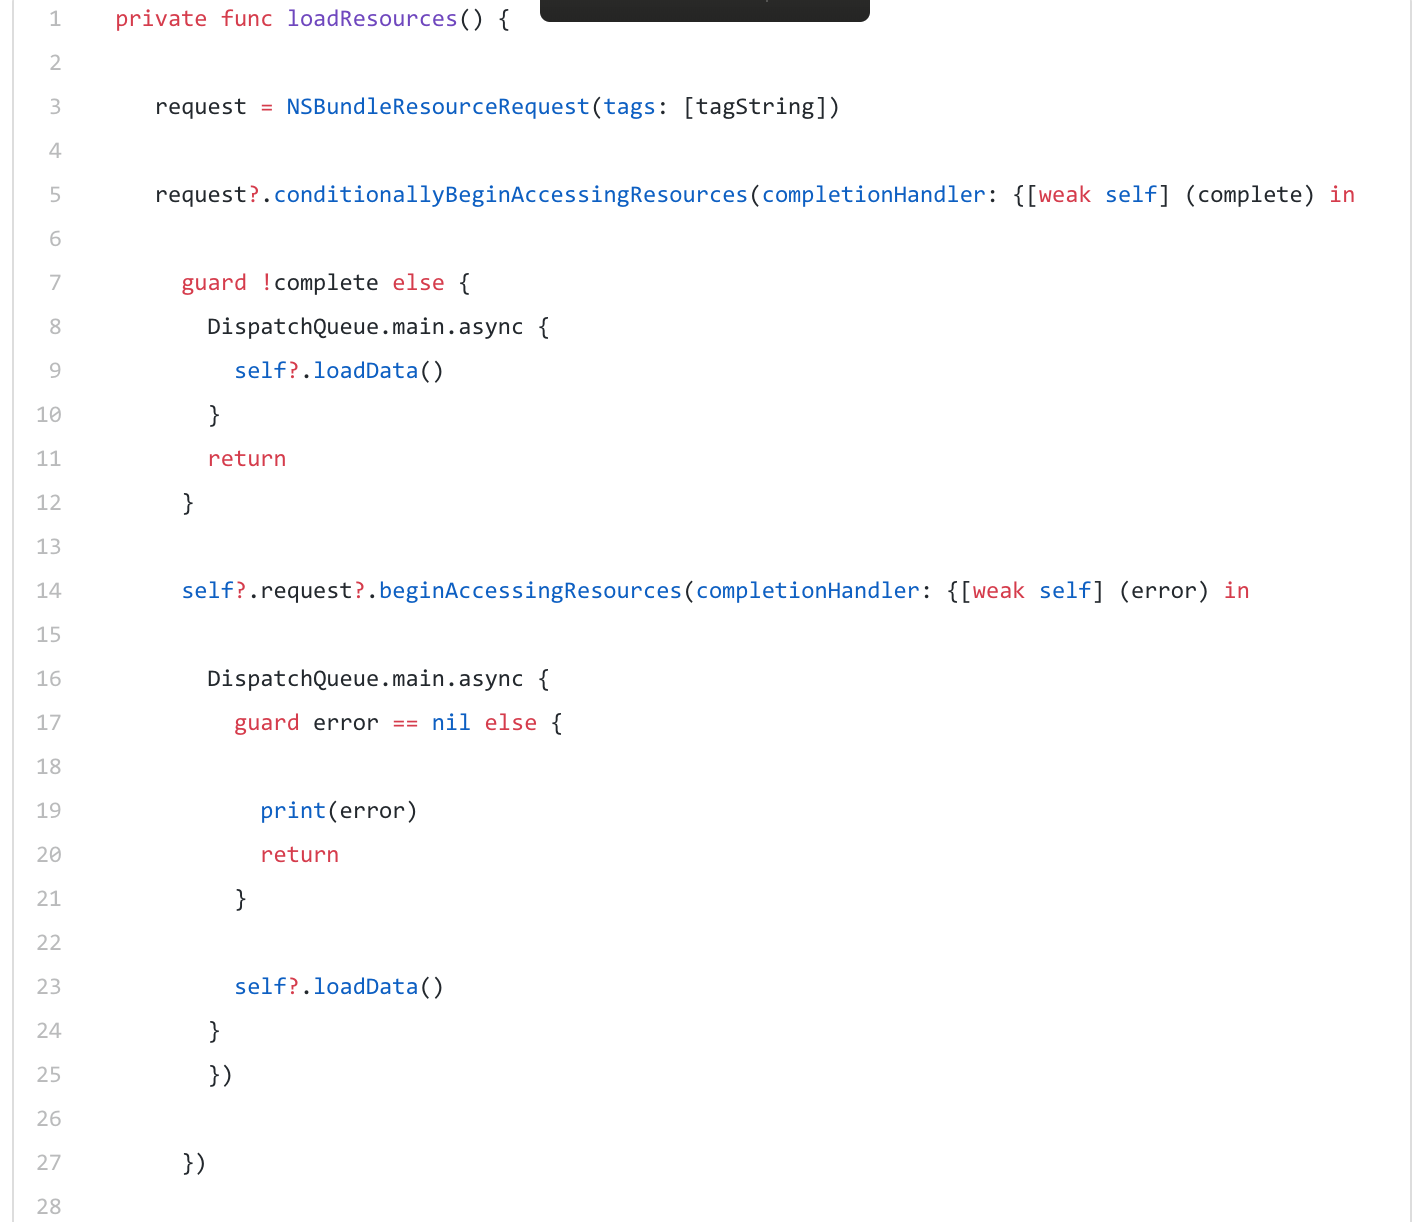
func conditionallyBeginAccessingResources(completionHandler: @escaping (Bool) -> Void)
This function checks if all the resources associated with tags passed in are available for use. If not, we will call:
func beginAccessingResources(completionHandler: @escaping (Error?) -> Void)
This call will download all the content associated with the tags passed in.
In the completion handler, we simply populate our data source with the images associated with the tags and they are displayed in a UITableView.
Conclusion
On-demand resources in iOS 9 and tvOS is a great way to reduce the size of your app and deliver a better user experience to people who download and use your application. While it’s very easy to implement and set up, there are quite a few details that you must keep in mind in order for the whole on-demand resources system to work flawlessly without excessive loading times and unnecessarily purging data.
References
https://www.raywenderlich.com/520-on-demand-resources-in-ios-tutorial