
In this tutorial, you’re going to build a complete CRUD web application using Vue.js for the client and Spring Boot as the resource server. You’ll also secure the application using OAuth 2.0 and Okta.
CRUD is C reate, R ead, U pdate, and D elete. It’s kinda the “Hello World” of the server world. Like “Hello server!” If you can add data, updated it, read it, and delete it, you’ve pretty much got all the basic tools down for a REST interface or basic resource API.
The example application you’re going to build is a simple todo app. Typically these todo apps use data stored locally, but in this example you’re going to create, read, update, and delete todos on a Spring Boot resource server.
Excited? Great! Before we dive in, a quick introduction to the technologies involved.
What is Vue.js?
Vue is a JavaScript view library, like React and Angular. It’s designed to be incrementally adoptable, and the core library focuses solely on the view layer.
In my experience, Vue.js is a great alternative to React. I learned React first, and came to use Vue later. Like React, Vue uses a virtual DOM, provides reactive and composable view components, and enforces a strict one-way parent-child relationship when defining properties and state. This means that it is performant and it avoids a lot of the confusing state relationships that can occur without one-way data binding. However, unlike React, Vue uses templates instead of JSX (a potentially welcome and more immediately accessible option) and Vue gives you component scoped css using style tags in single-file components. In practice this difference is pretty great because in React the JSX and css-like syntax is close enough to HTML and CSS to be confusing but not actually the same, which creates problems initially (ever gone from a language that doesn’t require semicolons back to one that does? It’s something like that).
I find Vue to be a simpler, cleaner implementation. React requires a deep dive. You gotta take the red pill and go all the way. It’s a super powerful system, but you have to be all in. Vue is a little friendlier and a little easier to get started.
About Spring Boot
The server technology you’re going to use is Spring Boot. Pure, unadulterated Spring (pre-Spring Boot) is a bit of a behemoth: super powerful but potentially time-sucking and frustrating. I’m pretty sure the whole computer conference phenomena came about so that people could learn and understand old-school Spring XML files. It certainly drove large sections of the computer publishing empires.
Spring Boot was Spring’s answer to this complexity (and to frameworks like Ruby on Rails and Grails). They did a great job of distilling down all of the power of Spring into a simple, quick, easy-to-use web framework. With a ridiculously small number of lines of code and a few annotations, you can have a fully functioning resource server.
Plus, when you’re ready, f have all the power of Spring under the hood, just waiting.
For this project you’re going to need a server and client project. Create a root project directory called SpringBootVueApplication, and under that directory create two subdirectories: client and server.
client will be your Vue.js client application.
server will be the Spring Boot resource server.
Create Your Spring Boot App
Let’s start by creating the Spring Boot app using the Spring Initializer.
Make the following selections:
-
Project Type:
Gradle Project -
Group:
com.okta -
Artifact:
spring-boot-vue -
Dependencies :
JPA,H2,Web,Rest Repositories,Lombok

Download the file and unzip the contents to your SpringBootVueApplication/server directory.
First off, let’s start with something simple. Change the default port from 8080 to 9000 (so that it doesn’t conflict with the Vue.js app client port in a bit).
Change the name of the server/src/main/resources/application.properties file to application.yml, and add the following line to it:
server:
  port: 9000
Define the Todo Model Class
Let’s define the Todo model class file. This defines the data structure that your Spring Boot application will be using.
Create a Todo.java class in the com.okta.springbootvue package under src/main/java.
package com.okta.springbootvue;

import lombok.*;

import javax.persistence.Id;
import javax.persistence.GeneratedValue;
import javax.persistence.Entity;

@Entity
@Data
@NoArgsConstructor
public class Todo {

  @Id @GeneratedValue
  private Long id;

  @NonNull
  private String title;

  private Boolean completed = false;

}
This is pretty straight forward. You’re defining a data model with a three properties: an autogenerated id, a String title, and a true/false completed property.
Lombok is saving you a lot of wordy ceremony code defining getters and setters. Those are all the annotations tacked onto the class.
A whole lot of heavy hitting is happening here in the background that allows Spring Data and JPA to automatically map this class file to a database. This is a deep subject, and there are links at the end of the tutorial if you want to know more. For right now, it’s enough to know that the class above will be mapped to a database table in an in-memory H2 database, and each property in the class will become a table column. You get the in-memory database by default with the included dependency: H2. This is super convenient for tutorials and testing, but, obviously, for much more you’ll want to include a mapping to an actual persisted database.
Define the Database and REST Classes
Create a TodoRepository.java in the com.okta.springbootvue package.
package com.okta.springbootvue;

import org.springframework.data.jpa.repository.JpaRepository;
import org.springframework.data.rest.core.annotation.RepositoryRestResource;

@RepositoryRestResource
interface TodoRepository extends JpaRepository<Todo, Long> {}
This class is dead simple. Again, there’s a ton of stuff going on behind the scenes. All of the methods we’ll need for the REST API for our Todo app will actually be automatically generated for us here. You could, however, define some custom access methods in this class if you needed to.
Let’s also create a RestRepositoryConfigurator class in the same package.
package com.okta.springbootvue;

import org.springframework.data.rest.core.config.RepositoryRestConfiguration;
import org.springframework.data.rest.webmvc.config.RepositoryRestConfigurer;
import org.springframework.stereotype.Component;

/**
 * IDs are not returned by RestRepository by default. I like them exposed so that the client can easily find
 * the ID of created and listed resources.
 * */
@Component
public class RestRepositoryConfigurator implements RepositoryRestConfigurer {

  @Override
  public void configureRepositoryRestConfiguration(RepositoryRestConfiguration config) {
    config.exposeIdsFor(Todo.class);
  }
}
This class is just a configuration class. The whole purpose of it is to tell Spring to return the data model instance IDs with the the object serializations (that way you can refer to them by ID from the client app, since this is going to be the UUID).
Test the Rest API Server
At this point, believe it or not, you have a working REST API.
Let’s test it out using HTTPie. If you don’t have HTTPie installed, install it using brew install httpie. Or head over to their website and make it happen. Or just follow along.
First off, start the server using ./gradlew bootRun.
You should see a lot of output that ends like this:
2018-11-08 21:20:36.614 INFO 56214 --- [nio-9000-exec-1] o.a.c.c.C.[Tomcat].[localhost].[/] : Initializing Spring FrameworkServlet 'dispatcherServlet'
2018-11-08 21:20:36.615 INFO 56214 --- [nio-9000-exec-1] o.s.web.servlet.DispatcherServlet : FrameworkServlet 'dispatcherServlet': initialization started
2018-11-08 21:20:36.646 INFO 56214 --- [nio-9000-exec-1] o.s.web.servlet.DispatcherServlet : FrameworkServlet 'dispatcherServlet': initialization completed in 31 ms
<=========----> 75% EXECUTING [2m 59s]
> :bootRun
Now perform a basic GET request on the server endpoint: http GET http://localhost:9000
HTTP/1.1 200
Content-Type: application/hal+json;charset=UTF-8
Date: Fri, 09 Nov 2018 03:44:37 GMT
Transfer-Encoding: chunked
{
  "_links": {
    "profile": {
      "href": "http://localhost:9000/profile"
    },
    "todos": {
      "href": "http://localhost:9000/todos{?page,size,sort}",
      "templated": true
    }
  }
}
The profile link has to do with the ALPS (Application-Level Profile Semantics). Take a look at the Spring docs on it. It’s a way to describe the available resources exposed by the REST API.
The todos link is the endpoint generated from the Todo class.
Take a look at that endpoint using a GET request. You can actually omit the “GET”, and the “http://localhost” since these are defaults with HTTPie.
$ http :9000/todos
HTTP/1.1 200
Content-Type: application/hal+json;charset=UTF-8
Date: Fri, 09 Nov 2018 03:50:12 GMT
Transfer-Encoding: chunked
{
  "_embedded": {
    "todos": []
  },
  "_links": {
    "profile": {
      "href": "http://localhost:9000/profile/todos"
    },
    "self": {
      "href": "http://localhost:9000/todos{?page,size,sort}",
      "templated": true
    }
  },
  "page": {
    "number": 0,
    "size": 20,
    "totalElements": 0,
    "totalPages": 0
  }
}
The _embedded.todos holds the data. But since there aren’t any todos yet, it’s empty.
You can POST some data to the server using the following command:
http POST :9000/todos title="Write Vue client app"
The output will show your new Todo has been added:
HTTP/1.1 201
Content-Type: application/json;charset=UTF-8
Date: Fri, 09 Nov 2018 03:51:22 GMT
Location: http://localhost:9000/todos/1
Transfer-Encoding: chunked
{
    "_links": {
        "self": {
            "href": "http://localhost:9000/todos/1"
        },
        "todo": {
            "href": "http://localhost:9000/todos/1"
        }
    },
    "completed": false,
    "id": 1,
    "title": "Write Vue client app"
}
Todo created! Now if you GET the /todos endpoint again, you’ll see your newly created todo.
$ http :9000/todos
HTTP/1.1 200
Content-Type: application/hal+json;charset=UTF-8
Date: Fri, 09 Nov 2018 03:54:40 GMT
Transfer-Encoding: chunked
{
"_embedded": {
  "todos": [
    {
      "id": 1,
      "title": "Write Vue client app",
      "completed": false,
      "_links": {
        "self": {
          "href": "http://localhost:9000/todos/1"
        },
        "todo": {
          "href": "http://localhost:9000/todos/1"
        }
      }
    }
  ]
},
...
}
Pretty amazing, huh? That’s a whole lot of functionality for not a lot of code. (It didn’t used to be that way, let me tell you. We used to have to code uphill both ways in the rain and in PERL using vi to get stuff like that working. And you could have painted a house with all the getters and setters and ceremony code. Hours and hours.)
Add CORS Filter to Your Spring Boot App
Before you move on to the Vue client app, there’s one more thing to update. Currently, the server application would throw a CORS error if you tried to use it with a single-page app framework like Vue. This can be fixed by adding a CORS filter to the SpringBootVueApplication class.
What is CORS? If you’re asking this, read up on it in Spring’s Understanding CORS docs.
Update your SpringBootVueApplication class to match below. Notice the URL defined in the simpleCorsFilter() method needs to match the URL of the client app.
package com.okta.springbootvue;
import org.springframework.boot.ApplicationRunner;
import org.springframework.boot.SpringApplication;
import org.springframework.boot.autoconfigure.SpringBootApplication;
import org.springframework.boot.web.servlet.FilterRegistrationBean;
import org.springframework.context.annotation.Bean;
import org.springframework.core.Ordered;
import org.springframework.web.cors.CorsConfiguration;
import org.springframework.web.cors.UrlBasedCorsConfigurationSource;
import org.springframework.web.filter.CorsFilter;
import java.util.Collections;
import java.util.stream.Stream;
@SpringBootApplication
public class SpringBootVueApplication {
public static void main(String[] args) {
SpringApplication.run(SpringBootVueApplication.class, args);
}
// Bootstrap some test data into the in-memory database
@Bean
ApplicationRunner init(TodoRepository repository) {
return args -> {
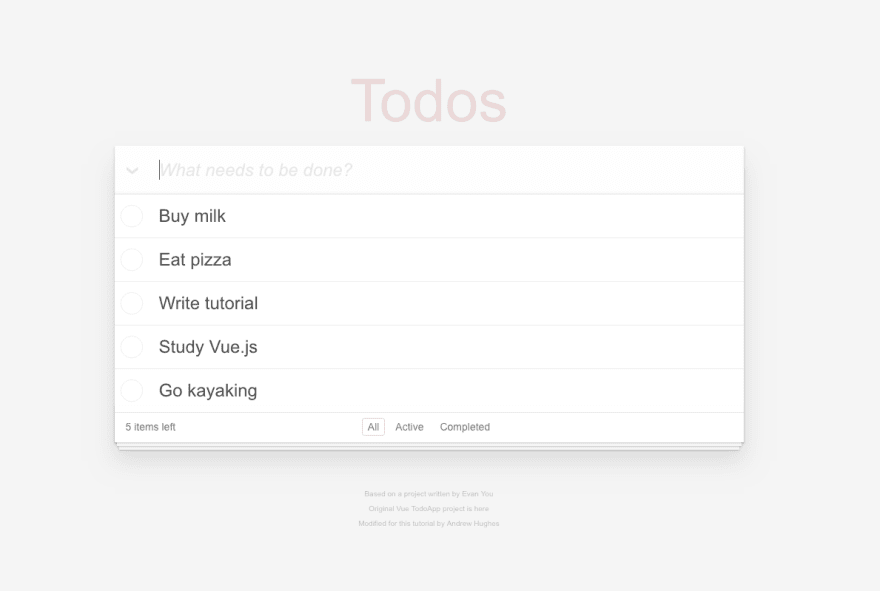
Stream.of("Buy milk", "Eat pizza", "Write tutorial", "Study Vue.js", "Go kayaking").forEach(name -> {
Todo todo = new Todo();
todo.setTitle(name);
repository.save(todo);
});
repository.findAll().forEach(System.out::println);
};
}
// Fix the CORS errors
@Bean
public FilterRegistrationBean simpleCorsFilter() {
UrlBasedCorsConfigurationSource source = new UrlBasedCorsConfigurationSource();
CorsConfiguration config = new CorsConfiguration();
config.setAllowCredentials(true);
// ***URL below needs to match the Vue client URL and port***
config.setAllowedOrigins(Collections.singletonList("http://localhost:8080"));
config.setAllowedMethods(Collections.singletonList("*"));
config.setAllowedHeaders(Collections.singletonList("*"));
source.registerCorsConfiguration("/**", config);
FilterRegistrationBean bean = new FilterRegistrationBean<>(new CorsFilter(source));
bean.setOrder(Ordered.HIGHEST_PRECEDENCE);
return bean;
}
}
The keen among you will also notice the ApplicationRunner init(TodoRepository repository) function. This bean is an initialization hook that adds some test todos into the repository when the application is run. This will make life easier as you’re building the client app.
On to the client app!
Install Node & Yarn
This tutorial assumes that you have Node and Yarn installed. If you don’t, install them now.
Yarn can be installed using brew install yarn, or if you’re not on a mac, take a look at (their website).
There are lots of ways to install Node.js. You can download a version from their website. I’m currently on version 8.12.0. Another option is the n package manager. Get it from their GitHub page.
Create Vue.js App
You’re going to use the Vue CLI 3 to create a project from scratch. Vue CLI is a great project that makes building a Vue app nice and easy. If you’re not familiar with it, take a look at their website.
Install the Vue CLI 3 using yarn:
yarn global add @vue/cli@3.1.5
Once that’s finished, make sure you’re in your root project directory SpringBootVueApplication and run the following command:
vue create -d client
This creates the default Vue application named client in the client subdirectory. Without the -d option, the Vue CLI has a pretty neat interface that allows you to choose which options to include. It’s worth checking out another time. The project you’re going to build is based on the Vue TodoMVC example project by Evan You. The difference is that this project will persist the todos using a Spring Boot server instead of browser local storage.
cd into the SpringBootVueApplication/client directory.
The project can be run with yarn serve.
Right now, all you’ll see is the standard “Welcome to Your Vue.js App” screen.
Add a couple dependencies:
yarn add axios@0.18.0 vuejs-logger@1.5.3
axios is the package you’ll use to make HTTP requests to your server. vuejs-logger is a logging framework, because you’re not still using console.log(), right?
Add a Vue config file client/vue.config.js:
module.exports = {
  runtimeCompiler: true
};
Replace src/main.js with the following
import Vue from 'vue'
import App from './App'

Vue.config.productionTip = false

import VueLogger from 'vuejs-logger';

const options = {
  isEnabled: true,
  logLevel : 'debug',
  stringifyArguments : false,
  showLogLevel : true,
  showMethodName : false,
  separator: '|',
  showConsoleColors: true
};

Vue.use(VueLogger, options);

/* eslint-disable no-new */
new Vue({
  el: '#app',
  template: '<App/>',
  components: { App }
});
Replace src/App.vue with the following:
<template>
  <div id="app">
    <Todos />
    <footer class="info">
      <p>Based on a project written by <a href="http://evanyou.me">Evan You</a></p>
      <p>Original Vue TodoApp project is <a href="https://vuejs.org/v2/examples/todomvc.html">here</a></p>
      <p>Modified for this tutorial by Andrew Hughes</p>
    </footer>
  </div>
</template>

<script>
  import Todos from './components/Todos'
  // app Vue instance
  const app = {
    name: 'app',
    components: {
      Todos
    },
    // app initial state
    data: () => {
      return {
      }
    }
  }

  export default app
</script>

<style>
  [v-cloak] { display: none; }
</style>
Delete the src/components/HelloWorld.vue module. You can also delete the src/assets folder, if you want, as you won’t need it.
Create a new Vue component called src/components/Todos.vue:
<template>
<div>
<h1 class="title">Todos</h1>
<h1 class="email">{{userEmail}}</h1>
<section class="todoapp">
<div v-if="loading">
<h1 class="loading">Loading...</h1>
</div>
<div v-else>
<header class="header">
<input class="new-todo"
autofocus autocomplete="off"
:placeholder="this.inputPlaceholder"
v-model="newTodo"
@keyup.enter="addTodo">
</header>
<section class="main" v-show="todos.length" v-cloak>
<input class="toggle-all" type="checkbox" v-model="allDone">
<ul class="todo-list">
<li v-for="todo in filteredTodos"
class="todo"
:key="todo.id"
:class="{ completed: todo.completed, editing: todo == editedTodo }">
<div class="view">
<input class="toggle" type="checkbox" v-model="todo.completed" @change="completeTodo(todo)">
<label @dblclick="editTodo(todo)">{{ todo.title }}</label>
<button class="destroy" @click="removeTodo(todo)"></button>
</div>
<input class="edit" type="text"
v-model="todo.title"
v-todo-focus="todo == editedTodo"
@blur="doneEdit(todo)"
@keyup.enter="doneEdit(todo)"
@keyup.esc="cancelEdit(todo)">
</li>
</ul>
</section>
<footer class="footer" v-show="todos.length" v-cloak>
<span class="todo-count">
<strong>{{ remaining }}</strong> {{ remaining | pluralize }} left
</span>
<ul class="filters">
<li><a href="#/all" @click="setVisibility('all')" :class="{ selected: visibility == 'all' }">All</a></li>
<li><a href="#/active" @click="setVisibility('active')" :class="{ selected: visibility == 'active' }">Active</a></li>
<li><a href="#/completed" @click="setVisibility('completed')" :class="{ selected: visibility == 'completed' }">Completed</a></li>
</ul>
<button class="clear-completed" @click="removeCompleted" v-show="todos.length > remaining">
Clear completed
</button>
</footer>
</div>
</section>
<div v-if="error" class="error" @click="handleErrorClick">
ERROR: {{this.error}}
</div>
</div>
</template>
<script>
// visibility filters
let filters = {
all: function (todos) {
return todos
},
active: function (todos) {
return todos.filter(function (todo) {
return !todo.completed
})
},
completed: function (todos) {
return todos.filter(function (todo) {
return todo.completed
})
}
}
// app Vue instance
const Todos = {
name: 'Todos',
props: {
activeUser: Object
},
// app initial state
data: function() {
return {
todos: [],
newTodo: '',
editedTodo: null,
visibility: 'all',
loading: true,
error: null,
}
},
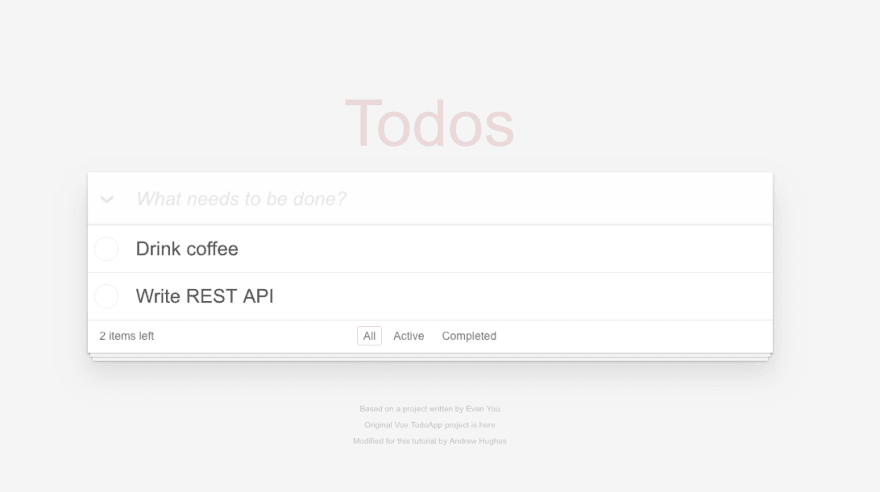
mounted() {
// inject some startup data
this.todos = [{title: 'Drink coffee', completed:false},{title: 'Write REST API', completed:false}];
// hide the loading message
this.loading = false;
},
// computed properties
// http://vuejs.org/guide/computed.html
computed: {
filteredTodos: function () {
return filters[this.visibility](this.todos)
},
remaining: function () {
return filters.active(this.todos).length
},
allDone: {
get: function () {
return this.remaining === 0
},
set: function (value) {
this.todos.forEach(function (todo) {
todo.completed = value
})
}
},
userEmail: function () {
return this.activeUser ? this.activeUser.email : ''
},
inputPlaceholder: function () {
return this.activeUser ? this.activeUser.given_name + ', what needs to be done?' : 'What needs to be done?'
}
},
filters: {
pluralize: function (n) {
return n === 1 ? 'item' : 'items'
}
},
// methods that implement data logic.
// note there's no DOM manipulation here at all.
methods: {
addTodo: function () {
var value = this.newTodo && this.newTodo.trim()
if (!value) {
return
}
this.todos.push({
title: value,
completed: false
});
this.newTodo = ''
},
setVisibility: function(vis) {
this.visibility = vis
},
completeTodo (todo) {
},
removeTodo: function (todo) { // notice NOT using "=>" syntax
this.todos.splice(this.todos.indexOf(todo), 1)
},
editTodo: function (todo) {
this.beforeEditCache = todo.title
this.editedTodo = todo
},
doneEdit: function (todo) {
if (!this.editedTodo) {
return
}
this.editedTodo = null
todo.title = todo.title.trim()
if (!todo.title) {
this.removeTodo(todo)
}
},
cancelEdit: function (todo) {
this.editedTodo = null
todo.title = this.beforeEditCache
},
removeCompleted: function () {
this.todos = filters.active(this.todos)
},
handleErrorClick: function () {
this.error = null;
},
},
// a custom directive to wait for the DOM to be updated
// before focusing on the input field.
// http://vuejs.org/guide/custom-directive.html
directives: {
'todo-focus': function (el, binding) {
if (binding.value) {
el.focus()
}
}
}
}
export default Todos
</script>
<style>
[v-cloak] { display: none; }
</style>
Finally, add a stylesheet called public/style.css and copy and paste the styles from the stylesheet in our GitHub repository..
In the public/index.html, add the following line at the bottom of the <head></head> block: incognito window.
<link rel="stylesheet" type="text/css" href="<%= BASE_URL %>style.css">
If you do this now, you’ll see a functioning todo application, but the data doesn’t persist. The todos are simply saved as an array in the Vue module. You’re going to modify this to send and receive data from your Spring Boot resource server.
Add Client Logic to Handle API Requests
Under the client/src directory, add a file name Api.js with the following contents:
import axios from 'axios'

const SERVER_URL = 'http://localhost:9000';

const instance = axios.create({
  baseURL: SERVER_URL,
  timeout: 1000
});

export default {
  // (C)reate
  createNew: (text, completed) => instance.post('todos', {title: text, completed: completed}),
  // (R)ead
  getAll: () => instance.get('todos', {
    transformResponse: [function (data) {
      return data? JSON.parse(data)._embedded.todos : data;
    }]
  }),
  // (U)pdate
  updateForId: (id, text, completed) => instance.put('todos/'+id, {title: text, completed: completed}),
  // (D)elete
  removeForId: (id) => instance.delete('todos/'+id)
}
This file encapsulates some of the logic around the REST API requests. The SERVER_URL should be the URL and port of the Spring Boot server.
You’ll notice the CRUD (Create, Read, Update, and Delete) functions are defined. This module would be totally trivial, really, except for the transformResponse options you’re setting. This is just used to normalize the data in the _embedded response property.
You might be wondering why to even bother with an API class this simple, thinking that this code could easily have just been put into the Todos component. That’s true, for the purposes of this tutorial. However, as projects grow, this kind of encapsulation is what keeps a project maintainable over time.
For example, suppose at some point in the future you decided that you didn’t want to use the axios module, or your boss told you to switch it out for fetch; you’d feel pretty smart when you realized that all of the code is handily gathered in one place and you’re only going to have to edit one file (as opposed to searching and replacing all over the project).
Load Data From the Server
Now you need to change the Todos component (src/components/Todos.vue) so that it loads data from the Spring Boot REST server.
First thing is to import the Api module you just created. Beneath the <template></template> section, just below the <script> tag, add the following line:
import api from '../Api';
Next change the mounted() method to this:
mounted() {
  api.getAll()
    .then(response => {
      this.$log.debug("Data loaded: ", response.data)
      this.todos = response.data
  })
    .catch(error => {
      this.$log.debug(error)
      this.error = "Failed to load todos"
  })
    .finally(() => this.loading = false)
},
This change uses the Api module you just created and imported above to load the todos from the Spring REST service (instead of simply using an array in the app process).
You can run yarn serve and go to http://localhost:8080. You’ll see that the bootstrapped data is being loaded from the Spring server. This assumes that your Spring Boot app is still running. If not, run it using ./gradlew bootRun.
Of course, you can edit this data but it’s only editing the local array. If you refresh the page, all your edits are wiped away. You still need to integrate the remainder of the CRUD operations.
Finish the CRUD Methods
To finish integrating the client CRUD methods, in the Todos.vue module, update the methods() function to match the following:
methods: {

  addTodo: function () {
    var value = this.newTodo && this.newTodo.trim()
    if (!value) {
      return
    }

    api.createNew(value, false).then( (response) => {
      this.$log.debug("New item created:", response);
      this.todos.push({
        id: response.data.id,
        title: value,
        completed: false
      })
    }).catch((error) => {
      this.$log.debug(error);
      this.error = "Failed to add todo"
    });

    this.newTodo = ''
  },

  setVisibility: function(vis) {
    this.visibility = vis
  },

  completeTodo (todo) {
    api.updateForId(todo.id, todo.title, todo.completed).then((response) => {
      this.$log.info("Item updated:", response.data);
    }).catch((error) => {
      this.$log.debug(error)
      todo.completed = !todo.completed
      this.error = "Failed to update todo"
    });
  },
  removeTodo: function (todo) { // notice NOT using "=>" syntax
    api.removeForId(todo.id).then(() => { // notice AM using "=>" syntax
      this.$log.debug("Item removed:", todo);
      this.todos.splice(this.todos.indexOf(todo), 1)
    }).catch((error) => {
      this.$log.debug(error);
      this.error = "Failed to remove todo"
    });
  },

  editTodo: function (todo) {
    this.beforeEditCache = todo.title
    this.editedTodo = todo
  },

  doneEdit: function (todo) {
    if (!this.editedTodo) {
      return
    }
    this.$log.info("Item updated:", todo);
    api.updateForId(todo.id, todo.title.trim(), todo.completed).then((response) => {
      this.$log.info("Item updated:", response.data);
      this.editedTodo = null
      todo.title = todo.title.trim()
    }).catch((error) => {
      this.$log.debug(error)
      this.cancelEdit(todo)
      this.error = "Failed to update todo"
    });

    if (!todo.title) {
      this.removeTodo(todo)
    }
  },

  cancelEdit: function (todo) {
    this.editedTodo = null
    todo.title = this.beforeEditCache
  },

  removeCompleted: function () {
    this.todos = filters.active(this.todos)
  },

  handleErrorClick: function () {
    this.error = null;
  },

},
Notice that the methods defined in the methods() block do not use the arrow syntax, =>. These functions will be bound to the appropriate context by Vue later. Using the => here will not work because the module has not been created yet, so this will refer to the window, which isn’t what you want. Potentially confusingly, however, notice that the API callback methods do use the arrow syntax. When the module’s functions are bound to the this instance of the module, these arrow functions allow the callbacks to refer to the module’s context.
The flexibility of binding this in JavaScript is both one of its strengths and one of its most confusing aspects.
Bask in the glory of your todo app! You still need to add security, but otherwise you have a fulling functioning todo app that’s creating, reading, updating, and deleting data on the server. Sweet.
This point of the tutorial corresponds to the pre-auth branch of the repository.
Go ahead and run it using yarn serve. Make sure your Spring Boot resource server is still running.
Integrate Okta and Add User Authentication
Okta makes user authentication really easy. The first step is to sign up for a free developer.okta.com account. Next, you need to create an OpenID Connect (OIDC) application. Once you’ve logged in, click on the Application top-menu item, and then on the Add Application button.
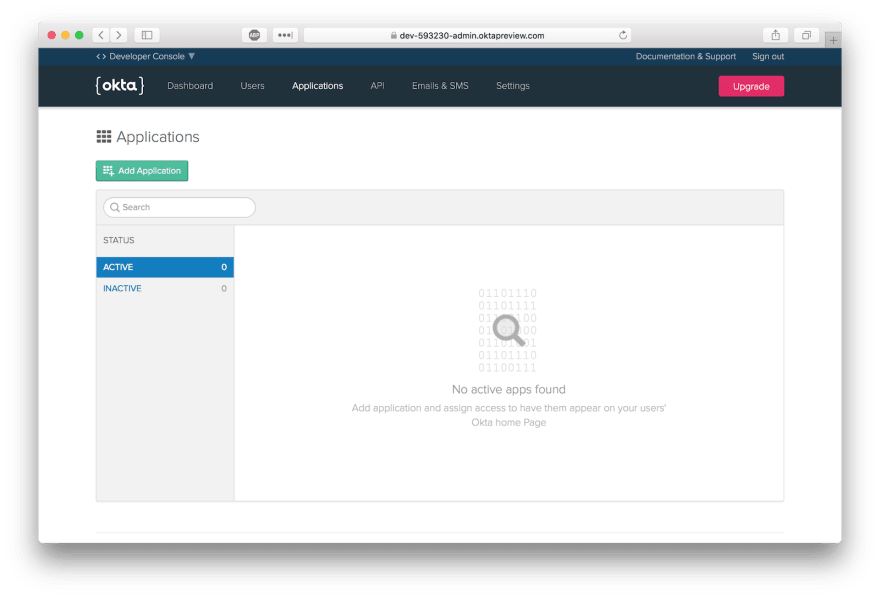
Select Single-Page App.

The default application settings should be fine. You’ll need to note your Client ID , as you’ll need that in a moment.

Add Authentication to Vue
Okta has an SDK that makes integration with Vue a snap. Install it with the following:
yarn add @okta/okta-vue@1.0.7
Now create a src/router.js file in the client app project.
import Auth from "@okta/okta-vue";
import Vue from 'vue'
import Router from 'vue-router'
import Todos from './components/Todos'

Vue.use(Auth, {
  issuer: 'https://{yourOktaDomain}/oauth2/default',
  client_id: '{yourClientId}',
  redirect_uri: window.location.origin + '/implicit/callback',
  scope: 'openid profile email'
});

Vue.use(Router);

let router = new Router({
  mode: 'history',
  routes: [
    {
      path: '/',
      name: 'Todos',
      component: Todos,
      meta: {
        requiresAuth: true
      }
    },
    {
      path: '/implicit/callback',
      component: Auth.handleCallback(),
    },
  ]
});

router.beforeEach(Vue.prototype.$auth.authRedirectGuard());

export default router;
You need to replace {yourClientId} with the Client ID from the OIDC app you just created. You also need to change {yourOktaDomain} to your Okta preview domain, something like dev-123456.oktapreview.com.
The Okta Vue authentication plugin injects an authClient object into your Vue instance which can be accessed by calling this.$auth anywhere inside your Vue instance.
There are only two routes. The home route is the todo app itself. The meta: { requiresAuth: true } } property turns on authentication for that route.
The other route, /implicit/callback, is the OAuth 2.0 callback route that handles a successful authentication from the Okta servers.
Now you need to update the src/main.js to use the router.
Import the router into the file:
import router from './router'
And update the Vue app instance to use the imported router:
new Vue({
  el: '#app',
  router, // <-- add this line
  template: '<App/>',
  components: { App }
})
Next, update the src/App.vue module to match the following:
<template>
  <div id="app">
  <router-view :activeUser="activeUser"/>
    <footer class="info">
      <p v-if="activeUser" class="logout-link"><a @click="handleLogout" href="#">Logout</a></p>
      <p>Based on a project written by <a href="http://evanyou.me">Evan You</a></p>
      <p>Original Vue TodoApp project is <a href="https://vuejs.org/v2/examples/todomvc.html">here</a></p>
      <p>Modified for this tutorial by Andrew Hughes</p>
    </footer>
  </div>
</template>

<script>
  // app Vue instance
  const app = {
    name: 'app',
    // app initial state
    data: () => {
      return {
        activeUser: null
      }
    },

  async created () {
    await this.refreshActiveUser()
  },

  watch: {
    '$route': 'refreshActiveUser'
  },

  methods: {
    async refreshActiveUser () {
      this.activeUser = await this.$auth.getUser()
      this.$log.debug('activeUser',this.activeUser)
    },

    async handleLogout () {
      await this.$auth.logout()
      await this.refreshActiveUser()
      this.$router.go('/')
    }
  },
}

export default app

</script>

<style>
  [v-cloak] { display: none; }
</style>
These changes demonstrate a couple things. First, the code creates and updates a property, activeUser, that passes information to the Todos module about the current active user (if there is one, or null, if there isn’t). It also adds a logout button to the footer.
The last thing you need to do is update the src/Api.js file.
import axios from 'axios'
import Vue from 'vue'

const SERVER_URL = 'http://localhost:9000';

const instance = axios.create({
  baseURL: SERVER_URL,
  timeout: 1000
});

export default {

  async execute(method, resource, data, config) {
    let accessToken = await Vue.prototype.$auth.getAccessToken()
    return instance({
      method:method,
      url: resource,
      data,
      headers: {
            Authorization: `Bearer ${accessToken}`
      },
      ...config
    })
  },

  // (C)reate
  createNew(text, completed) {
    return this.execute('POST', 'todos', {title: text, completed: completed})
  },
  // (R)ead
  getAll() {
    return this.execute('GET','todos', null, {
      transformResponse: [function (data) {
        return data? JSON.parse(data)._embedded.todos : data;
      }]
    })
  },
  // (U)pdate
  updateForId(id, text, completed) {
    return this.execute('PUT', 'todos/' + id, { title: text, completed: completed })
  },

  // (D)elete
  removeForId(id) {
    return this.execute('DELETE', 'todos/'+id)
  }
}
These changes get the access token from the Okta Vue Auth module and inject it into the API request methods.
Try Your Vue + Spring Boot App
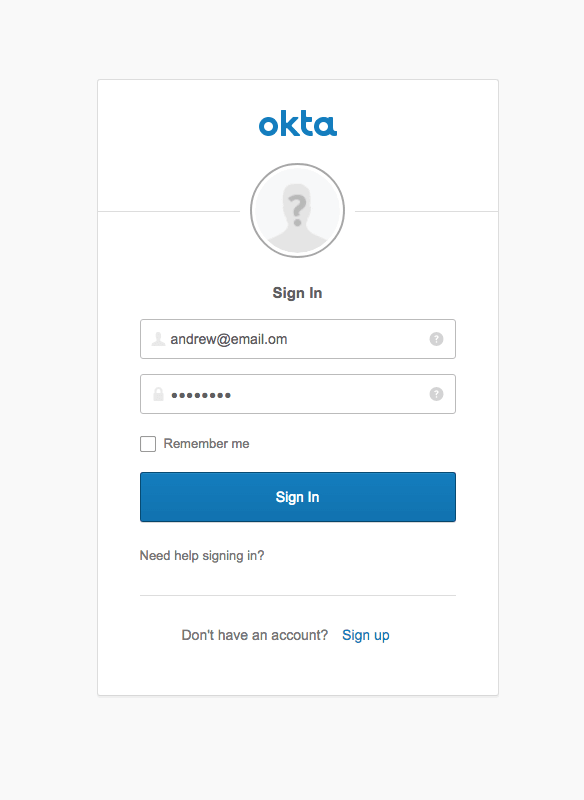
Run the app using yarn serve. Now you’ll be able to log in using Okta. And when you go to the app screen itself, you’ll see your email at the top and your name in the input placeholder.
NOTE: to see the login screen you may have to log out of developer.okta.com first. Or you can just use an incognito window.

There’s still one more step to go, however. You can log in through Okta, but the Spring Boot server app isn’t requiring authentication.
Configure Spring Boot Server For Token Auth
Okta has a nice project call the Okta Spring Boot Starter (check out the GitHub project) that makes added token authentication to a Spring Boot project quick and painless.
First you need to add a couple dependencies to your build.gradle file.
compile ('org.springframework.security.oauth.boot:spring-security-oauth2-autoconfigure:2.0.1.RELEASE')
compile ('com.okta.spring:okta-spring-boot-starter:0.6.1')
Also add the following to the bottom of the build.gradle file. This resolves a logback logging dependency conflict.
configurations.all {
  exclude group: 'org.springframework.boot', module: 'spring-boot-starter-logging'
  exclude group: 'org.springframework.boot', module: 'logback-classic'
}
Next you need to add the following to your application.yml file, replacing {yourClientId} with the Client ID from your Okta OIDC application.
okta:
  oauth2:
    issuer: https://{yourOktaDomain}/oauth2/default
    clientId: {yourClientId}
    scope: openid profile email
Finally, you need to add the @EnableResourceServer annotation to your SpringBootVueApplication class.
import org.springframework.security.oauth2.config.annotation.web.configuration.EnableResourceServer;
...

@EnableResourceServer // <- add me
@SpringBootApplication
public class SpringBootVueApplication {

   public static void main(String[] args) {
      SpringApplication.run(SpringBootVueApplication.class, args);
   }
   ...
}
And that’s it! You now have a fully functioning Vue client and Spring Boot REST service using Okta’s authentication services. Too easy.
Do More with Okta, Vue, and Spring Boot
This tutorial did quite a lot. You built a Vue.js client application and a Spring Boot REST service, using them to demonstrate a fully functioning CRUD application. You also added authentication using Okta and the Okta Vue SDK.
If you’d like to dig a little deeper, take a look at the Okta Vue SDK project.
The Spring Boot REST service used Spring Data’s JPA implementation to persist data based on a Java class. Spring Data and JPA is a super deep area, and the Spring docs on it are a great place to learn more.
Okta also has a number of other great related tutorials.
- Build a Basic CRUD App with Angular 5.0 and Spring Boot 2.0
- Build a Basic CRUD App with Vue.js and Node
- Build a Web App with Spring Boot and Spring Security in 15 Minutes
- 10 Excellent Ways to Secure Your Spring Boot Application
If you have any questions about this post, please add a comment below. For more awesome content, follow @oktadev on Twitter, like us on Facebook, or subscribe to our YouTube channel.


Top comments (0)