How to Install Apache ActiveMQ on Debian 11
This tutorial exists for these OS versions
- Debian 11 (Bullseye)
- Debian 10 (Buster)
- Debian 9 (Stretch)
On this page
Apache ActiveMQ is a free and open-source message broker developed by Apache Software Foundation. It is one of the well-known message brokers that supports multiple protocols such as AMQP, MQTT, Stomp, and OpenWire. It is written in Java and fully compliant with JMS 1.1 standards.
Apache ActiveMQ is one of the most popular message brokers that support different types of programming languages that can be deployed on multiple platforms. It is an enterprise-grade message broker that provides high availability, scalability, reliability, high performance, and security.
In this post, you will learn how to install the Apache ActiveMQ Multi-Protocol message broker on the Debian 11 system. This tutorial includes the installation of Java OpenJDK and JRE and the configuration of the JAVA_HOME environment variable.
Prerequisites
- A Linux server Debian 11.
- A non-root user with root administrator privileges.
Install Java OpenJDK and JRE
First, you will need to install the Java OpenJDK and JRE before installing the Apache ActiveMQ. The current version of Apache ActiveMQ required a minimum Java JRE v1.8.
On the Debian 11 repository, there are multiple versions of Java OpenJDK and JRE. But you will be installing Java OpenJDK and JRE v1.11 for the Apache ActiveMQ.
Refresh and update your Debian repository using the below command.
sudo apt update
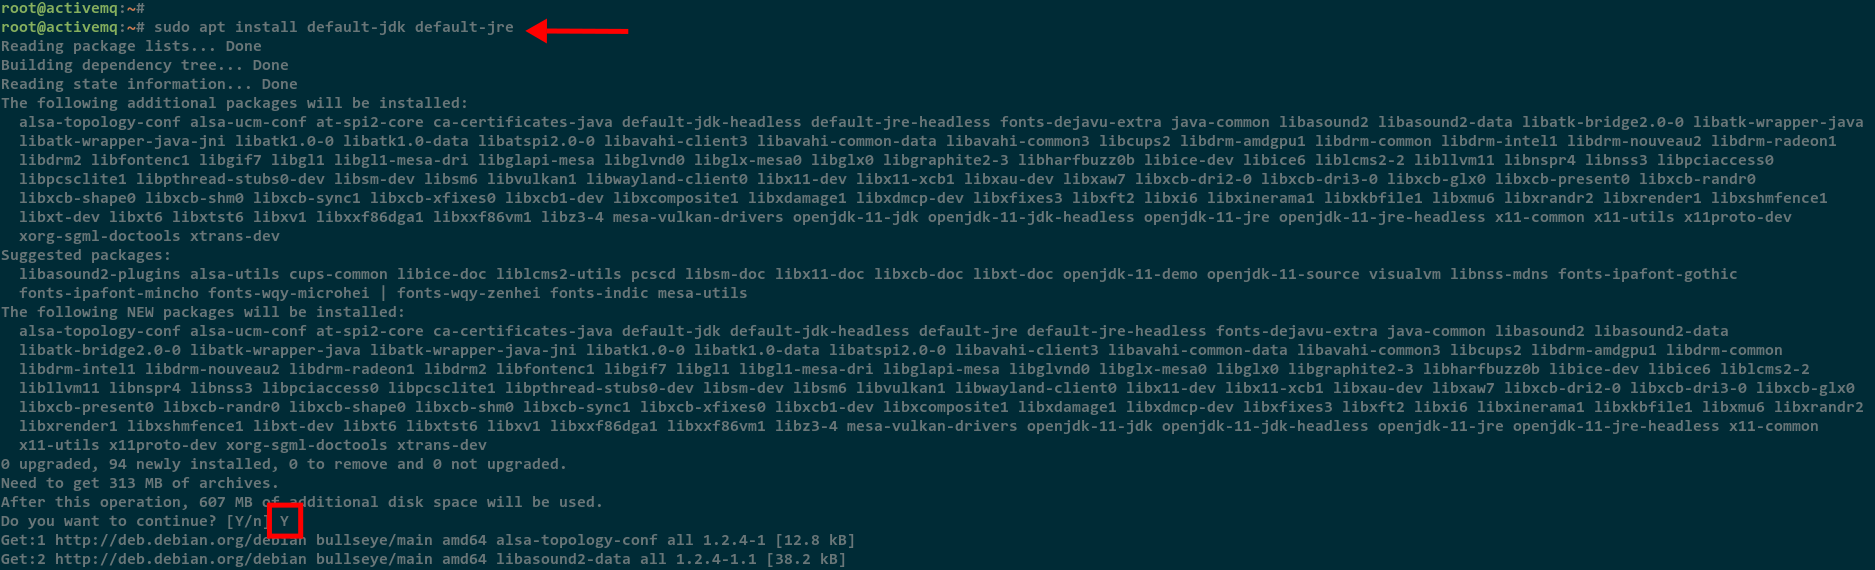
Next, install java OpenJDK and JRE using the apt command below.
sudo apt install default-jdk default-jre
Type Y to confirm the installation and press ENTER to continue.
After installation is completed, check the Java version using the following command.
java -version
On the below screenshot, you will see that Java OpenJDK 1.11 is installed on the Debian system.

Go to the next step to set up the JAVA_HOME environment variable.
Setting Up JAVA_HOME Environment Variable
The Apache ActiveMQ required the JAVA_HOME environment variable to be configured correctly to the jvm installation directory, which is available at /usr/lib/jvm/java-11-openjdk-amd64 directory. And in a simple way, you can set up the JAVA_HOME environment variable through the "~/.bashrc" file.
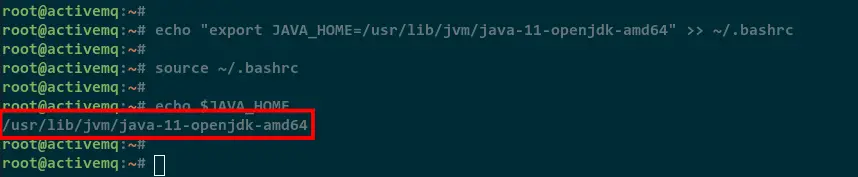
Add the configuration to the "~/.bashrc" configuration file using the below command.
echo "export JAVA_HOME=/usr/lib/jvm/java-11-openjdk-amd64" >> ~/.bashrc
Now reload the ~/.bashrc configuration file to apply new changes.
source ~/.bashrc
Lastly, check the environment variable JAVA_HOME using the below command.
echo $JAVA_HOME
You will see the following output. The JAVA_HOME environment variable is configured correctly to the JVM directory /usr/lib/jvm/java-11-openjdk-amd64.
Now move to the next step to start the Apache ActiveMQ installation.
Installing Apache ActiveMQ
The Apache ActiveMQ provides multiple versions of the ActiveMQ. In this example, you will be installing the Apache ActiveMQ Classic, which is powerful and supports multiple messaging protocols such as AMQP, MQTT, Stomp, and OpenWire.
Additionally, you can install another version such as ActiveMQ Artemis in the same way as the ActiveMQ classic.
To start the installation, run the below command to download the Apache ActiveMQ v5.17 (the latest version during this writing).
wget https://dlcdn.apache.org//activemq/5.17.1/apache-activemq-5.17.1-bin.tar.gz
After the download process is completed, you will see the file apache-activemq-5.17.1-bin.tar.gz. Extract it using the following command.
tar -xzvf apache-activemq-5.17.1-bin.tar.gz
Next, move the extracted directory apache-activemq-5.17.1 to the /opt/activemq.
mv apache-activemq-5.17.1 /opt/activemq

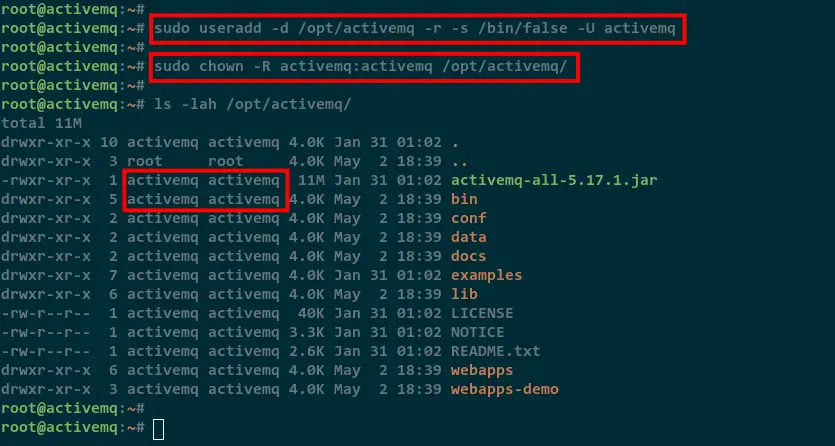
After that, add a new user and group named activemq using the following command.
sudo useradd -d /opt/activemq -r -s /bin/false -U activemq
Now change the ownership of the Apache ActiveMQ installation directory /opt/activemq to the activemq user and group.
sudo chown -R activemq:activemq /opt/activemq/
Lastly, check the ownership of all Apache ActiveMQ files using the below command.
ls -lah /opt/activemq
As you can see on the following screenshot, the Apache ActiveMQ directory /opt/activemq is owned by the user activemq and group activemq.
Setting Up Apache ActiveMQ as a Systemd Service
Now you will need to set up the Apache ActiveMQ as a systemd service. Doing this, allows you to manage the ActiveMQ using the systemctl command for starting, stopping, or enabling the ActiveMQ to start at system startup.
Now create a new systemd service configuration /etc/systemd/system/activemq.service using nano editor.
sudo nano /etc/systemd/system/activemq.service
Add the following configuration to the file.
[Unit]
Description=Apache ActiveMQ
After=network.target

[Service]
Type=forking
User=activemq
Group=activemq
ExecStart=/opt/activemq/bin/activemq start
ExecStop=/opt/activemq/bin/activemq stop

[Install]
WantedBy=multi-user.target
Save and close the file when you are done.
Next, run the below command to reload the systemd manager and refresh all list service units on your system.
sudo systemctl daemon-reload
Now add the activemq service to the system startup and start the service.
sudo systemctl enable activemq
sudo systemctl start activemq

Lastly, check the activemq using the below command.
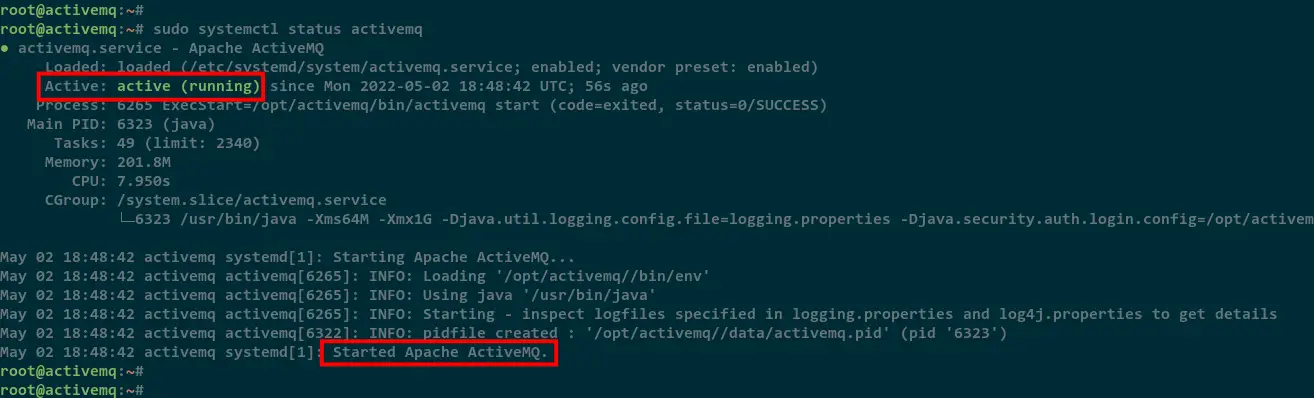
sudo systemctl status activemq
In the below screenshot, you will see the activemq service is running and enabled. At the end of the log message, you will see the "Started Apache ActiveMQ".
Setting Up Apache ActiveMQ Web Console
At this point, you have completed the Apache ActiveMQ installation on the Debian 11 server. The default ActiveMQ web console is running on the localhost, so if you are running on an external server, you will need to change the LISTEN address of the Apache ActiveMQ web console to your server IP address.
Edit the configuration file /opt/activemq/conf/jetty.xml using nano editor.
sudo nano /opt/activemq/conf/jetty.xml
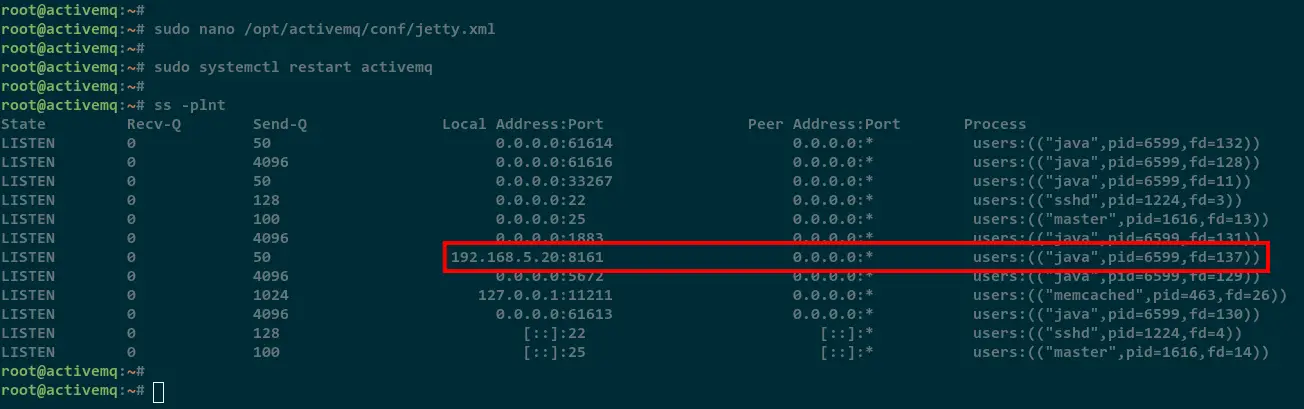
Change the default host 127.0.0.1 to your server IP address. In this tutorial, the server IP address is 192.168.5.20.
    <bean id="jettyPort" class="org.apache.activemq.web.WebConsolePort" init-method="start">
             <!-- the default port number for the web console -->
        <property name="host" value="192.168.5.20"/>
        <property name="port" value="8161"/>
    </bean>
Save and close the file when you are done.
Next, run the below command to restart the activemq service and apply new changes to the jetty.xml configuration file.
sudo systemctl restart activemq
Check the LISTEN ports on your Debian system using the below command.
ss -plnt
As you can see on the below screenshot, the Apache ActiveMQ Web Console is running on IP address 192.168.5.20 with the default pot 8161.
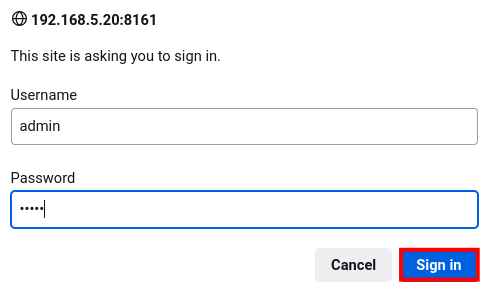
Open the web browser and visit your server IP address with the following port 8161.
http://192.168.5.20:8161/
You will be prompted for basic authentication. Input the default user admin and the password is admin, then click Sign In.
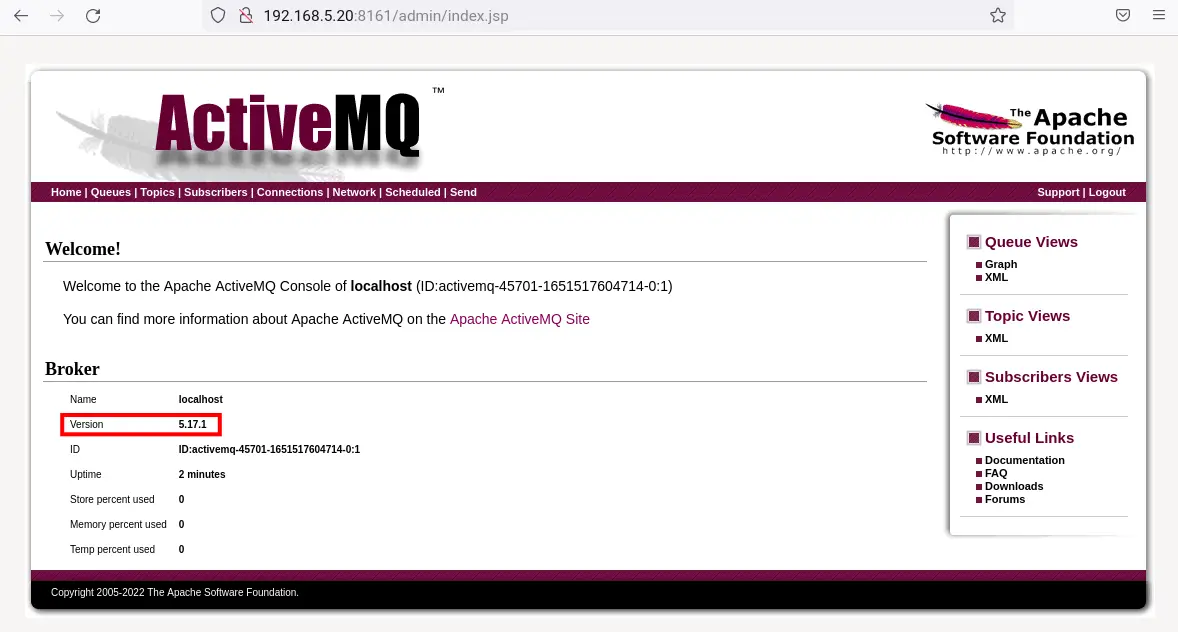
And below you can see the dashboard of Apache ActiveMQ Web Console.
Conclusion
Congratulation! You have learned how to install and configure the Apache ActiveMQ on Debian 11 server. You have also learned how to add a custom Systemd service to your Debian server and enable the Apache ActiveMQ Web Console.

