Full-Stack TypeScript with Ionic, Angular, and NestJS Part 2

Welcome to part two of the Full-stack TypeScript with Ionic and NestJS series!
In part one of the series, we went over the benefits of using TypeScript on both the client and server, shared an introduction to NestJS, and built a simple app, that’s already up and running, called GoSpaceRanger.
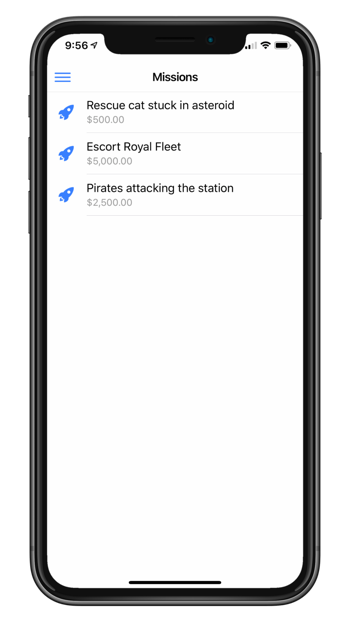
So far in GoSpaceRanger, we have a simple list screen showing a list of missions our space rangers can go on:
In this second part of our series, we are going to dive deeper into building out the Nest backend service, including adding a database to store missions and using some Nest features to keep our code clean and reusable.
Getting Back Into the Project
If you followed along in part one, go back into the main project folder, open up the gsr-client (the Ionic project) and gsr-server (the Nest project) folders.
If you would like to start fresh in part two, clone the project repo from git@github.com:ionic-team/demo-ionic-nest-tutorial.git, and go to the part2-start branch, which leaves you at the same place as if you had completed part one.
Open up each of the projects in your favorite code editor and run ionic serve in the gsr-client folder to kick off the Ionic development server, and npm run start:dev in the gsr-server folder to start the Nest server.
Friends of Nest
To help build out the backend, we will look into a few additional libraries to use within the Nest service.
The following libraries are NPM packages that provide additional functionality in the Nest backend. Like Nest, they are written in TypeScript and take advantage of TypeScript features—like decorators and type meta-data—to provide a cleaner, more declarative coding experience.
TypeORM
TypeORM is an ORM (object relational mapper), which helps manage and interact with databases. TypeORM uses a code-first methodology, which means you create your classes, and TypeORM automatically generates the tables and columns in your database for you. TypeORM is heavily influenced by other enterprise-grade ORMs, such as Entity Framework, and provides a performant, scalable, and easy to use data access library.
TypeORM supports the most common relational databases: such as MySql, PostgreSQL, SQLite, MS SQL, and more. Setting up your database instance is outside the scope of this tutorial, so please reference the database vendor’s documentation if you need assistance there. In this tutorial, I am going to use PostgreSQL, but feel free to stick with whatever database you have available—the only part that should change with the code is the connection info to the database.
To install TypeORM (and a couple of additional helper libraries) run the following command in the gsr-server folder:
npm install @nestjs/typeorm typeorm pg
Note: pg is the PostgreSQL driver for Node. If you use a different database, install the appropriate driver.
Class Transformer
Class Transformer is a powerful library that helps with the serialization from everyday JavaScript objects into classes, as well as classes back to plain JavaScript. This library helps convert data coming in from requests to the proper class type.
Install class-transformer via npm in the gsr-server folder:
npm install class-transformer
Adding a Database
First, we need to register the TypeORM library with Nest and provide it with the connection information to our database.
In the server’s app module, add TypeOrmModule to the list of imports like so:
gsr-server/src/app.module.ts:
imports: [
    TypeOrmModule.forRoot({
      type: 'postgres',
      host: 'localhost',
      port: 5432,
      username: 'mydbuser', // Update to your db username
      password: 'mydbpassword', // Update to your db password
      database: 'gospaceranger',
      entities: [__dirname + '/**/*.model{.ts,.js}'],
      synchronize: true,
    })
  ],
Import
TypeOrmModulefrom ‘@nestjs/typeorm’Note: The synchronize property keeps your database schema up to date with your models, which helps during development, but make sure to disable this in production.
Additionally, you’ll want to make sure to update the connection details (username, password, database, etc.) to your actual setup. The database that you will connect to needs to be a blank database, TypeORM will automatically create the schema for you based on the model definitions.
Now that TypeORM is set up, we need a database entity to represent our missions. We already have the mission model, so let’s use that.
Open up Mission and replace what is currently defined for the model with the following:
gsr-server/src/models/mission.model.ts:
import { Entity, PrimaryGeneratedColumn, Column } from 'typeorm';

@Entity()
export class Mission {
  @PrimaryGeneratedColumn()
  id?: number;

  @Column({ length: 50 })
  title: string;

  @Column()
  reward: number;

  @Column()
  active: boolean;

  @Column() createdAt: Date = new Date();
  @Column() createdBy: string = 'user';
  @Column() isDeleted: boolean = false;
}
Here our model has decorators applied to the class and its properties imported from TypeORM.
At the class level, the @Entity decorators inform TypeORM that this class represents an entity in the database. TypeORM will create a table based on this model and associated all data for this model in that table. By default, it names the table based on the model’s name, but you could override that by passing in a string to @Entity.
The @PrimaryGeneratedColumn decorator specifies that our id property will be the primary key for the missions table and that the value of it will be generated by the database.
The rest of the properties have @Column decorators, which instructs TypeORM to created columns for each of these fields. The data type for the column will be derived from the properties TypeScript type.
There are three additional fields on this mission model that wasn’t on the original. The createdAt, and createdBy fields store when the record was created and by whom. The isDeleted field gives us soft delete support, in which when a user deletes a record we mark it as deleted, but we keep the original around for our records.
These additional meta-data fields only belong to the database entity, and shouldn’t be returned to the front end app. We will add the logic in the MissionsService to not returned deleted missions when fetched.
When the Nest server restarts, TypeORM analyzes all the entities and constructs the database schema on it. You should see a schema similar to the following now in your database:

Before we try to pull back any data, we will add a mission manually using SQL. Run this SQL statement in your database’s query tool to insert a single mission:
INSERT INTO public.mission(
    title, reward, active, "createdAt", "createdBy", "isDeleted")
    VALUES ('Rescue cat stuck in asteroid', 500, true, '4/20/2019', 'user', false);
Retrieve Missions from the Database
TypeORM uses the Repository pattern, in which all your data interaction for a particular entity is handled through an object called a repository. The repository has methods to retrieve, create, update, and delete data for that particular entity. TypeORM provides these repositories for us, and we need to register them with Nest.
Go back into the server AppModule, and append TypeOrmModule.forFeature([Mission]) to the list of imports:
gsr-server/src/app.module.ts:
imports: [
    TypeOrmModule.forRoot(...),
    TypeOrmModule.forFeature([Mission])
]
This import registers the Mission entity with both TypeORM and Nest and provides us a repository that we can now inject.
Open up MissionsService, and update the class to the following:
gsr-server/src/missions/missions.service.ts:
export class MissionsService {
  constructor(
    @InjectRepository(Mission) private missionsRepository: Repository<Mission>,
  ) {}

  async getMissions(): Promise<Mission[]> {
    return this.missionsRepository.find({isDeleted: false});
  }
}
Import
InjectRepositoryfrom ‘@nestjs/typeorm’ andRepositoryfrom ‘typeorm’.
We inject a Mission repository in the constructor of the class using TypeORM’s generic Repository class. If you are not familiar with generics, they are a TypeScript language feature that allows you to use a base class but have it work with a variety of different types, without having to write that class for each of those types. In our case, we have a base Repository class, but by passing in the Mission as a generic parameter (via Repository<Mission>, we set up this repository to work with the Mission type.
The getMissions method was updated to return data from the repository instead of the hard-coded array that we also removed. In the method, the repository’s find method is called, and we specify that we only want to return missions that are not deleted.
With the service updated, we should now be able to retrieve all the missions stored in the database, and since the interface of the API hasn’t changed, the Ionic client should now show live data.
However, if you take a look at the HTTP request, you will see that the data being returned has the meta-data fields (createdAt, createdBy, and isDeleted) returned as well. Ideally, we would want to exclude these properties as the client does not need them.
We utilize the class-transformer library we introduced above to do just that. The library has an @Exclude decorator, which when ran through class-transformer, will exclude any members decorated with it.
Add the @Exclude decorator to those members from the Mission model:
gsr-server/src/models/mission.model.ts:
@Exclude() @Column() createdAt: Date = new Date();
@Exclude() @Column() createdBy: string = 'user';
@Exclude() @Column() isDeleted: boolean = false;
To exclude the properties, we run them through the classToPlain function from the class-transformer library. We could do this in the controller like so:
@Get()
async getMissions() {
  const missionEntities = await this.missionsService.getMissions();
  const missions = classToPlain(missionEntities);
  return missions;
}
However, this adds some cruft to our controller methods. We would have to repeat this code everywhere we return a mission, and repeating code violates the DRY (don’t repeat yourself) principle.
Fortunately, Nest provides a mechanism called interceptors that allow manipulation of data before being returned in the request. Let’s take a look at building one next.
Nest Interceptors

Interceptors are a piece of Nest middleware that gets access to both the start of the request (before the controller), and then again before the response is sent out (after the controller is done). Interceptors are an ideal fit for any data manipulation that needs to be done before a request is sent out.
In our case, we will build an interceptor to call the classToPlain function from class-transformer on the data the controller returns, that way any transformations we set up on the models get applied.
Run the following command in the gsr-server folder to create a new interceptor using the Nest CLI:
nest g interceptor util/data
Update the DataInterceptor class with the following:
gsr-server/src/util/data.interceptor.ts:
import { classToPlain } from 'class-transformer';
import { Observable } from 'rxjs';
import { map } from 'rxjs/operators';
import { CallHandler, ExecutionContext, Injectable, NestInterceptor, } from '@nestjs/common';

@Injectable()
export class DataInterceptor implements NestInterceptor {
  intercept(context: ExecutionContext, next: CallHandler): Observable<any> {
    return next.handle().pipe(
      map(data => {
        return classToPlain(data);
      }),
    );
  }
}
The next.handle() method is an observable stream that you can interact with like any other observable. Here, we use the map operator from RXJS to transform the output from one object to another. Specifically, we are using classToPlain to apply any transformations added to our models (like we did with Exclude in Mission).
To use the DataInterceptor, Nest provides a few different options to bind it to a request. We can use the @UseInterceptors decorator and either put it on a class if we want it to apply to the entire controller like so:
@UseInterceptors(DataInterceptor)
@Controller('missions')
export class MissionsController { ... }
Alternatively, we can be more selective and put it only on the route handlers we want:
@UseInterceptors(DataInterceptor)
@Get()
async getMissions() { ... }
A third option allows us to apply the interceptor to run globally by specifying it in the app module:
gsr-server/src/app.module.ts:
@Module({
  providers: [
    {
      provide: APP_INTERCEPTOR,
      useClass: DataInterceptor,
    },
  ],
})
export class AppModule {}
Import
APP_INTERCEPTORfrom ‘@nestjs/core’ andDataInterceptorfrom ‘./util/data.interceptor’.
This method is the one we will we use, so go ahead and add this to the list of providers in AppModule.
Once saved, hit the /missions endpoint again and you should see the list of missions minus the createdAt, createdBy, and isDeleted members.
Retrieve a Single Mission
We are now returning a list of missions, so next, let us see how we can specify the id of the mission in the URL to return a particular mission and display the mission in the app.
Starting in the MissionService, the call to get the mission from the repository is fairly straight forward:
gsr-server/src/missions/missions.service.ts:
async getMission(id: number): Promise<Mission | undefined> {
  return this.missionsRepository.findOne(id, {
    where: {
      isDeleted: false,
    },
  });
}
The findOne method on the repository takes the id of the object being looked for. If found, it returns the object, and if not, returns undefined. We also make sure not to return a mission if it is marked as deleted.
Update the MissionController to call into this new service method:
gsr-server/src/missions/missions.controller.ts:
@Get(':id')
async getMission(@Param('id') id: number) {
  return this.missionsService.getMission(id);
}
The Get() decorator here takes in a route parameter named id, and in the getMission method, we extract that parameter out using the new @Param decorator, which in turn assigns the value to id.
If you request http://localhost:3000/missions/1, you should notice that nothing comes back. Why? Parameters are passed in as strings, but we expect the id to be a number, and the repo does not find the mission because of it. In the params to getMission, id is of type number, but, unfortunately, we are practically lying to TypeScript that the value is coming in as a number.
We could parse the string value of id into a number manually inside the controller method before calling into the service, but once again this muddies our controller code with duplicated logic throughout. It would be nice to have a facility to do this for us automatically.
Nest comes to the rescue again!
Nest Pipes
Fortunately, we can use another facet of Nest, called Pipes, to manipulate data that comes in from the request before it reaches the controller. Pipes are another type of Nest middleware, but unlike interceptors, they can transform the data before they reach the controller.

Because we are using TypeScript, Pipes know all the little details about your controller methods, including all the parameters, and the types of those parameters. We can take advantage of this information and use class-transformer library again to convert a plain object into something of a specific type. Let’s see how to do that.
Use the Nest CLI in the gsr-server folder to generate a new pipe:
nest g pipe util/data
Then open up the DataPipe and update its transform method to:
gsr-server/src/util/data.pipe.ts:
transform(value: any, metadata: ArgumentMetadata) {
  const { metatype } = metadata;
  if (!metatype) {
    return value;
  }
  const convertedValue = plainToClass(metatype, value);
  return convertedValue;
}
Import
plainToClassfrom ‘class-transformer’.
The transform method takes two arguments. The first is the original value of the parameter, and the second one is all the meta-data provided by TypeScript about the parameter.
The plainToClass method can use this type information to convert the value into the particular type. In our use case, it takes the type of the id parameter, a number, and then converts the string parameter that gets passed in from the URL.
Bind the DataPipe in the AppModule providers like so:
gsr-server/src/util/data.pipe.ts:
{
  provide: APP_PIPE,
  useClass: DataPipe,
}
Import
APP_PIPEfrom ‘@nestjs/core’ andDataPipefrom ‘./util/data.pipe’.
Now, parameters passed into all controller handlers have their types converted automatically. Make a call to http://localhost:3000/missions/1, and you should see a single mission come back.
Wrapping Up
In part two of this series, we spent the majority of time replacing the hard-coded Missions array we had in the MissionsService with a real database backend. We used a library called TypeORM to manage our database access. TypeORM is an excellent companion library to Nest; they are both built with TypeScript and offer the same declarative style programming.
Then, we explored Interceptors and Pipes, a couple of the Nest building blocks that allow you to extract common logic into reusable components and apply them in various ways to your Nest controllers.
In the next post, we will finish building out the rest of GoSpaceRanger, including creating, updating, and deleting missions.
Happy coding! 🚀


