
In a lot of modern web applications, a number of assets or dependencies are generated separately from your normal development cycle. For example, you might be compiling some JavaScript, fetching some external dependencies or even generating a static site.
Fortunately, you can do this in DeployHQ without having to generate anything locally, and commit it to your repository unnecessarily. With a DeployHQ Build Pipeline, you can run pretty much any command you like on your code before the main deployment process begins, then DeployHQ will upload any changed files to your server, alongside any changes found in the repository.
Setting up a build pipeline
There are a number of parts to a build pipeline (some optional, but recommended) that you'll want to setup.
- Build commands
- Language versions
- Cached files
- Known hosts
- Excluded files
We'll go through each of these in turn, and why they're useful.
Build commands
This is the most important part of your build pipeline. You'll need to define a series of commands that run, after which the generated assets can be uploaded to your server.
To start, head to any project in DeployHQ account, then click Build Pipeline on the left hand side, then the New Command button to the top-right of the screen.
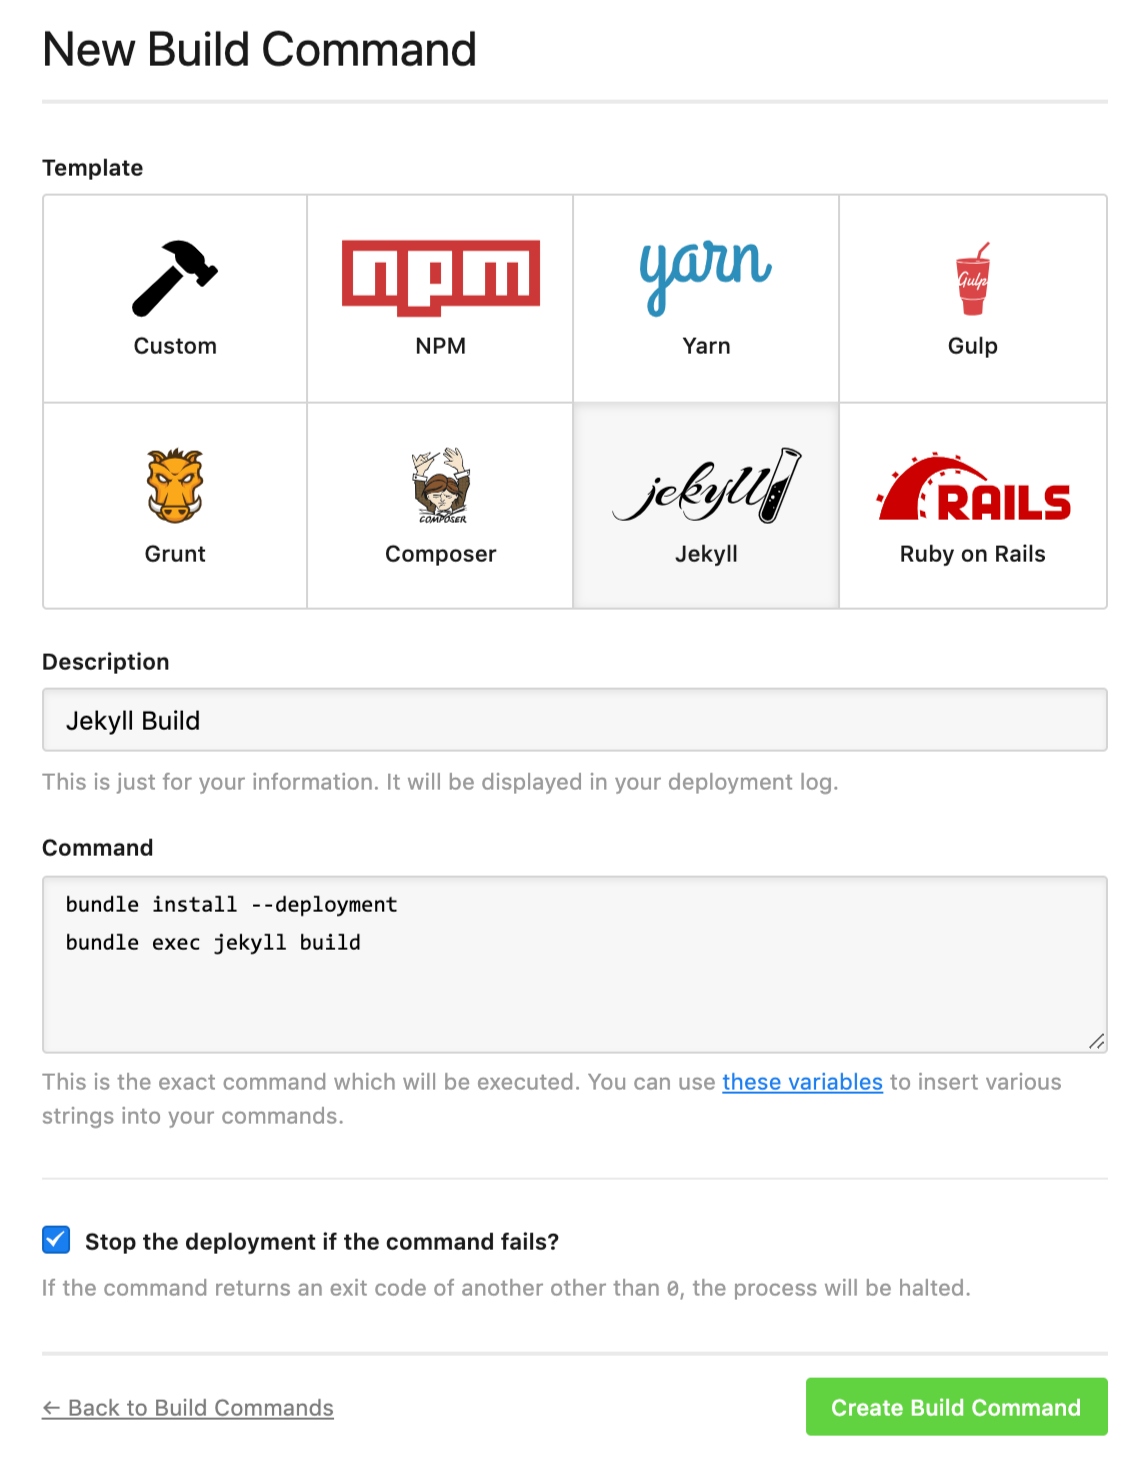
You can choose one of the recommended commands, or click the Custom button and write your own procedure. Once you've added your set of commands, click Create Build Command to finish.
Language versions
By default, DeployHQ will use the latest version that it has available on its servers of a tool when you run a command using it. However, if you're using an older version of Ruby or Node in one of your projects, you can specify to use that version.
Head to Build Configuration at the top of the page when you're in your Build Pipeline area, and choose a specific version of any of the supported tools at the top of the screen.
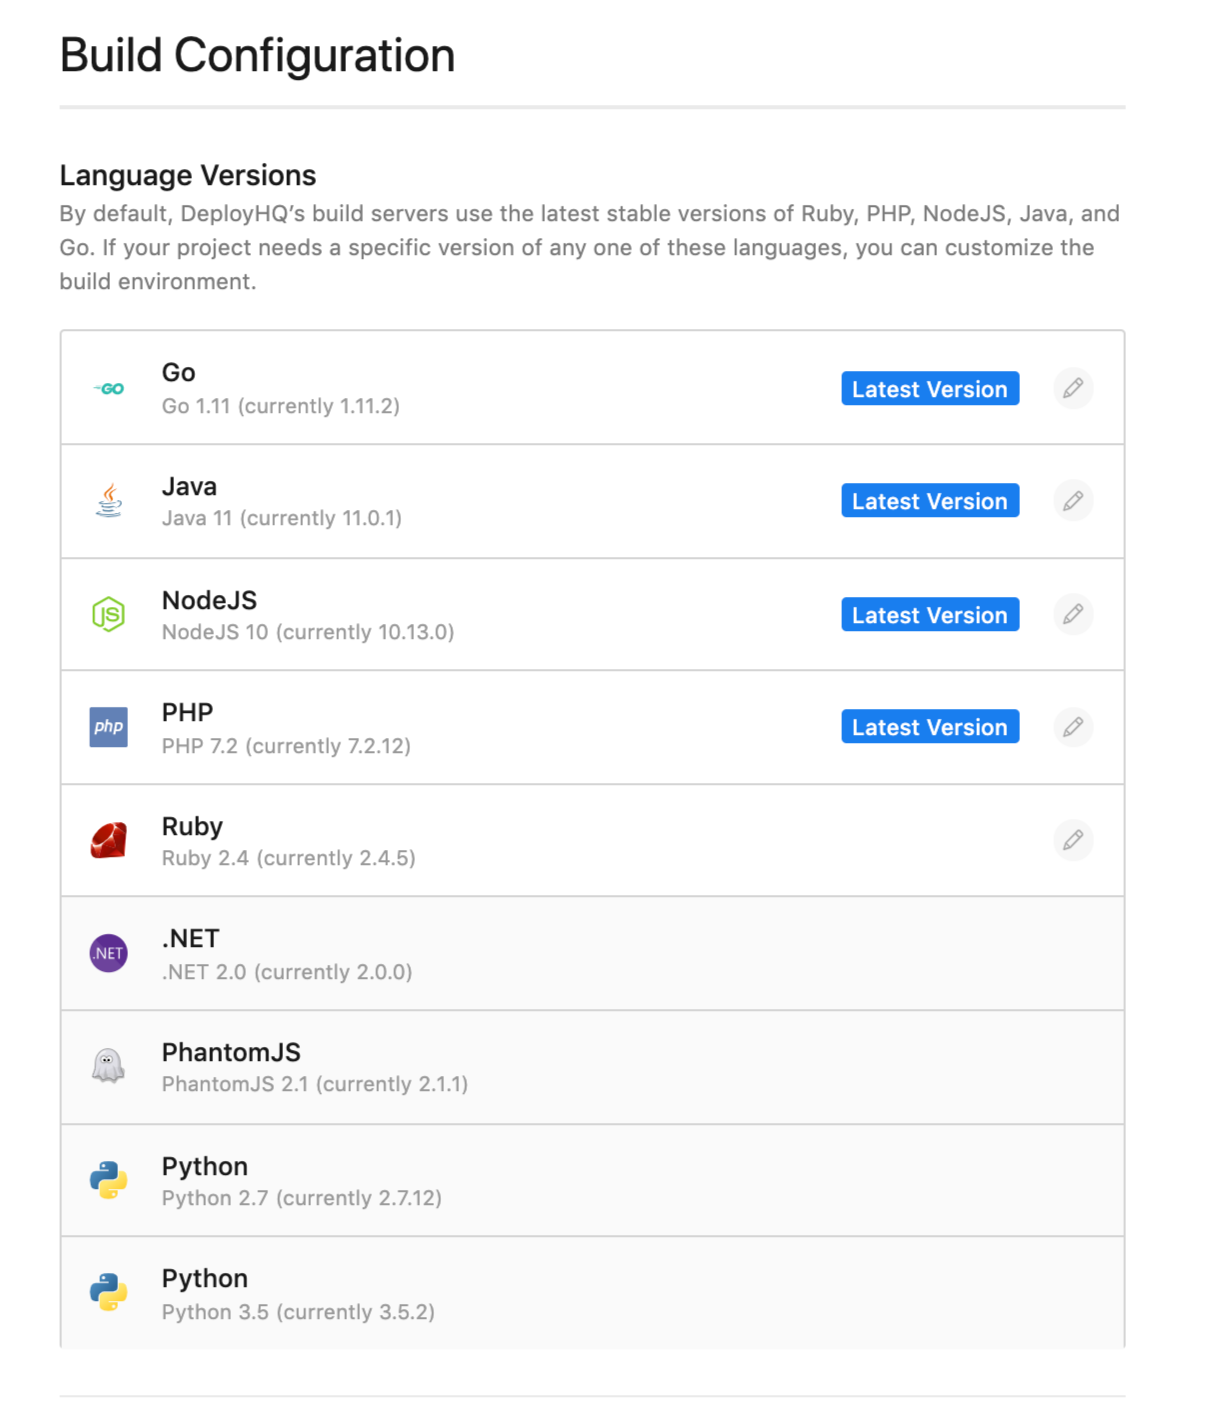
Anything with an edit icon can be changed, and if you've selected to use the latest available version Latest version will be shown next to the tool.
Cached files
When you run a build process, you might find a large number of dependencies are fetched. To save time on future builds, you can add cached build files, which are paths or filenames that act as instructions for DeployHQ to keep a copy of them between builds.
Head to Build Configuration again, then locate Cached Build Files further down the page.
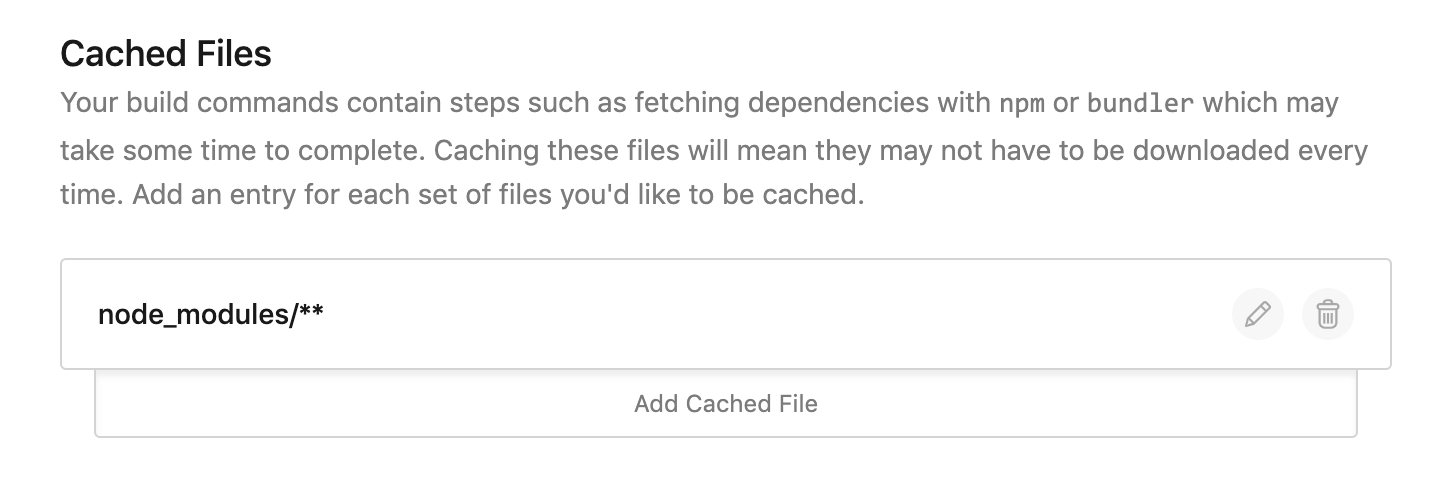
Simply add anything you wish to cache as a relative path, starting at the root of your app.
Different package managers will use different directories, for example when using PHP with composer, you'll be caching the vendor directory. Check the package you're using to see which directories are used.
Known hosts
During the build process, your commands may attempt to make an SSH connection to another service such as GitHub, Bitbucket, GitLab, Codebase or another host. By default we allow connections to any service, however you may manually define hostnames and public keys here to restrict what servers can be connected to with SSH during your build.
As soon as a single hostname has been defined, access to that connection only will be allowed.
Head to Build Configuration, then scroll to the bottom to Known Hosts and click to add a new known host.
Separately in a terminal, you can run the following command to retrieve the host key of the service you want to connect to, replacing codebasehq.com with the hostname of the service as appropriate:
$ ssh-keyscan -t rsa codebasehq.com 2>/dev/null | cut -d ' ' -f 2-3
ssh-rsa AAAAB3NzaC1yc2EAAAABIwAAAQEAqafgFtYVquYfReJa3MGIyGz0RZoc1kfnXHFDjprY4Uy0lwia+35rRa9Aycrf4eySa55JXsg7rOosqpNOi2hSFWHQ/FfKzMH077Vu1X6d5gNBzxR3aJq/zaAJSiRbrUM20NgEHzBiT8x+32zM71E4qjKnGG8AdEqV9AmROXHWddLSs3e5Tsr2+Dkc/lu+Ko4eVjFjW3ZUgTRE3VTd+PDSRGOfmimgBpcuhkBbEyK4+dq7NJKxLbUl9zC7jKPddkWpbonR9CYWj+c8R8MimKLhhSilNRUKuQBNYydol3eX8VNi+PTzAYtB/w8/jl3+BWzj6xAyfMRdeJDyhhTYX+/s+w==
Then, enter a name for the service and paste the key only in the box below, clicking Create Known Host to finish.

Excluded files
You may find when you're building your assets that you fetch a number of dependencies that are used for the compilation, but don't need to be actually uploaded to the server. Head to Excluded Files on the left hand side of our project, then click to add a new excluded file:
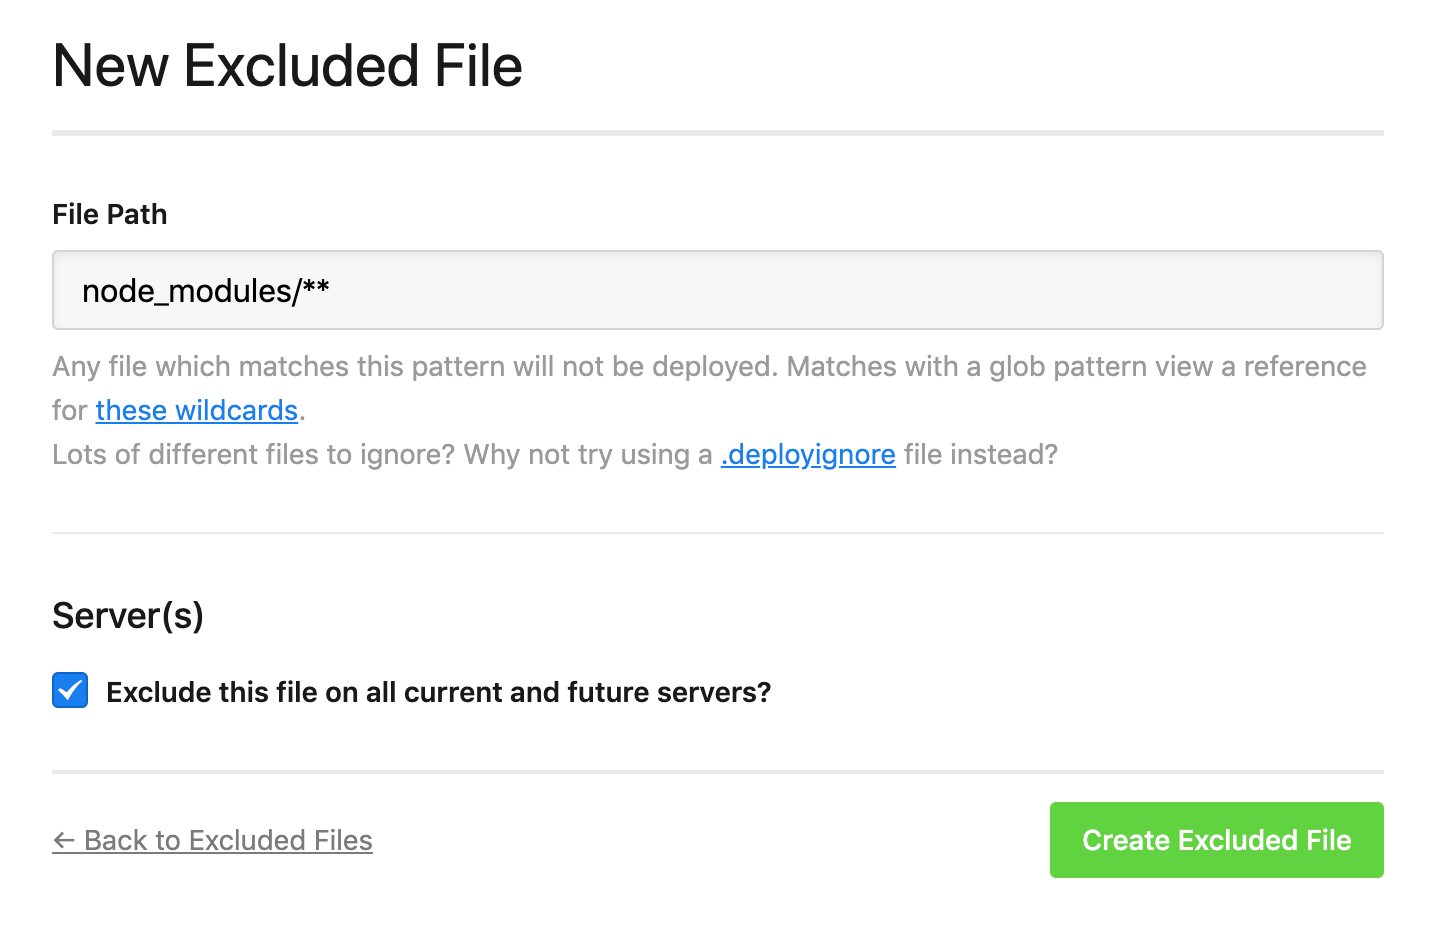
Add the path, then click Create Excluded File to finish.
So in this case, we'll keep a cached copy of the node_modules directory for future builds via the Cached Build Files configuration, but never upload that directory to the server.
If you have any questions about any aspects of the build pipeline, please let us know.