
Using Vue CLI Inside an ASP.NET Core Project

Using Vue CLI Inside an ASP.NET Core Project
As many of my readers already know, I’ve become enamoured with Vue.js. Because of this, I’ve been using it more and more on projects.
Since I also deal with ASP.NET Core almost exclusively, I’ve been at odds with how to get the two technologies to work well together. Originally I had just used the JavaScript file, but as I’ve started building larger pieces, I’ve wanted to use projects built by the Vue CLI in ASP.NET Core. Here’s how I’ve been doing it. Might not be right, but it’s at least a way ; )
Assumptions
I’m going to assume you have used the Vue CLI and ASP.NET Core before. So I’m skipping a lot of steps like creating the ASP.NET Core project. I’m also going to assume you’ve opened up a console before and ran commands. Lastly, I’m assuming you’re using Visual Studio (though shouldn’t be much different if you’re not), and that you have the Vue CLI installed.
Creating the Vue Project
In my case, I’m going to build a simple Vue project that may contain one or more ‘islands of functionality’ so I’ll need just one Vue project. This technique should work with multiple projects if that’s how you roll.
I start out but opening a console in the project directory. I use the Vue CLI to create the project:
D:\working\VueCliAndCore>vue create -n -b client-app
Once you create the project (the options don’t really matter for my technique so if you’re using JS or TypeScript or other options, it’ll be ok). You should end up with a directory like this:
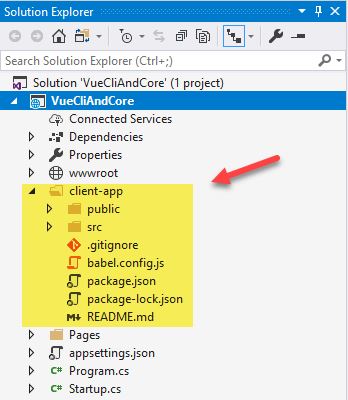
You now have the project created. In order to really work with it, you’ll need some steps:
Build the Vue Project
Because you’re using the Vue CLI, you’ll need to run a build for your project. Because the package.json is in a subdirectory (not in the root of the ASP.NET Core project) you won’t be able ot use the Task Runner Explorer to run your build. I’ve just gotten into a habit of using a console window for development.
If you still have the console open, just typing the following command will build your project for production:
D:\working\VueCliAndCore>npm run build
You might have expected me to use the CLI to build it, but I like using NPM to do this instead. You’ll see that in the generated project (if it’s newly created by the CLI) it’s created scripts for this in package.json:
{
  "name": "client-app",
  "version": "0.1.0",
  "private": true,
  "scripts": {
    "serve": "vue-cli-service serve",
    "build": "vue-cli-service build"
  },
If you run the build at this time, it’ll create a new dist folder with the results of the build. But as you know, without changing the setup of the ASP.NET Core project, you need the results somewhere in wwwroot.
Moving the Build
To change the behavior of where the build goes, you’ll need a new file in the client-app directory called vue.config.js. Normally the build would work with no configuration, but now that we’re making changes we’ll need one.
This new file needs you to export a configuration object:
// vue.config.js
module.exports = {
};
To move the build, we’ll need to just add a property for the outputDir. Additionally, I like to add turning off hashing of the files (I’ll let ASP.NET Core handle cache breaking):
// vue.config.js
module.exports = {
  outputDir: "../wwwroot/client-app/",
  filenameHashing: false
}
By specifying a relative path for outputDir, when we build the project again, it’ll end up in the wwwroot directory:
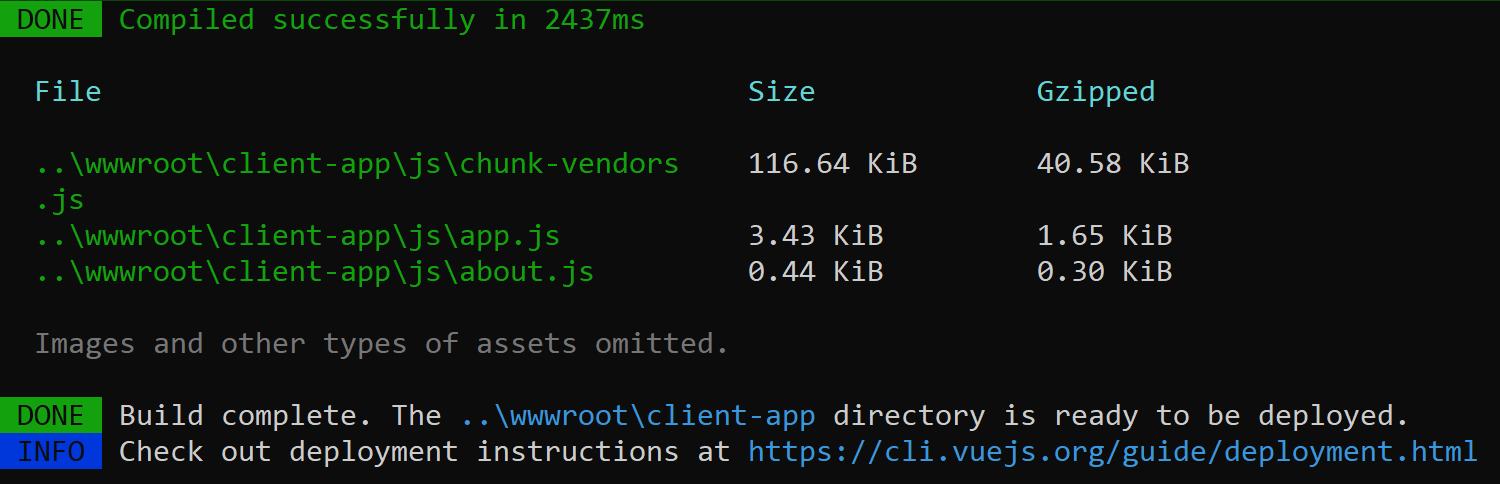
That fixed, let’s change the way we build the project to have a sane option for development.
Setup Watch Build
Now that we have the build working in the console window, you might have noticed that the build we’re doing is for production. The other option in the scripts is to ‘serve’ which deploys the project and attempts to host it in a skeleton .html file. We want to use it in our ASP.NET Core project, right? So we need another script. Open up the project.json and create a third script.
{
  "name": "client-app",
  "version": "0.1.0",
  "private": true,
  "scripts": {
    "serve": "vue-cli-service serve",
    "build": "vue-cli-service build",
    "watch": "vue-cli-service build --mode development --watch"
  },
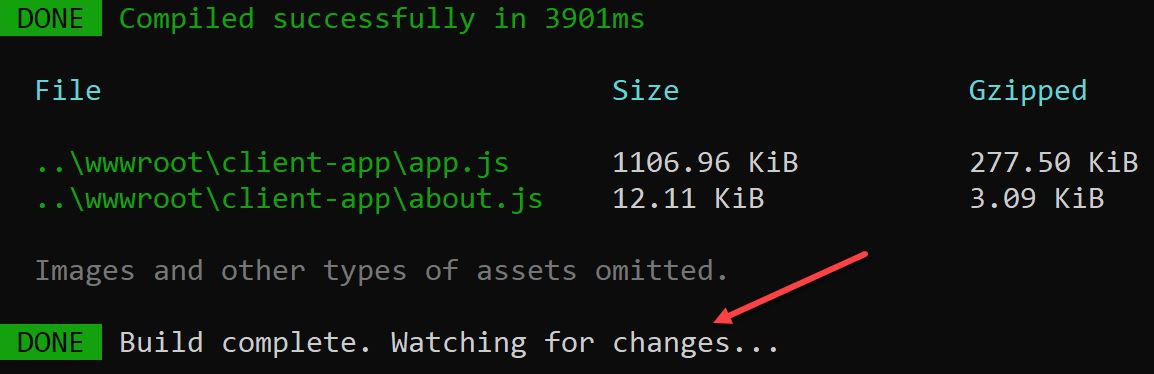
In this new script, you can specify build again, but tell it you want a development mode so we get debugging info and such. And finally adding –watch tells it to keep watching the project and rebuild incrementally as it needs to while you work with the code. In this case, I run the npm run watch and leave it in the background while I work. That way it just keeps chugging away:
Work with Deployment
Finally, we need a way of making sure this happens on deployment. Otherwise we’re going to be messed up in our CI servers. The trick here is to add the npm call in the csproj file. What we need is a new target that is computed before deployment starts:
  <Target Name="client-app" BeforeTargets="ComputeFilesToPublish">
    <Exec Command="npm install" WorkingDirectory="client-app"></Exec>
    <Exec Command="npm run build" WorkingDirectory="client-app"></Exec>
  </Target>
This tells MSBuild to install app npm requirements and run the production build before it figures out what files to publish. This doesn’t mean you’ll get a build in Visual Studio on every build which would slow things down, but instead you’ll get this happening when deployment or publishing happens. Of note, because we need these to happen in the client-app directory, we need the WorkingDirectory to be set.
Conclusion
It’s not perfect, but it smoothes a lot of the rough patches of using Vue CLI with ASP.NET Core. Something similar would work with ASP.NET MVC, but the specific mechanics are a little different.
You can get the source here:
Do you have any improvements on my technique? I’d love to hear about them below!
